Clutch Basket Repair
The clutch baskets in Triples can become loose internally with age. Although not harmful, it can be a source of clutch noise. Sometimes they can be repaired by peening the rivets... other times not. The following is from Jim Shreve (Darth) and is late H1 clutch.... others may differ:
Example of loose basket (video): http://youtube.com/watch?v=yGMaKKd4m8c
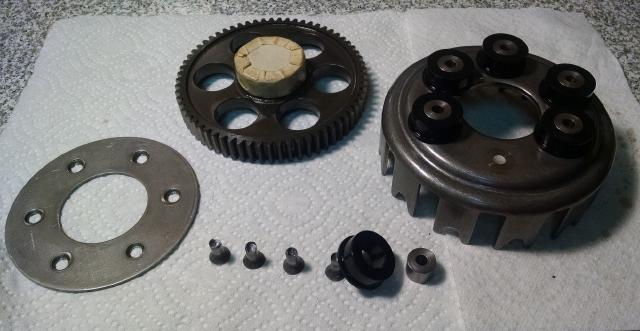
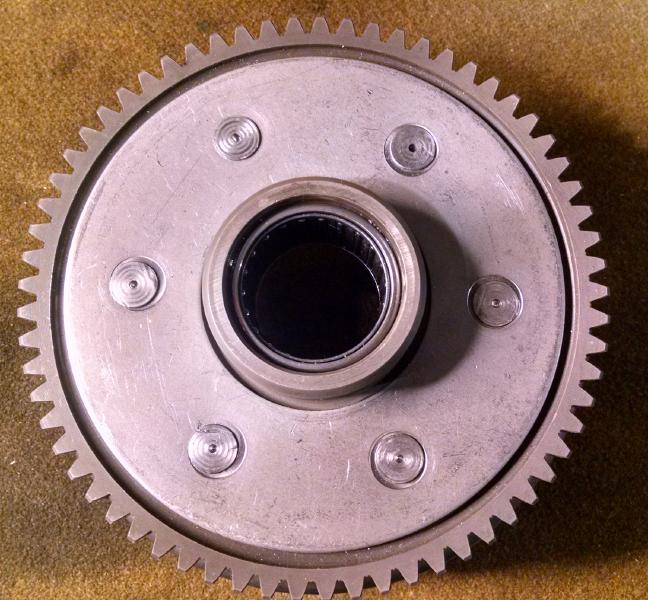
Here it is all apart ... the rivets were tight as ...
well, lets just say they were tight.
The entire problem is the rubber bushings you see. No amount of "rivet pressing"
would help. The rivets pinch on the small steel piece that resides inside the
rubber bushing you see. You could press all you want on the rivets and it's not
going to help.
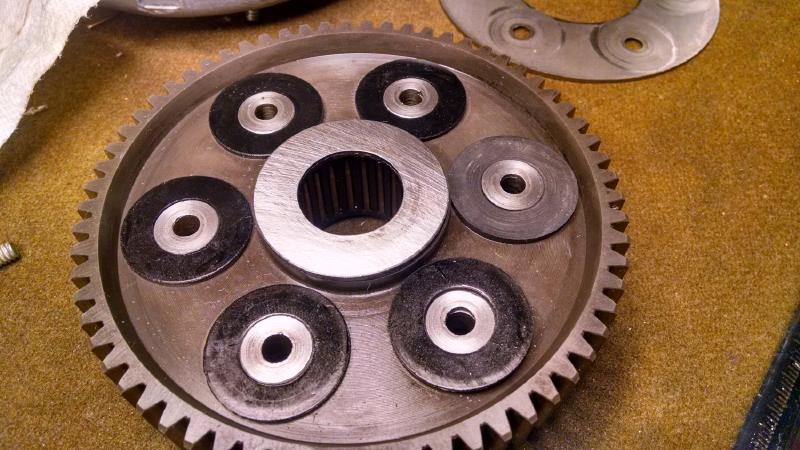
So, I can easily make new rubber (or whatever) bushings ... the question is, how
to re-assemble the unit in a secure fashion. A new center piece (the part inside
the rubber bushing) could also be made, I will gladly consider any ideas on how
to get it back together.
This whole thing raises a ton of questions for me....
1. It seems as though the clutch rattle is an accepted symptom for these bikes.
Now, I know that straight cut gears under a “no load situation” will chatter. It
also seems to me that when I first started this bike I didn't have any clutch
rattle (and I know the basket was pretty darn tight) but, then again, this bike
was completely new to me and I may not have noticed it. It now sounds completely
obvious to me.
2. I have no idea what material the dampeners are made of. Neoprene was an
acceptable material for petroleum based oils … not the best, but rated #2,
Nitrile was rated #1 for the same type of oils but, rated #2 (or not at all) for
synthetics … this is all per a chart I have. Viton is #1 rated for both oil
types. I also have to ask the question about chemical additives in today’s oils,
which may (or may not) play a part.
3. How many of us have changed their clutches and actually shake stuff around
intentionally looking for problems (which is my plague) and then, even if they
did … didn't consider it an issue because “these things always rattle” or
“that's normal” or “there's nothing I can do about it” and just put the clutch
back together saying nothing ???
4. I worry too much !!! … but I have fun the whole time
![]()
![]()
![]()
I will continue to work on resolving this issue and we shall find out to what
extent (if any) the dampeners are related to the rattle.
Me personally ??? … I don't like the idea of that basket having the opportunity
to wobble around like that. I know the clutch plates will help to keep things in
line … but still.
I stopped off at my local rubber shop and got the news
I was kinda expecting ... the parts (dampers) would be real cheap AFTER I spent
a couple grand on having the mold made ... but the gentleman did give me a few
places to look for Viton stock in my area ... ![]()
I gave up on the Viton due to the cost ... and it
seems like you can't get tubing in the size I need.
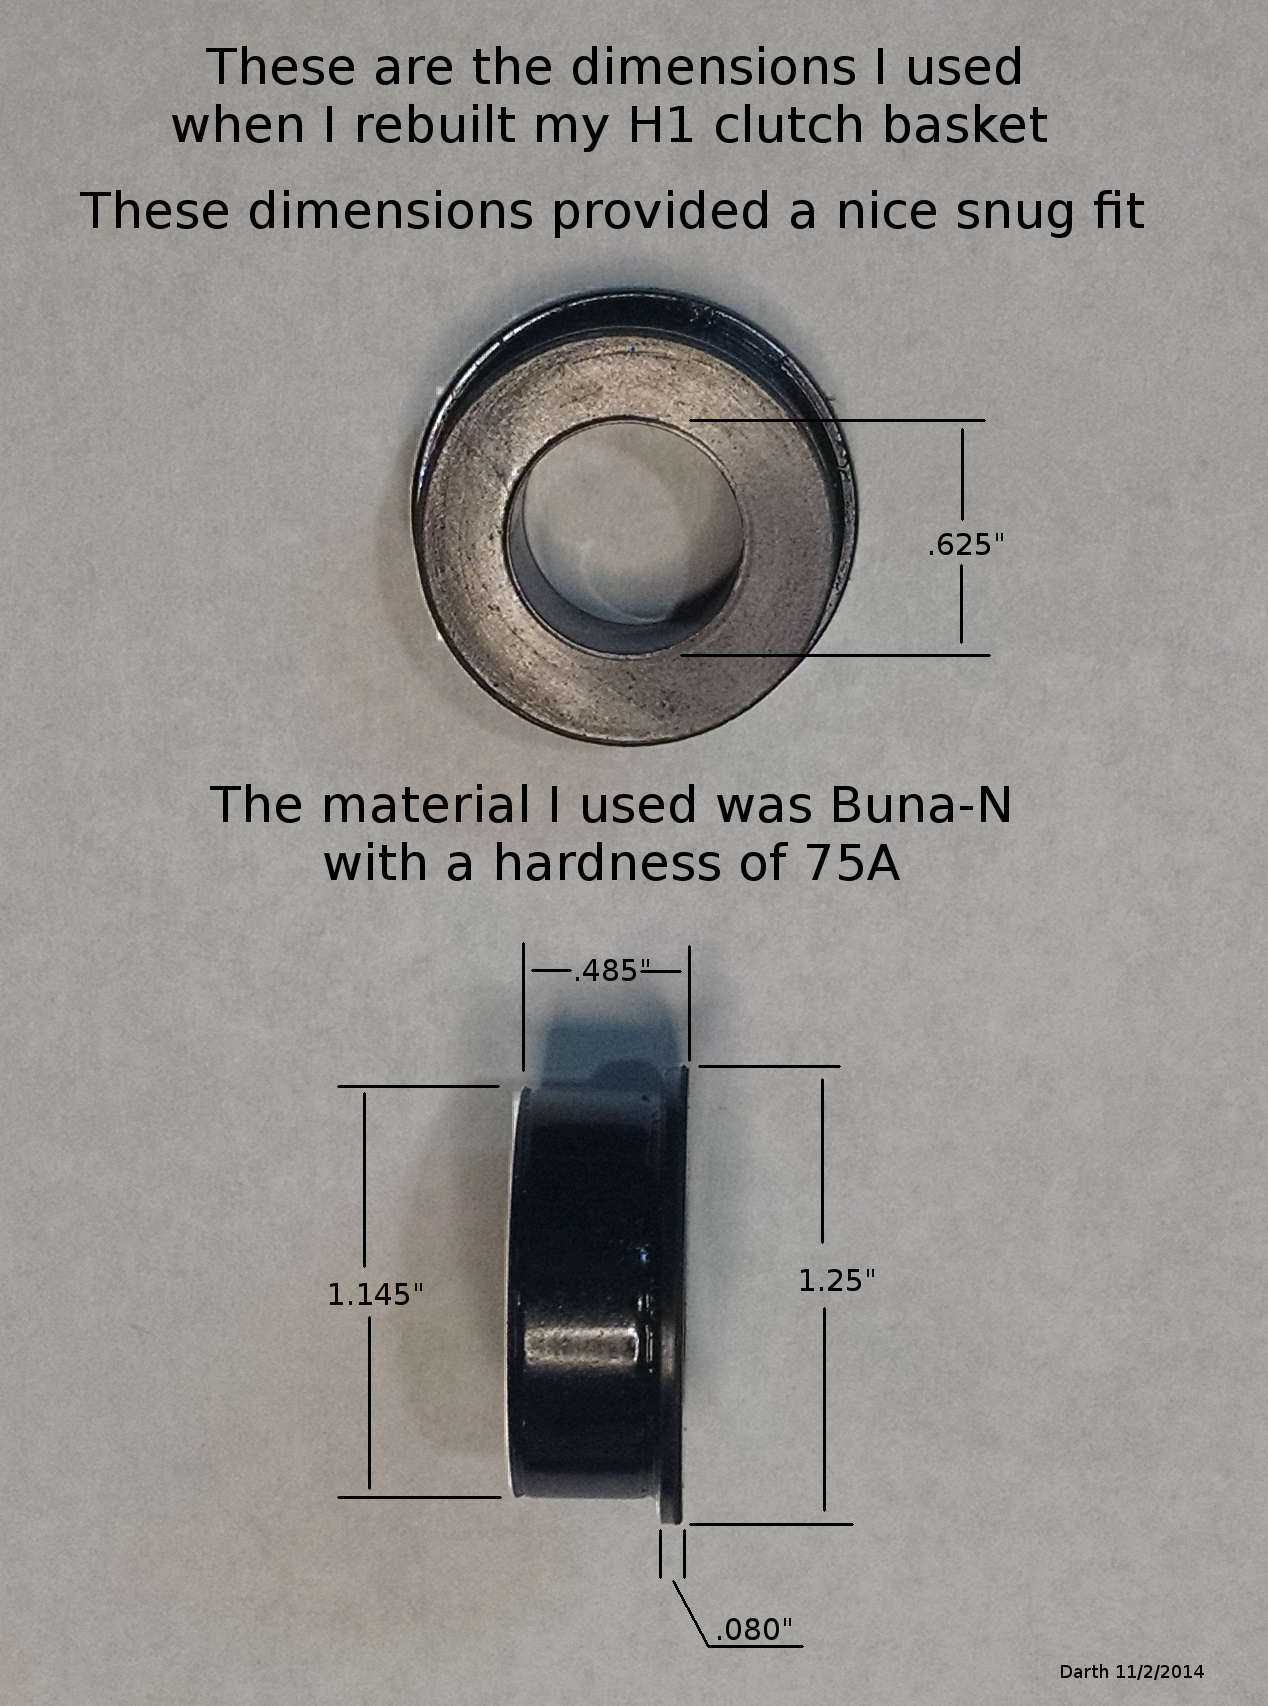
So, I ordered a 2 foot chunk of 75A Buna-N tubing ... the Buna-N should be good
for the majority of the oils we run in these things. I'm going to try and
machine a set and see what happens.
I'm also going to try and rivet this thing back together ... but I also ordered
screws ... which is plan "B" ... as it were ...
See the "odd" looking one ??? ![]()
![]()
![]()
Not too bad to make actually, and this one is TIGHT !!! I still have to "fine tune" my lathe fixture ... but, they should go pretty quickly once I get a procedure down.
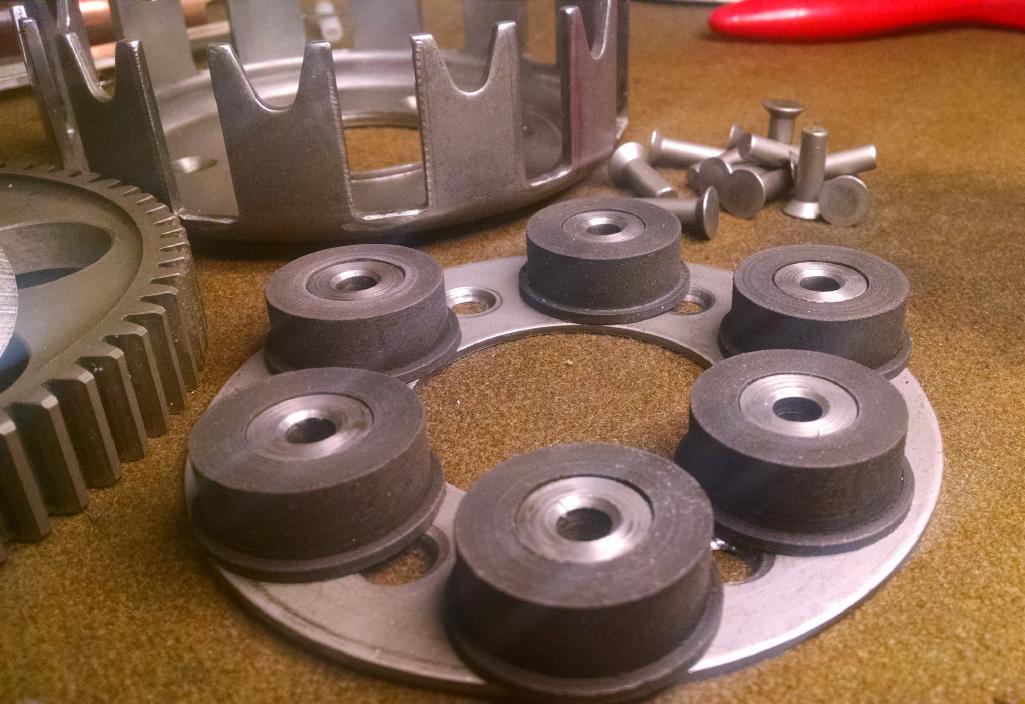
I have all my rubbers made now. I had to make a few
jigs along the way. The hardest part was trying to grind a tool that cuts rubber
good. I didn't want to use a grinder on the things so, I worked at finding a
"tool grind" that worked. It's just a lot easier to not have to mess with the
grinder mounted on the lathe.
As you can probably see, the rubbers are about .015 taller than the spool pieces
in the center. This is so that the assembly doesn't move. If the rubbers were
smaller (shorter) than the spool piece, the entire assembly would move (shift)
side to side.
Now I just need to see if I can rivet this back together.
![]()
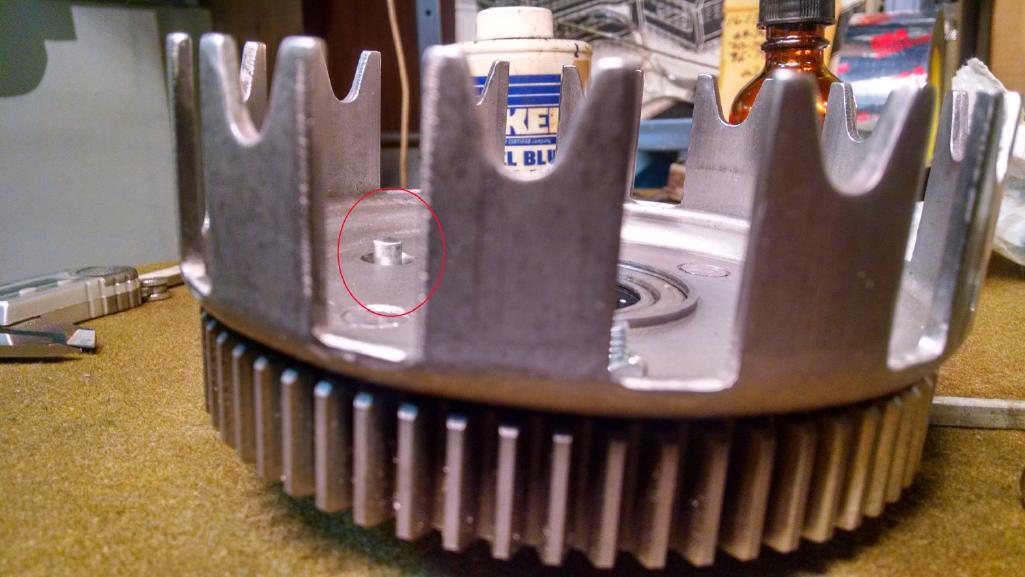
Here is the progress. I have set 2 rivets in place.
You can see how I got a bit rambunctious on the first one. The second one is
much nicer. I had to drill out my very first one because it was too short. In
the other photo ... you can see how far it has to stick up to start with
![]()
![]() ... it seems that about .160" above the surface of the clutch is just about
right.
... it seems that about .160" above the surface of the clutch is just about
right.

It takes about 4-5 minutes to set each rivet ... I'm using a flat punch and an
average to small size ball peen hammer and just casually work around the rivet.
I found it rather interesting that the steel would deform that easily.
You can see a small center drilled hole in the new rivet head I made ... that's
just in case I have to drill one out ... the center of the rivet is already
there.
The finished product ... I timed 2 of the rivets ... it takes more like 7-10 minutes to set each one ... for me anyway.

Now I just need to clean the bearing and put it all back together ...
![]()
I got it all together and fired it up last night. Everything was obviously cold, but you couldn't tell if the clutch was pulled or not ... no change in sound whatsoever. BUT ... the real test will be when it's hot ... I do expect some noise.
Rubber specs in PDF format: H1 H2