Mark's H1F
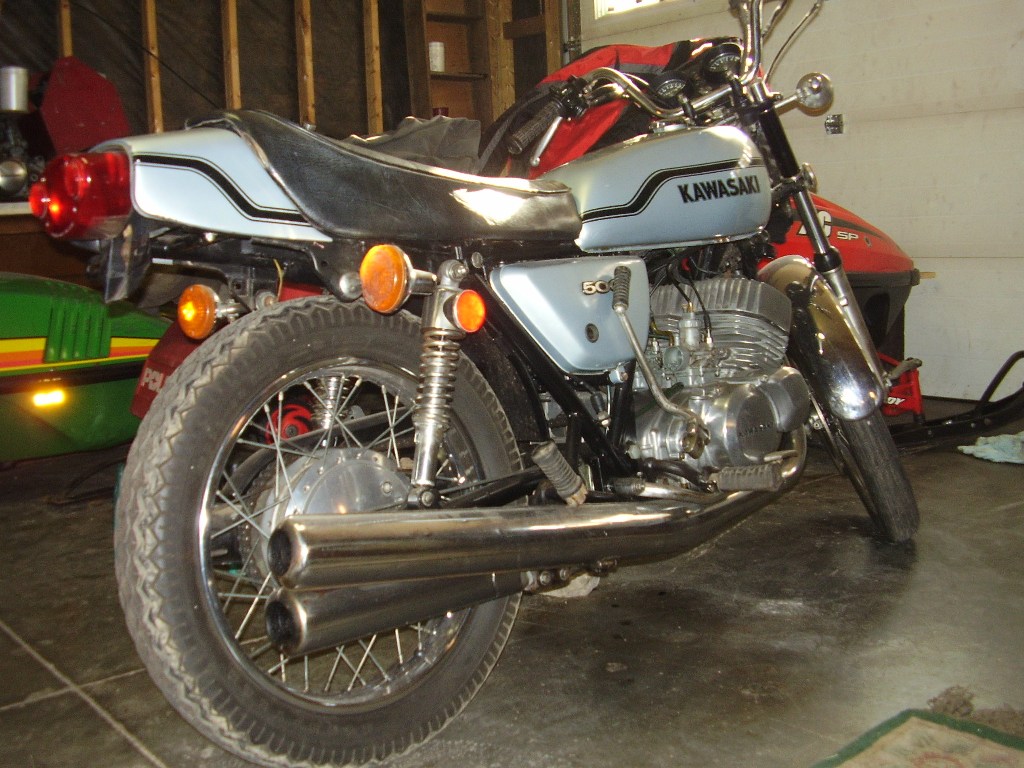
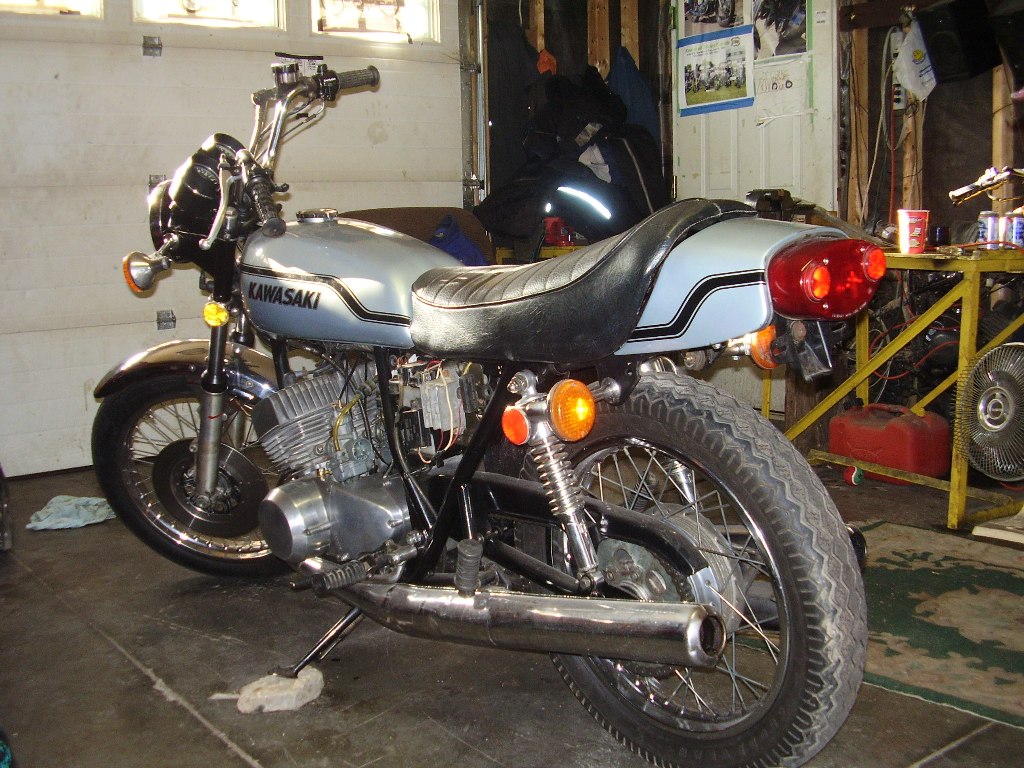
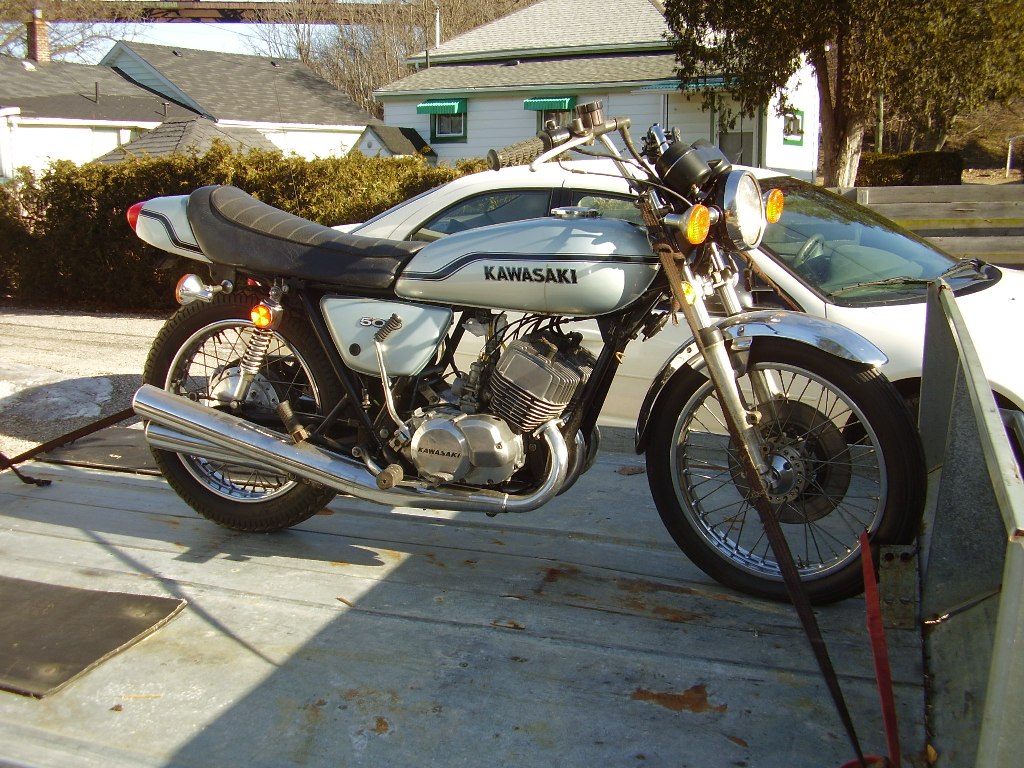
Here you will find out more about my latest acquisition (Late February 09') which is a 1975 Kawasaki H1F 500 Triple.
As I mentioned on the Kawasaki KH 400 page I was originally looking for a 500 or 750 triple but due to rarity & collectors, prices are getting to be too expensive. Well I was lucky enough to stumble across this one at a friends house. He has several in his collection & wanted to downsize a little. Based on condition & originality the price was right so I got the knife into the Piggy bank & took the plunge.
So now I find myself in the somewhat privileged ranks of Kawasaki 500 ownership, I have to say I'm really stoked about it & can't wait to get started on making the necessary repairs & renovations to get it back into street worthy condition.

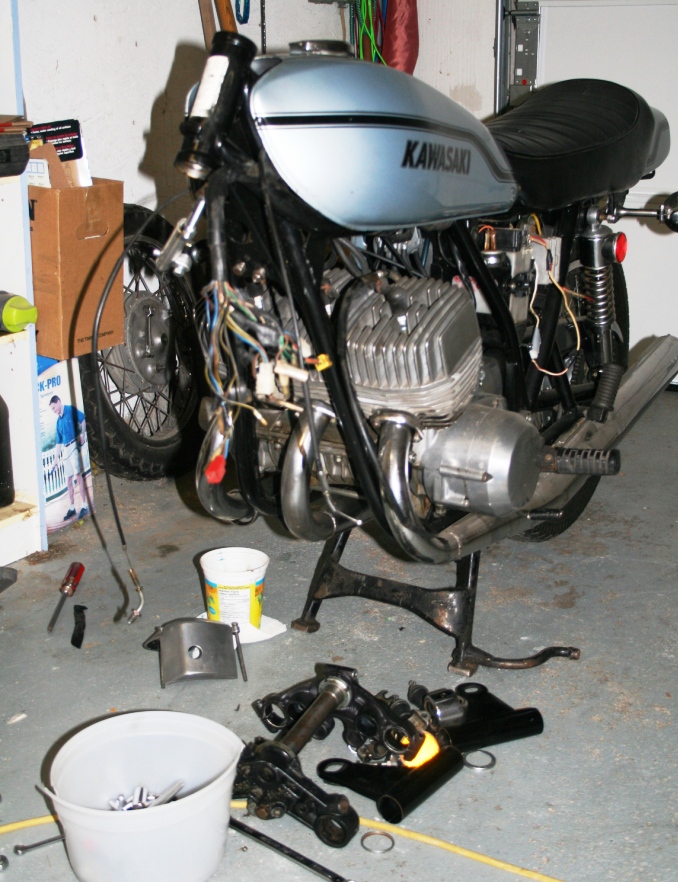
You can see from the pictures that overall it is not in bad shape, unlike the 400 project most of the difficult to find & therefore expensive parts won't need replacement. I defiantly went overboard with the 400 & have spent a fortune restoring it to as new condition. Having learned that expensive lesson I will be doing enough to the 500 to make it a nice daily rider, not a show bike. With that said here is a list of things I'm planning to do to it.
Major.
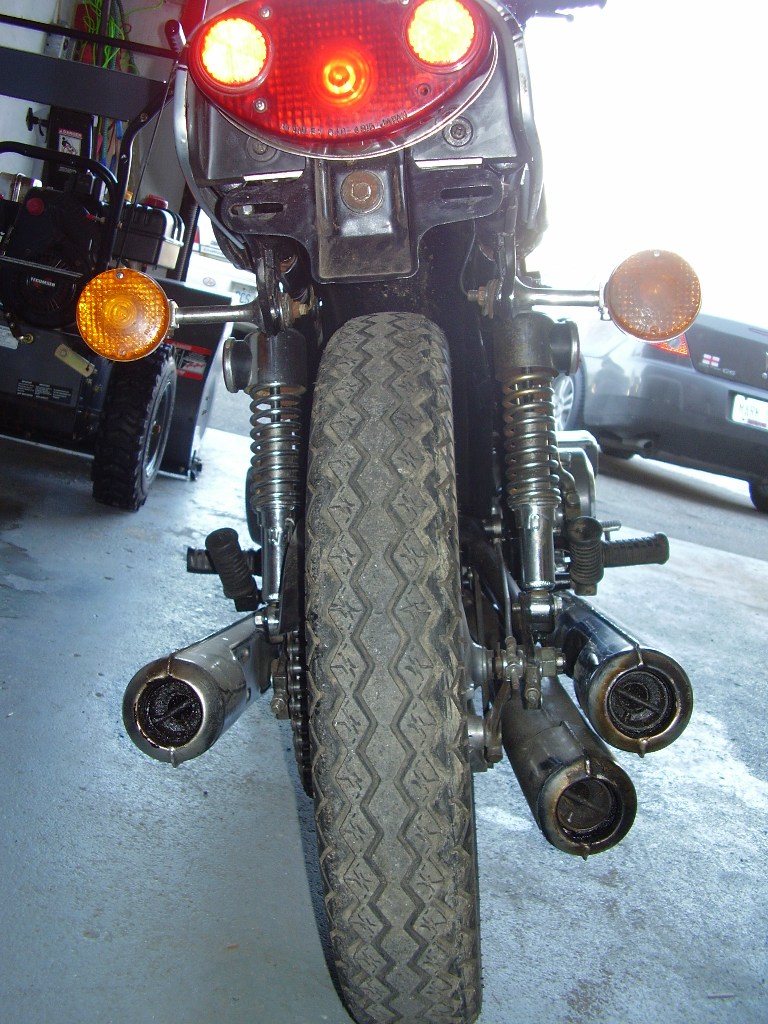
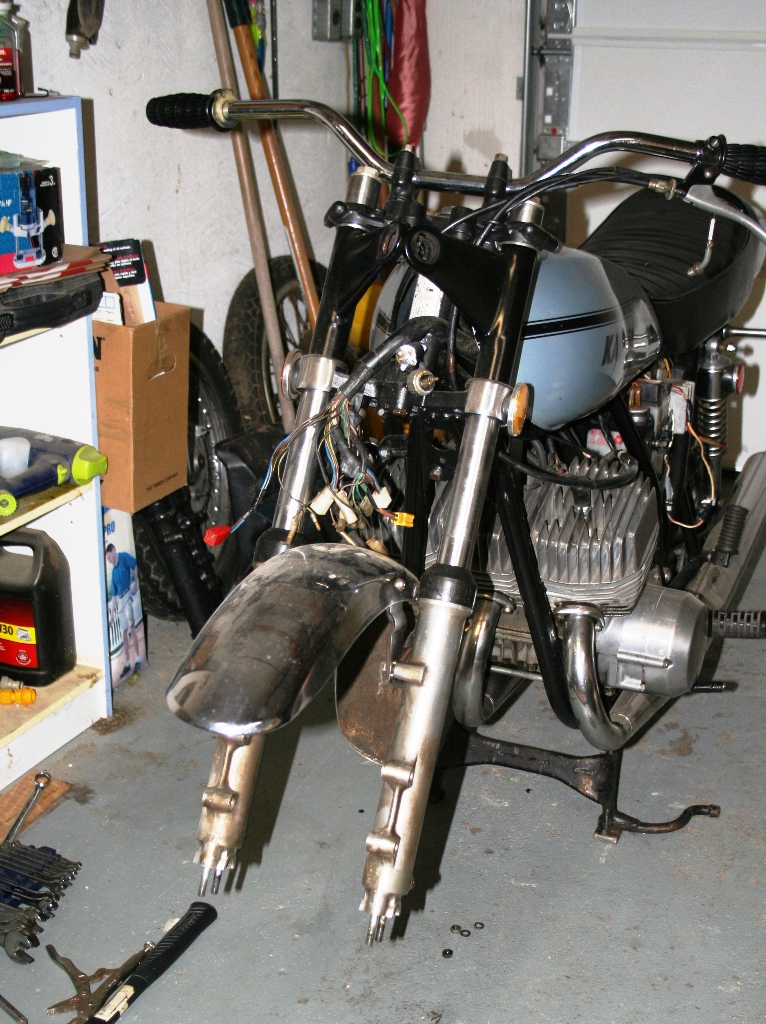
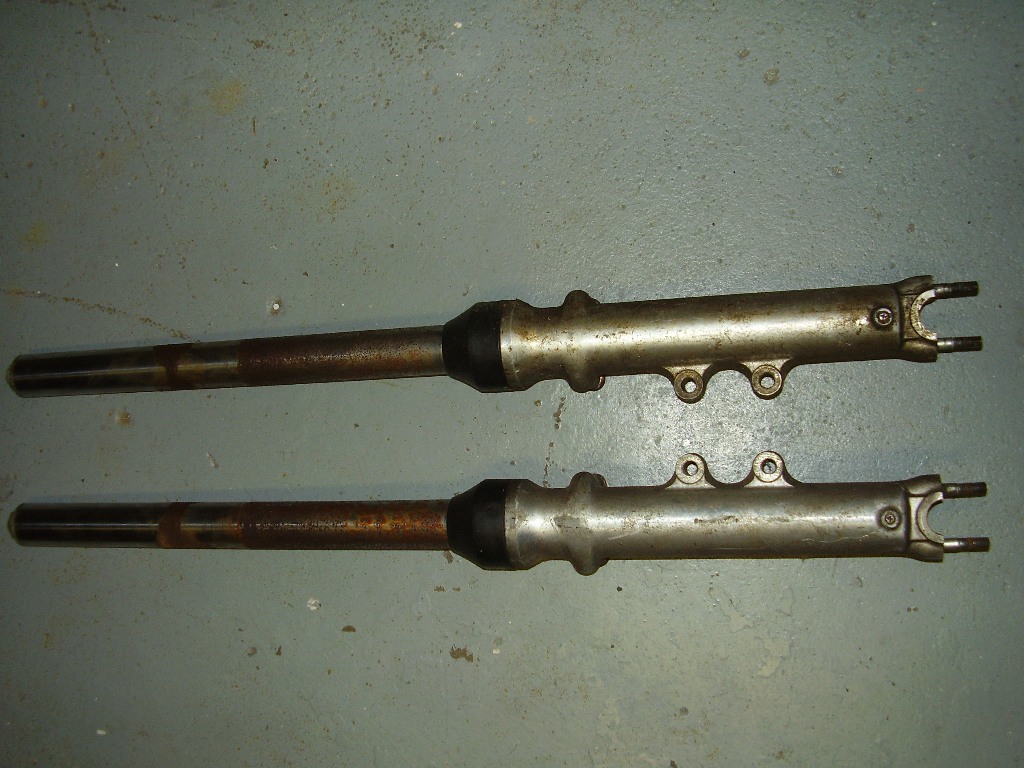
Replace front fork tubes.
Replace Front wheel.
Upgrade or replace front braking system (I'm thinking of upgrading it to a more modern caliper & master cylinder for better stopping power).
New paint job, (probably attempt this one myself).
New tyres & tubes.
Minor.
Cosmetic stuff, seat cover, grab rail, new air box, new handlebars, (I hate the cow horns it is currently fitted with).
Update August 9th 2009.
Not much to report really, I have been concentrating on my 400 & have not done too much to the 500, mainly small things. I rebuilt the leaking petcock & installed new fuel pipes & filters. Currently I'm in the process of doing some cosmetic stuff, mainly painting. I did manage to get a decent set of fork tubes & will be getting a hydraulic steering damper later today. I also managed to score a few needed items off Ebay & lucked out by getting a complete spare motor as part of a deal I made with one of the Triple club members.
Update Mid January 2010.
I spent the last few months accumulating more parts & now have most of what I need to start putting Humpty Dumpty back together again.
First priority is to repair / rebuild the whole front end, on this basis here is what I'll be doing:
Restore & rebuild the front wheel:
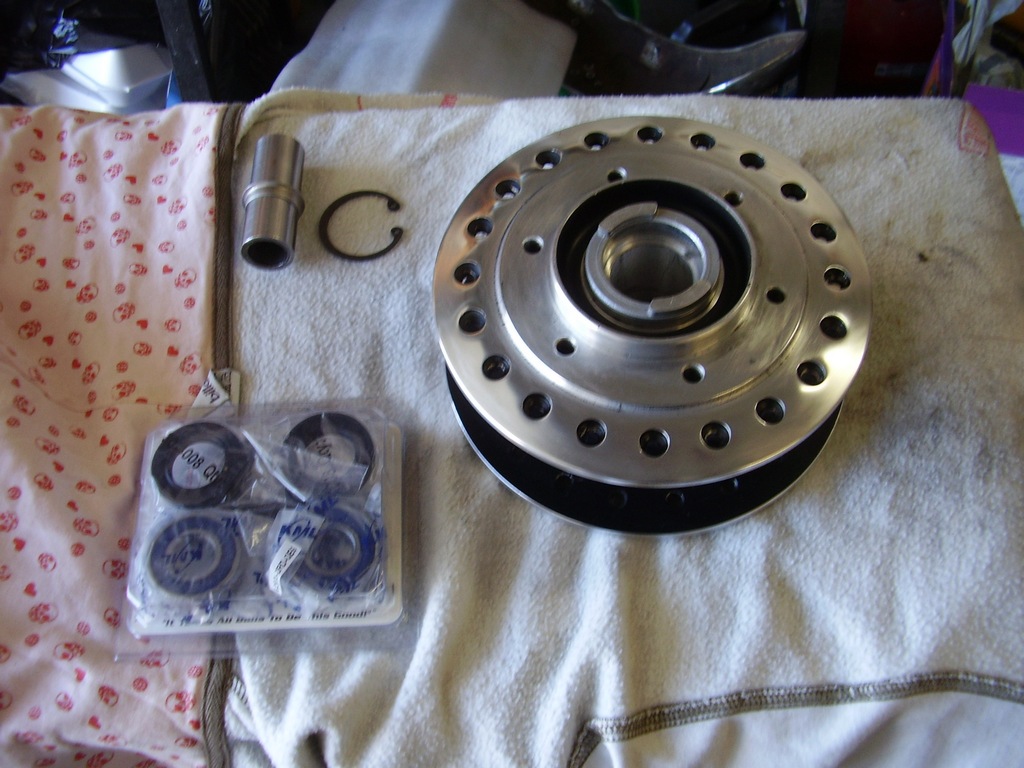
This will actually be made out of 2 wheels, I have one with a wrecked rim but really good spokes & hub. I bought a really good rim off a fellow KTC member (thanks Dave) for 20 Bucks. I'll also replace the wheel bearings & fit a Bridgestone BT 45 tyre.
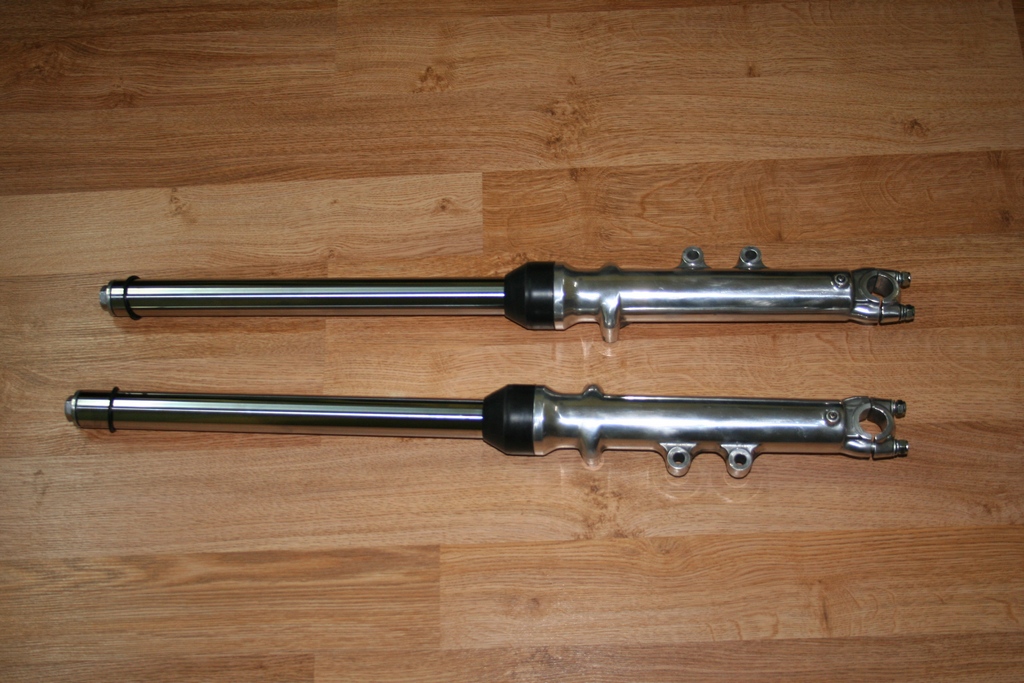
Restore & rebuild the front forks:
I decided to buy new stanchions, finding decent used is not worth the effort when new ones can be had for around $90.
Replace the original steering head bearings with new taper roller bearings. This is a no brainer as far as I'm concerned.
Restore, rebuild / replace the front brake:
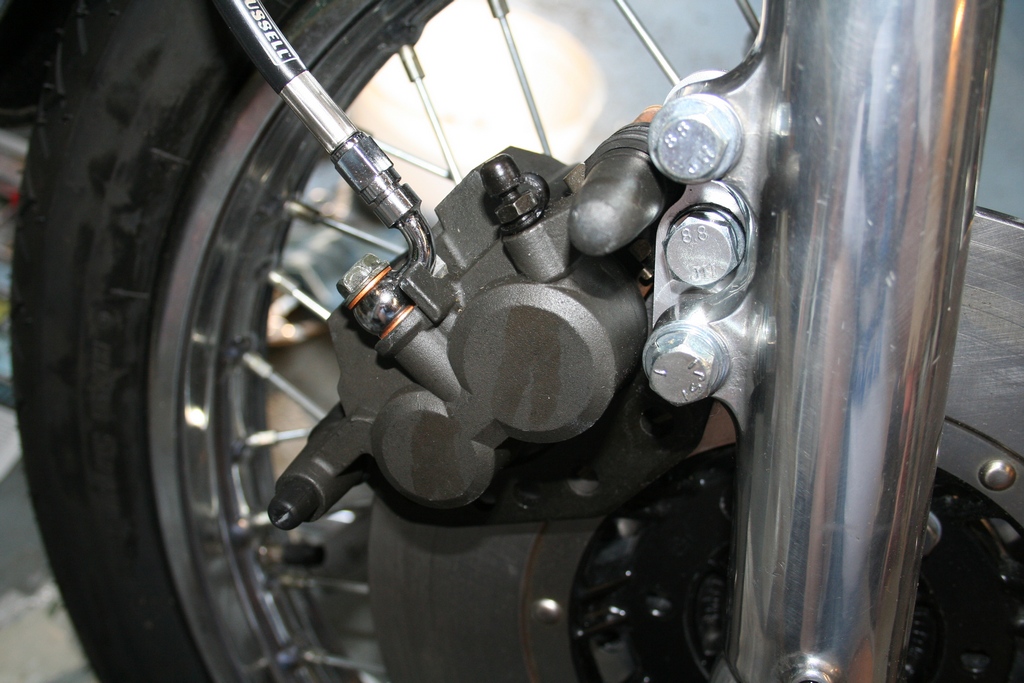
The bike did not have a brake caliper when I purchased it but I'd already decided to upgrade the brake with a more modern caliper design. I bought a low mileage twin pot Kawasaki EX caliper off Ebay for 20 Bucks, this can be easily adapted to fit the H1 mounting lugs. I'll rebuild the master cylinder (of course) & replace the hoses with stainless braided types.
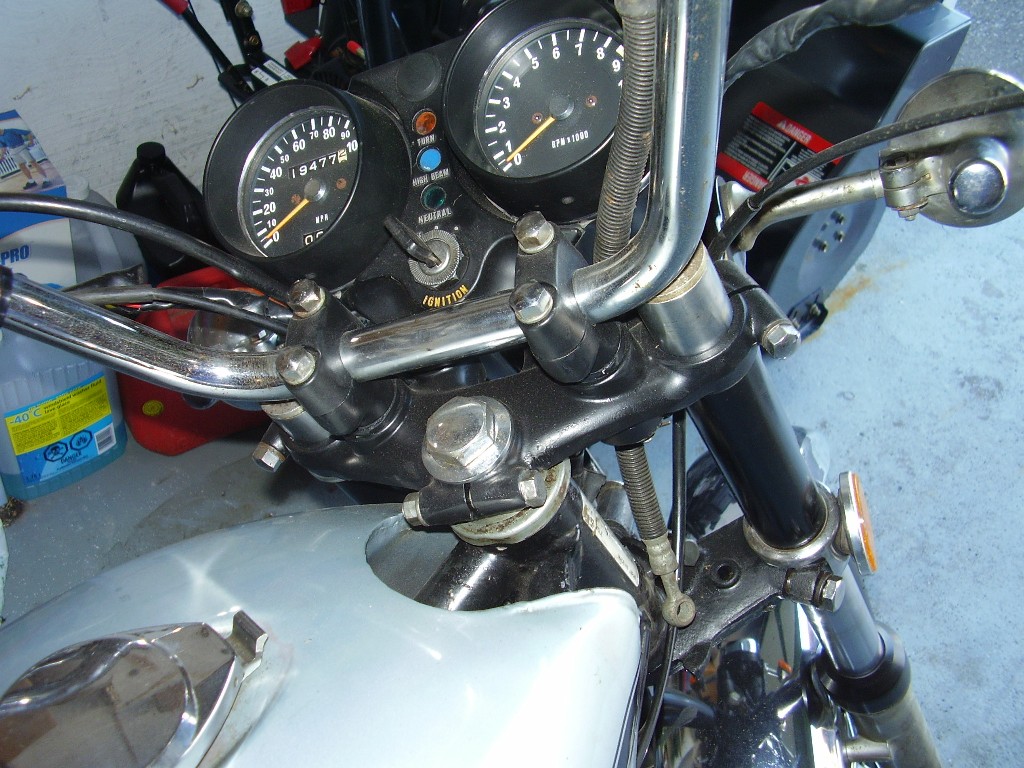
Upgrade the headlamp:
I'll be doing the same conversion to a halogen H4 unit that I did on my KH400.
Update Late January 2010.
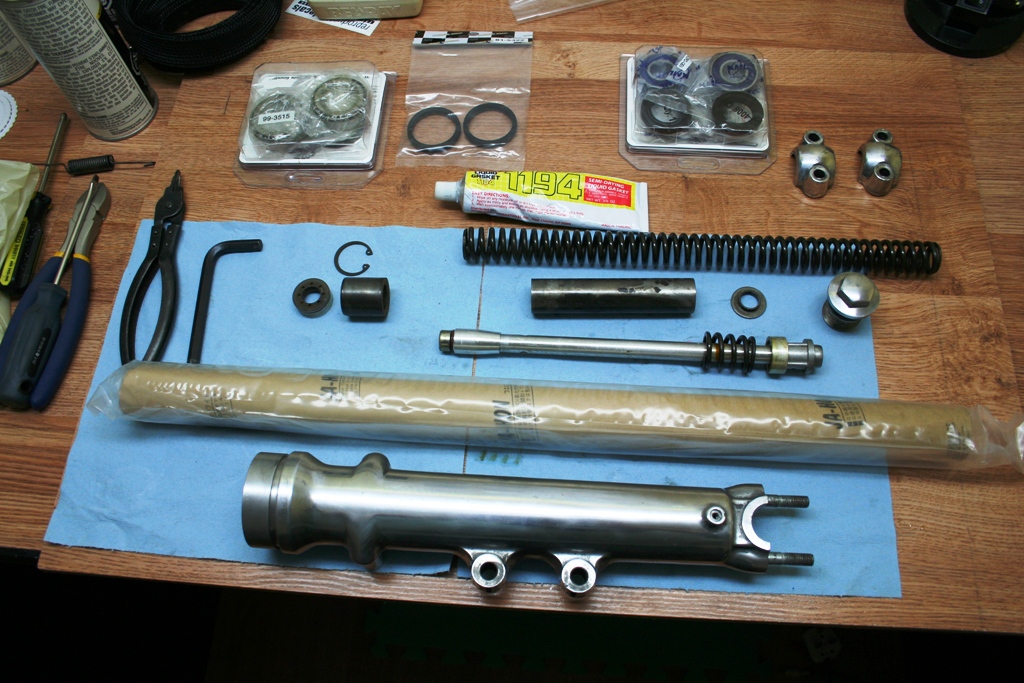
Despite the cold weather (minus 17c today) I decided to strip the front end down. Earlier in the week I ordered new fork tubes, taper headrace bearings, & new front wheel bearings from ReproductionDecals. Andre & Ellen are great people to deal with & I can highly recommend them. I also stripped down both of the sets of forks I aquired, the idea being to make one good set to install on the bike.
Here are a couple of pics showing progress this morning (29th)
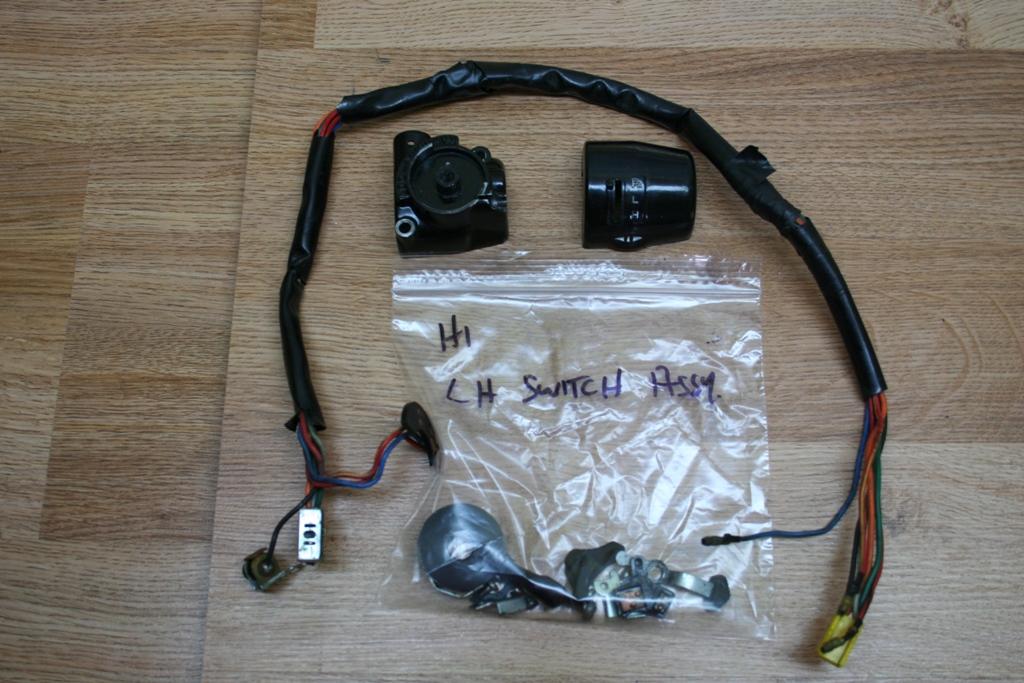
I've also been busy working down in my office / workshop stripping, sanding & painting some of the smaller parts. To remove rust I've been using a product called Evapo-rust, it is (supposedly) a bio friendly product that removes rust. I can vouch for the fact that it does indeed dissolve rust, leaving a nice grey rust free surface. Not sure about the bio friendly part though.
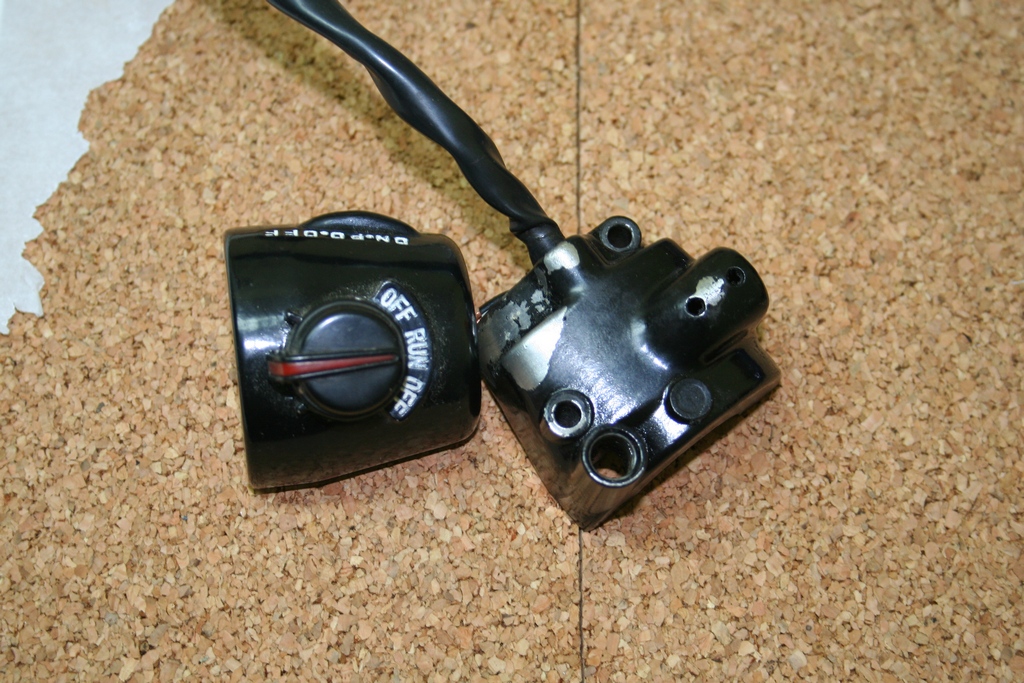
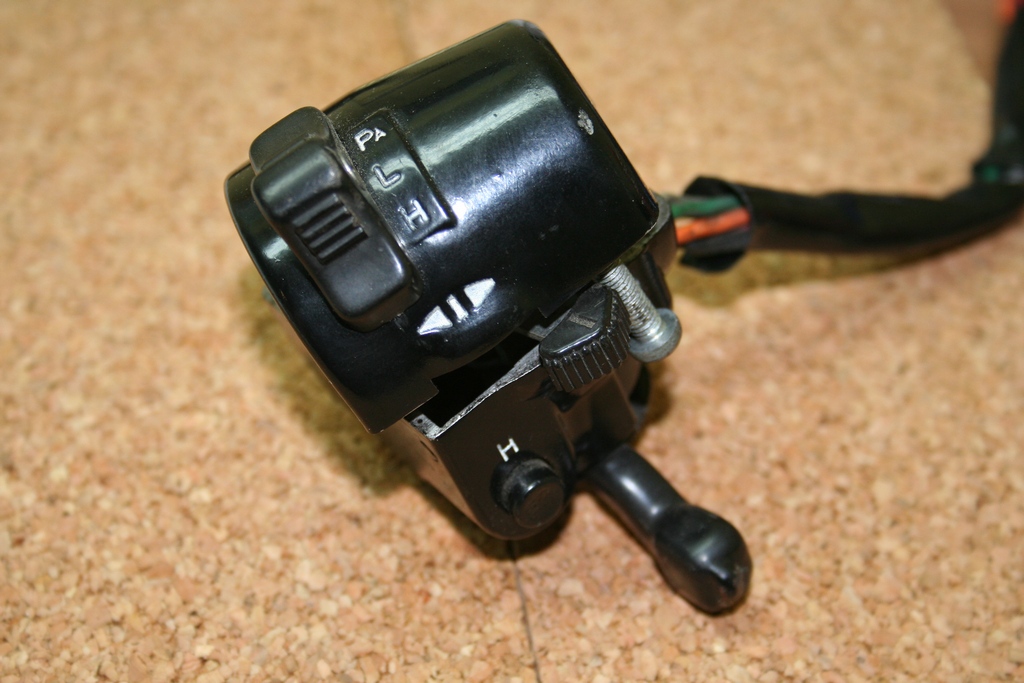
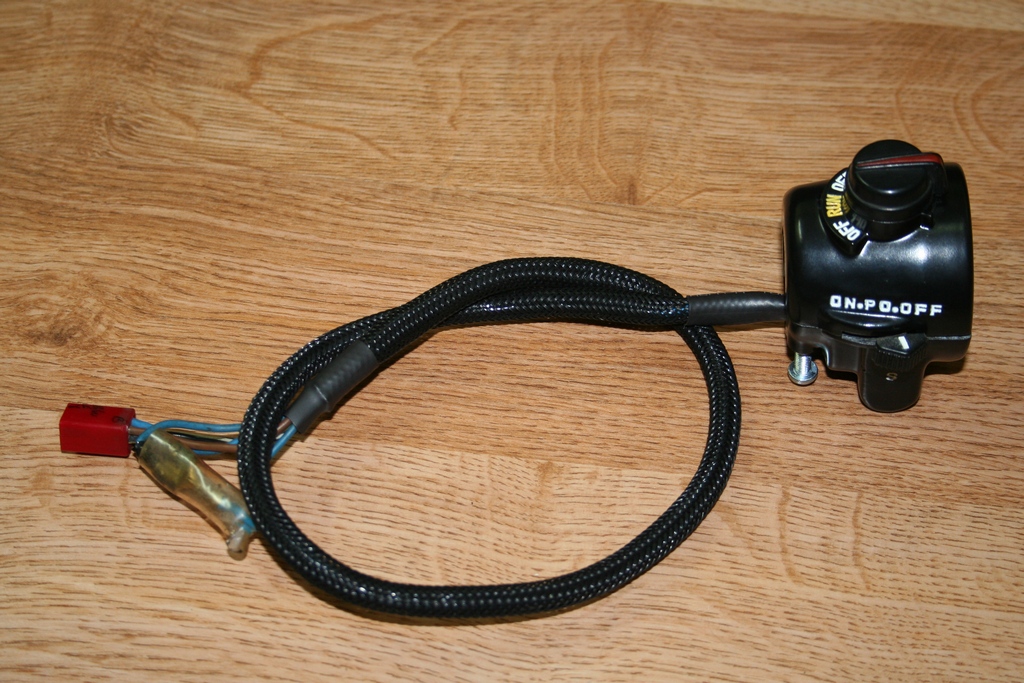
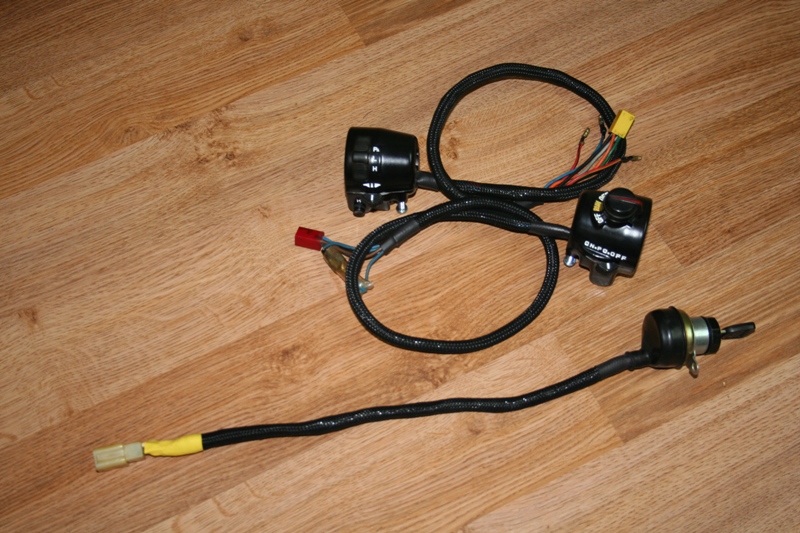
Here are the handlebar switches stripped & ready to be restored. I'll be replacing the old brittle & cracked sheathing, more than likely with woven nylon braid sleeving

Update Late June 2010.
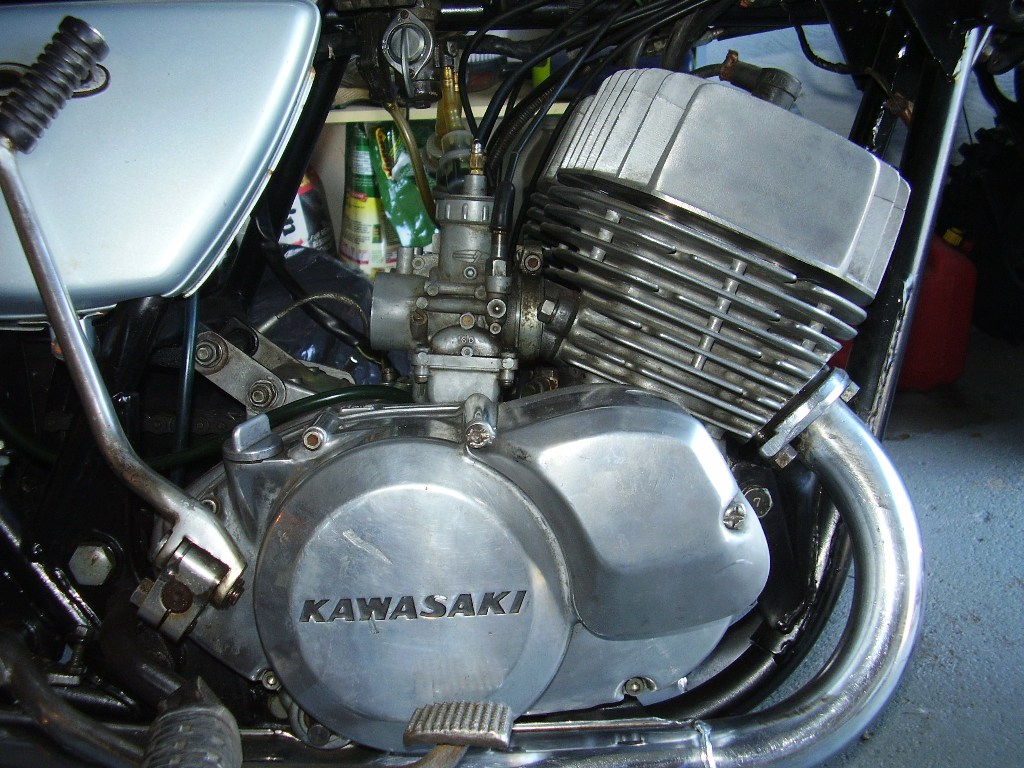
I have not managed to do the amount of work to the bike that I intended to in the past few months but nevertheless have gotten the front end of the bike rebuilt / restored along with repairs & general tidying up of the wiring harness. Also managed to get the carbs stripped, cleaned & rebuilt with new stock jets.
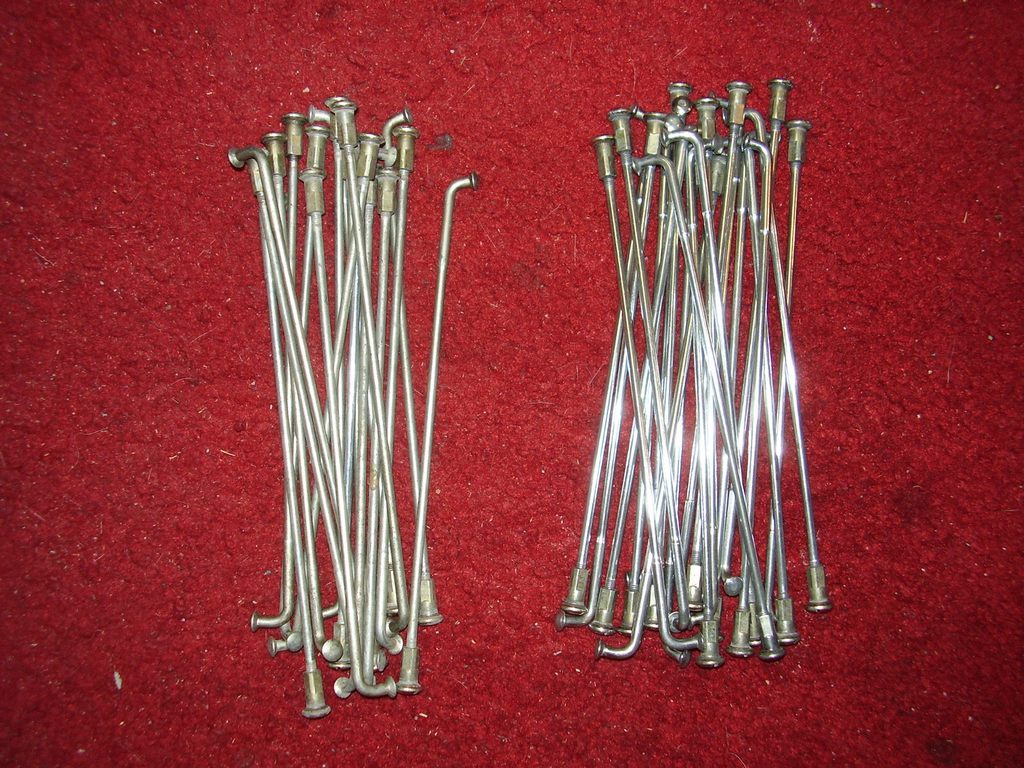
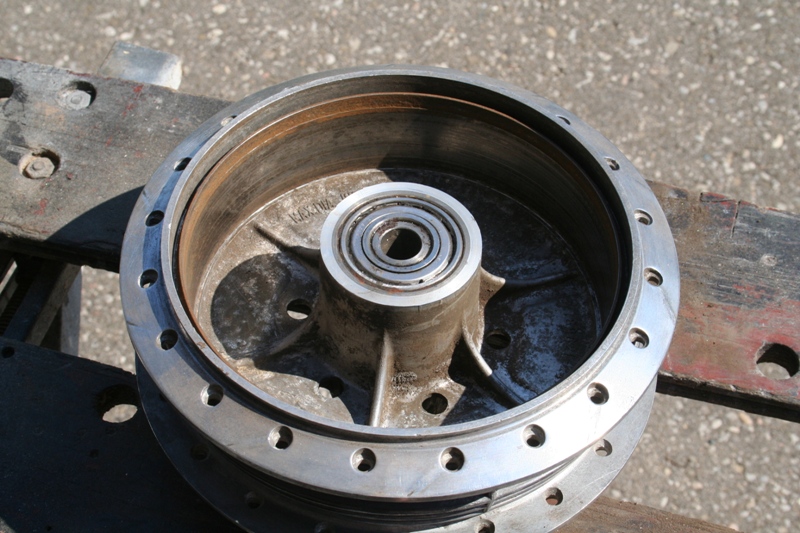
My Buddy Ken stripped the original front wheel down for me, I re-used the original spokes which somehow had escaped the ravenges of time & just needed a buff up with some Autosol to get them looking like new, see pic below, un-polished spokes are on the left. I removed the rust from the inside of the rim I got from Dave on the Canadian triples board, I can vouch that the Evaporust product does work very well if a little slowly. The original chrome on the rim is so good that after a quick polish it looked like new, so I sanded & polished the front wheel hub prior to fitting new bearings before giving everything back to Ken to re-assemble the wheel & fit a new Bridgestone BT45 tyre.

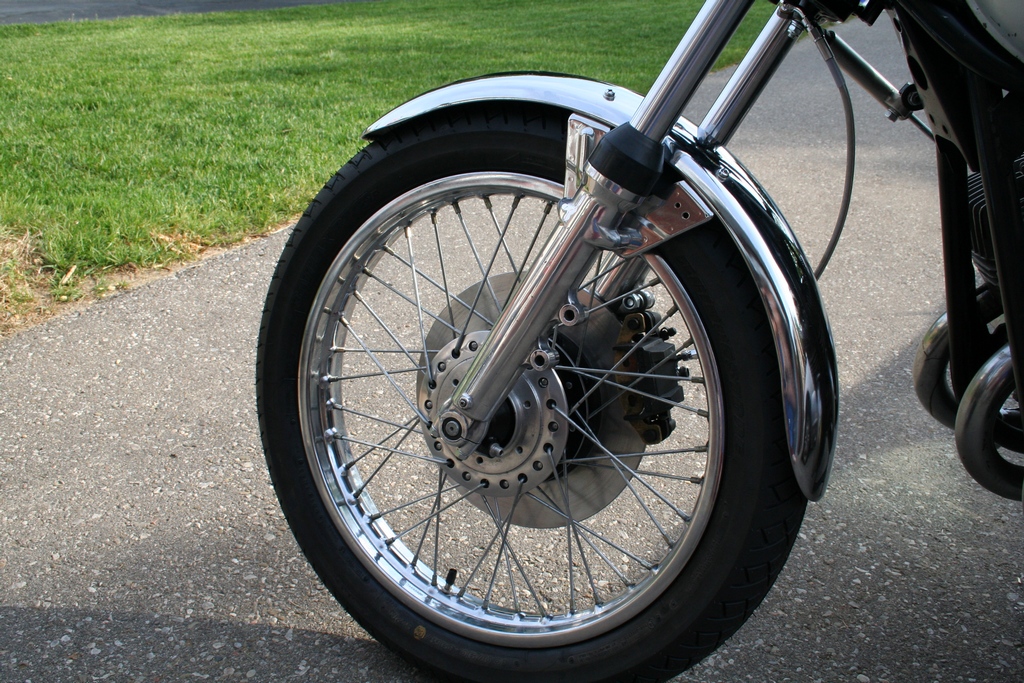
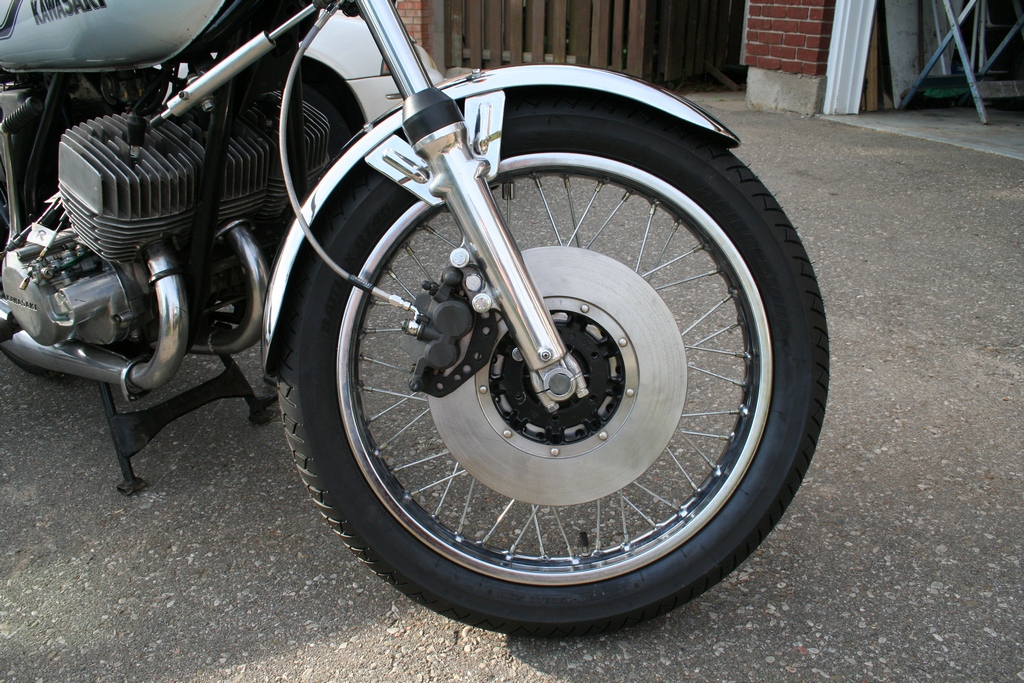
As mentioned earlier I completed the front brake conversion to a Kawasaki EX twin pot caliper along with a restoration & rebuild of the original master cylinder. I purchased the braided brake hoses & fittings from Russell, filled the brake system with Dot 5 silicone brake fluid which will not strip the paintwork like Dot 3 fluid does. The word is that this conversion transforms the brake performance making 2 finger panic stops easy, hopefully I won't need to test that out for myself..
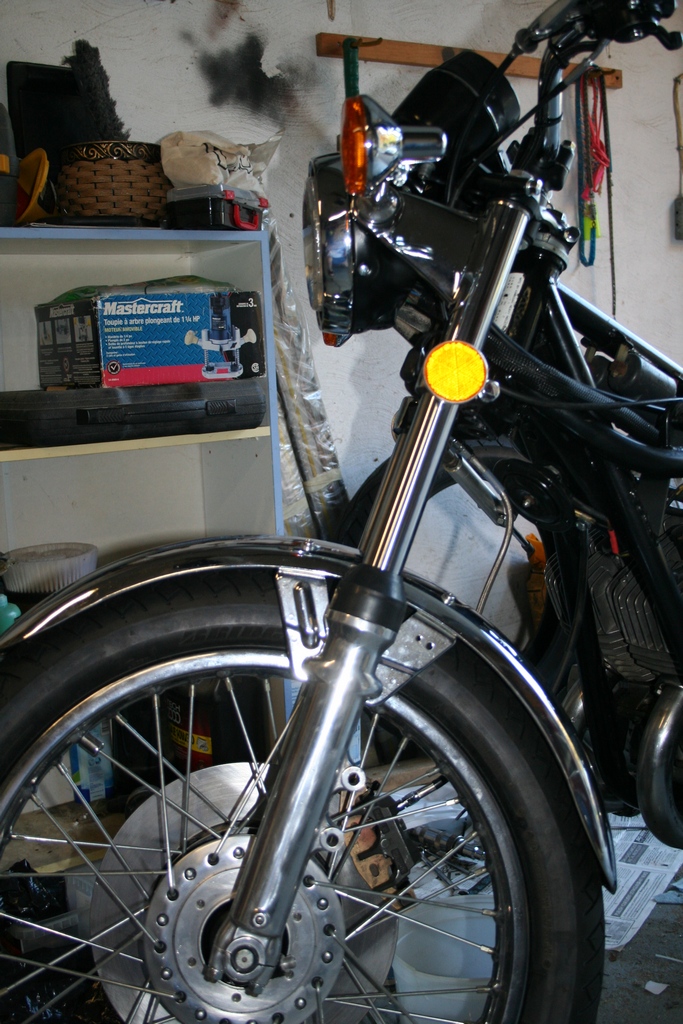
I stripped the front forks down & was happy to see that with the exception of the tubes everything was in good shape. I polished the sliders & installed new seals, I got all of the chrome bits & pieces including the headlight ears re-chromed for a very reasonable cost. The original fender (mudguard) had some road rash & really needed to be repaired & re-chromed but in the interests of saving a few Bucks I thought I'd see if my spare KH400 fender would fit. It bolted straight in & sits nice & close to the tyre therefore it's a keeper...


The original handlebar switches were a little rough & needed to be restored along with the wire sheathing which had become brittle with age & was cracked & broken. Restoration was pretty straight forward & as per my KH400 I replaced the original PVC sheathing with nylon braid & mounted the switches to a set of 4" lower than stock superbike bars. I have never understood the North American obsession with high "cow horn" handlebars, especially on a sport bike.


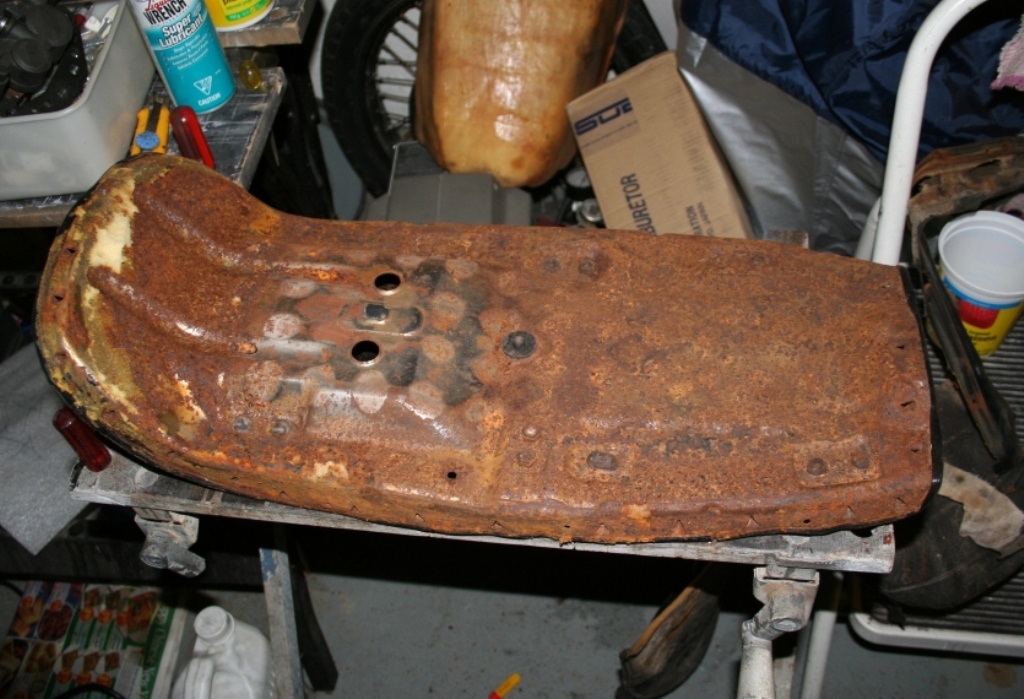
I also had an opportunity to make a start on the seat restoration. The original pan was really rusted badly & would require a lot of work to repair. My good freind Donny surprised me on my last birthday by giving me a complete H1 seat assembly for a birthday gift! Once stripped & sand blasted the pan showed that it needed a couple of minor repairs, once again Ken came through & got the pan TiG welded in the bad spots. Once I'd got it cleaned up & sanded down I covered the inside of the pan with fibreglass matting & polyester resin to add more strength. a couple of coats of primer & 3 coats of gloss black enamel & it is looking pretty good. I'm hoping to order the new seat cover in the next few weeks.


Update Late January 2011.
I must admit I have been very delinquent in the last few months both in doing work on the bike & updating the progress made on this website. However, I have made some progress & am aiming to get the bIke on the road in time for this years Canadian triples club rally in June, or, a little more ambitiously for the Friday the 13th bike rally in Port Dover.
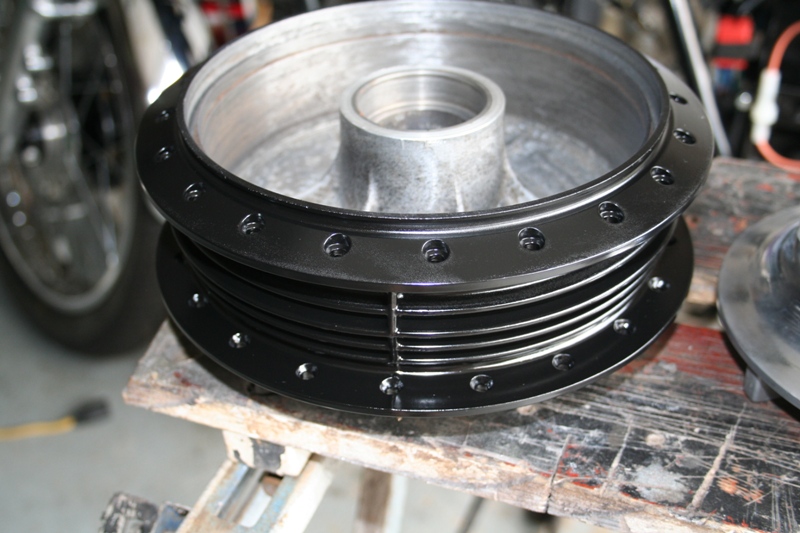
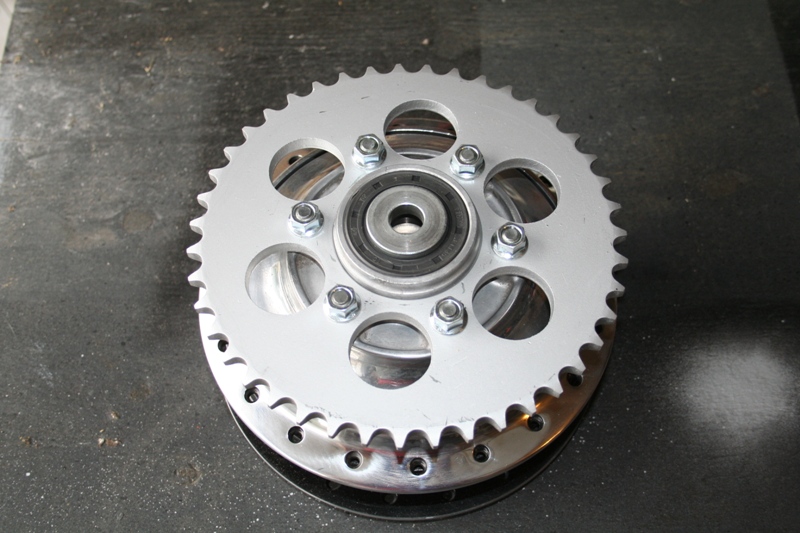
My original attempt to not spend too much time & money on this project somewhat predictably has gone out of the window, the catalyst being the rebuild & restoration of the swing arm & rear wheel. Both items were well past their best with the exception of the wheel rim which was in very good shape. Once again my buddy Ken came through & stripped the wheel down for me, gave me the hub assy back & shipped the spokes out to be re-plated. I replaced all of the bearings with new ones then stripped, cleaned, polished, & painted the hub to match the polished & painted front prior to giving it back to Ken. He re-built the wheel with the freshly painted spokes & installed a new Bridgestone BT45 tyre.


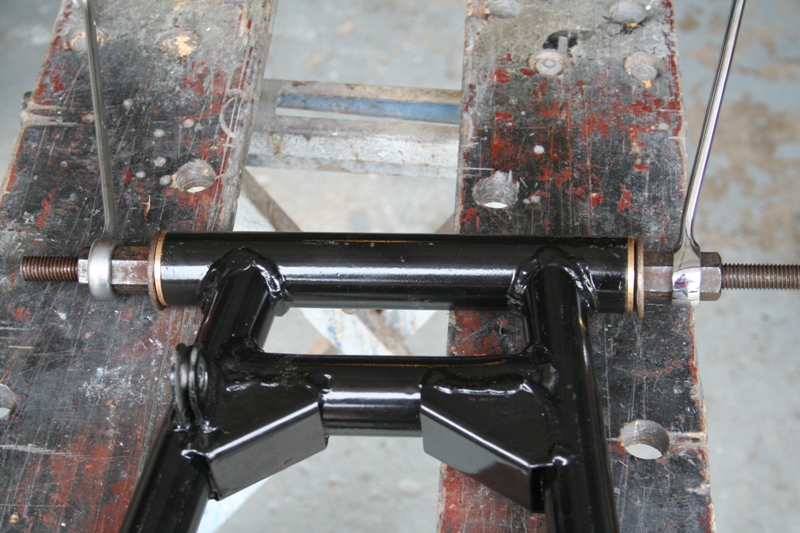
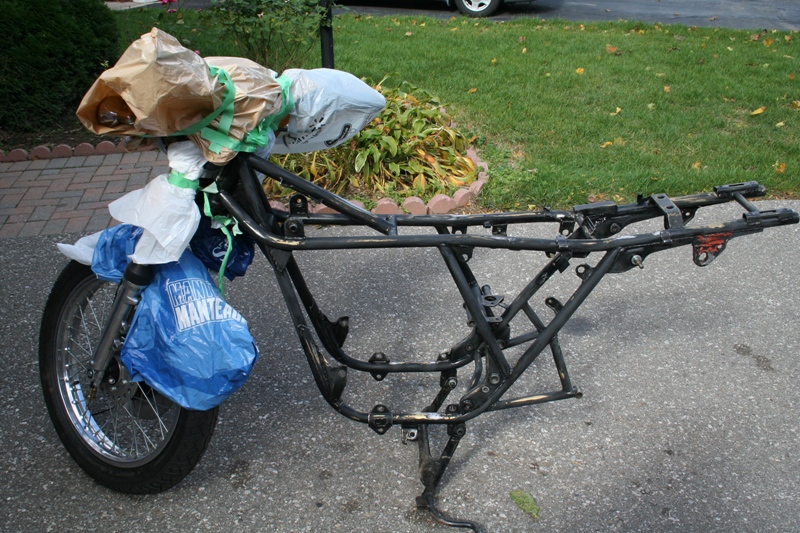
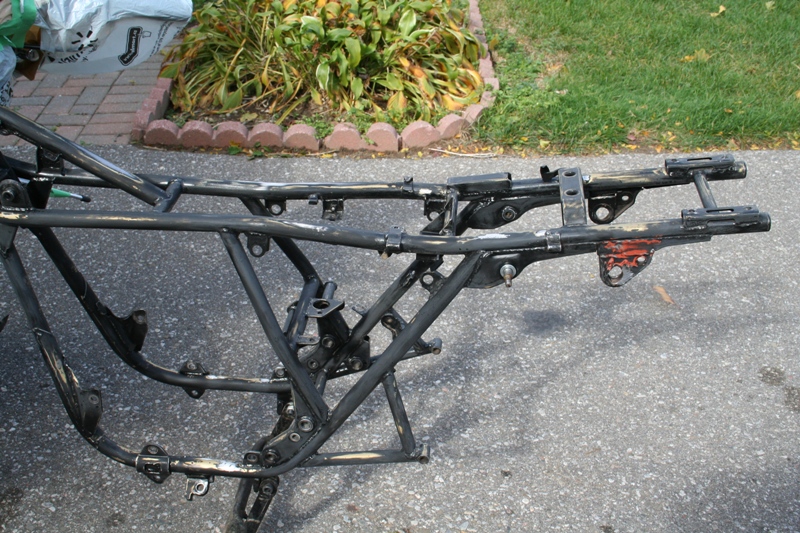
In the meantime, I stripped the swing arm, the original bushings did not have any significant play but given the reputation these bikes have for poor handling, made worse by play in the bushings I decided it would be prudent to replace them. Once installed the swingarm got a couple of coats of primer & gloss black chip resistant paint. Once done, it looked brand new & comparing it to the frame which I'd previously decided to leave "as is" would just not look right, therefore a re- paint of the frame would be necessary (sigh). With that said I will admit to taking a shortcut or two by not stripping the bike right back down to the bare frame. I'd already rebuilt the complete front end & was loathe to remove it so I covered it up prior to rubbing down, priming, & repainting gloss black.

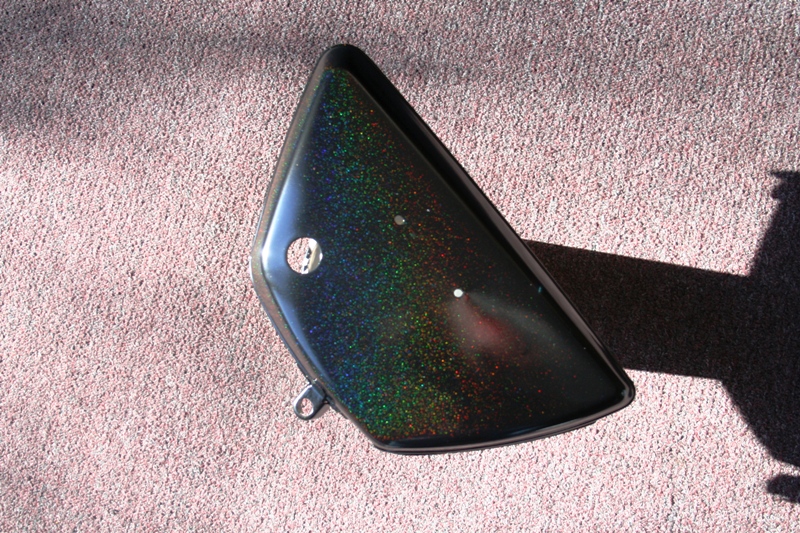
Again, reneging on my intention to make this bike a daily rider I succumbed to the bling factor & have had pretty much all of the bright work re-chromed, including some pieces that were not originally plated by the factory. Along with this I keep flip flopping over what to do with the paint, I was set on getting it done in the 75' H2 purple but more recently have been toying with the idea of metal flake black with the 75' H2 lilac decal colour. I did a quick spray test with a spray can on the side covers & quite like the results.

Update Early December 2011.
Like my KH400 page I have been shamefully delinquent in keeping this one up to date. Needless to say I have finished this bike & have been riding it for the last 3 months....