 |
 |
 |
 |
 |
 |
 |
 |
 |
 |
 |
 |
 |
 |
 |
 |
 |
 |
 |
 |
 |
 |
|
| Brake Light Switch Adjustment |
|
|
|
 |
|
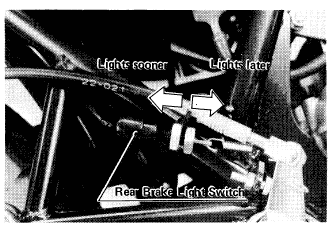
| The rear brake light switch must turn on the brake light after about 15 mm (5/8 in) of brake pedal movement. Adjust it by turning the switch adjusting nuts up or down so that the brake light will go on after the correct amount of brake pedal travel. |
|
|
| CAUTION: To avoid damaging the electrical connections inside the switch, be sure that the switch body does not turn during adjustment. |
|
|
|
|
| The brake light will also light when the front brake is applied. However, the frontbrake light switch requires no adjustment. |
|
|
|
|
|
| Steering Inspection |
|
|
 |
|
|
|
| The steering should be checked after 800 km (500 mi) and then every 6,000 km (4,000 mi) thereafter. |
|
|
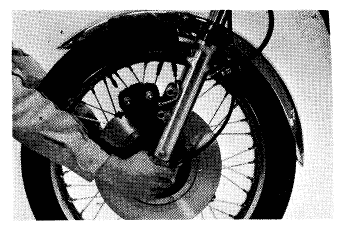
| To check the steering adjustment, first place a stand or block under the engine so that the front wheel is raised off the ground. Push the handlebarlightly to either side; if it continues moving under its own momentum, the steering is riot too tight. Squatting in front of the motorcycle, grasp the lower ends of the front fork at the axle, and push and pull the front end back and forth; if play is felt, the steering is too loose. |
|
|
|
|
| Note: Since the steering adjustment is sensitive and crucial for safe operation, have it performed only by an authorized Kawasaki Dealer. |
|
|
|
 |
|
 |
|
| Clutch Adjustment |
|
|
|
|
|
|
| Due to friction plate wear and clutch cable stretching over a long period of use, the clutch must be adjusted periodically. |
|
|
|
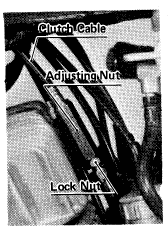
| Loosen the lock nut at the middle of the clutch cable, and screw in the adjusting nut to give the cable plenty of play. |
|
|
|
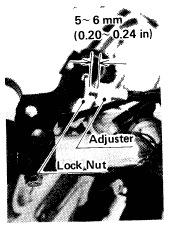
| Loosen the lock nut at the clutch lever just enough so that the adjuster will turn freely, and then turn the adjuster so that there is a 5~6 mm (0.20~ 0.24 in) gap between the adjuster and lock nut. |
|
|
|
|
|
 |
|
| Remove the engine sprocket cover. |
|
|
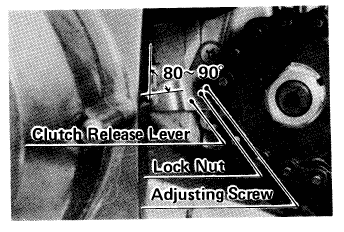
| Loosen the clutch release lever lock nut, and back out the clutch adjusting screw 3 or 4 turns. |
|
|
| Set the clutch release lever angle at an 80~90º to the clutch cable by turning the adjusting nut at the middle of the clutch cable. |
|
|
| Turn the clutch adjusting screw in to where it suddenly becomes hard to turn, and then tighten the lock nut. |
|
|
| Take up all the cable play with the adjusting nut at the middle of the cable, and then tighten the lock nut. |
|
|
|
|
 |
|
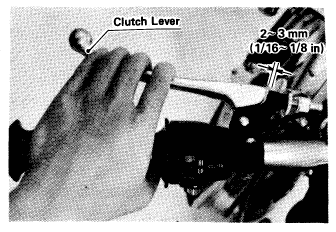
| Turn the adjuster at the clutch lever so that the clutch lever will have 2~3 mm (1/16~1/8 in) of play, and tighten the lock nut. |
|
|
| Replace the engine sprocket cover. |
|
|
| When adjustment is finished, start the engine and check that the clutch has no slippage and releases properly. |
|
|
|
|
| Note: For minor corrections while riding, use the adjuster at the clutch lever. |
|
|
|
|


