Late H1 Stator Coil Winding by Bugman Jeff
The stator cover on my H1F vibrated loose,
and the stator hit the rotor. Afterwards, the bike wouldn’t charge. Diagnostics
showed that the stator was shorted to ground and since I couldn’t find a good
used one for a reasonable price, I had to rewind mine. I’ve got lots of
experience hand winding brushless motors, but this looked more complicated.
There are other winding “how-to’s” out there, but I didn’t see any for the late
H1. Since I had to do it anyway, I figured I’d take some pics along the way
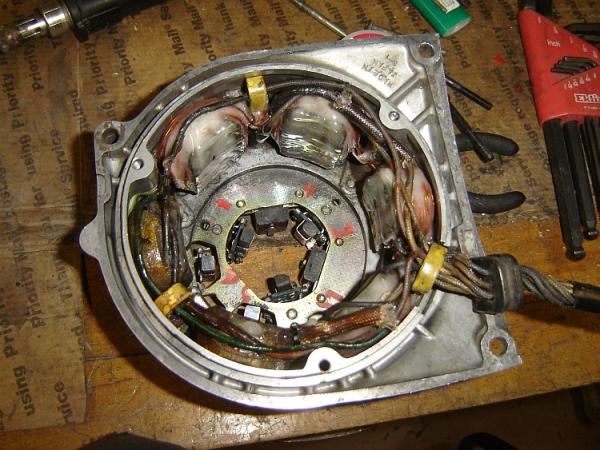
![]() This little how-to will cover rewinding the four epoxied charging coils. I’ll
try not to get to wordy, but no promises…
This little how-to will cover rewinding the four epoxied charging coils. I’ll
try not to get to wordy, but no promises…
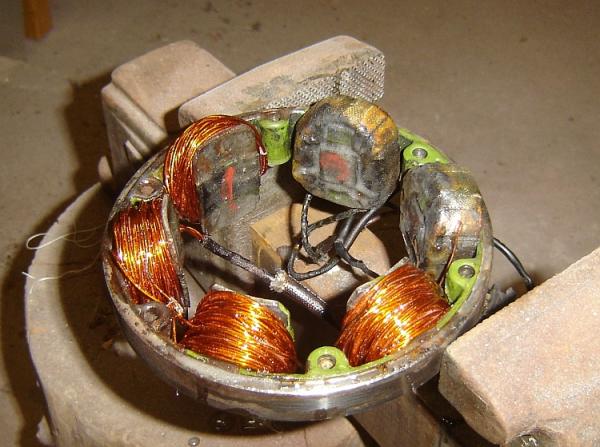
As you know, 2 of the 6 coils are cloth wrapped. The one that is used for the charging system has bare enameled wires coming out on it. Although I didn't measure it, the wire gauge is slightly smaller than the other 4 charging coils, 21ga. The ignition coil is the wrapped coil that has insulated wires coming out of it. In the pic below, the 5th charging coil is at 7 o'clock, the ignition coil is at 9 o'clock (you can see it's two insulated wires coming out of the top of the coil, one going each direction).
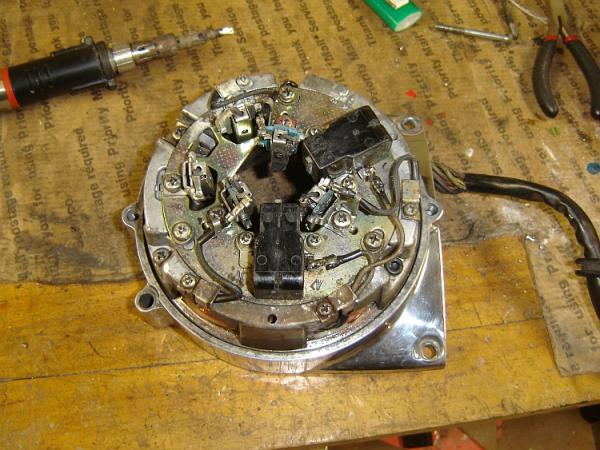
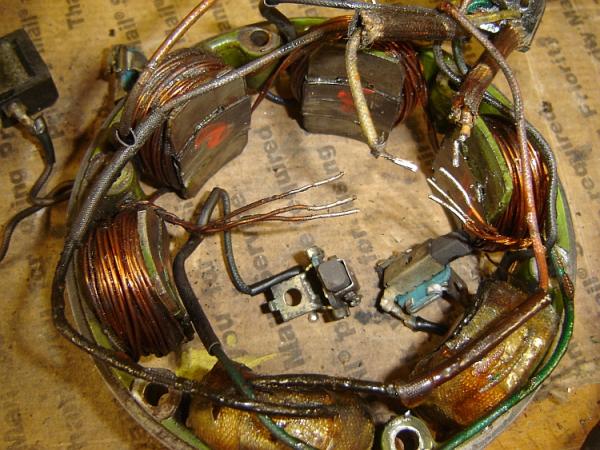
First things first, MARK EVERYTHING, and take LOTS of pictures
and notes! This can not be stressed enough. While it is fairly straight forward,
you need to make sure you know where everything is supposed to go. Mark all the
brushes. Mark the ignition pickups. Mark where the stator frame, brush/pickup
frame, and stator housing all line up. Mark where the wire bundle lays in
relation to all those parts. I also marked my coils 1-4. If yours is like mine,
the wires will all be about the same color by this point, so unless yours is
really nice don’t rely on wire color to tell you where things go.
Once everything is marked, take it apart. All the wires, brushes, and pickups
will stay with the stator frame. Try not to twist the wires around too much,
remember, they are nearly 40 years old. There is also a whole lot of epoxy on
these things, so you might have some wires a bit stuck. With everything apart,
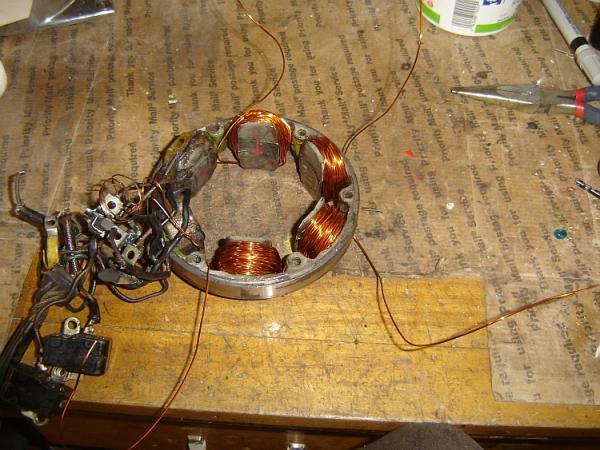
you can find the solder joints where the charging coils are all wired together.
The joints are covered in fiberglass braiding. You should be able to just slide
the braid up the wire. You can see the two joints here.
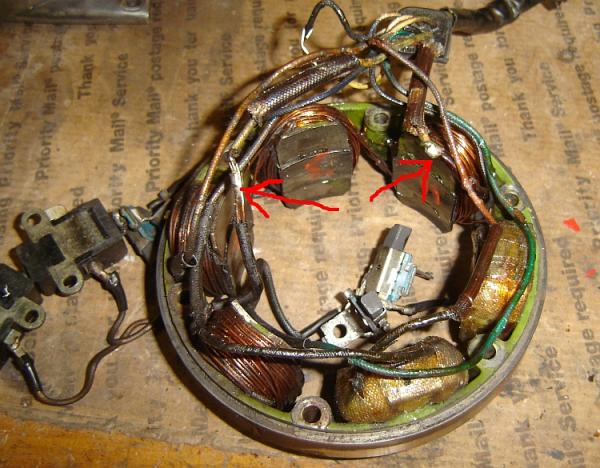
With the joints exposed, you can de-solder them. There are 8 wires in total, four in each joint (the two yellow wires that exit the stator housing, and six wires coming from the coils. You can see the wires here.
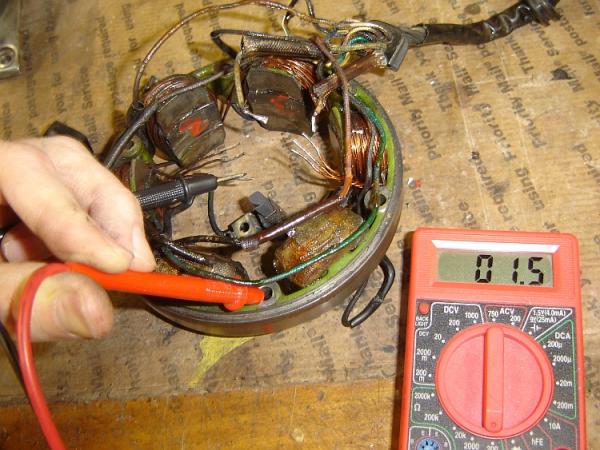
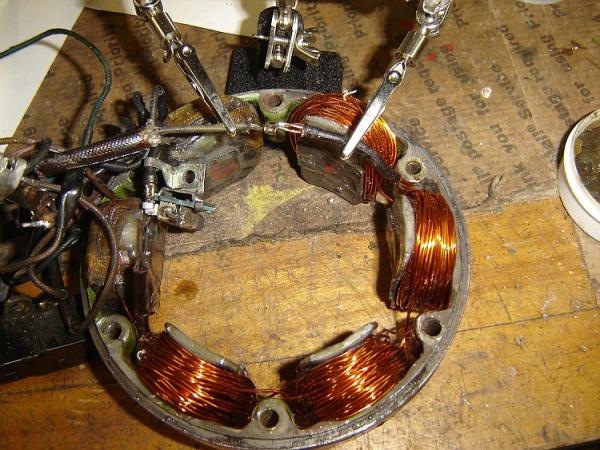
With all the wires loose, you can do a more through diagnostic. Mine didn’t have anything visually wrong with it, but the VOM says otherwise. You can see here that one of the series coil pairs is indeed shorted to ground.
This is actually the toughest part(and the part I have the
least pictures of…), unwinding. The epoxy the factory used to coat the coils is
reasonably strong, but also brittle. I highly recommend you wear latex gloves
when you do this. The epoxy cracks off in shards, and without gloves you will
get dozens of paper cut type slices on your fingers…go ahead ask me how I know…
![]()
The first thing to do is ID the smaller wires that goes to the 5th cloth wrapped
charging coil. It is 21 gauge, the 4 main coils are 17 gauge, so it’s easily
identified. It’s routed around the main coils and is tough to follow. Starting
at a loose end, carefully start peeling it off the epoxied coils. Since we’re
not rewinding this coil, try not to break the wire.
Next, you can start unwinding the main coils. For each pair of coils, the wire
starts at the solder joint, wraps around one coil then the next, then to the
other solder joint. One end will be buried under the coils and won’t unwind. The
other will be looped around the outside of a coil, this is the one you want to
start with. Basically, just start pulling it off the coil.
VERY IMPORTANT: make a
note of which direction each coil is wound!! (clockwise vs counterclockwise).
Also make note of which coil goes to which solder joint. If you don’t get these
right, the bike won’t charge. Again…ask me how I know…
![]() It’s also important to count the number of turns of wire are on the coil. Number
of turns will affect output voltage. In my case, each coil had 122.5 turns of
wire (a half turn is where the wire makes a “U” around the coil instead of a
full loop). Once you get the wire off, here’s what you’re left with. You can
also see the 5th coil’s wire wrapped out of the way.
It’s also important to count the number of turns of wire are on the coil. Number
of turns will affect output voltage. In my case, each coil had 122.5 turns of
wire (a half turn is where the wire makes a “U” around the coil instead of a
full loop). Once you get the wire off, here’s what you’re left with. You can
also see the 5th coil’s wire wrapped out of the way.
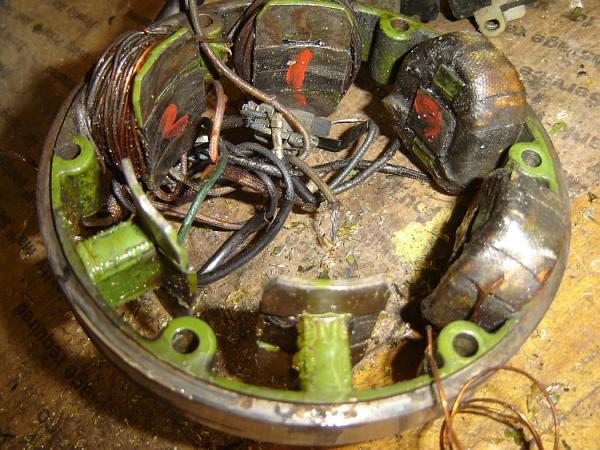
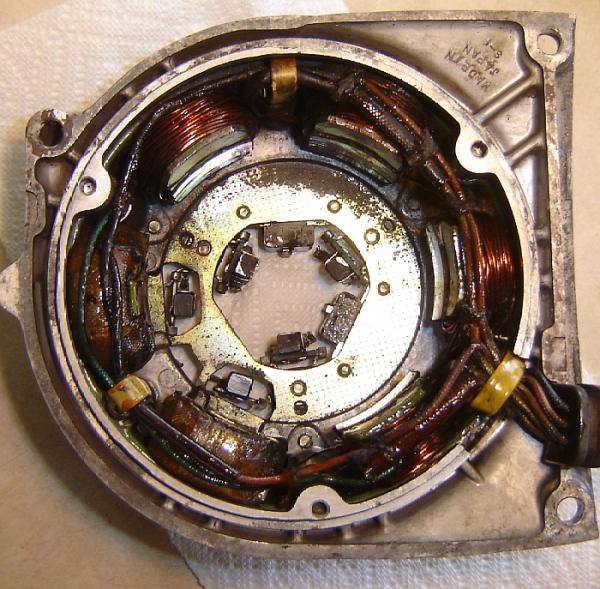
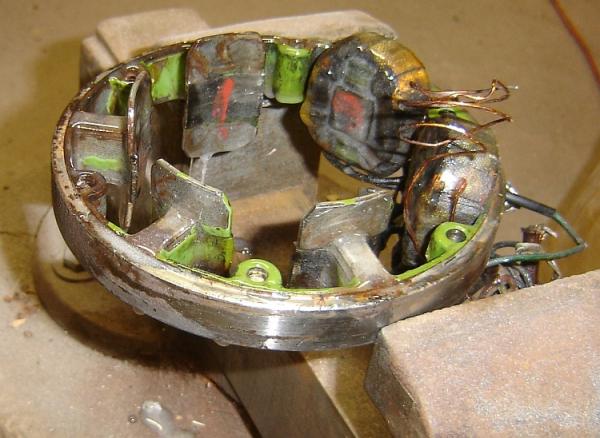
With all the coils unwound, you can chip off and clean up any remaining loose epoxy. Don’t go crazy though, the green epoxy is there for a reason.

Remember when I said some of that epoxy was there for a reason? I meant it. It’s there to help insulate the stator frame in case the wire insulation ever wears through. Since most of mine is missing, I had to replace it. I’m using 30 minute epoxy(the 30 min set time gives you time to work with it a bit). Since we’re going to need a lot of it, I recommend the 8oz kit from your local Hobby Lobby. Its $10, and they often have weekly 40% off coupons at http://www.hobbylobby.com I mixed some up and gave the stator frame a through coating with a cheap paint brush.
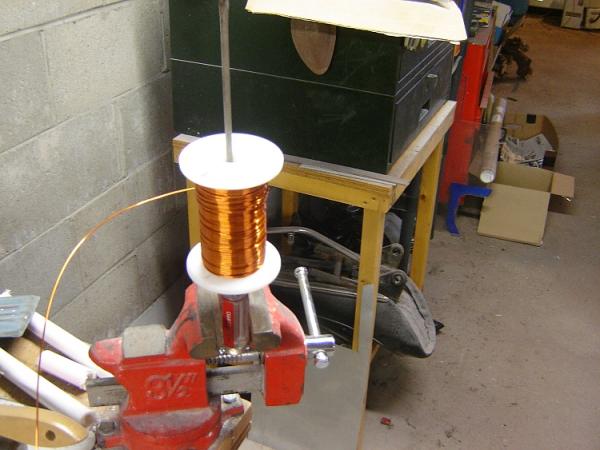
Next the fun part, putting wire back on. Since 17ga wire
isn’t very common here in the US, I opted to use 18ga. Electrically speaking,
you won’t notice much difference; the number of turns is the most important
thing here. I got a 300’ spool of 18ga magnet wire (enameled wire) from McMaster
for $35. You don’t need 300’, but it’s nice to have extra in case you have to
re-rewind. To hold the spool while winding, I just put a screwdriver in the vice
and we were off
![]()
The actual winding takes a bit of concentration because you need to be counting turns of wire. Using your notes as a reference (you were taking lots of notes, right?), wind the coils exactly as they were originally wound. Try to keep your coils nice and neat. The first few rows are easy, but they tend to get sloppier as you wind. Try not to catch the wire on any corners, there’s a chance you could scratch through the coating. Make sure you leave plenty of extra wire at the ends of your coils.
Once the coils are wound, check with your ohm meter to make sure nothing is shorted to ground. If you do have a short, you have to rewind…sorry… If it checks out, route your wires back to the solder joints, and solder everything back together. Don’t forget to route the 5th coil’s wires too. Helping Hands helps, they’re under $5 on sale at Harbor Freight. At this point, I highly recommend you reassemble everything and test it on the bike to make sure it works before you burry it in epoxy. Remember that with the wires loose, you have to be very careful none of them contact the spinning rotor. I used some kite string to tie the wires down, similar to the factory’s tie job.
If everything checks out, it’s time to epoxy the coils. The reason for the epoxy is to keep the wires stationary. If they are loose, they can vibrate and overtime, wear the coating off causing a short. I did the epoxy in two stages. For the first stage, I used rubbing alcohol to thin the epoxy down a bit. The thinner epoxy will wick down through the coils, gluing the inner winds in place. Try not to epoxy any wires that you still need to move (brushes, pickups, etc)
After the first stage sets, the second stage uses
unthinned epoxy. Basically you want to thoroughly coat the coils, working it
down between the winds as much as possible. Because of the long set time, it
will wick down into the winds, and will drip off the bottom. If you aren’t
making a mess, you aren’t using enough epoxy
![]() One note of caution though, don’t get more than a thin coat of the surface that
faces the rotor, the tolerance is pretty tight there (I had to sand it off there
because I put too much on).
One note of caution though, don’t get more than a thin coat of the surface that
faces the rotor, the tolerance is pretty tight there (I had to sand it off there
because I put too much on).
As a side note, you’ll notice that my epoxy has a milky look to it. These 2-part
epoxys have a shelf life, as they age, they start to get milky. They still work
alright, but get harder to mix. This epoxy is around 6 months old.

When the epoxy is cured, you can file off any drips. Just
be careful not to file all the way down to the wires. You’ll also want to clean
off the pads where the frame attaches to the rest of the stator assembly. Once
that’s done, you can bolt everything back together, and if you did everything
right, you’ll be charging good as new
![]()