by Kelly Wright
One
of my projects is complete restoration of a 1973 Kawasaki H2A 750 triple
two-stroke. I found the H2 in a pole barn in
In any event, since a restore back to original condition was my objective, one of the tasks I faced was reconditioning the front shocks to their original state, or at least as close as I could get. Though I can appreciate the almost-chrome look of highly polished forks, this treatment was not original to the H2. Rather, I was after the machined/satin look that the bike originally came with.
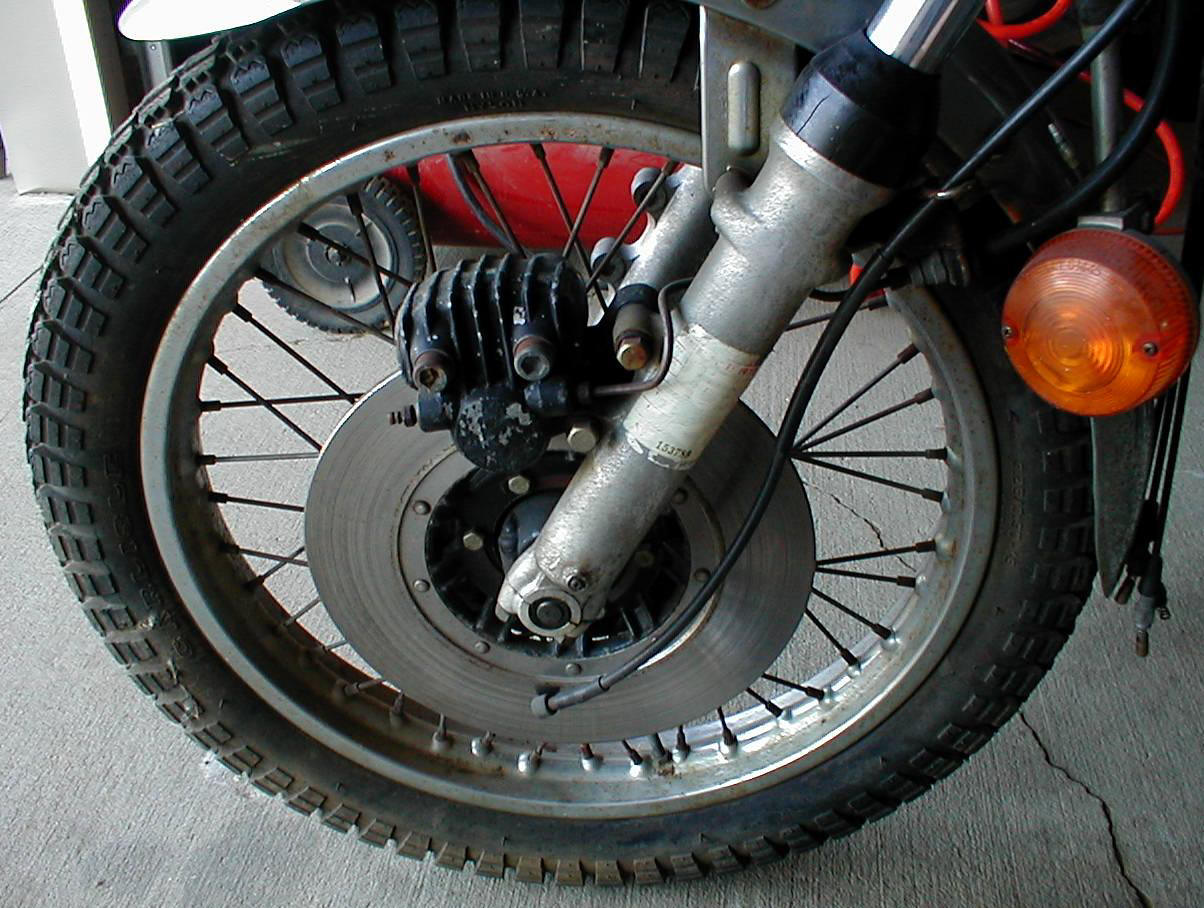
The fork tubes are rusty and severely pitted, so I will likely replace them with new items. The lower forks, though a bit rough, were in considerably better shape then the chrome tubes. The seals remained intact through the years, which fortunately prevented water from getting inside the lower units.
There is information available on the internet describing how to achieve an original satin look. Essentially, the described process involves wet sanding with 360 and 600 grit sandpaper, then polishing with succeeding finer grades of steel wool, starting at 0 and progressing to 0000. I tried this technique, and the result was simply too polished for my taste.
Therefore, I decided to start over. Described here is how I achieved the satin look that finally satisfied me. Note that I was specifically not seeking perfection for my project, as these forks were not perfect coming from the factory. Rather, my objective was to duplicate the original appearance as closely as possible. I will also not describe the disassembly of the shock assembly, as there are a number of service manuals that describe this process in detail.
A word of caution: I reference a number of chemicals and solvents in this article; i.e., kerosene, acetone, lacquer thinner and paint stripper. These are powerful and dangerous products when improperly used and are not something to trifle with. Read and follow the manufacturer’s directions, be sure to use with adequate ventilation and wear suitable chemical resistant gloves. I am serious about these precautions, and you should be too, so use care and common sense.
After disassembly and draining of the fork oil, I washed the parts in clean kerosene to remove any remaining fork oil or other contaminates. I followed with a careful wiping and drying with clean shop towels, after which I sealed all openings and media blasted the forks in a blast booth. Since the lower forks on this bike are aluminum, I used glass bead media for the blasting. This served two purposes; removal of any remaining factory clear coat, and provide a clean and uniform part surface. If you choose not to bead blast, use a chemical paint stripper to remove the clear coat or wash the parts down with lacquer thinner. Sanding it off will work as well, using the next step in the process to accomplish this.
Following the blasting, a careful and through wet sanding was done with two different grits of waterproof sandpaper, starting with 320 grit and finishing with 600. This step was a bit time consuming, to say nothing of messy, but is important to remove any significant marks and flaws and is the real foundation of this process. Do not skimp on time or effort during this step.
Next, I used 0-grade steel wool, again proceeding carefully and deliberately, generally working with the long direction of the part. The intent here is to remove any obvious sanding marks left from the previous steps. I then switched to a Scotch-Brite® pad, which will dull the finish considerably, and will leave noticeable fine scratches in the finish. One useful technique to minimize scratching is using a small amount of lubricant such as kerosene or WD-40®, on the polishing pad. Though we will not totally eliminate all the fine scratches introduced by the Scotch-Brite, the final step will minimize the obviousness of the scratches.
The last step was to use a gray sanding pad, the kind available in home improvement stores. The label on the pad indicates it is the equivalent to a 000-grade steel wool. As an experiment, I tried 000 wool and compared the results to the gray pad. I preferred the plastic pad as it resulted in a duller finish. Once again, take your time, being careful and deliberate, use a sanding motion with the long direction of the part. If done properly, any remaining scratches will be very fine and not noticeable when the fork is in the ‘in use” position. The best part though, is the fork with have a very-close-to-original look when you are though.
After thoroughly washing the parts in hot water with dishwashing soap added, I used acetone for a final cleaning to remove any remaining contamination, such as skin oil from my hands. If preferred, lacquer thinner could also be used as an alternative to acetone. Be sure to wear gloves during this final cleaning, to protect your hands from the chemical cleaner, and to ensure the parts stay clean, important if you intend to apply clear coat. Note that if you do not wash the parts in hot soapy water first, you will find it will require a lot of effort to get the parts clean with acetone alone.
I finished the project by clear coating the forks with Eastwood Crystal Clear® satin for bare metal. I applied five coats, which is probably overkill but it was quick and easy to do so I figured why not. Note that some folks do not feel clear coating is necessary and prefer to keep the forks clean to maintain the appearance. As this is a personal choice, consider applying a clear coat as optional.
What I started with
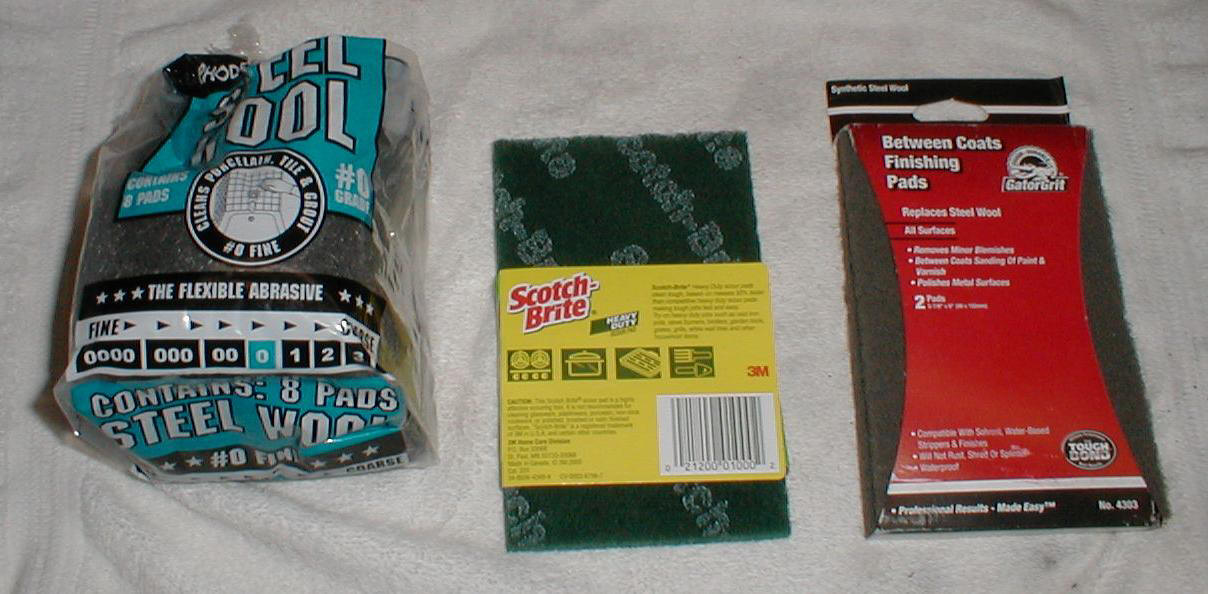
Basic Materials
As I had a number of sets of forks to do, I made this simple jig for applying the clear coat.

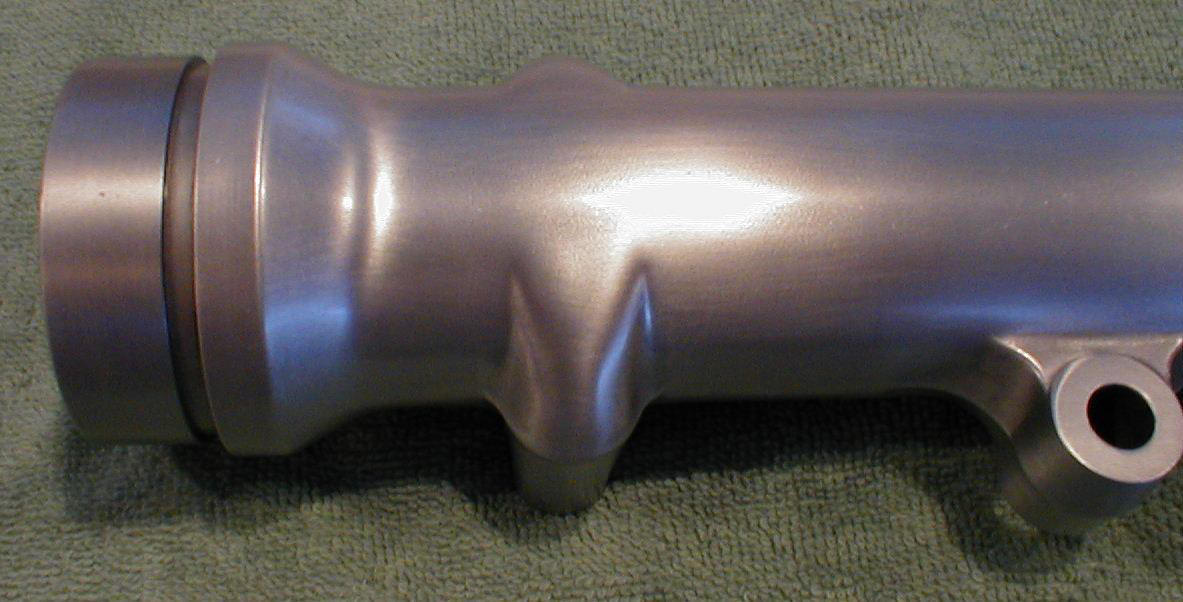
Up close of the finished product.
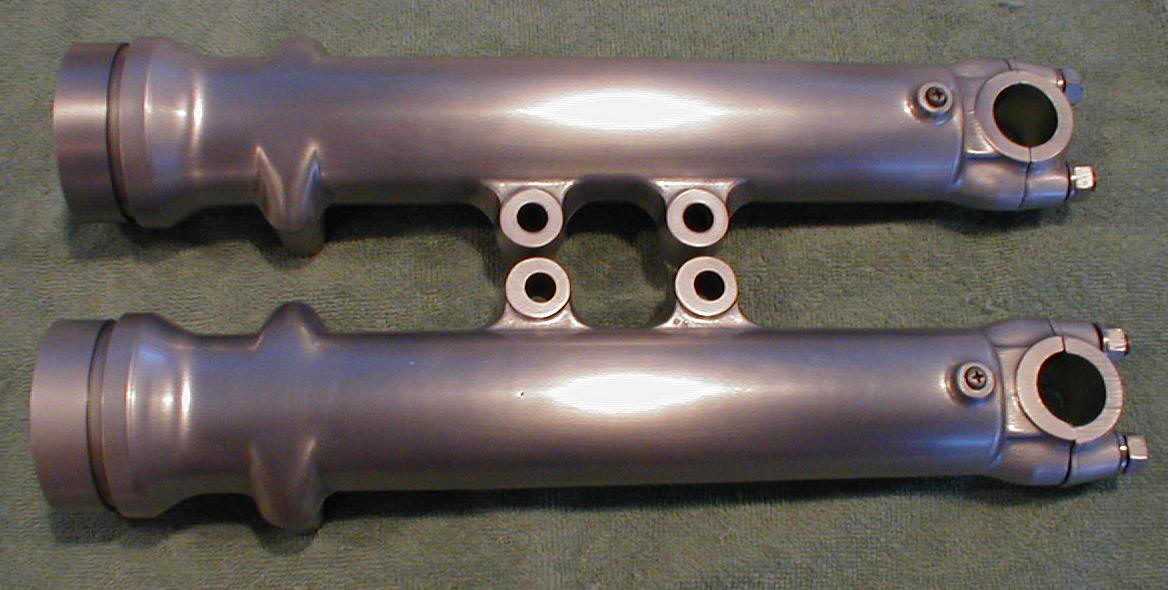
Both finished forks