This is the technique I use to do that:
Meter Restoration
The only way to get inside a meter is to remove the ring around the meter face.
This is the technique I use to do that:
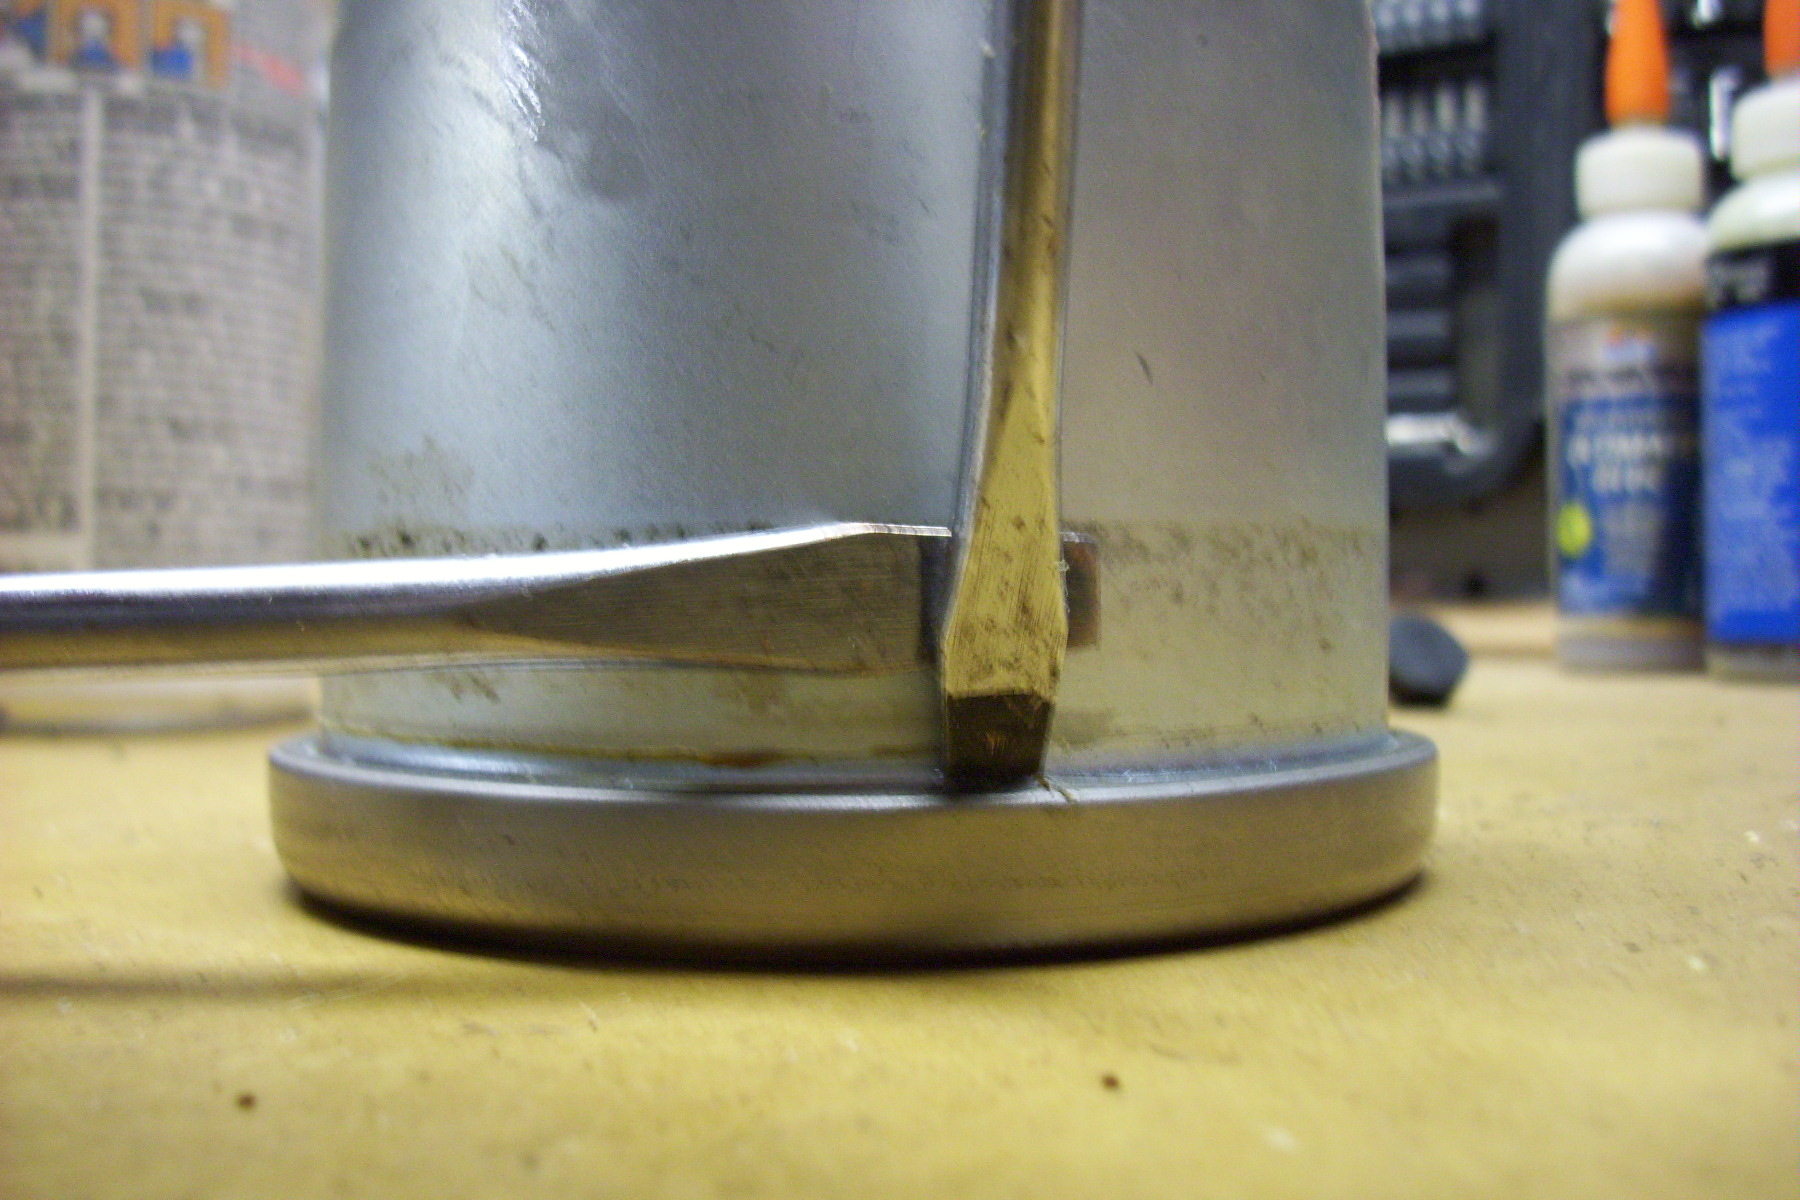
By inserting a flat blade screwdriver tip (sharp) between the ring and meter body and prying against another screwdriver tip the ring can be decrimped. The tip of the screwdriver must not be rounded or it won't "bite" on the edge of the ring. If small steps are taken while walking around the crimp minimal damage will be done to the ring. It will take numerous times around the crimp to open it up wide enough to be removed.
Another option is a simple tool made from barstock:
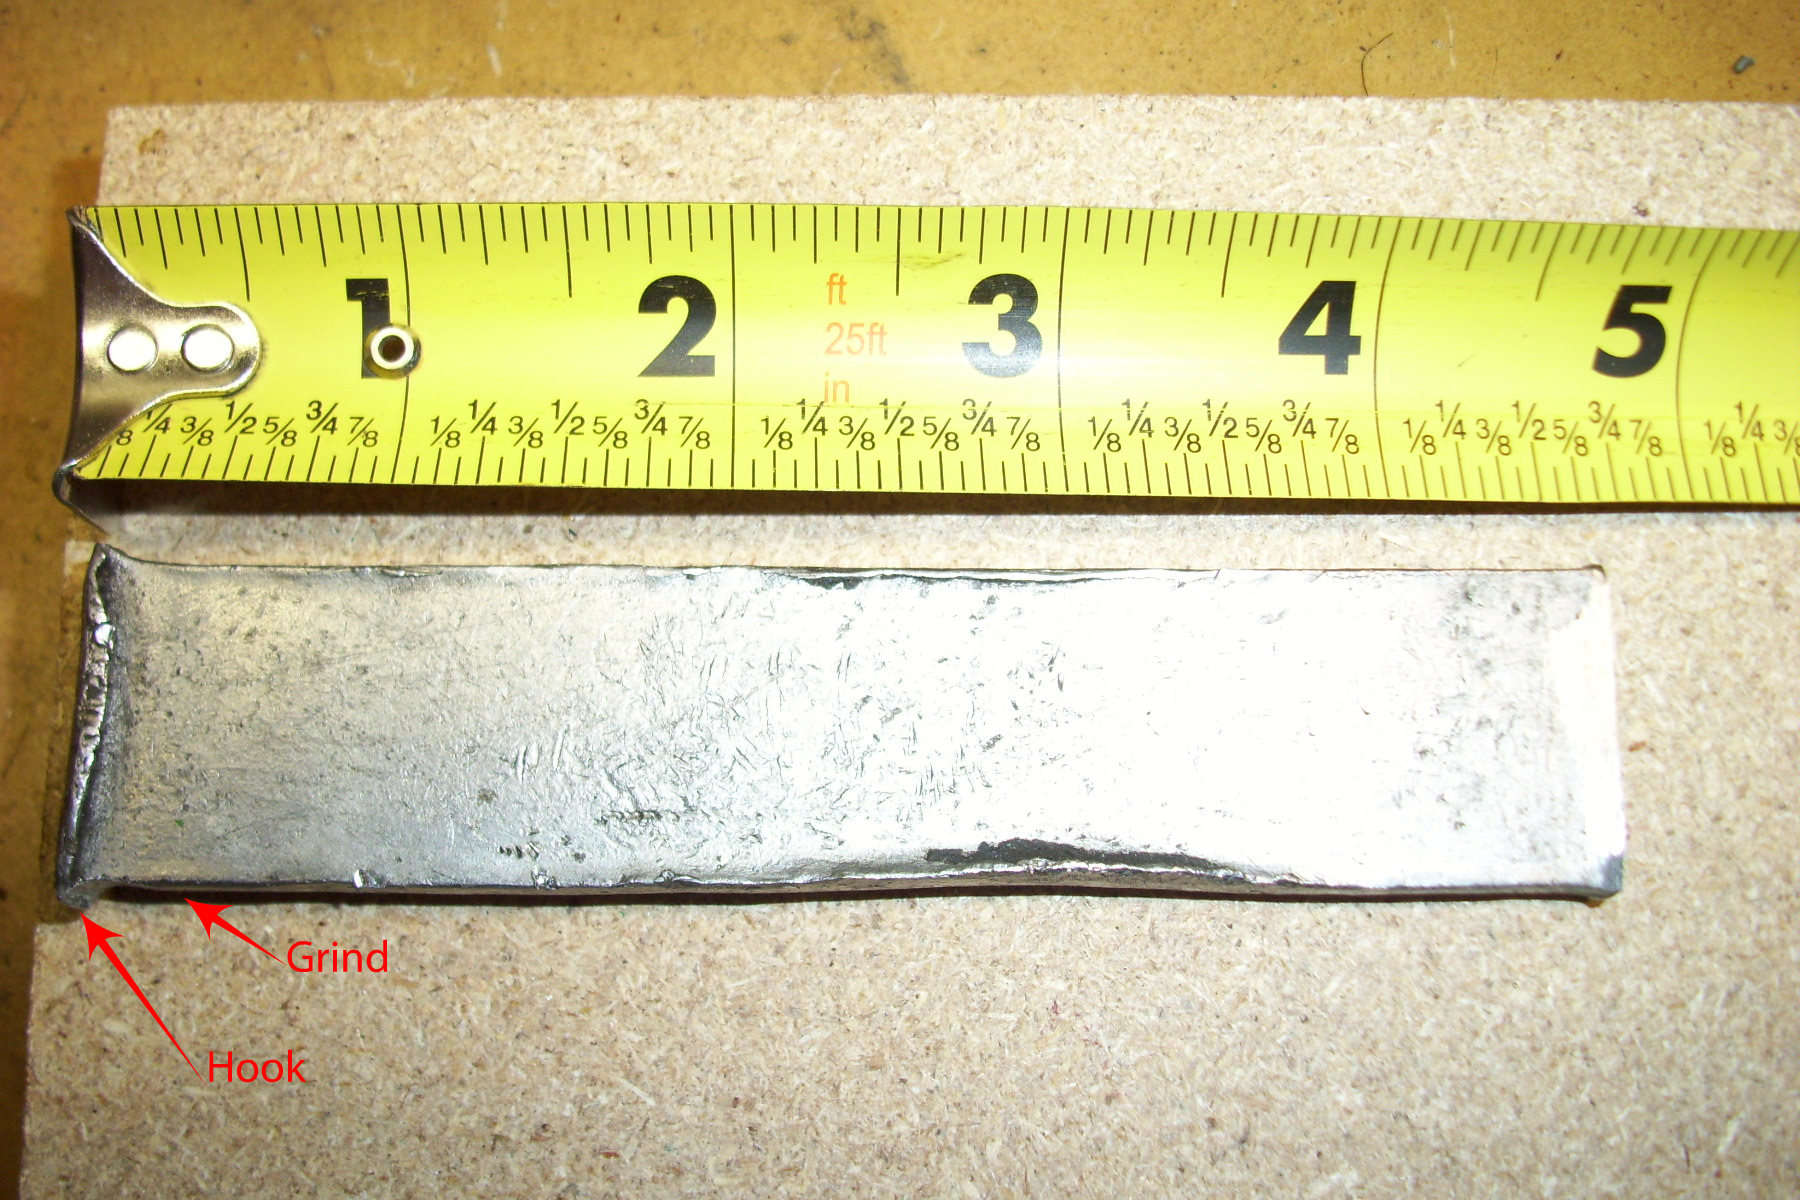
Grind away material near the edge leaving 1/32" barb. Use a hacksaw to cut a recess into the barb for the ring lip. Hammer the barb down to form a hook. It should look similar to a sharp hammer claw. I can open a can in about 15min with this tool. The other end of the tool is use to recrimp the ring.
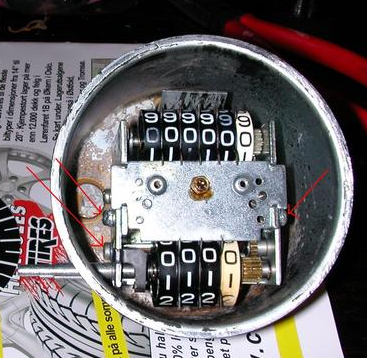
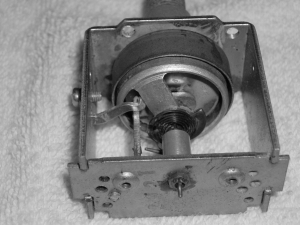
With the ring and glass removed, removal of the screws on the bottom of the meter will allow the assembly to be removed. It is advisable to remove the needle and face prior to assembly removal.
The needle can be removed by pulling or prying off the shaft. Take care not to bend the shaft. Remove the needle by placing two flat blade screwdriver under the needle 180deg apart at 90deg to the needle and pry up against the outer case. The needle will fly off to unknown region, so be prepared.
With the needle removed the meter face can then be removed. The two faceplate screws are sometimes held in place with epoxy. If they won't loosen with a jewelers screwdriver, use needlenose pliers on the threads at the backside to loosen.
The trip reset knob can be removed with a jewelers cross point screwdriver. It is a very tiny screw and, if rusted in place, can snap off. Soaking the screw with some PB Blaster or other rust penetrating oil can aid in freeing the screw.
Early H1/A/C trip reset shaft stems are a more difficult item to deal with. The shaft must be loosened at screws indicated with needlenose pliers for assembly removal.
If decals are to be applied to restore the meter face
there is an excellent "How To" on the ReproductionDecals.com website for meter
face preparation prior to applying decals. It can be very tricky to
properly apply the decal.
The needle can be painted with a neon orange paint available at hobby shops or department stores. I have found that Amsterdam Acrylic Reflex Orange #257 is a good match for late meters.
The meter assembly can be disassembled as required. Take care NOT to get strong cleaning agents on the printed numbers of the mileage dials as they will easily be smeared or removed. I have found no way to restore the white background of the "tenths" dial short of applying a decal. At this time I know of none being offered.
Early Meter Drive
Late Meter Drive
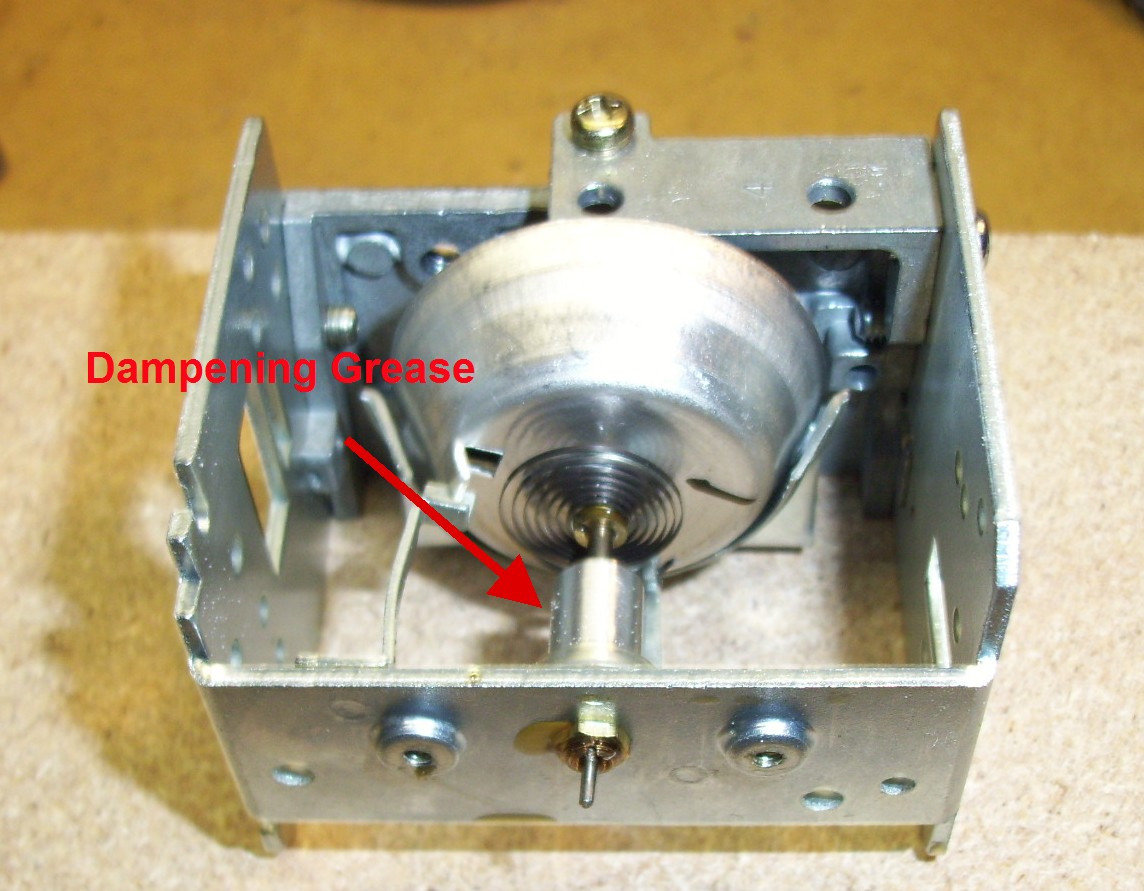
Many times a meter will be non functional or "sticky" in operation. A small drop of WD40 on the needle shaft where it goes through a bushing will, many times, remedy that illness. When spinning the "bowl" of the movement with fingertip, it should return promptly to the stop while dampened near zero. The cylinder attached to the front plate that the needle shaft runs through is filled with a dampening grease to prevent overshoot and keep needle movement smooth. If this grease is flushed out with WD40 or any other chemical, dampening will be lost. The meter can be tested for proper operation by attaching a drive cable to a variable speed drill. The drill must be set to drive "reverse" or CCW.
There is a bushing at the cable connection that should be lubricated. Lack of lubrication may cause a noise and needle jumping.
Calibration:
There is a spring attach between the "bell" that drives the needle and a metal
tab that is used for a stop. Bending that metal tab changes the tension on the
spring and calibration. It also changes the "zero" stop.
Drive the meter at a known rpm, bend the stop, reposition the needle for zero,
and repeat until both zero and known rpm are correct.
Tach & speedo are calibrated in the same manner. Be sure all moving parts are
lubed prior to calibrating. Drive source should be about 2500-3000 rpm.
This works for all late model meters.... can't confirm for early meters.
Reassembly should be self explanatory. Be sure the needle is setting at "zero" before pressing fully in place.
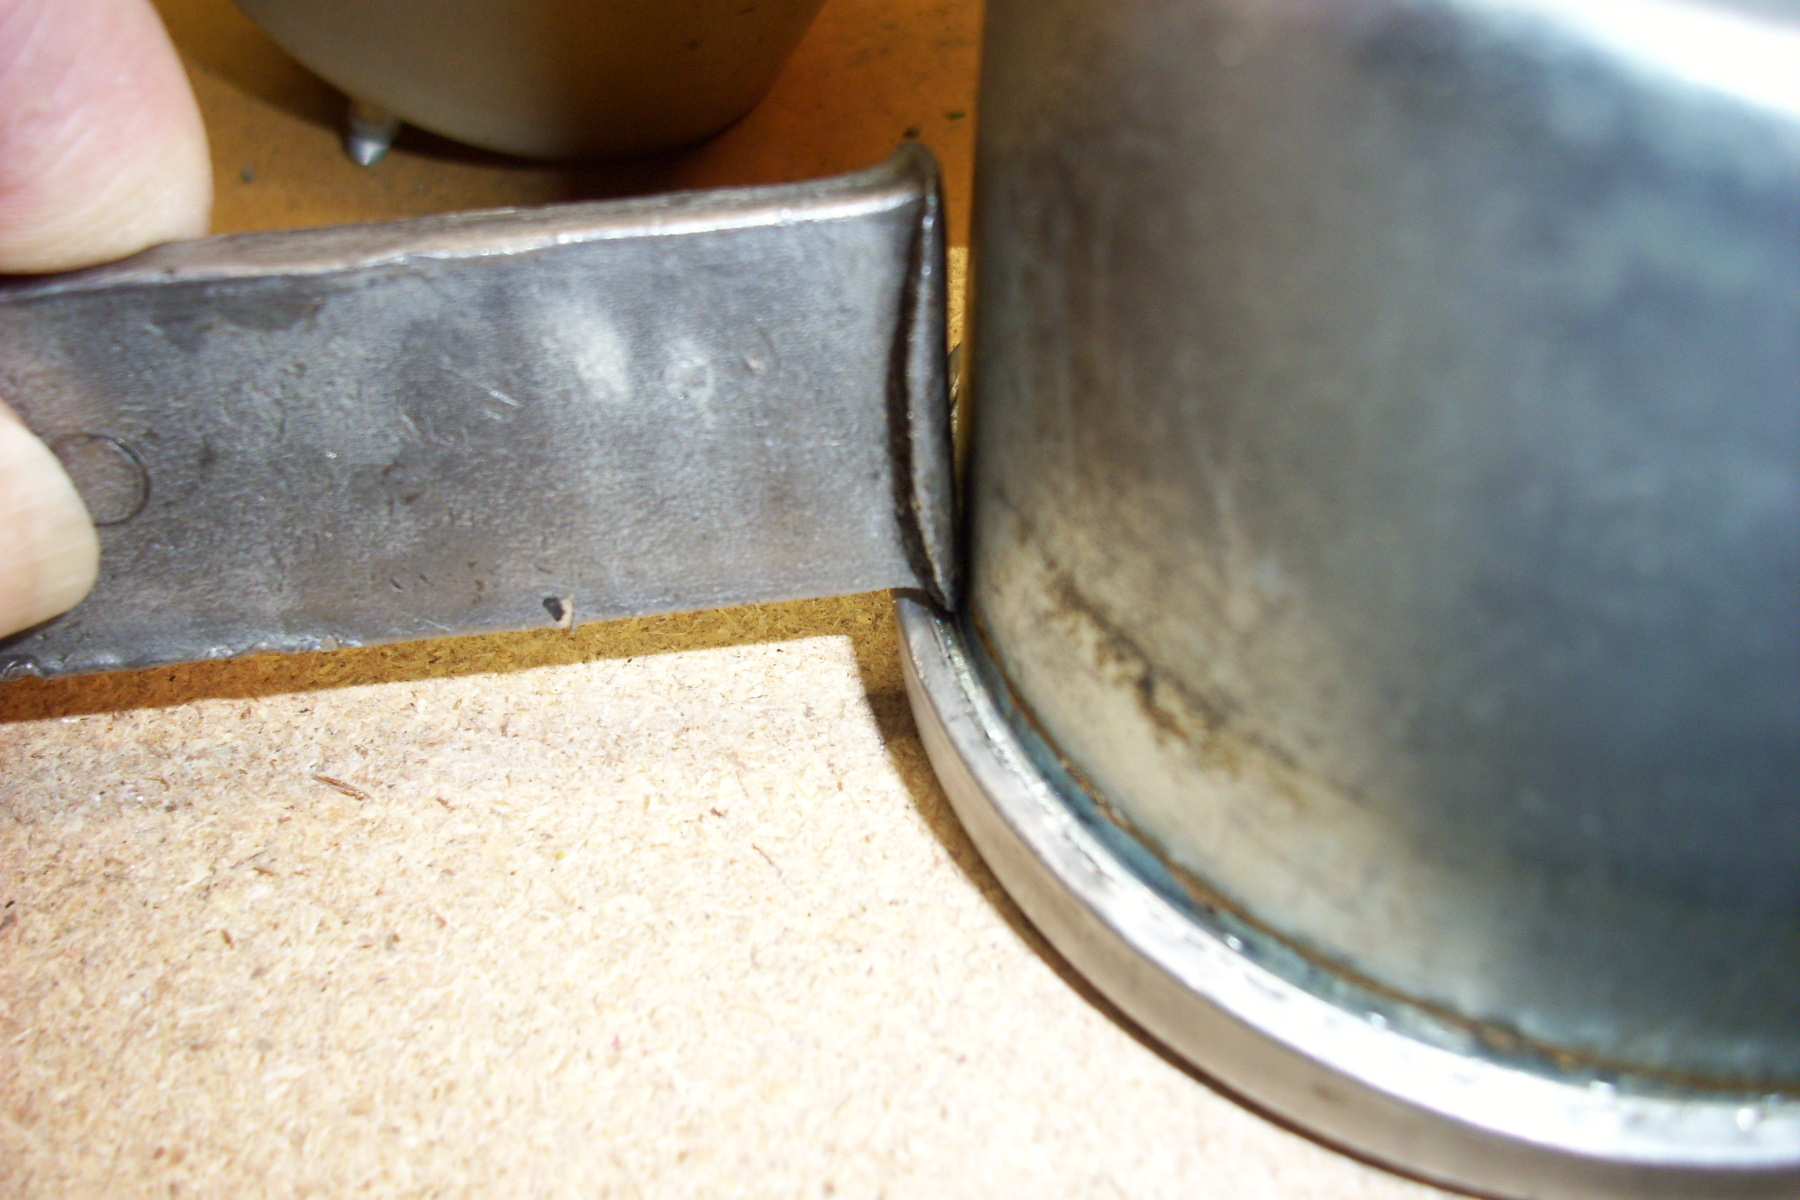
With glass, gasket, and ring in place, I use a piece of 1" flatstock to recrimp the ring:
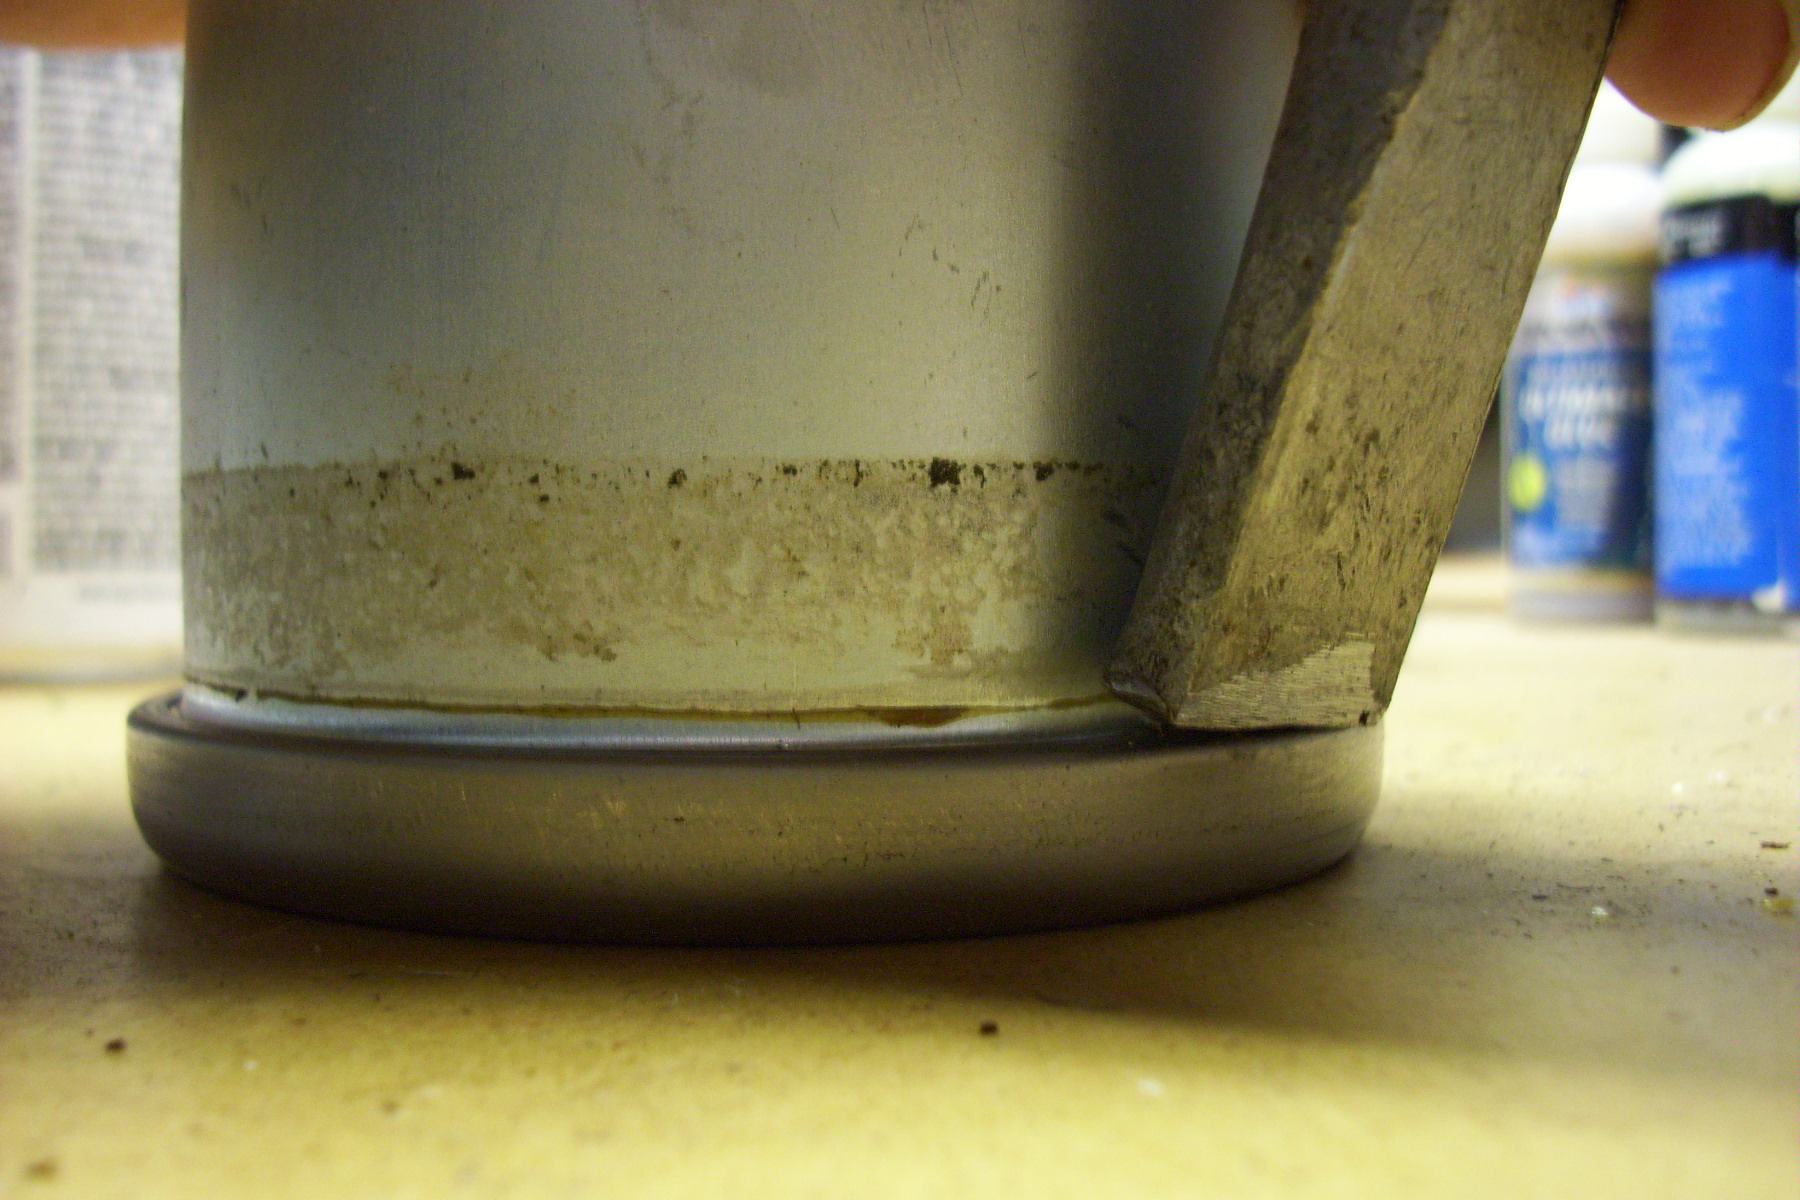
The ring can be recrimped by walking around the ring, tapping the flatstock with a small hammer, in small increments. It will take several rounds, just a little at a time, to recrimp with a minimum amount of damage to the ring.