This is the 2nd set of cases I've rubber mounted. The first being for the KH750, which I have sinced logged 5000 VIBRATION FREE miles on over the last 2 years.. As stated many times. Rubber mounting your H2 is the best modification you can make if you actually ride it on a daily basis. Thanks to Leo and Joop for helping me see the light!!!!!!!!!!!
Last time around I didn't take as many pics as I could have for you guys thinking about doing this to your late H2 cases (H2b/c only) so I took a few more today. Mraxl, feel free to post this on your site if you think it will be of help.
on to the fun....................
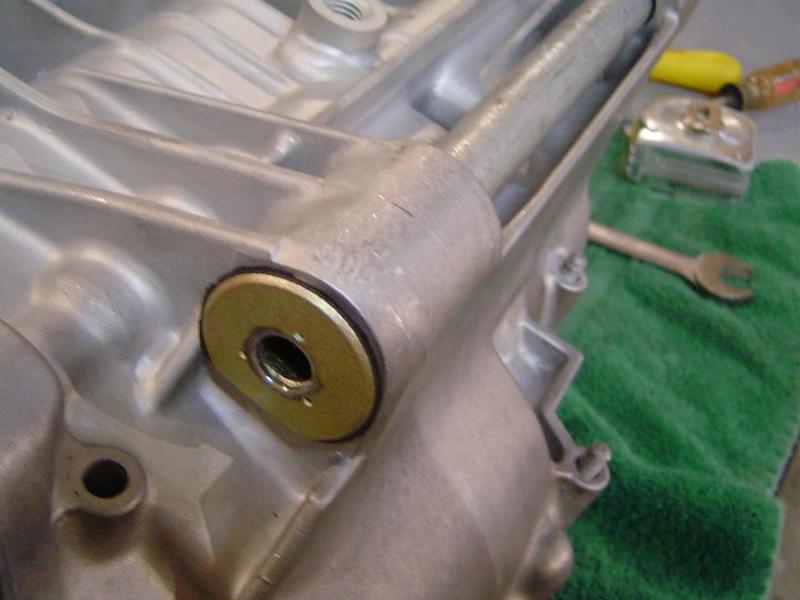
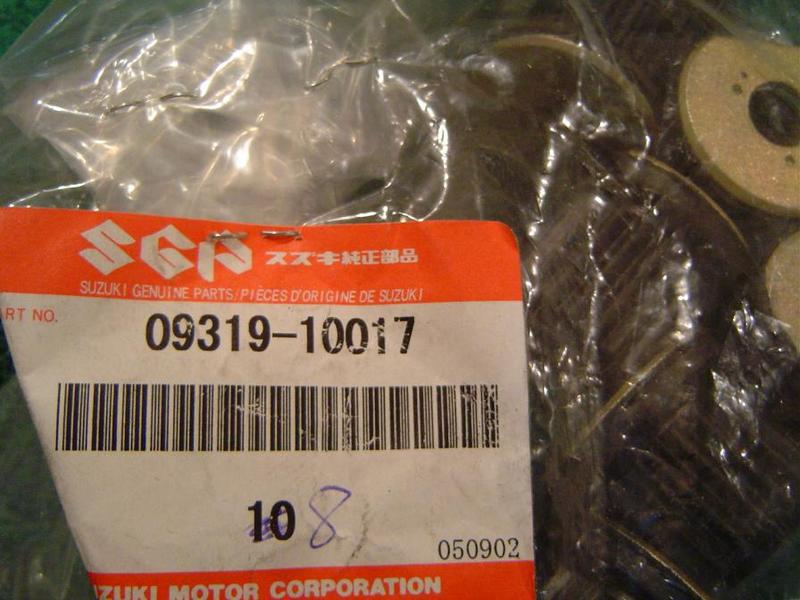
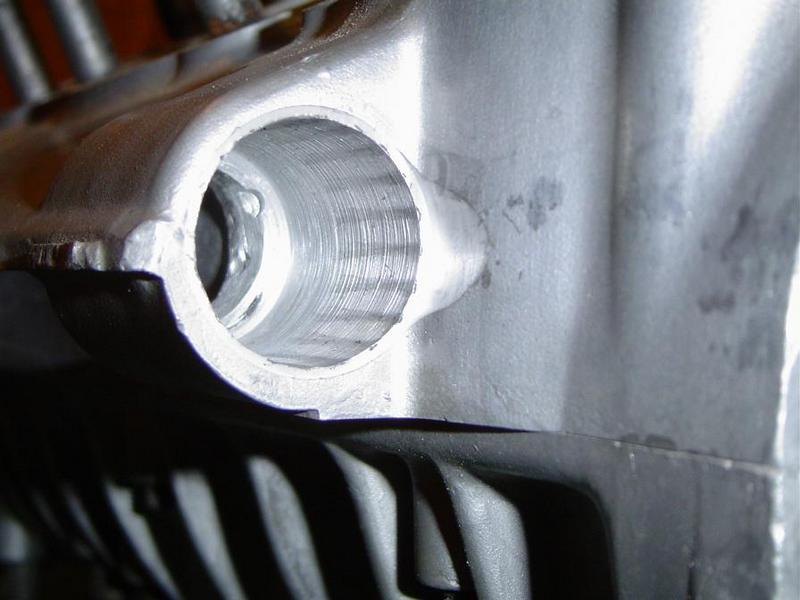
First you will have to drill (mill) the engine cases to accept the Suzuki Waterbuffalo "Silentblock" rubbermounts.
I used a 1" (25mm) drill (friend couldn't find a mill the right size!!!) chucked in an ancient Bridgeport to do the actual holes. As you can see in the first pic, We were able to mill the area around the holes on the upper fronts mounts, but the rest was done with a good old drill bit.. Not the prettiest holes I've ever drilled
Once the holes are drilled, you will need to make steel spacers to fill the void between the "Silentblocks" as to not put extra stress on the mounting lugs of the engine cases themselves when mounted tightly in the frame. I used galvanized tubing found at my local hardware store. The tubing I.D. being approx 12mm and the O.D. being approx 17mm.
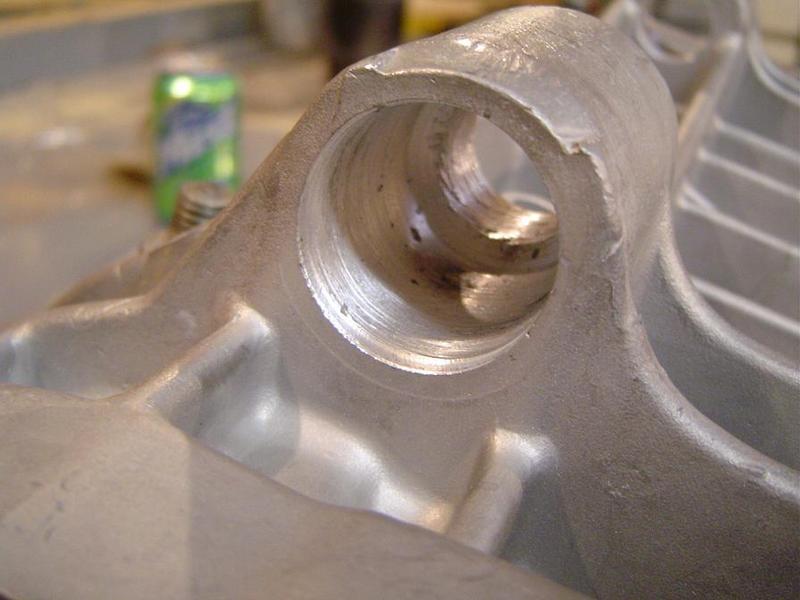
These next 2 pics show "Factory Original/OLD!!" Kawasaki H1 rubbermounts with the integral steel spacer sleeves along side of the newly cut spacers and "Silentblocks"
As for the length of the spacers, I make them about 2.5mm shorter than the distance between the Silentblocks when they are hand-pushed snugly into the case holes WITHOUT over-compressing the thin rubber pad affixed to the back of the steel face of the Silentblock. Once everything is in place and the engine mounting bolts are tightened down, it allows the Silentblocks to be pulled tight against the face of the case mounting lugs without being over-compressed and prematurely wearing out the rubber.
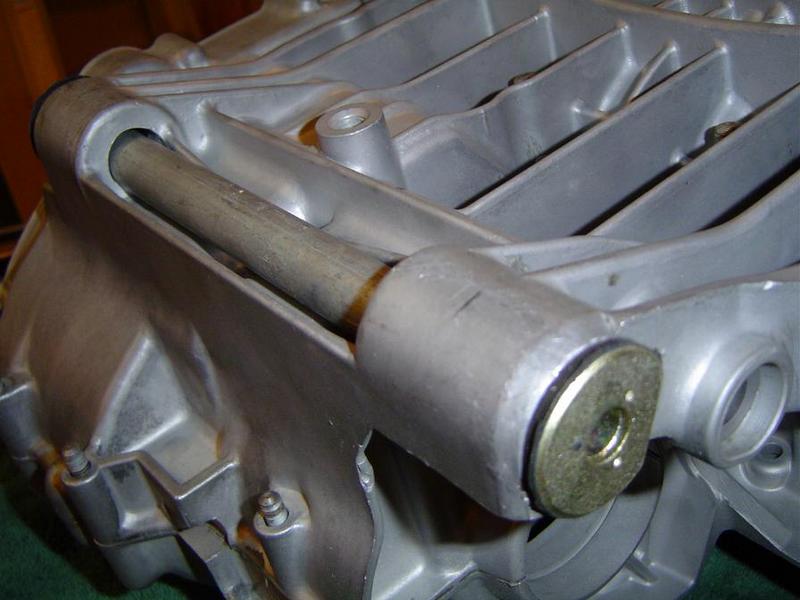
The next thing you will need to do is to drill out the "Inner Hole" of the engine case mounting lugs. This is done to allow for clearance of the new steel spacer tubing once the engine is running/vIbRaTiNg. I drilled and dremmel tooled these out to about 19-20mm. Once again, not an exact science. Just common sense so the steel tube doesn't "buzz" against the engine cases while in operation.
Notice the "clearance-gap" around the new spacer tube...
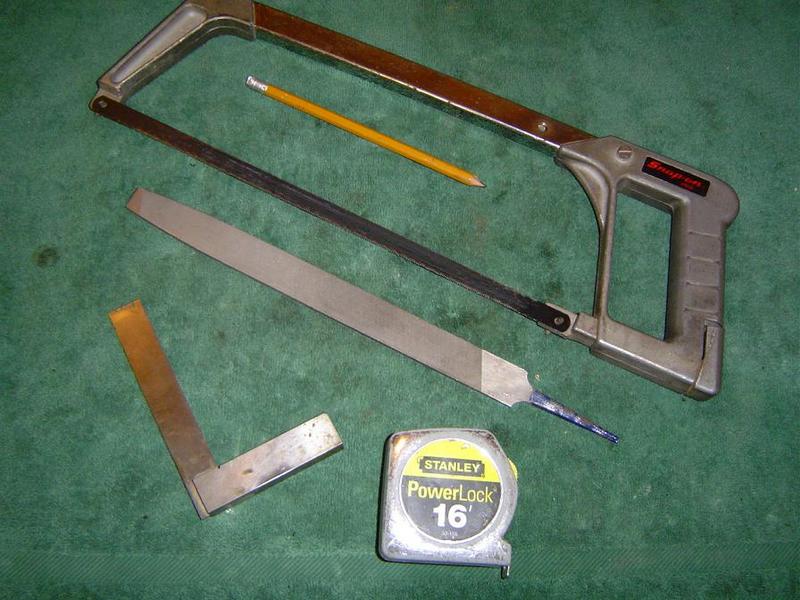
as for the tools used?
Hacksaw to cut tubing to length. Mark w/ pencil all the way around perimeter and score tubing first with shallow cut. This helps prevent your blade from "deflecting" and keeps the cut semi-straight. Once scored, make your through-cut. This saves time on your final squaring up of the end.
Machinist square.... Rotate it around the tubing and file as necessary until the end is square.
Pretty high-tech huh?
That's about it..
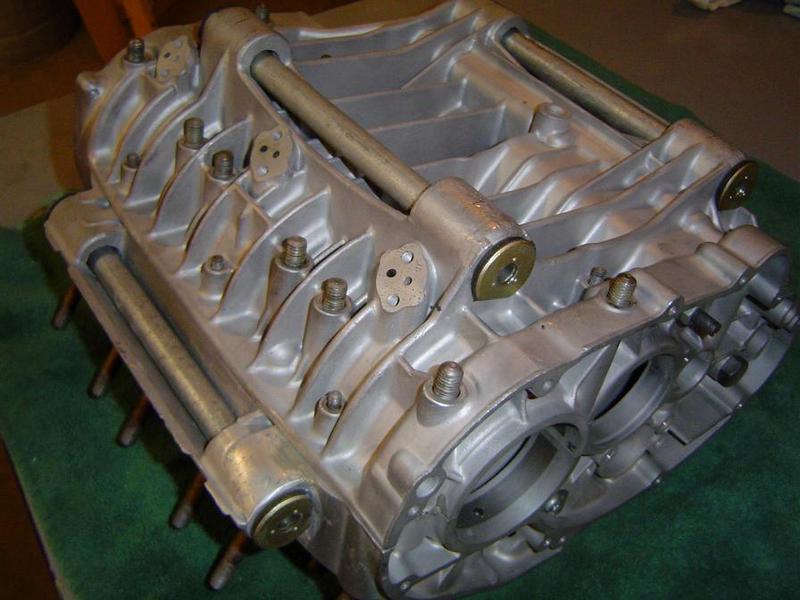
Here are a few more pics of Silentblocks installed...