Kawasaki triples came stock with ball bearings in the steering head. If you still have ball bearings in your steering head, they might be 40 years old unless somebody replaced them later on with ball bearings. Sometimes you can tell the bearings are worn out because turning the handlebars back and forth should be smooth. If it feels notchy, it’s probably because the bearings are shot. Tapered steering bearings are the modern norm now, why bother with ball bearings?
Here’s how I tackled changing steering head bearings.
1. Order the bearings. Kawasaki H1’s and H2’s both (all Triples) take the same size bearings. Search the internet and you’ll see prices ranging from around $25 to $70+. As far as I can tell, the bearings are all of the same quality. How much do you want to spend? Yeah, me too I want the least expensive bearings!
OEM Cycle Shop on E-bay currently sells them for $28 including postage.
The kit is made by All Balls and the stock number is 22-2012 or 22-1012. The kits are the same, either one will work. Time to change bearings.
2. Remove the front wheel, remove the fork tubes and unscrew the big bolt on top of the upper triple clamp. Then remove the two triple clamps from the front end. It’s good to have a box or something similar handy to put below the lower triple clamp and keep it from crashing onto the ground. Pound out the upper and lower races from the steering head. If you don’t have a drift, use a pipe about a foot long or longer.
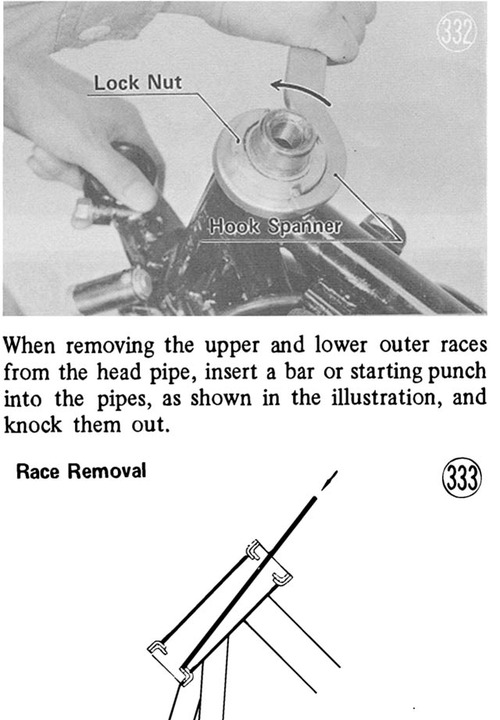
Here’s an illustration from the shop manual, showing removal of the top lock nut and then the bearing races.
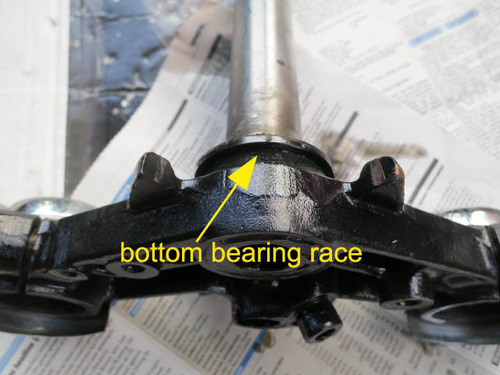
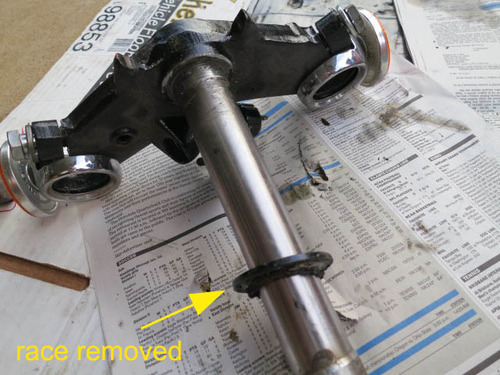
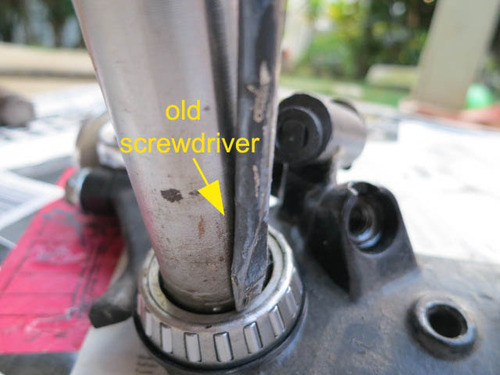
3. Remove the bottom race from the lower triple clamp. I use a blunt screwdriver to get underneath the race then tap it with a hammer, going around the race and getting it to lift up. Then it can be pulled off.
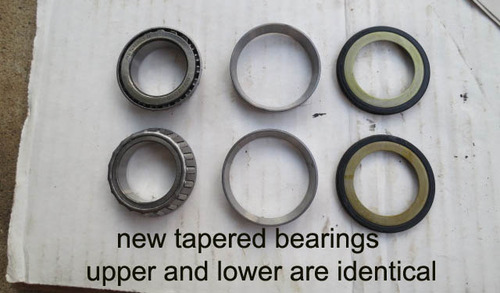
4. Unpack the tapered roller bearings. There are six pieces total, three for the top and three for the bottom. The bearings are identical for top and bottom so they won’t get mixed up.
Put a seal at the bottom of the lower triple clamp. The seal should cup upwards as it’s going to keep grease in and water out. Then slide the tapered bearing down. It will stick about 2 inches from the bottom as the stem is thicker there. We want to press the bearing down without destroying it.
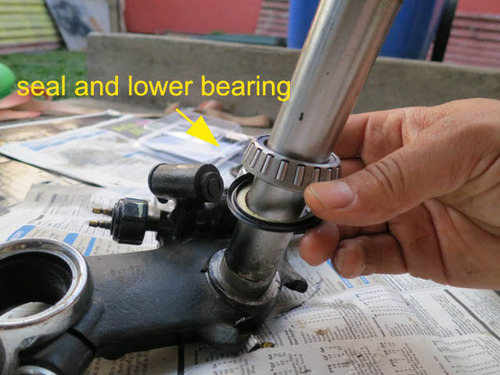
I have pretty basic tools so I carefully use an old, blunt screwdriver to push on the body of the bearing (not the rollers). Carefully tap the screwdriver with a hammer onto the body of the bearing going around the stem and slowly the bearing will settle down onto the bearing seal at the bottom.
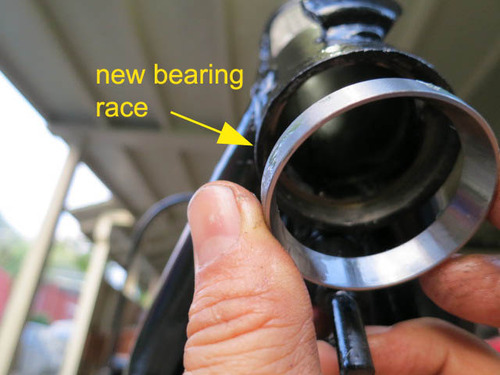
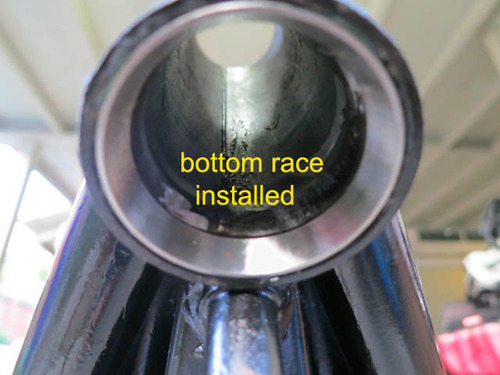
5. Now it’s time to install the bearing races. Here I’m lining up the lower race to the head tube.
Tap the edge of the race gently with a hammer to get it into the tube. I put a little grease around the outside edge of the race before installing to help it slide in there.
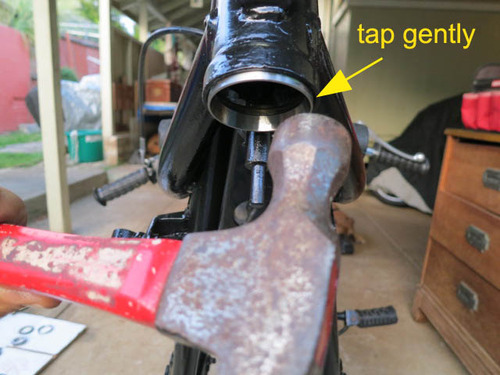
Here’s the race snugly fitted into the bottom of the head tube.
Next I went to the top side of the head tube and did the same thing. The wider end of the upper race faces out (just as the wider end of the lower race is facing out in the picture above).
6. After both races were installed, I greased the tapered bearings, slid the bottom triple clamp into the head tube, then put the top tapered bearing in, the bearing seal on top of that (cup facing down) and then the metal cup and the lock nut that secures the metal cup into place.
7. Tighten the lock nut so that the bearings rotate smoothly but not too tight and not too loose. There should be no free play, that’s why we’re installing new bearings, so that the forks turn smoothly from side to side but don’t otherwise move around in the steering head.
8. Next I reinstalled the top triple clamp. Tighten the big bolt on the top, along with the fork tube pinch bolts on the upper and lower triple clamps.
9. If headlight ears are loose insert an O-ring above the ear as a spacer to tighten it up.