Not sure how to play this one yet, first looks tell me there is a bit of play in the Crank/little ends area so I think a total strip is called for, once again wish me luck
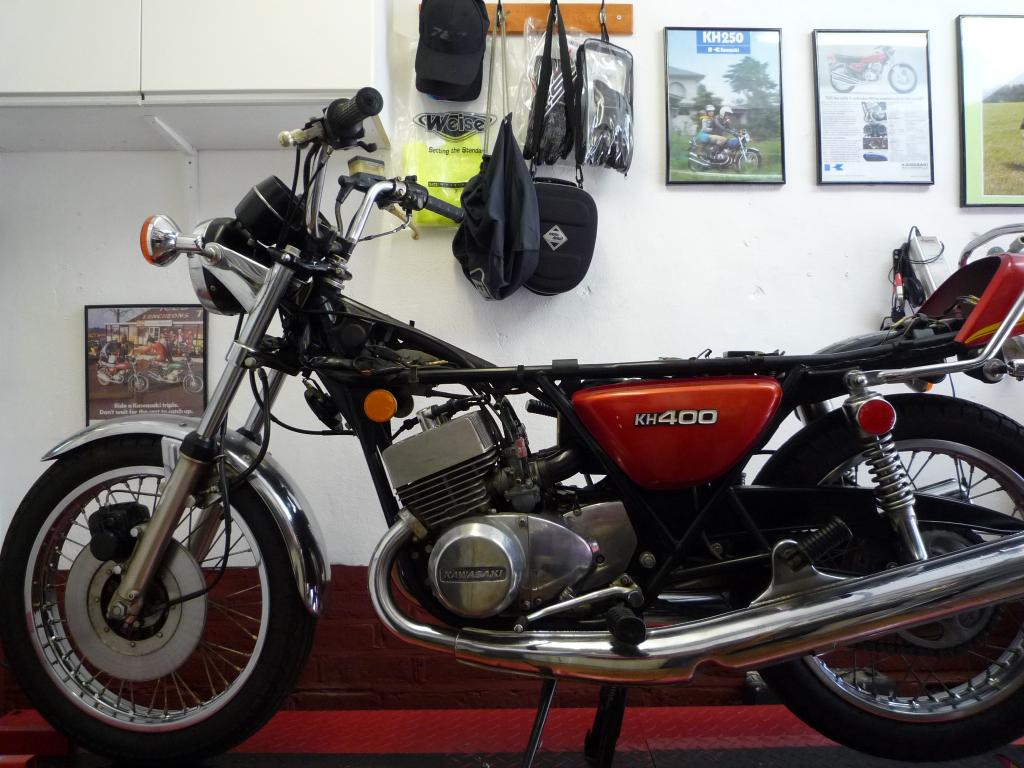
KH400A5 Restoration
(Part1)
click here for Part2
Schurminator, on the UK KH & S message board, has chronicled his restoration
with great detail. There are several hundred excellent pictures included.
Although this is a KH400 restoration, there are great similarities to all late
model Triples for reference.
The flow of this restoration is duplicated as it was done and published. While
it is a good read from start to finish, a table of contents is included for easy
reference to specific areas. Specifications and part numbers are not included
and appropriate manuals should be used in conjunction with this document. Full
size photos may be seen by clicking on any picture.
Contents
(use browser back button to return)
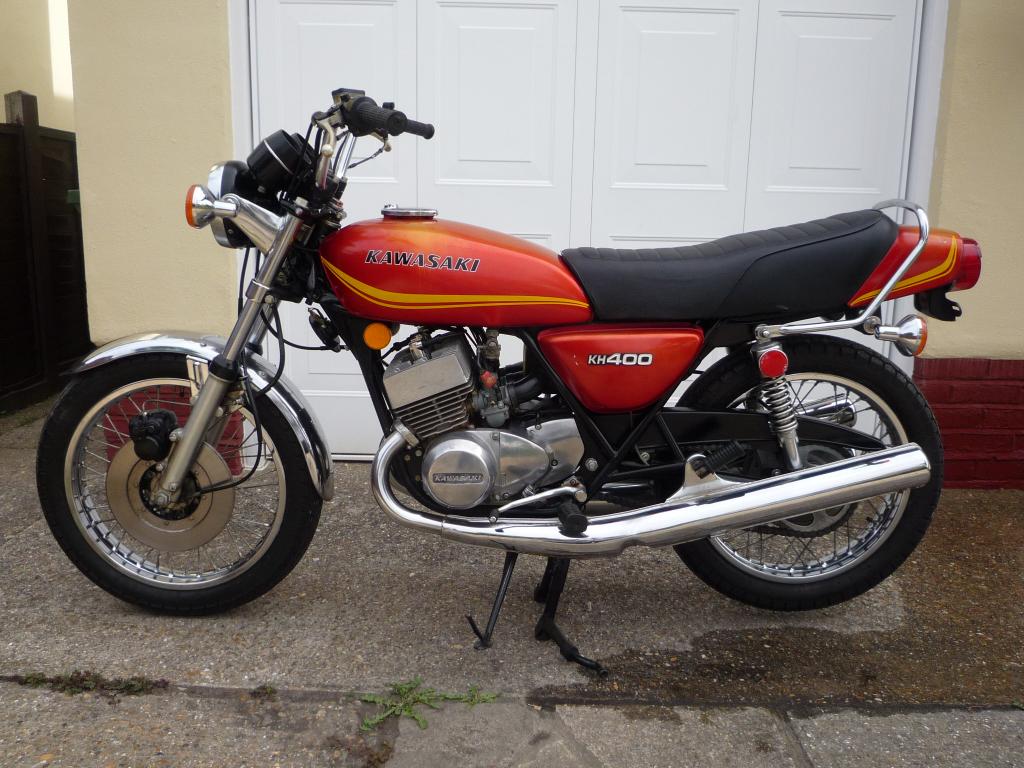
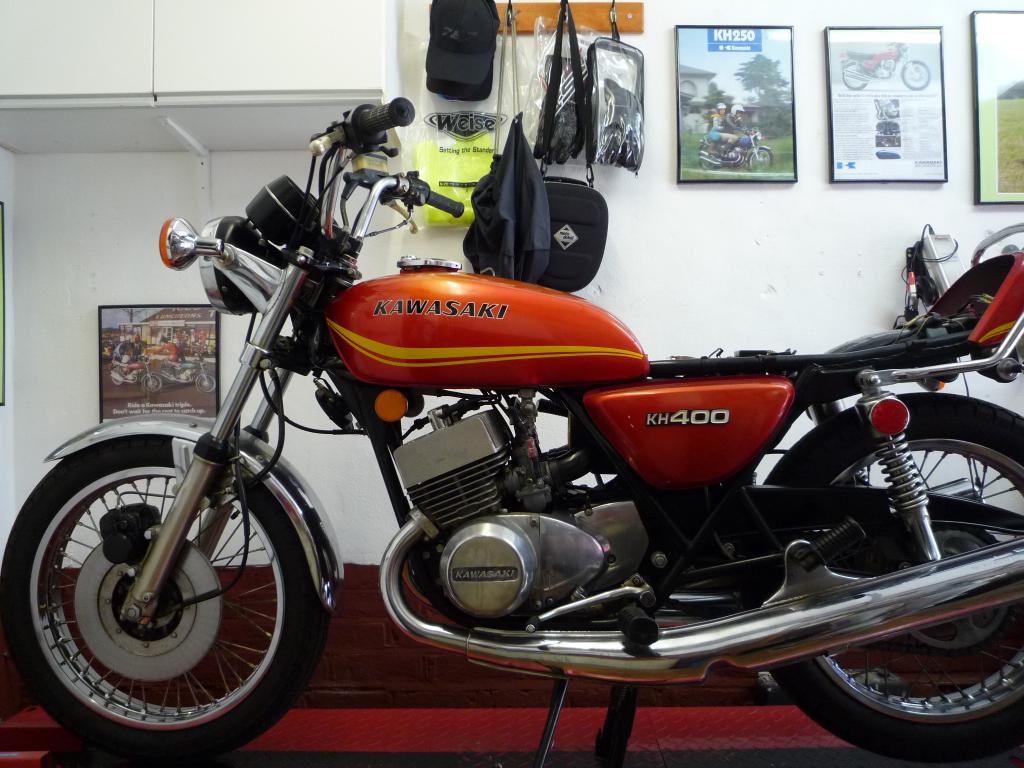
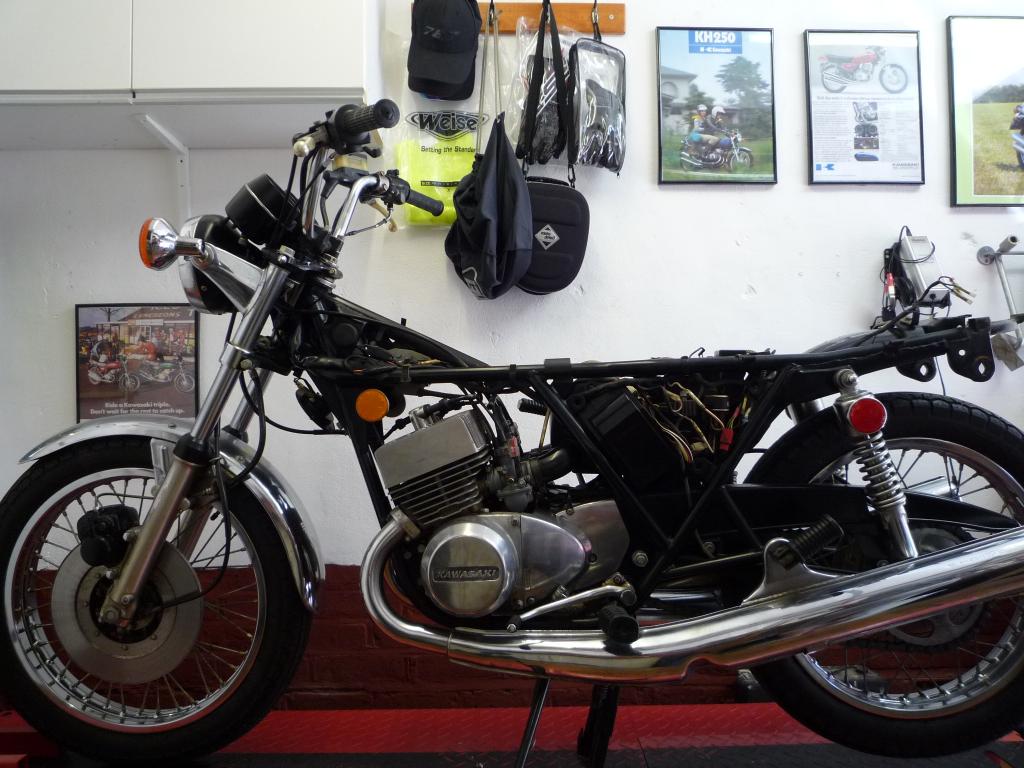
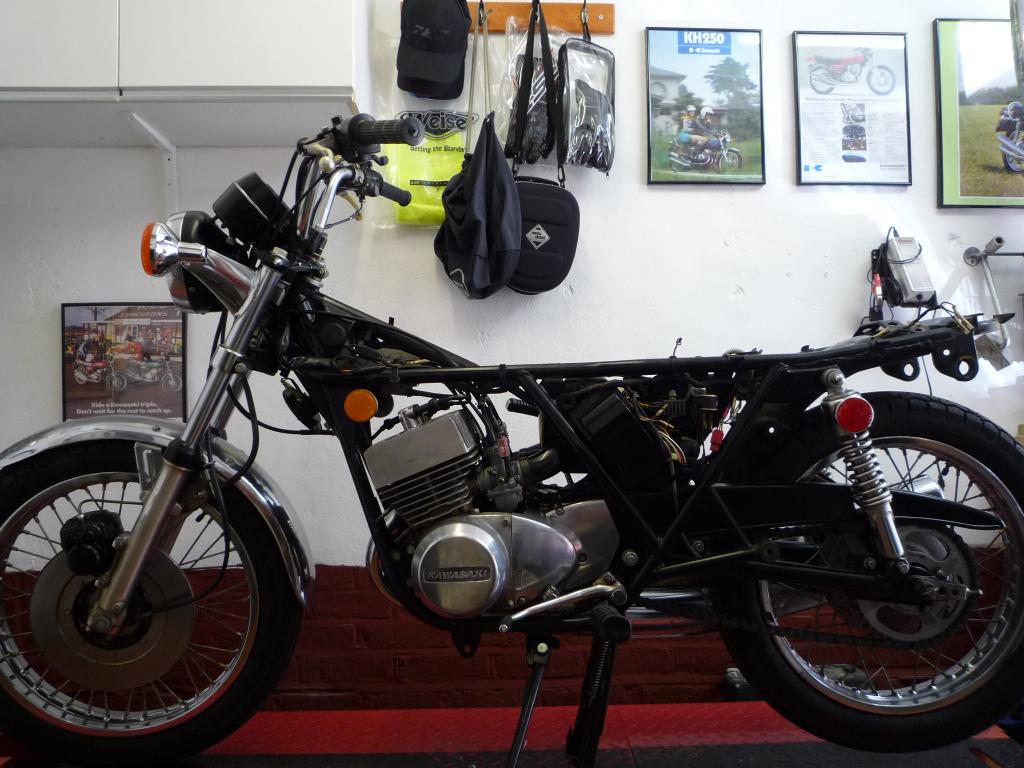
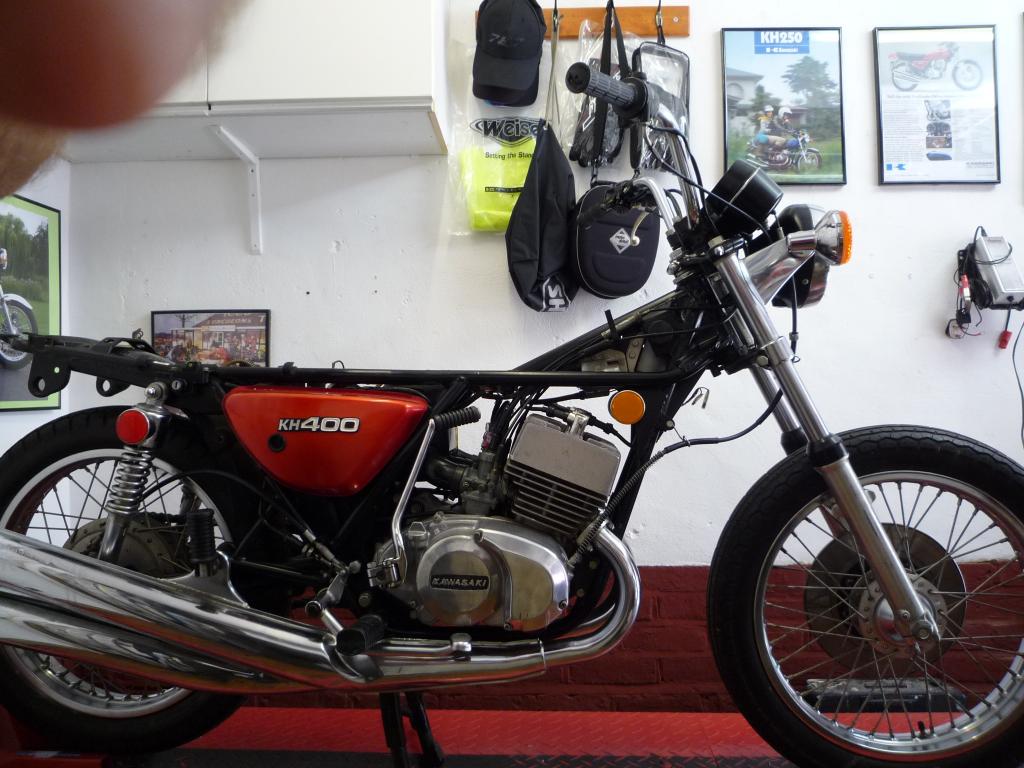
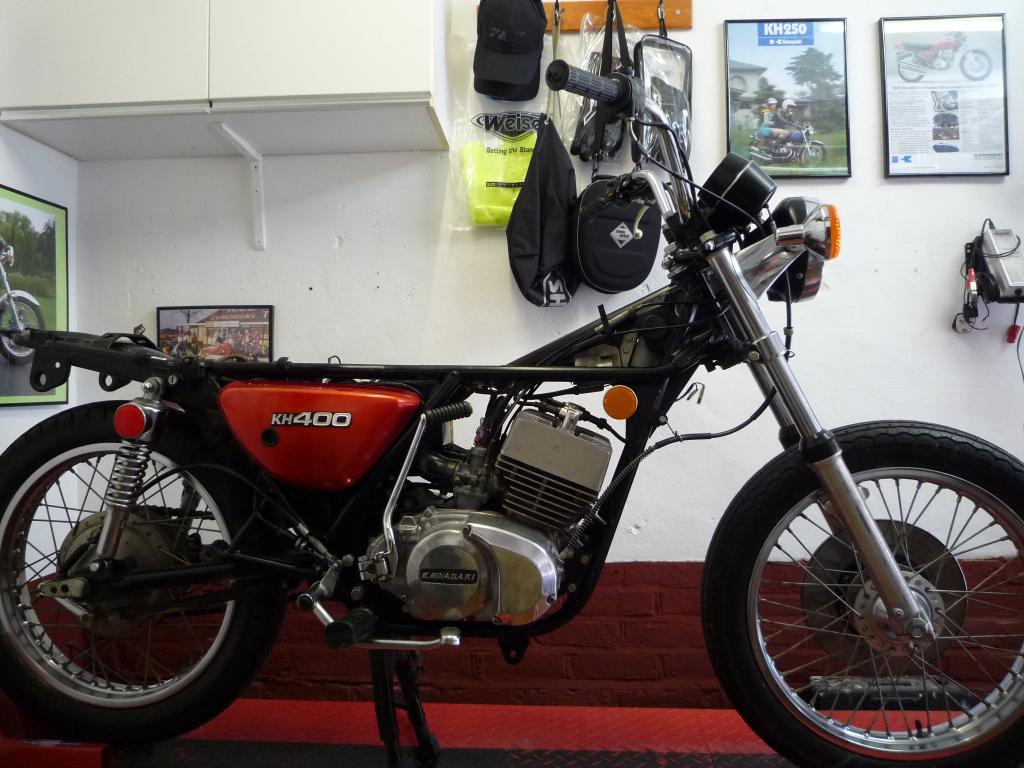
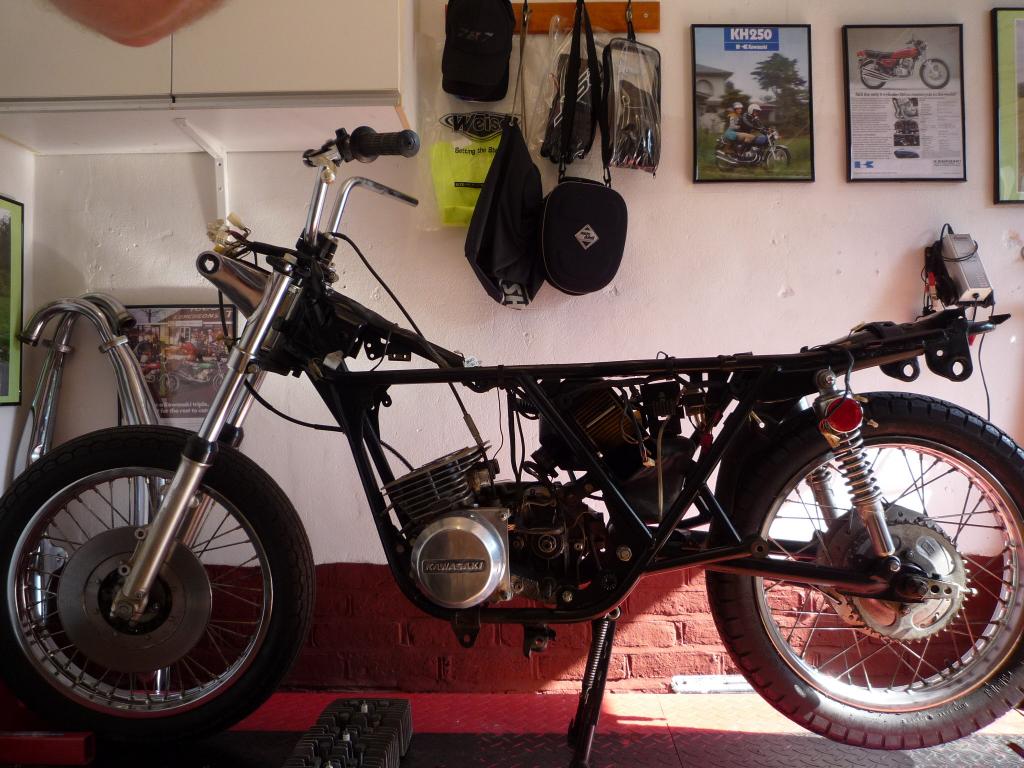
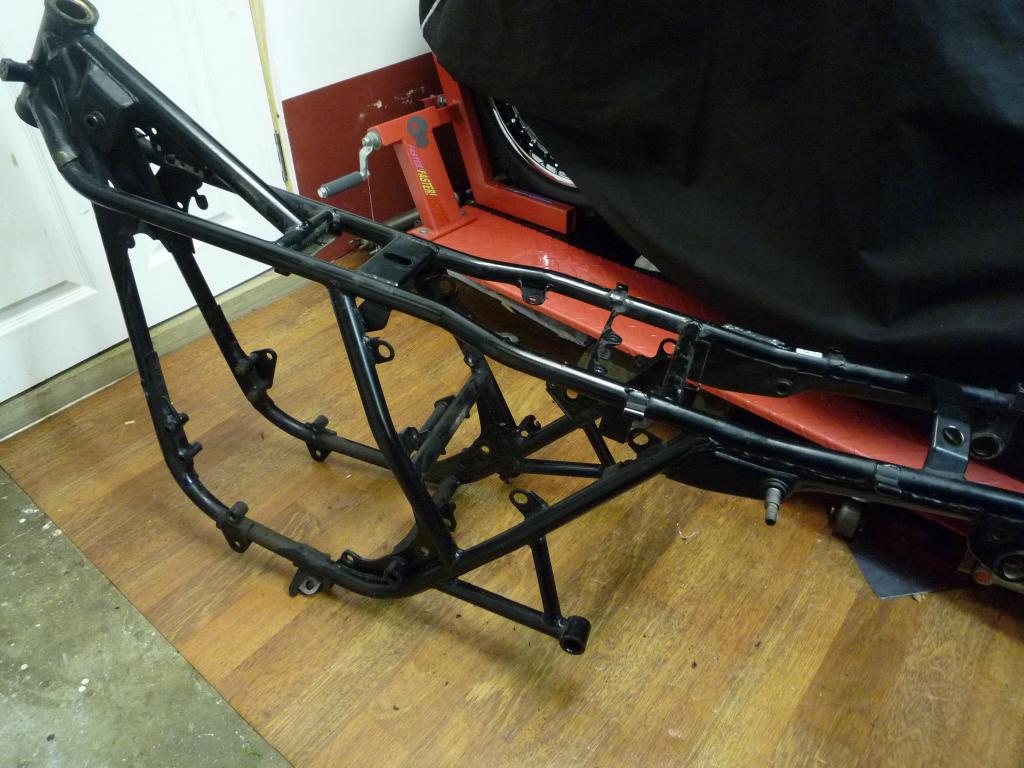
Well here it is Guys and Girls and we start all over
again hope you like it, chose this one as it seems all original and what is
there is in remarkably good nick. Haven't seen many in this colour either apart
from a couple of pictures whilst searching the forums. Service decal under the
seat sold it to me and I think it will make a perfect garage buddy for the 250.
Not sure how to play this one yet, first looks tell me there is a bit of play in
the Crank/little ends area so I think a total strip is called for, once again
wish me luck
![]()
So here is the starting point:


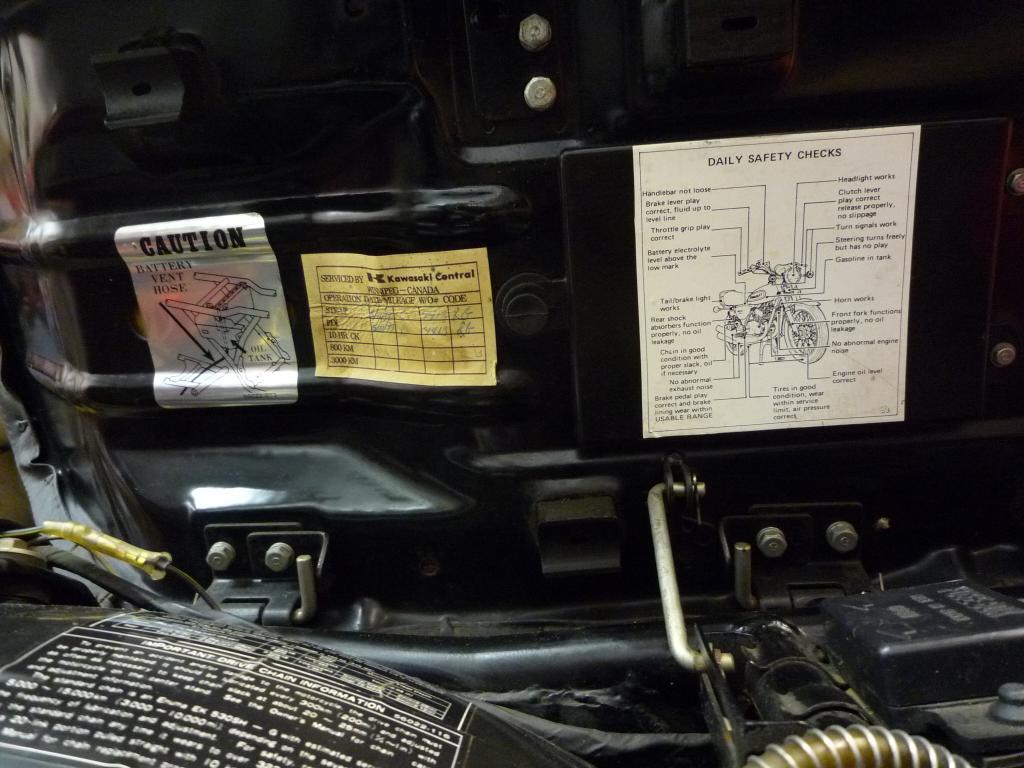
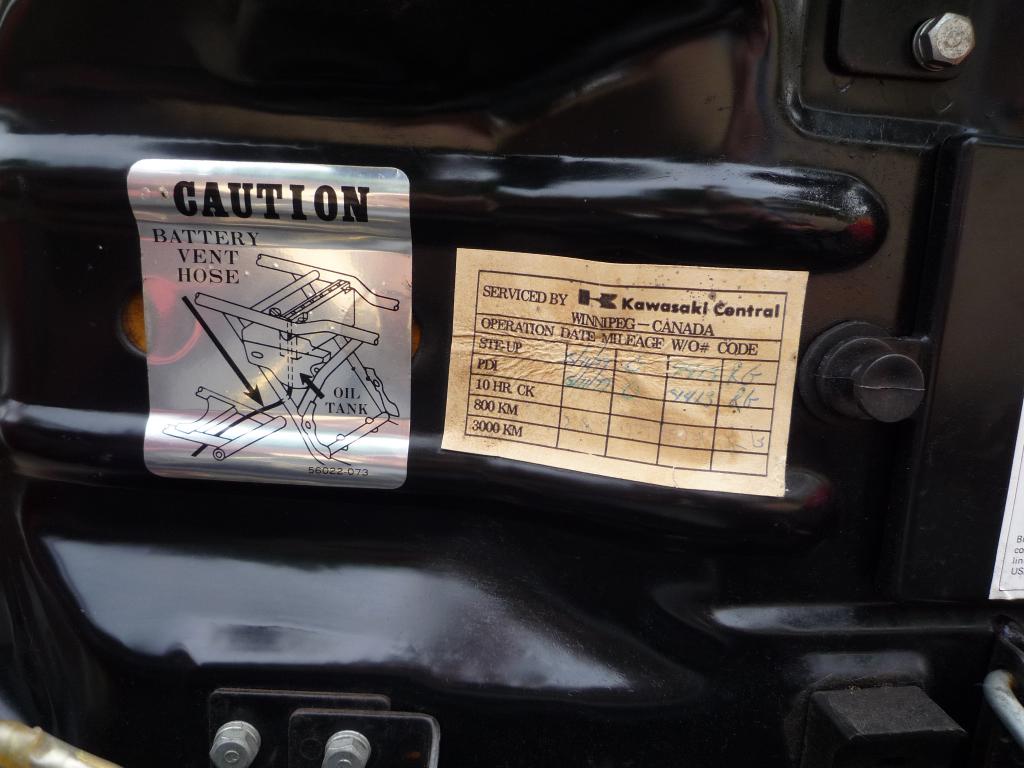
Dates of PDI and STE-UP were 5/11/79 By RG (anyone know him?)
Well yesterday my daughter and I spent some time in
the garage working on the 400 so I am pleased to say the journey begins, as I
did with the B2. I will try and take pictures as I go along if there are too many
SHOUT and if there are not enough SHOUT Louder
![]() wish me luck and here goes.
wish me luck and here goes.
First thing to come off is the seat which looks to be in great shape and should clean up nicely.
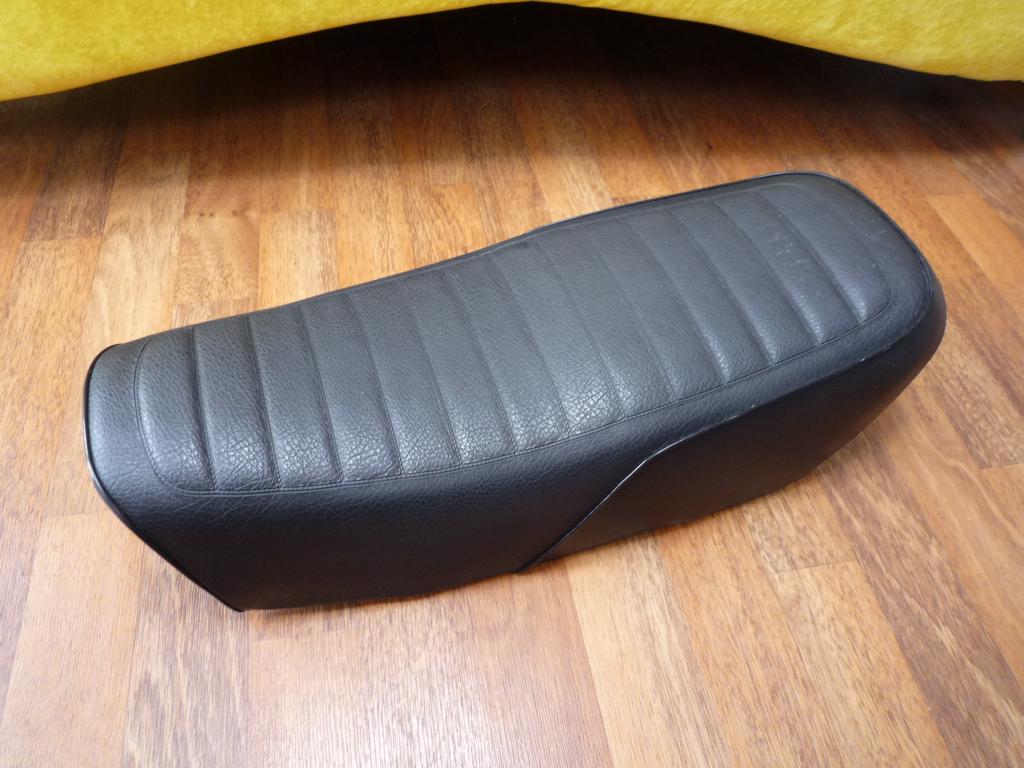

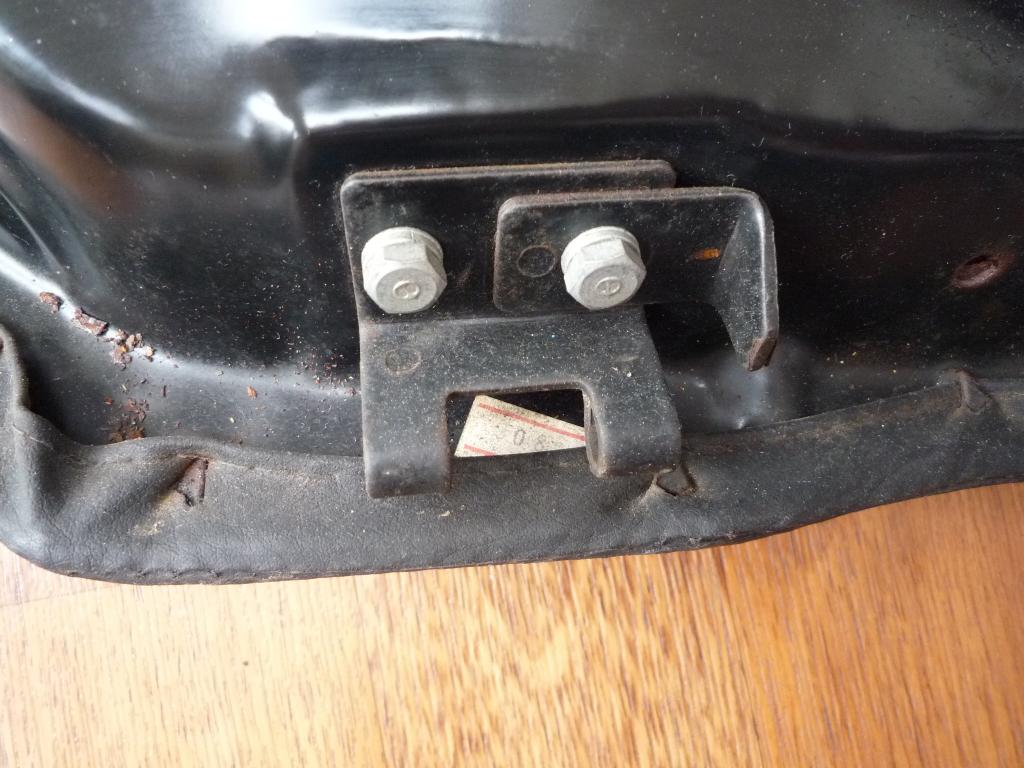
Decals are in great shape and I love finding little details hidden away like this one, need to see if there is a date on it later.
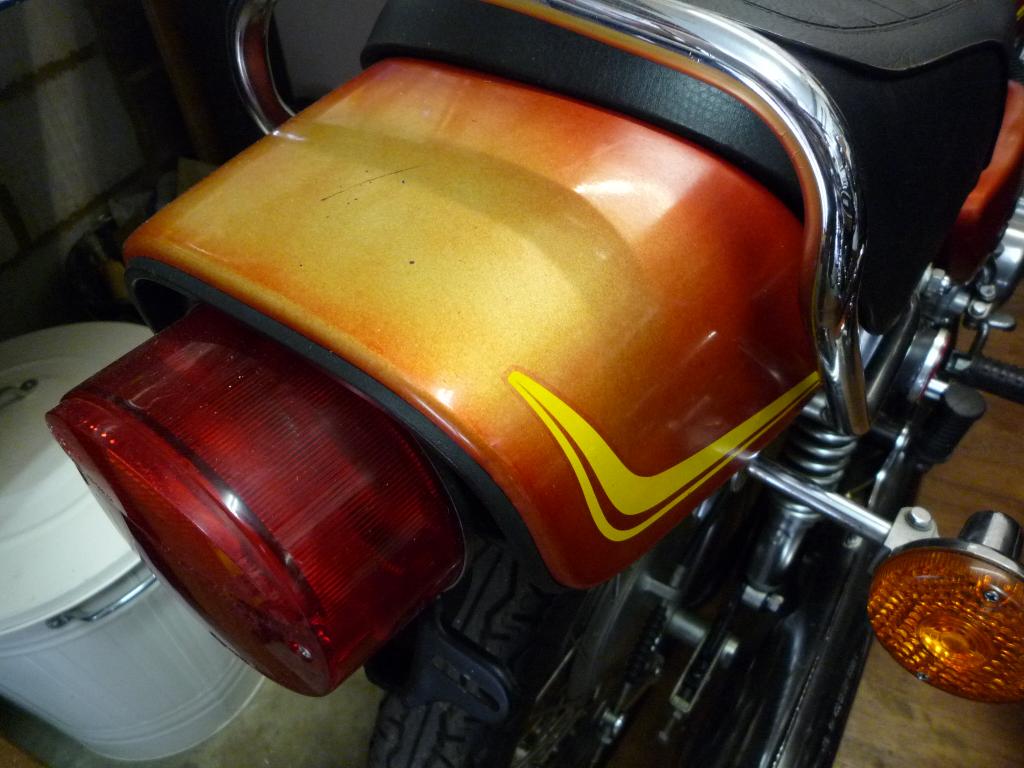
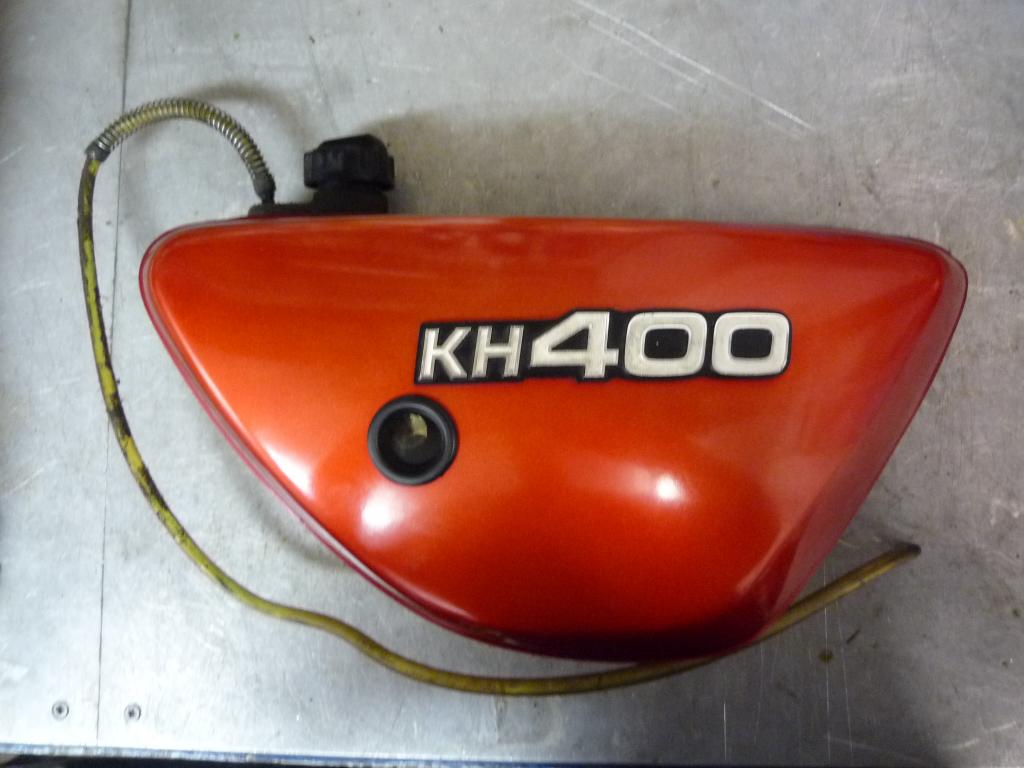
Tank will be next which is also in great shape but like the tailpiece has faded
badly faded in the Sunshine, however I still think the yellow stripes on the
tailpiece look retro cool.......
![]()


Unfortunately for me the original fuel lines have been cut and silly little fuel
filters have been fitted and on top of that the fuel tap lever has been snapped
off

Replacement on its way though, thanks Simonh
![]()
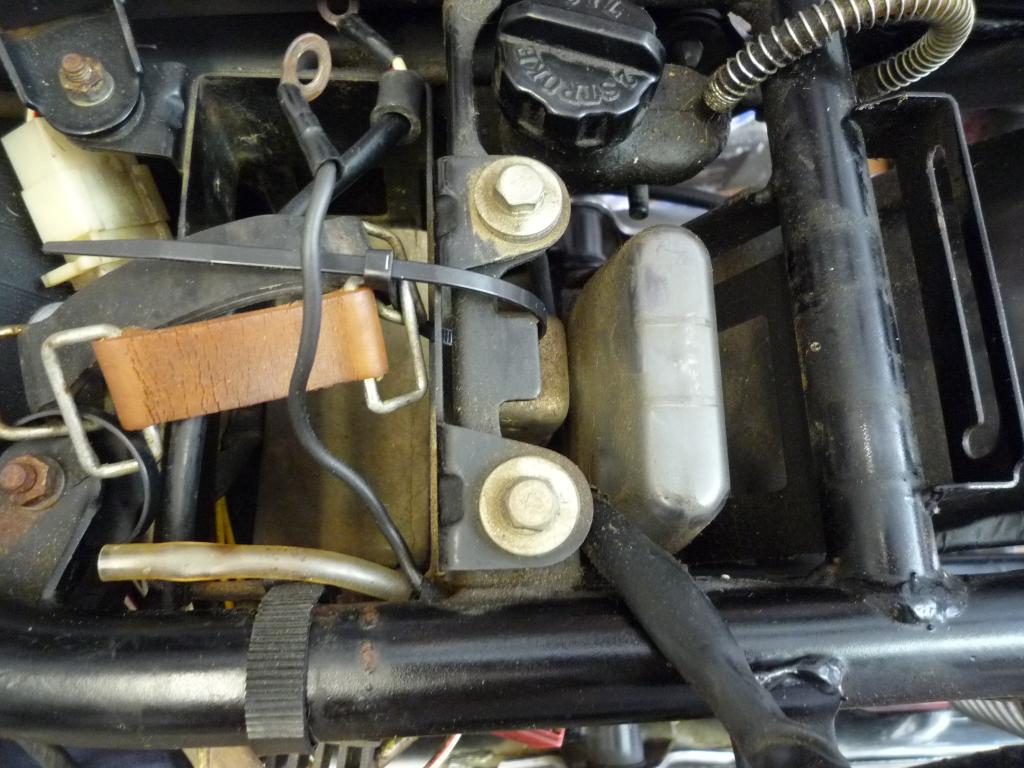
With the tank and seat off I get to see what lies beneath, and a chance to record the cable runs for later..........................
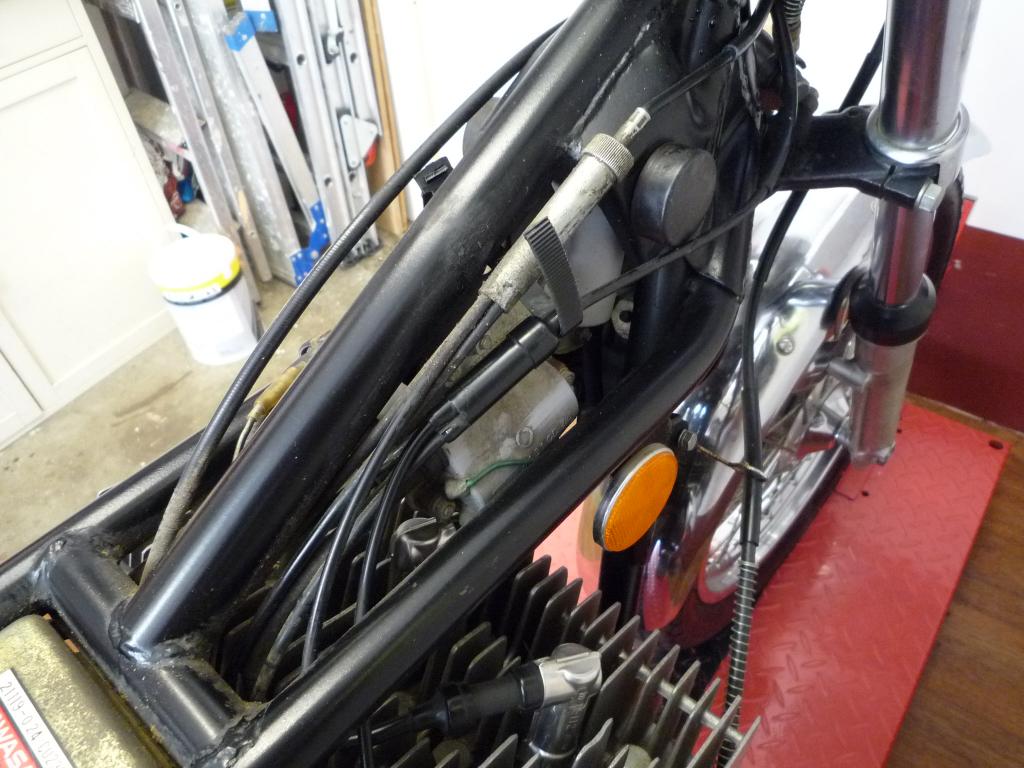
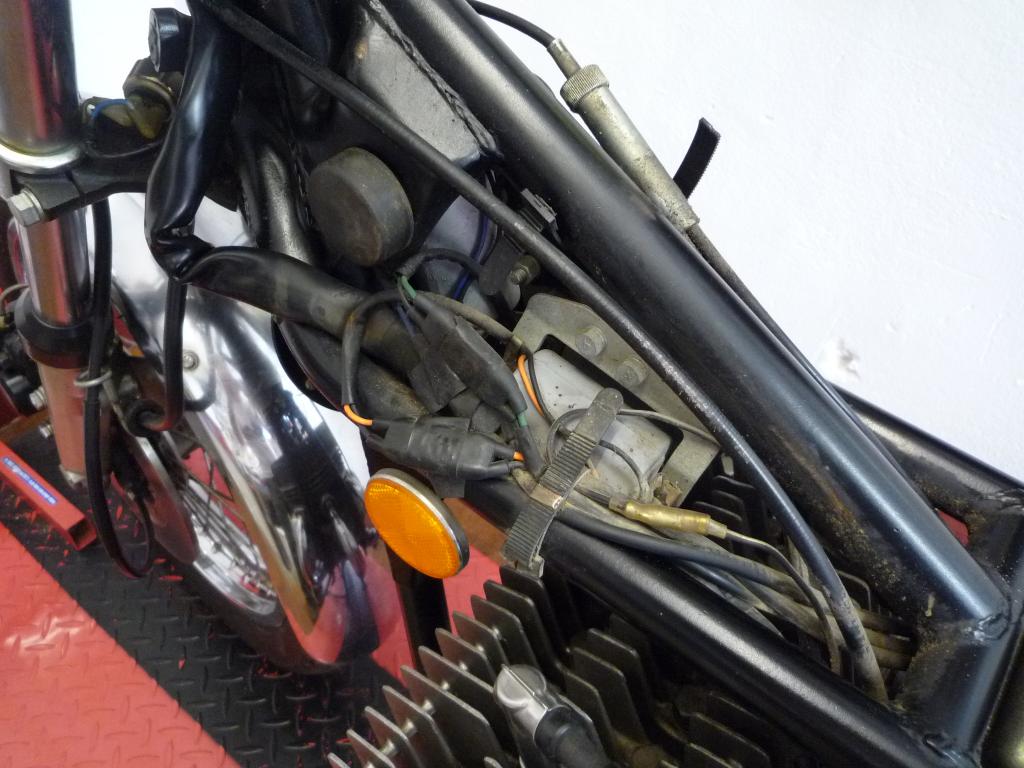
and also notice some developments over the 250, better than points?......we will
see....
![]()

After my daughter sets to work on the tailpiece. Child slavery or future Triples rider?
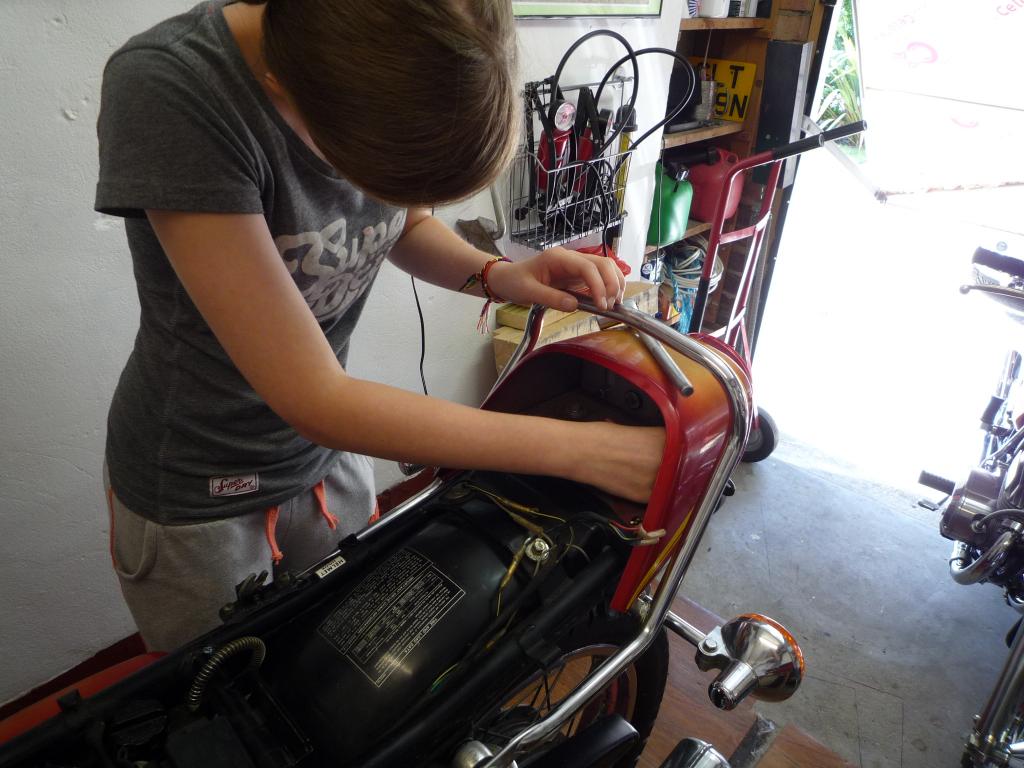
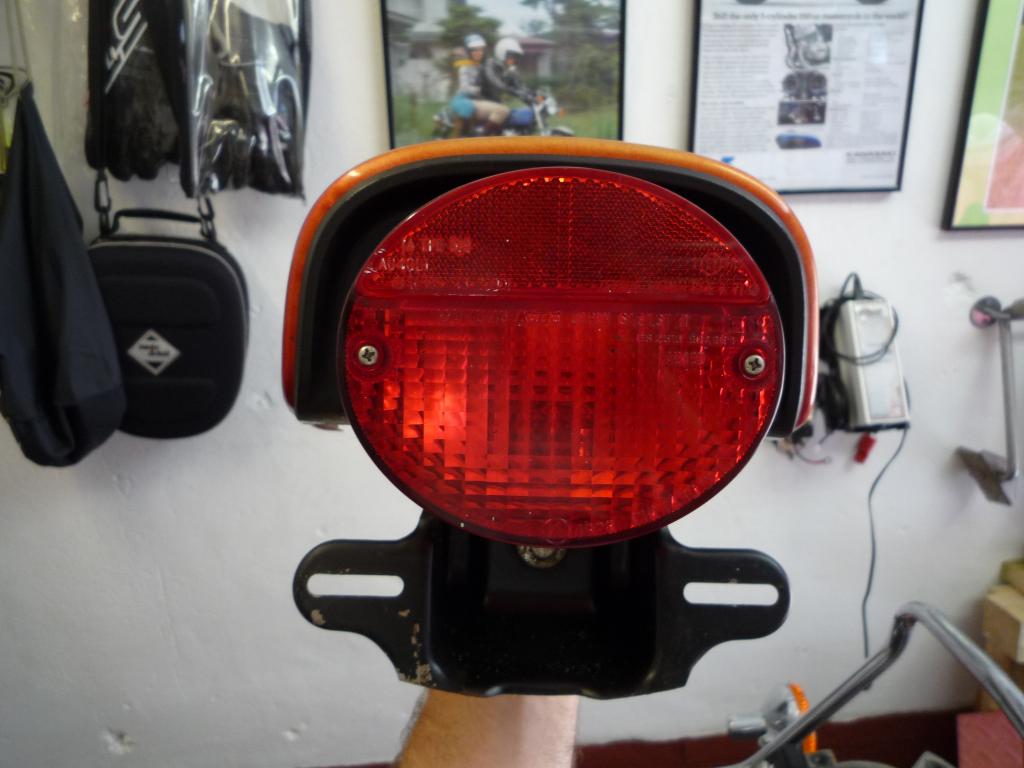
I explain to her how cool and iconic that rear light is..............and I get
the look
![]()
Paintwork set down for later.

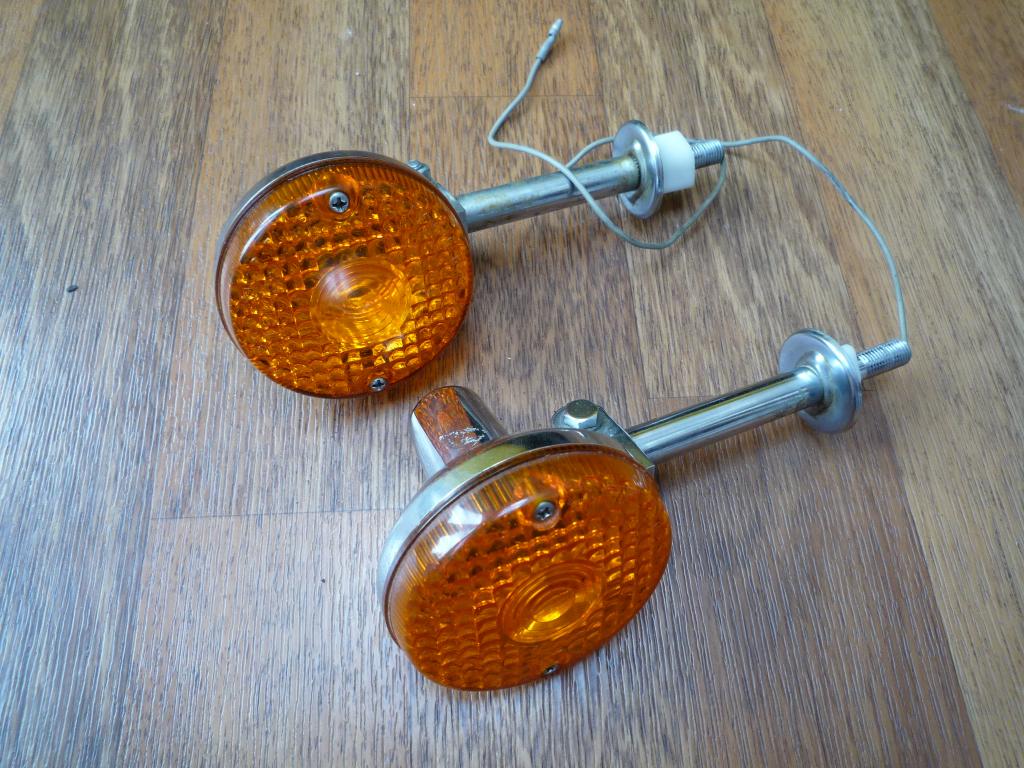
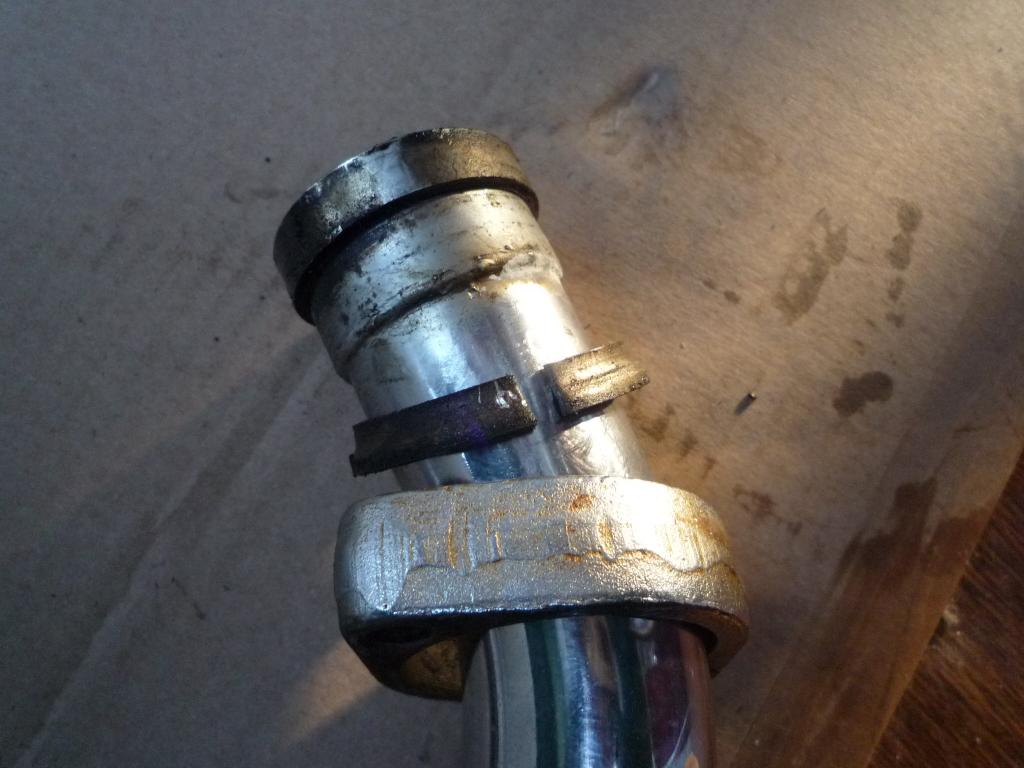
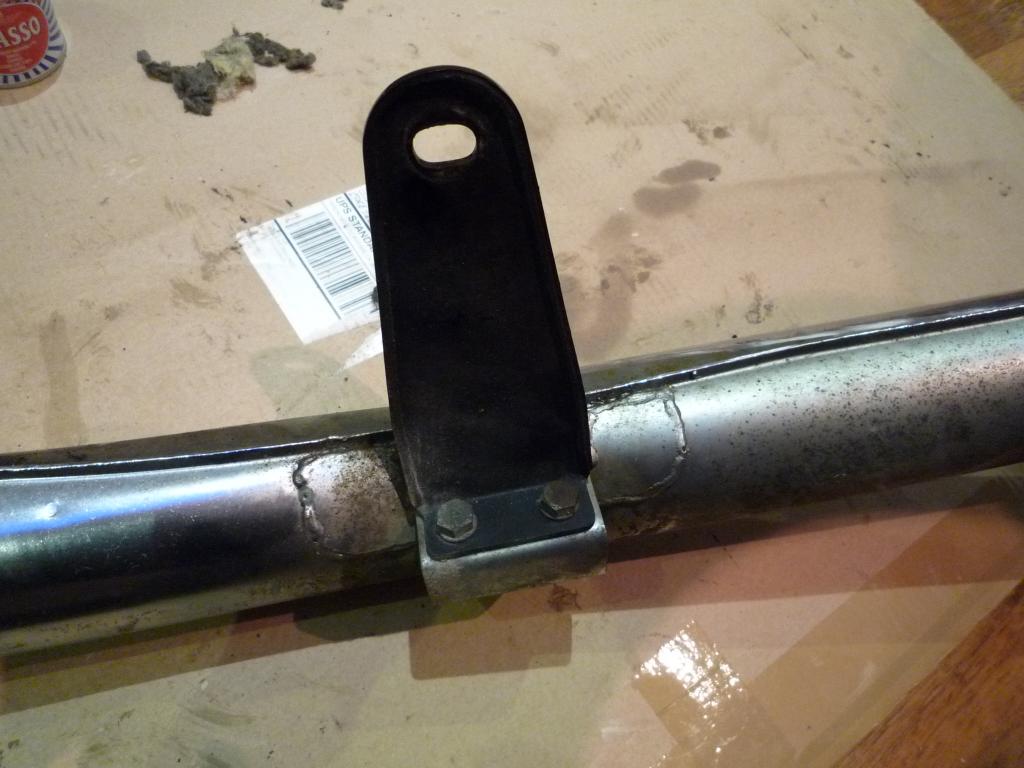
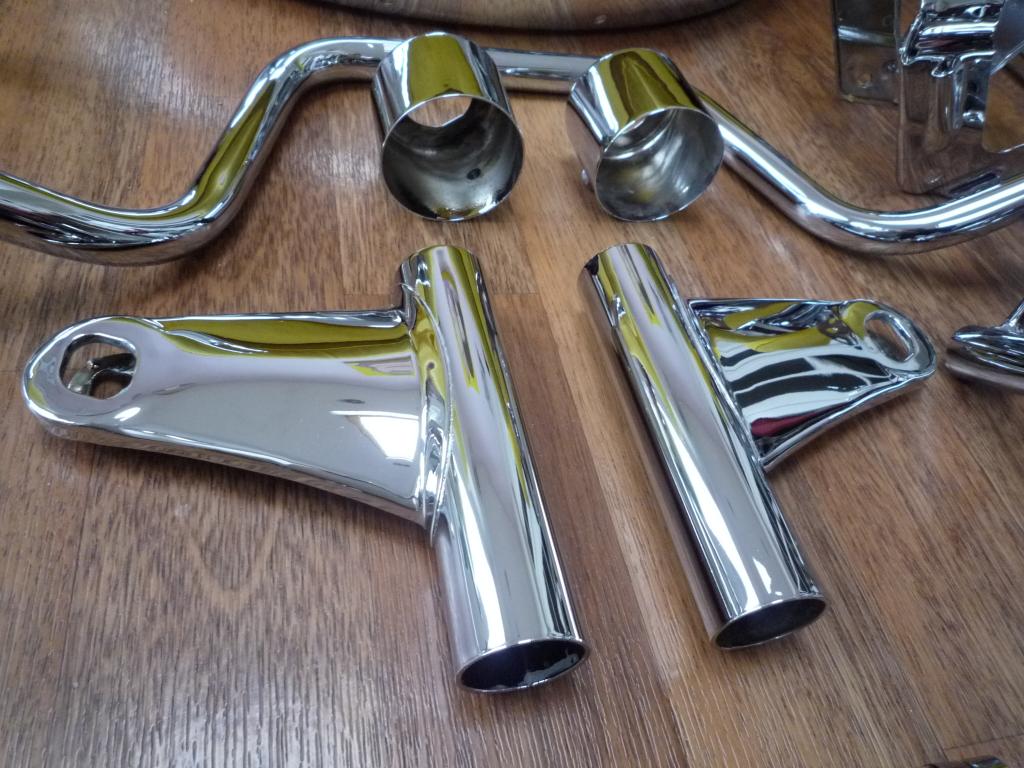
Grab rail and indicators were next and as Simon pointed out and I didn't realize
these are different, longer and harder to get hold off, there is a bit of
distortion on the stem plates but luckily they too are in great shape and may
not even have to be re chromed which will help the Wallet
![]()
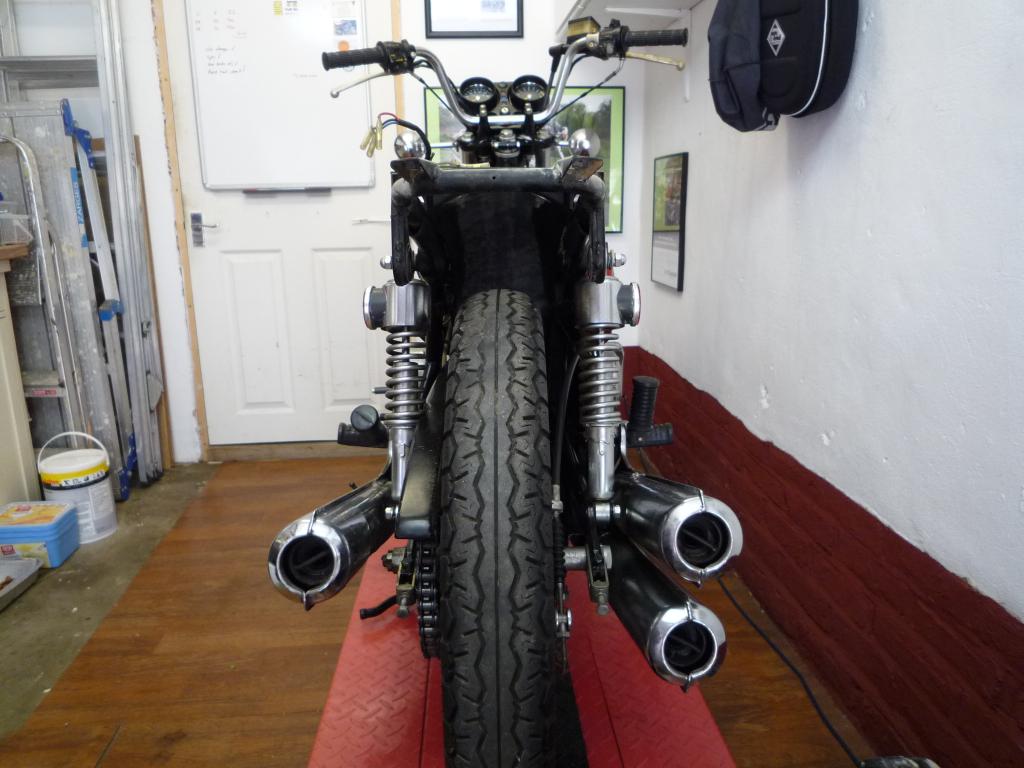
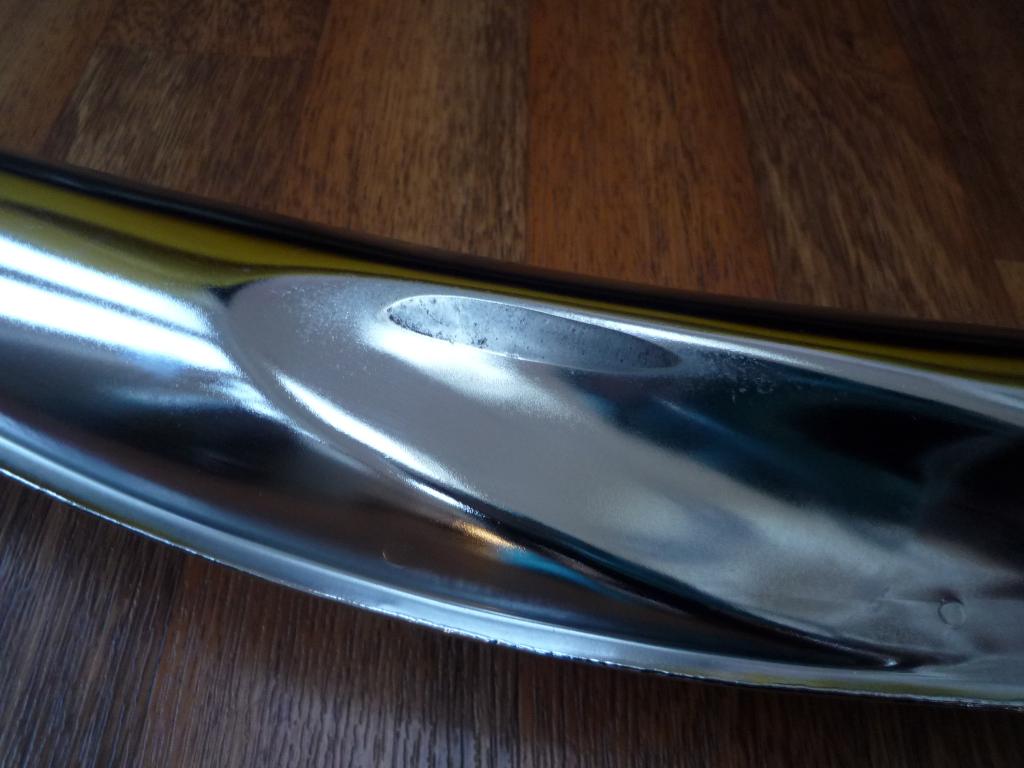
Back end looking rather bare now, must say the 400 seems to be slimmer than the
250 but maybe that's because the pipes are smaller in diameter
![]()
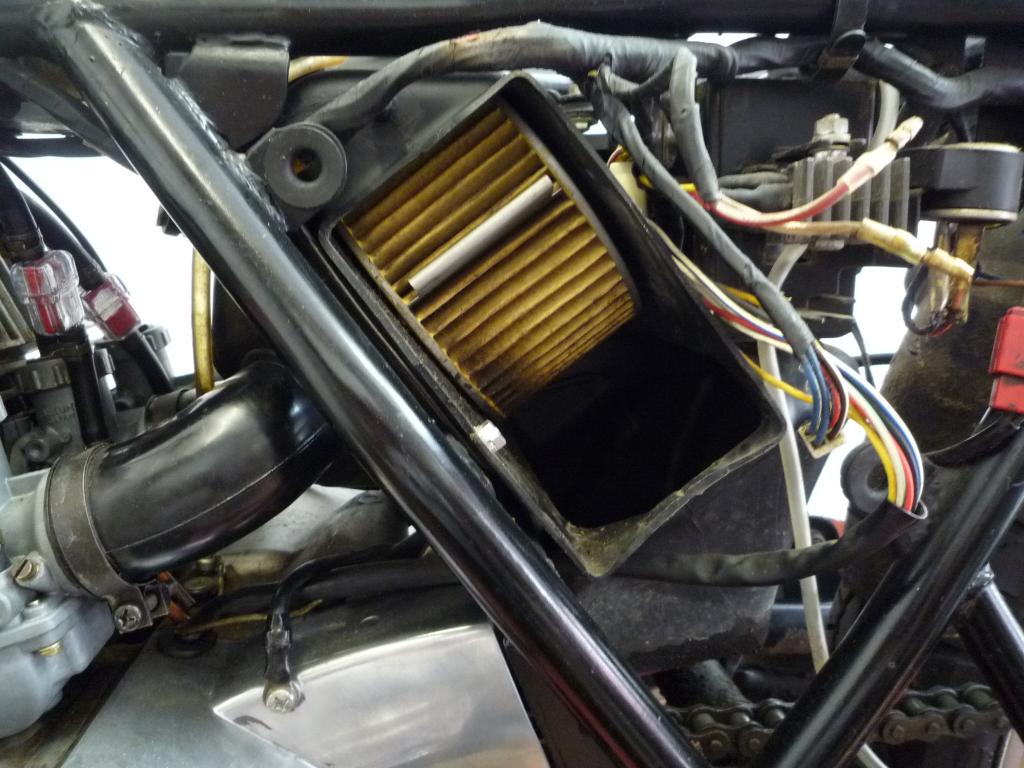
While I was routing around I happily found the spare plug holder, cross that off the list of parts needed and the air filter adding that to the list of parts needed.
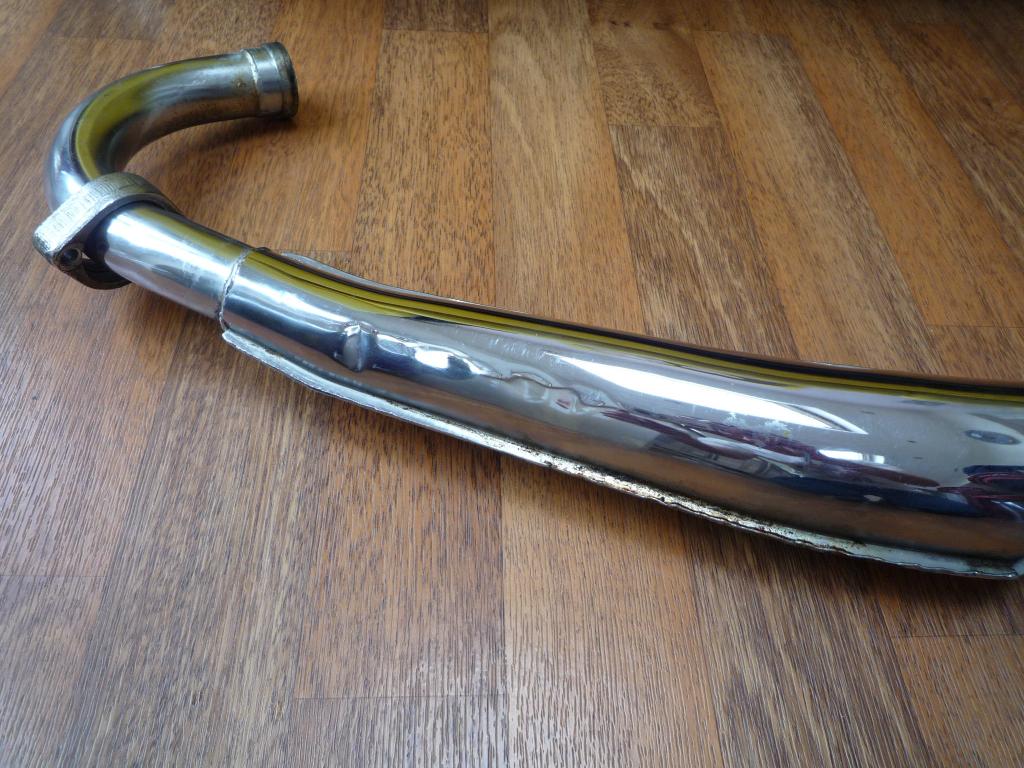
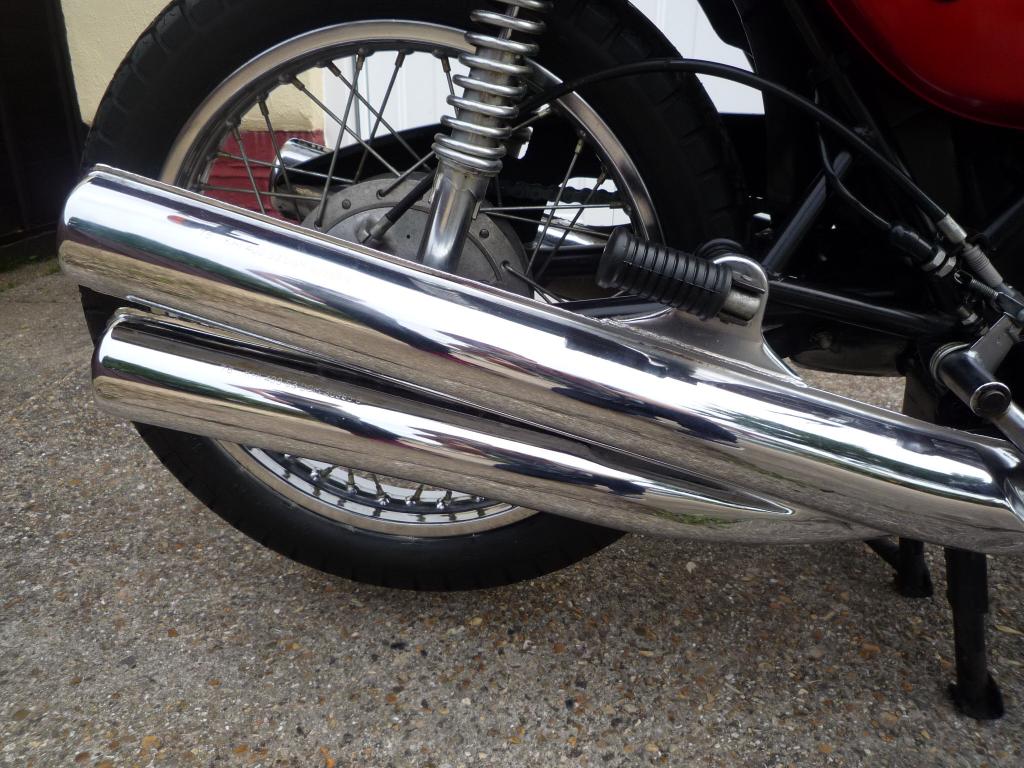
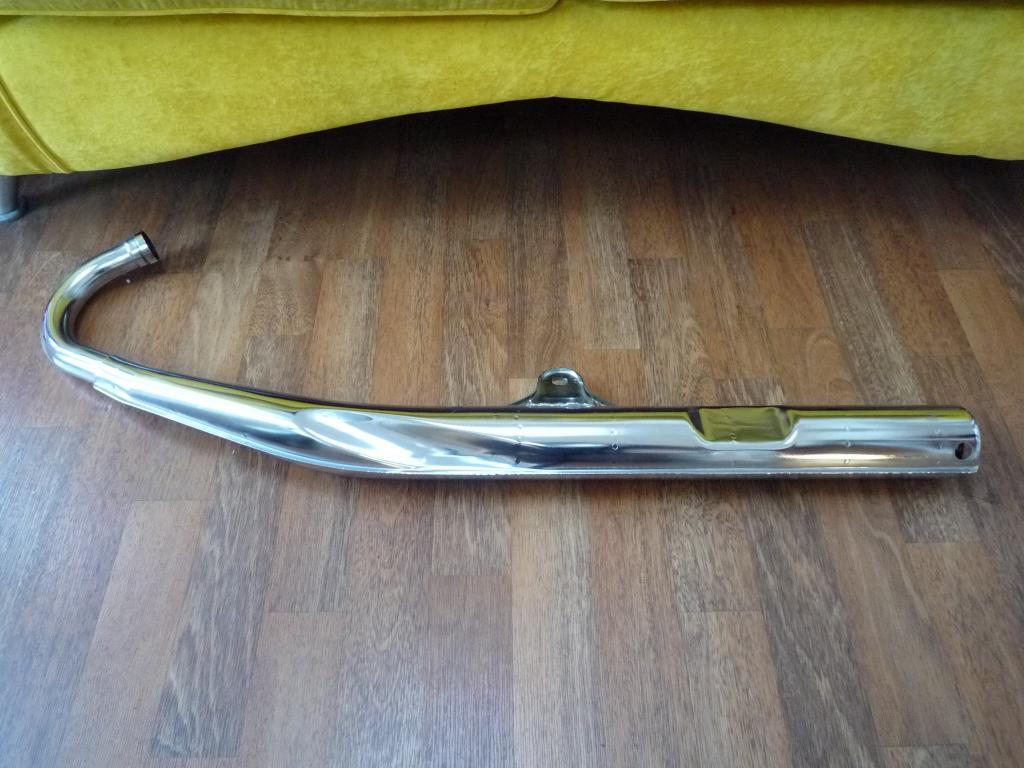
Then it was time to nervously remove and inspect the first of the exhausts
![]()


Some work to do but luckily its all down the narrow end which should be a bit more hardy when it comes to rework and heat, time will tell.........
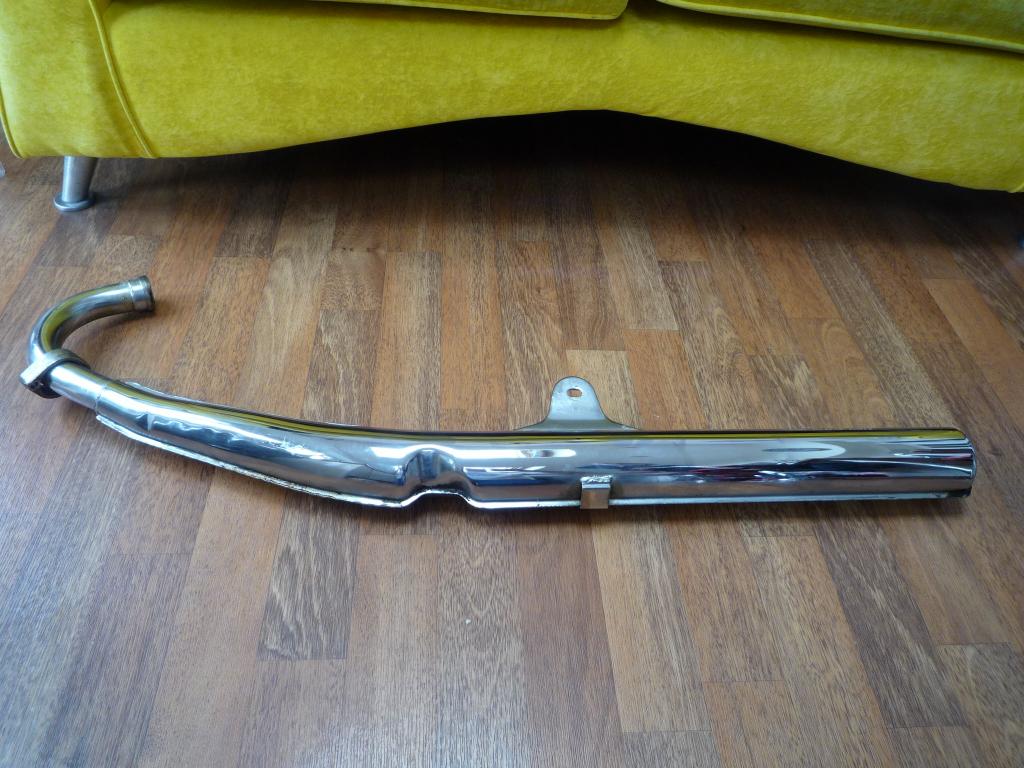
Have noticed a lot of oil dripping out of them though when hanging up so they
shouldn't have gone rusty inside
![]()
More later........................
We continue,......The inside of the tailpiece is actually dusted red so i
think its an illusion and the way the Candy red acts with the light changing to
Pink, here's another picture....
looks totally original to me
![]()
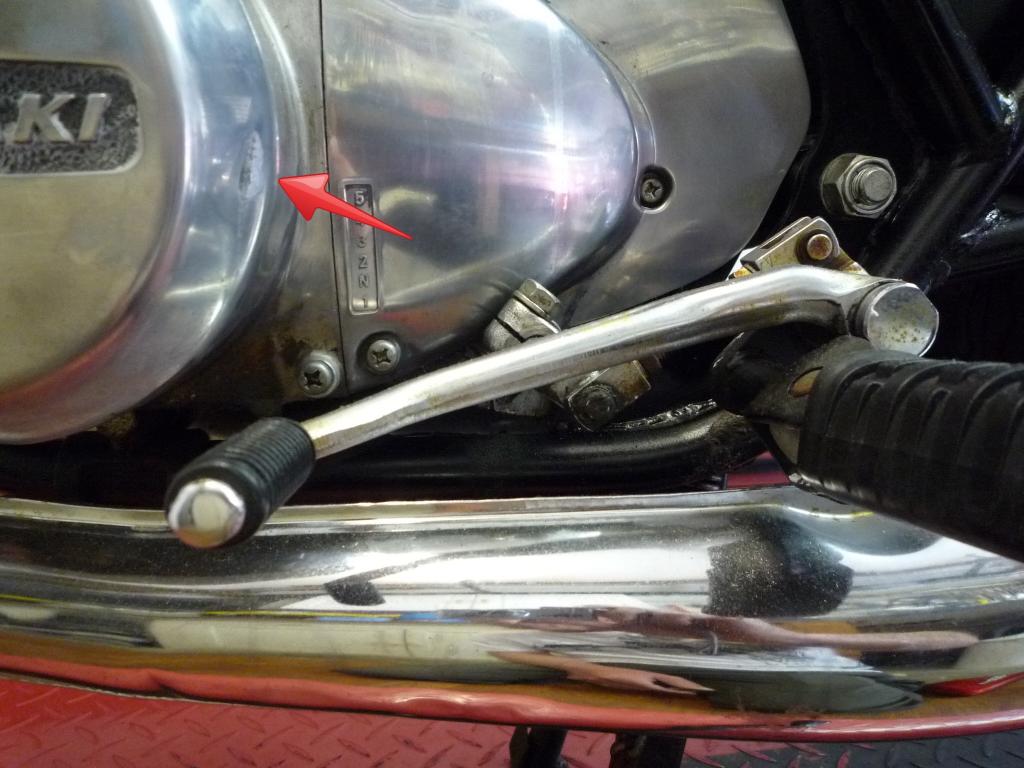
Following on the gear linkage was removed, please to see there is very little slack in the linkages so no rework required.
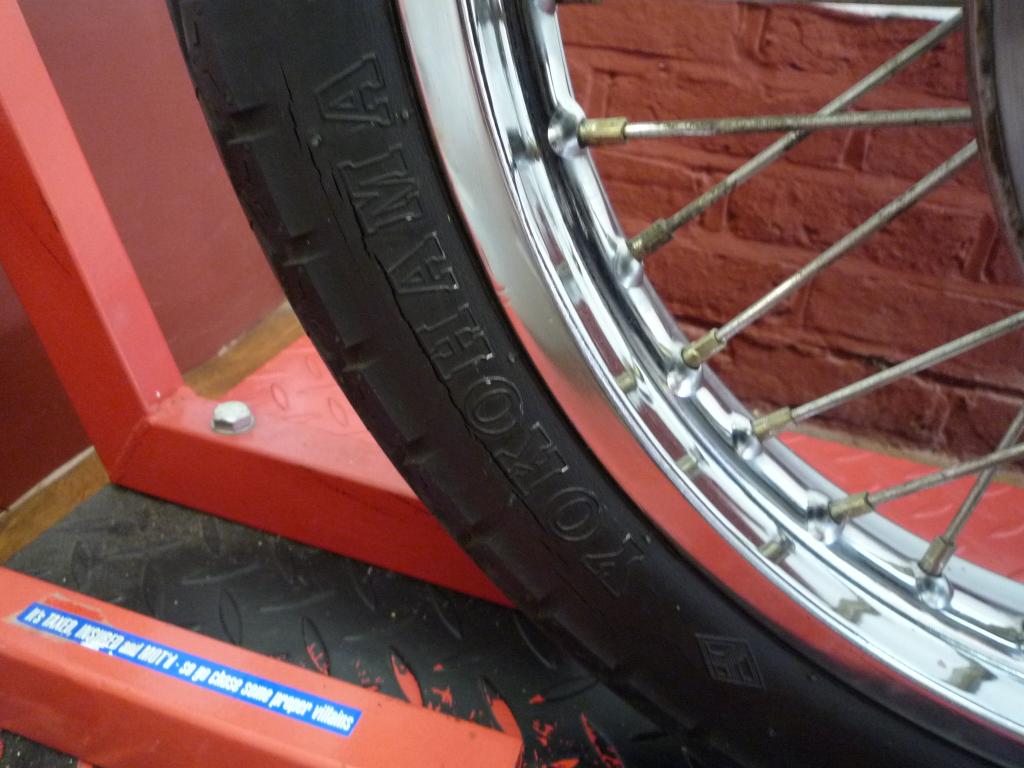
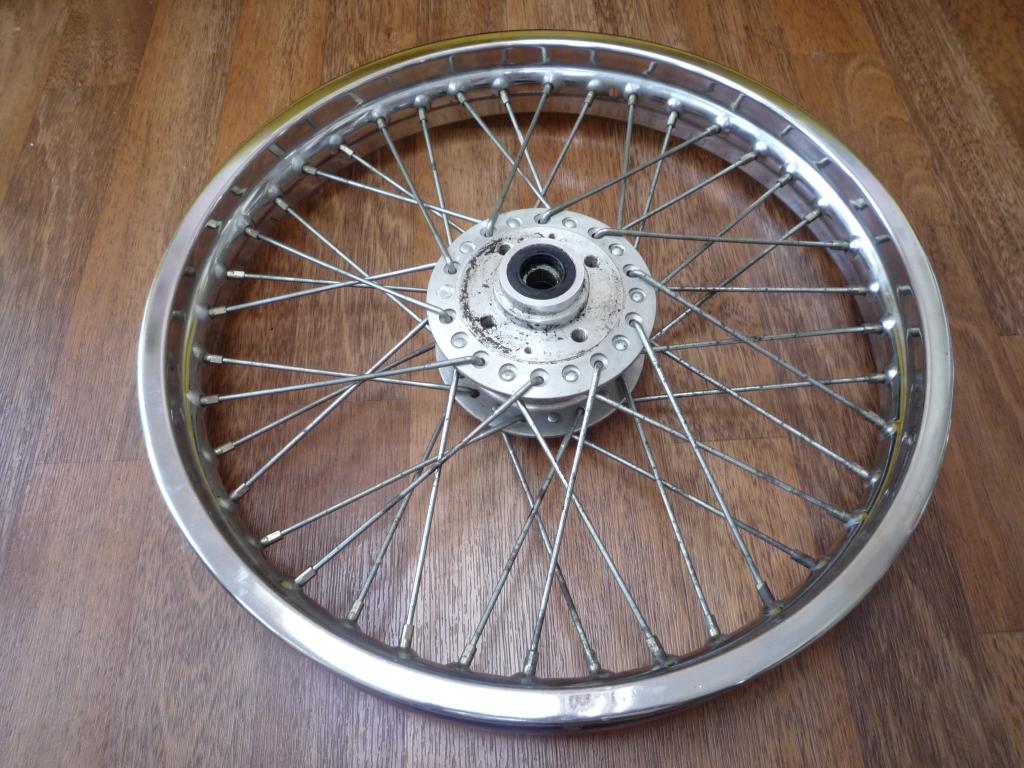
Moving backwards the wheel rims seem to be in good condition unlike the original Tyres which have cracked over time, don't think these will see action on the road again.

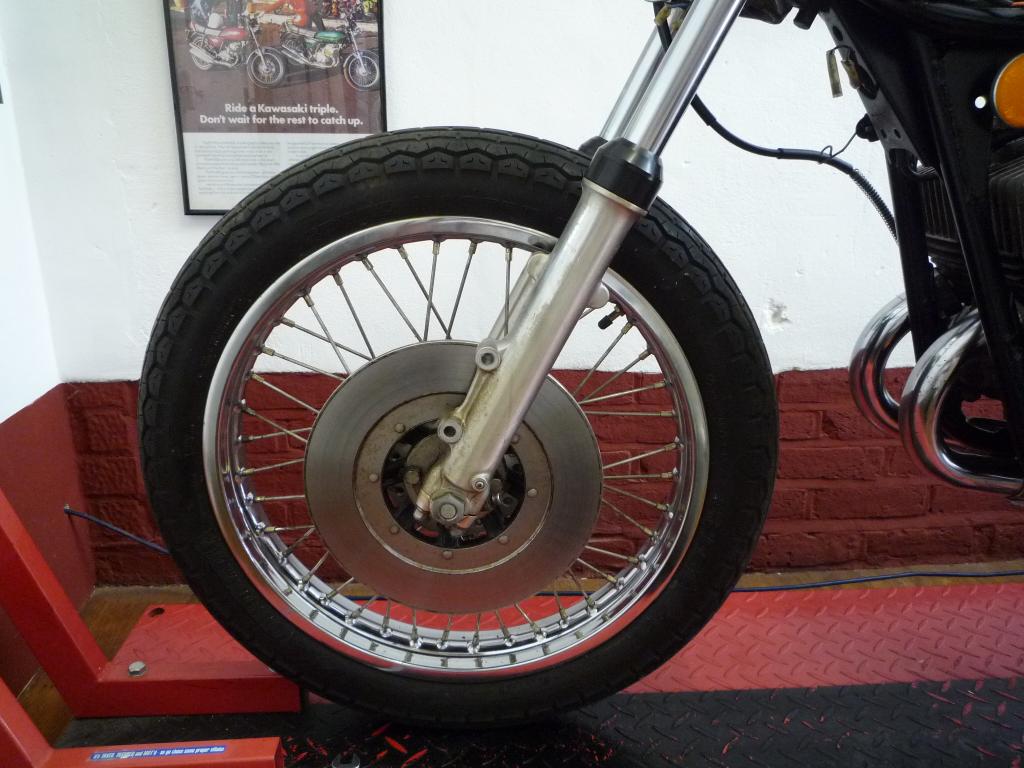
Front Mudguard removed, and hopefully preserved under this, I wonder what road this came from?
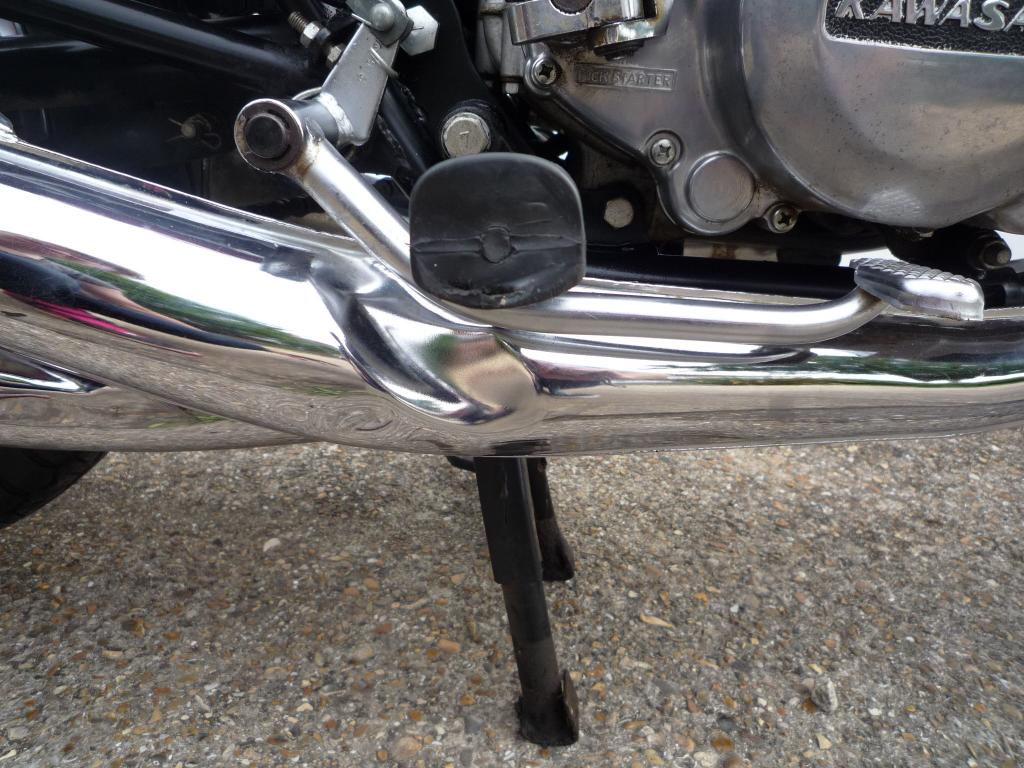
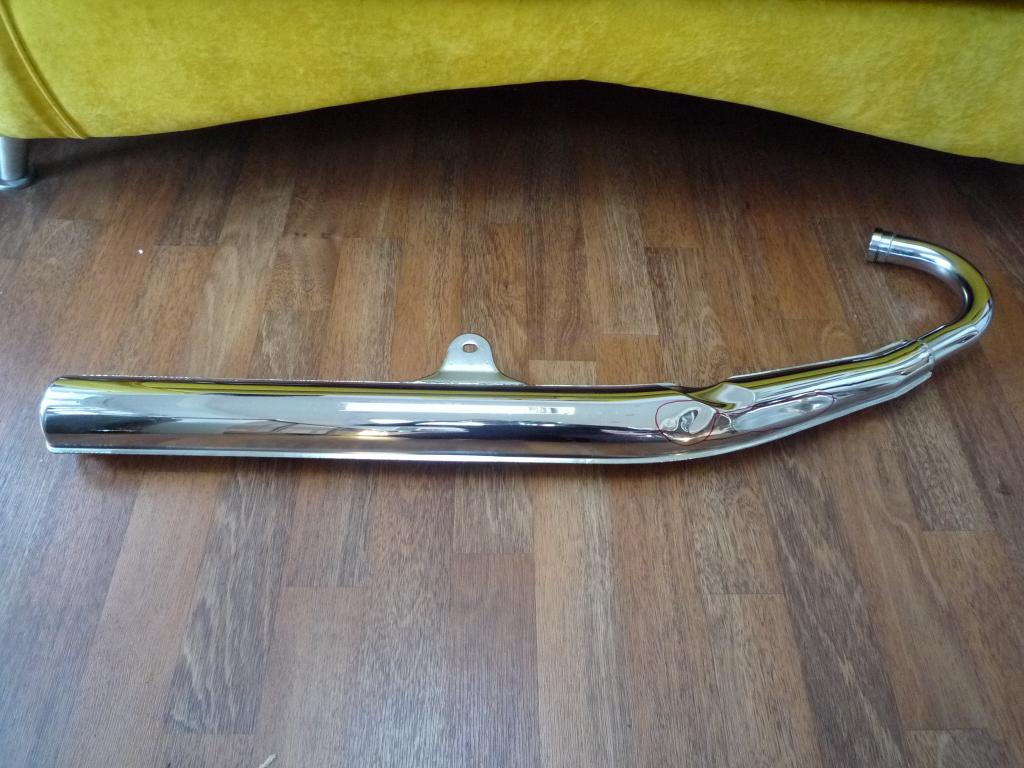
After a bit of shuffling we turned the bike round to get to the other exhausts, closer inspection revealed some more damage up front but I will have plenty of time to worry about that later, still good for their age though.
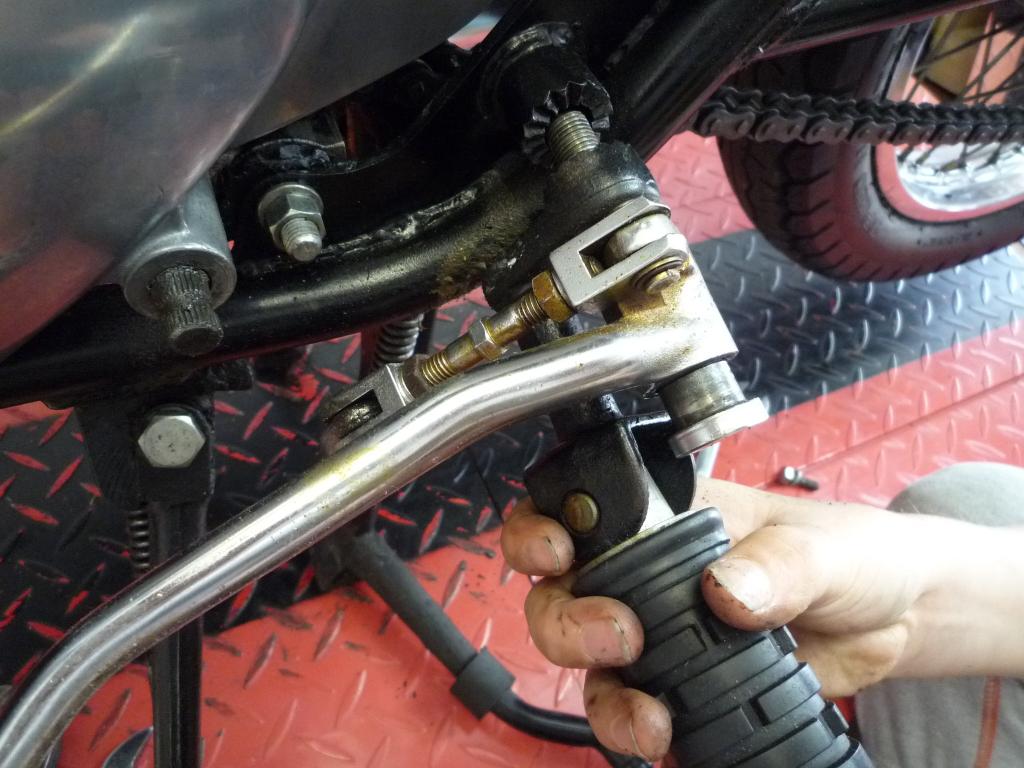
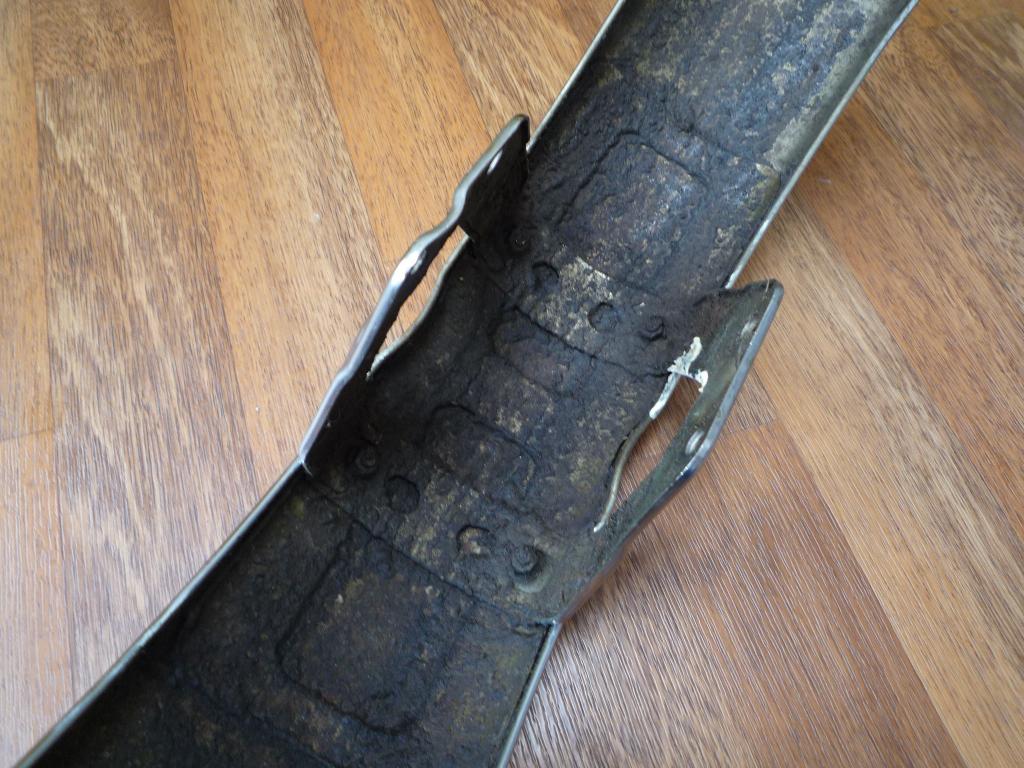
Next job was to remove the rear brake pedal and cable, the pedal has either taken a knock or been welded very badly, can't see any damage so more investigation needed.
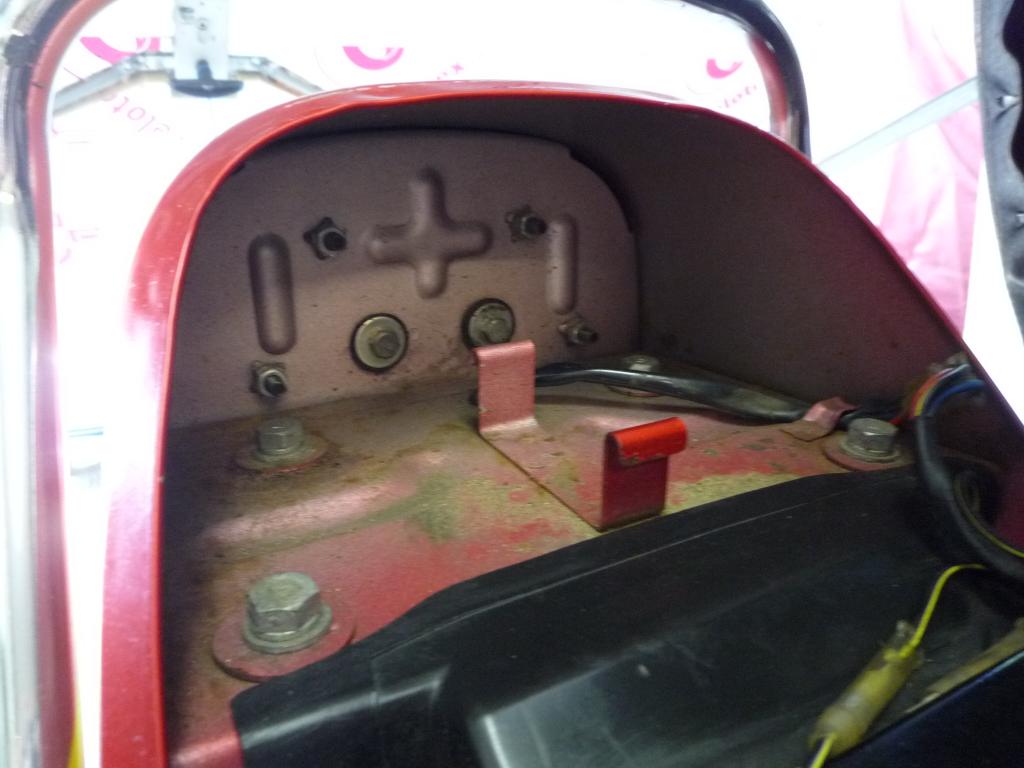
Draining the oil tank revealed some liquid Gold.


Quite a lot of it thankfully and good to see.
Then Oil tank removed.

Note slightly distorted filter outlet, you don't want that to break!!
Bike spun round again
![]()
![]() note to self You do need a bigger garage for this you know.
note to self You do need a bigger garage for this you know.
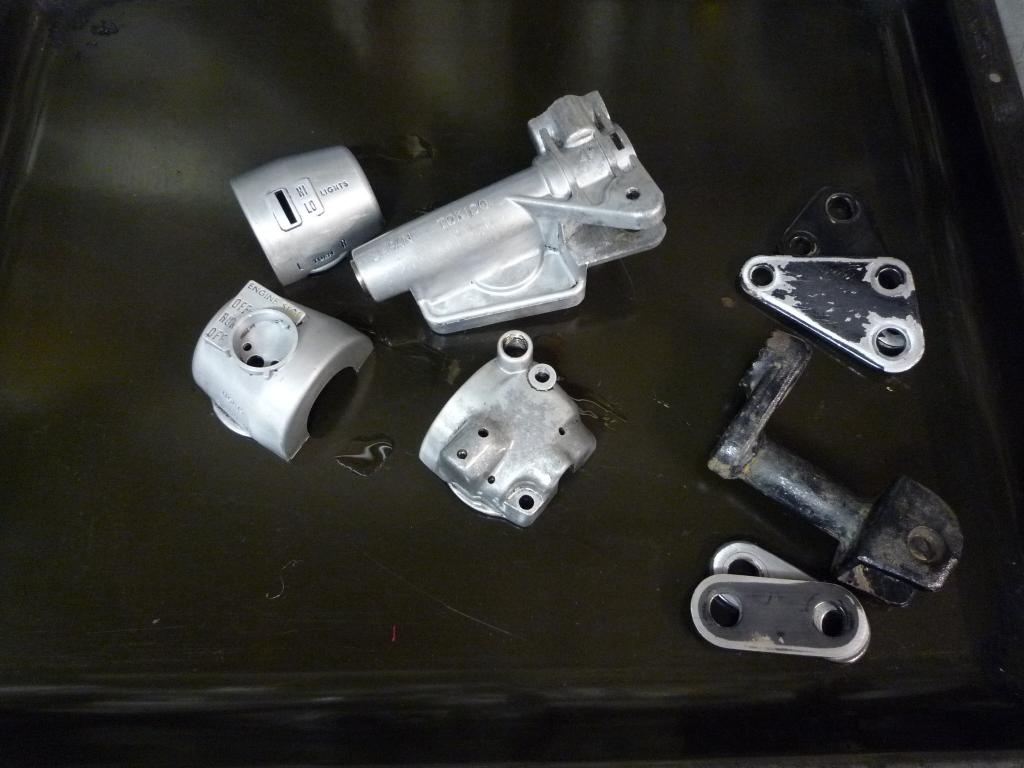
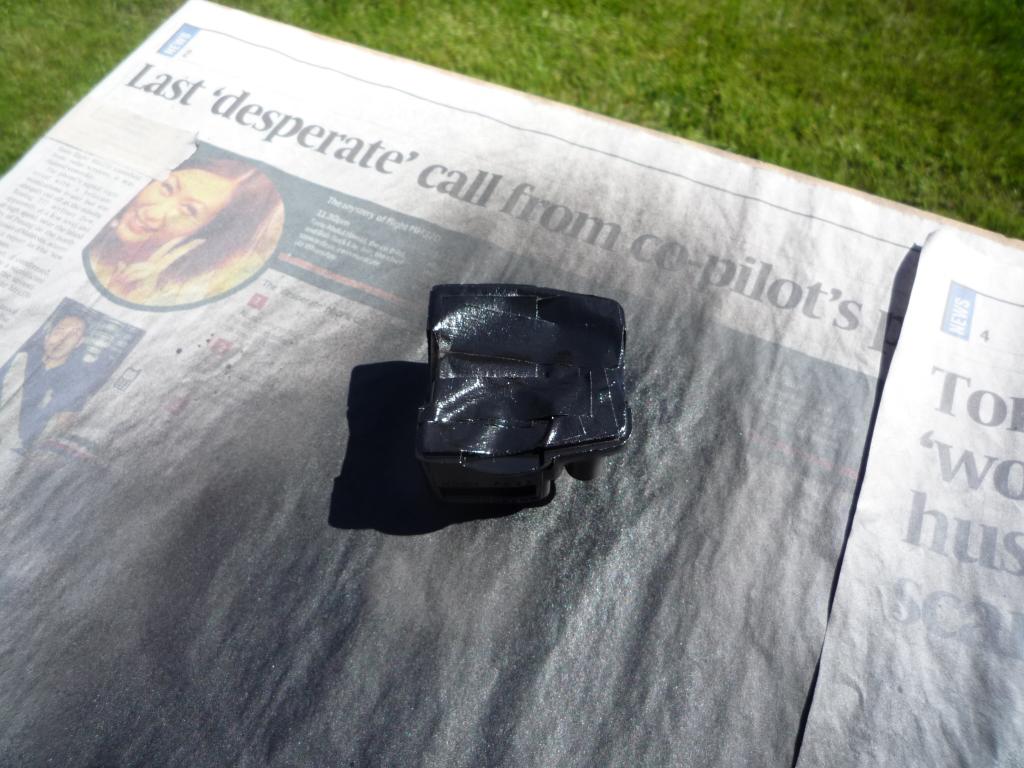
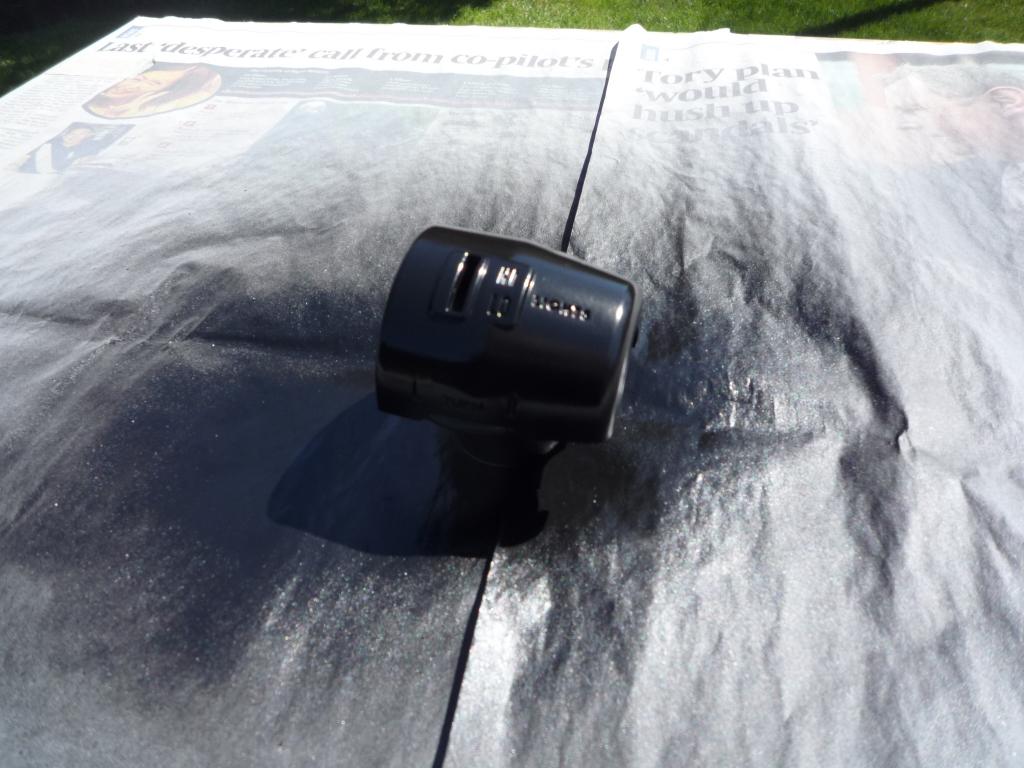
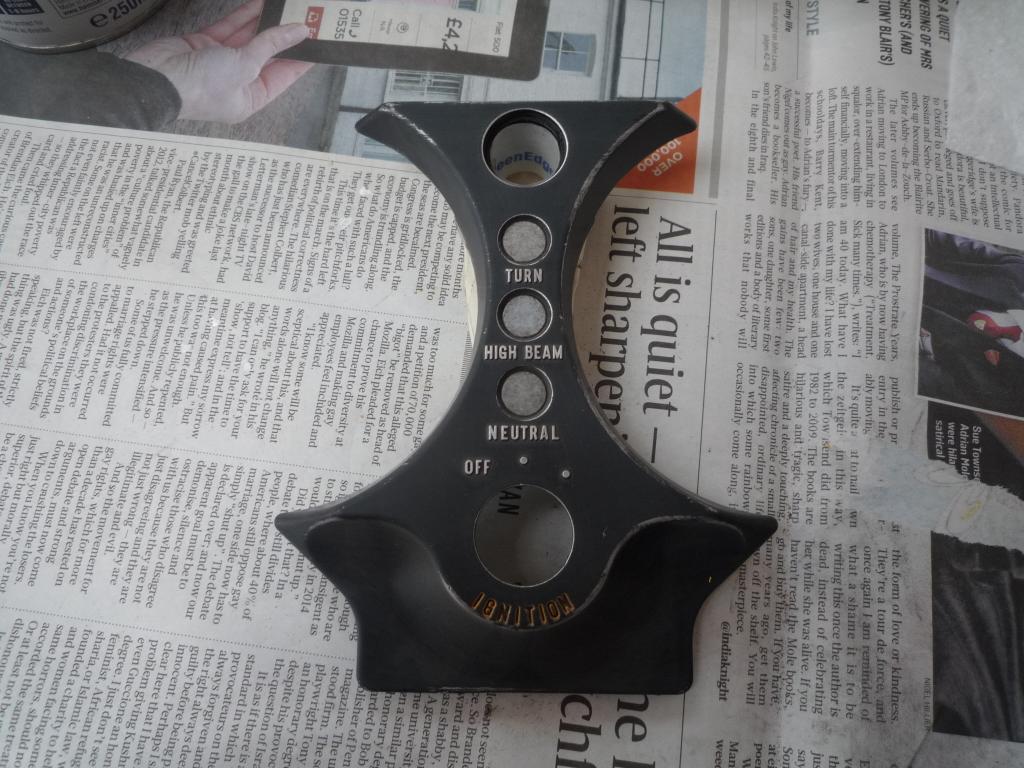
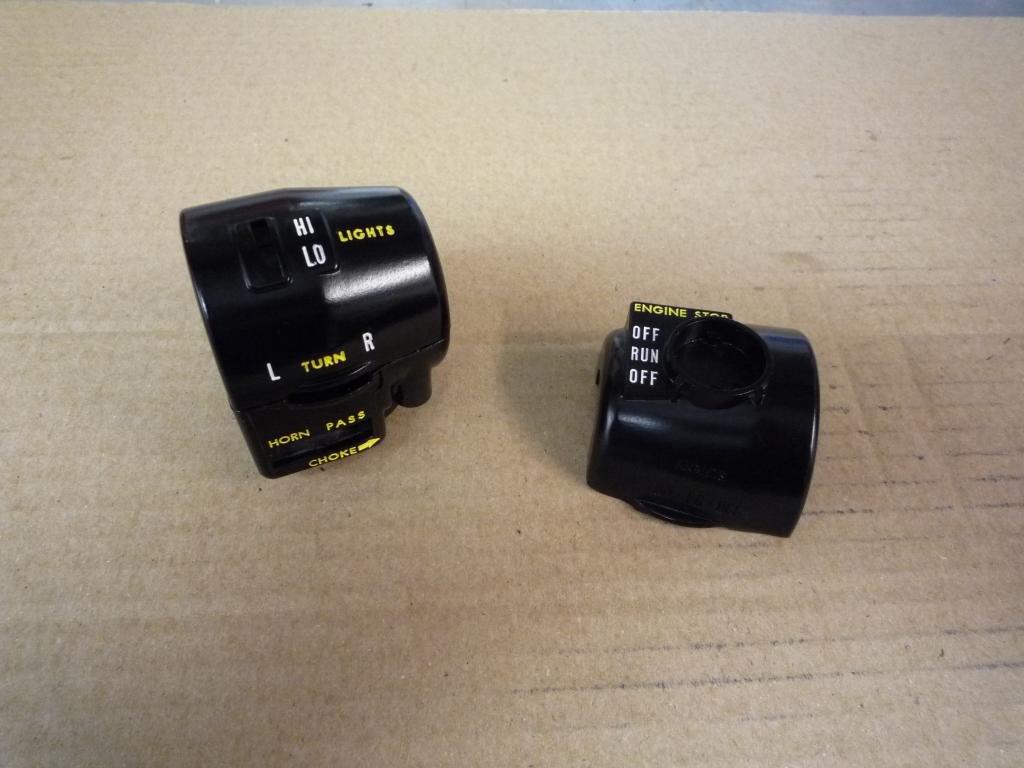
And time to look at the switchgear...............Hi Low switch broken somewhere
along the way but I have already sourced a replacement.
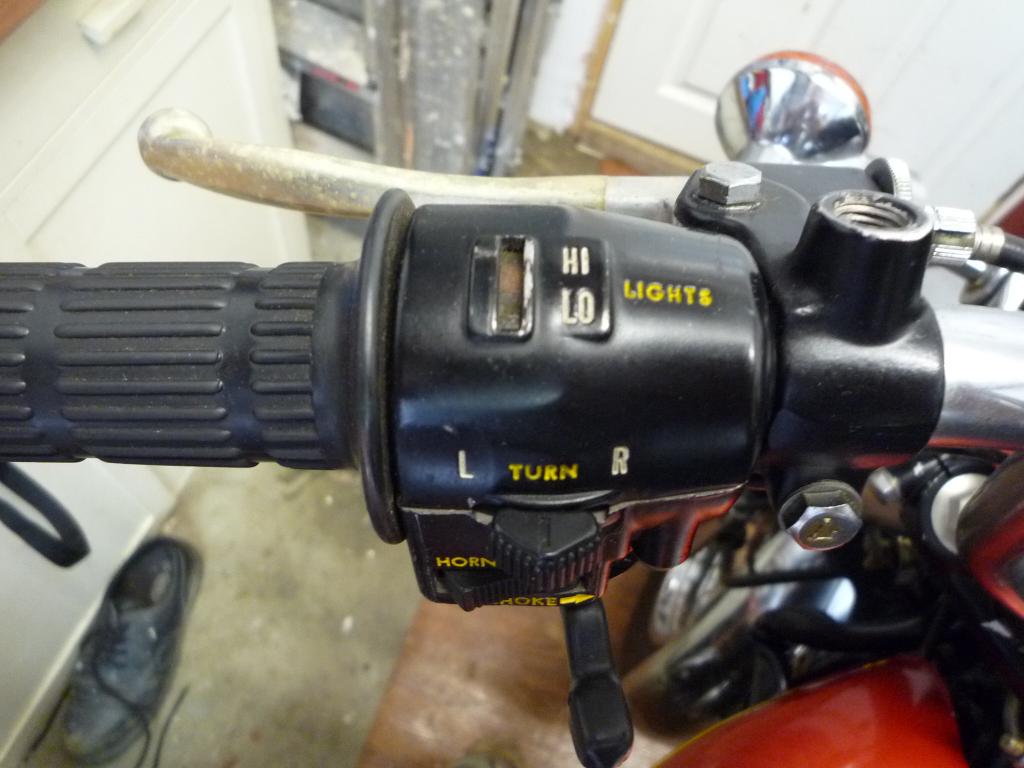
Right hand side has suffered from a brake fluid leak but should be easily repaired.
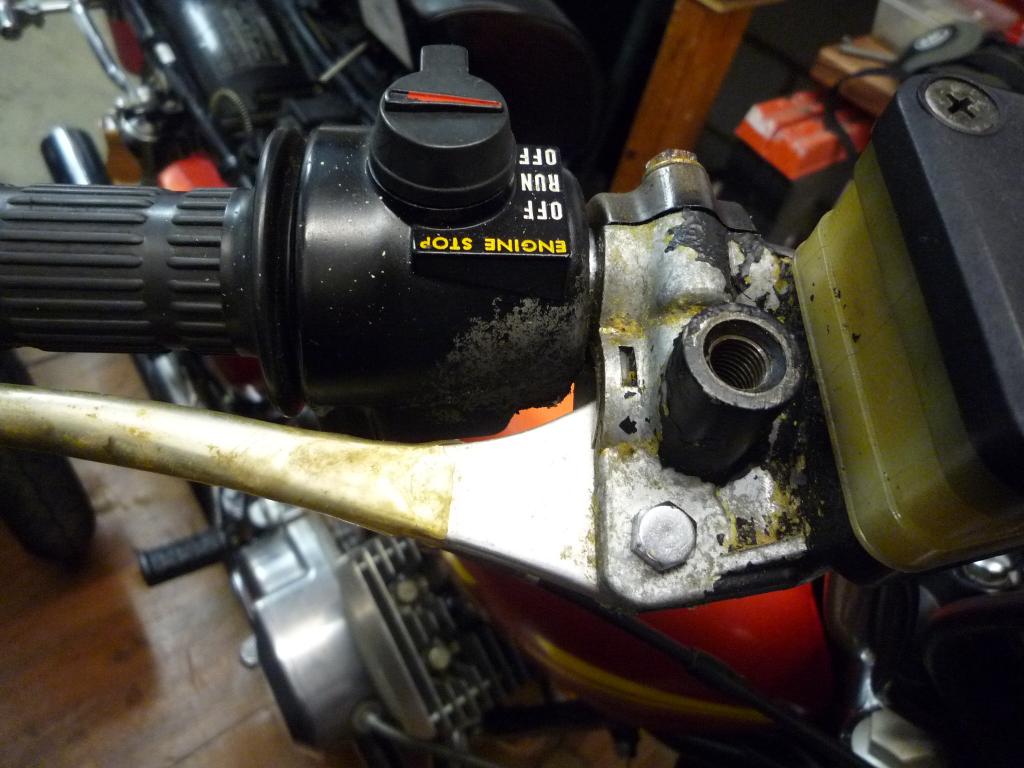
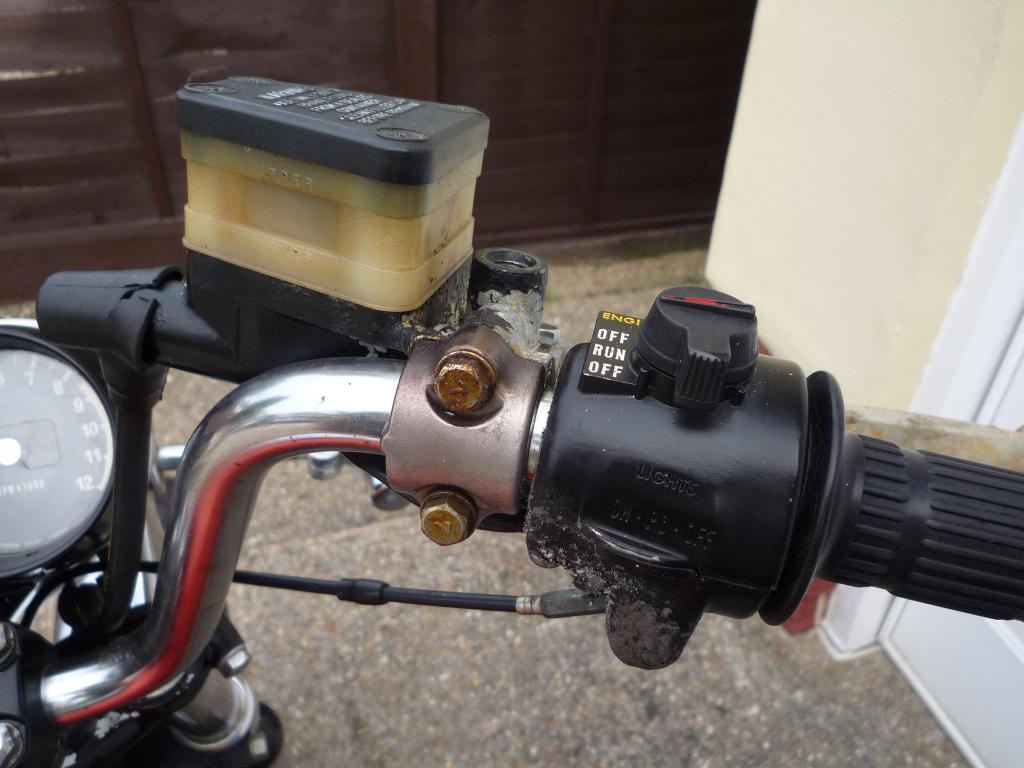
Being US/Canadian Spec the lights control switch is blacked out and a rubber plug fitted.
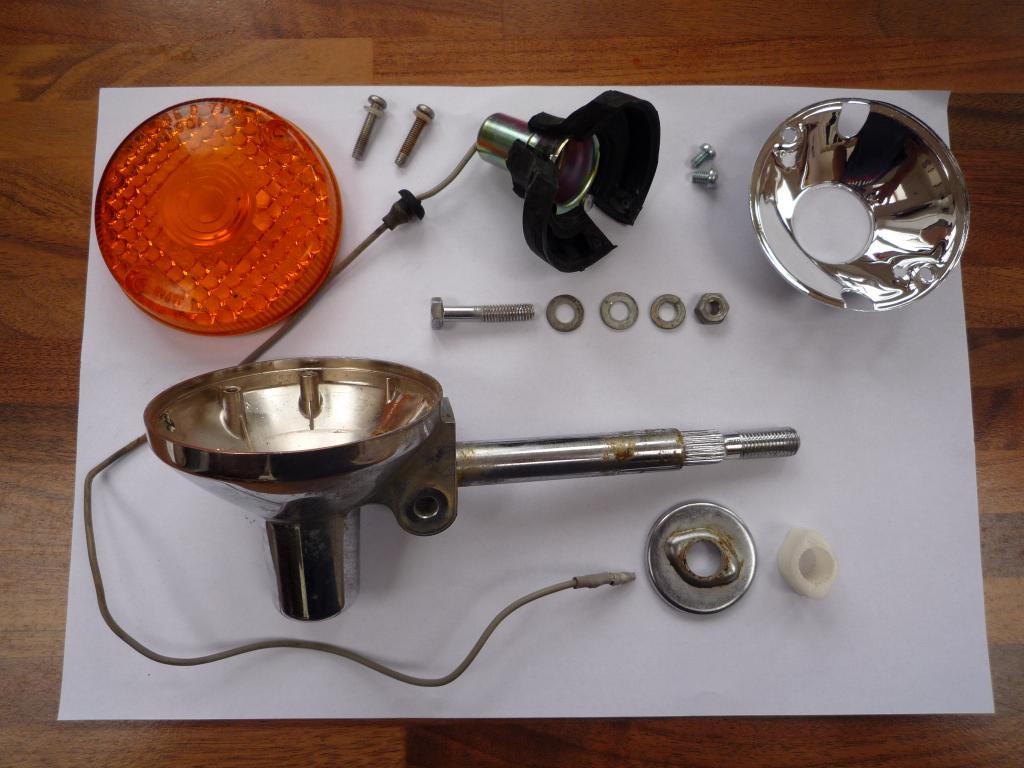
Headlight next revealed a mass of wiring and two dead Wasps!!
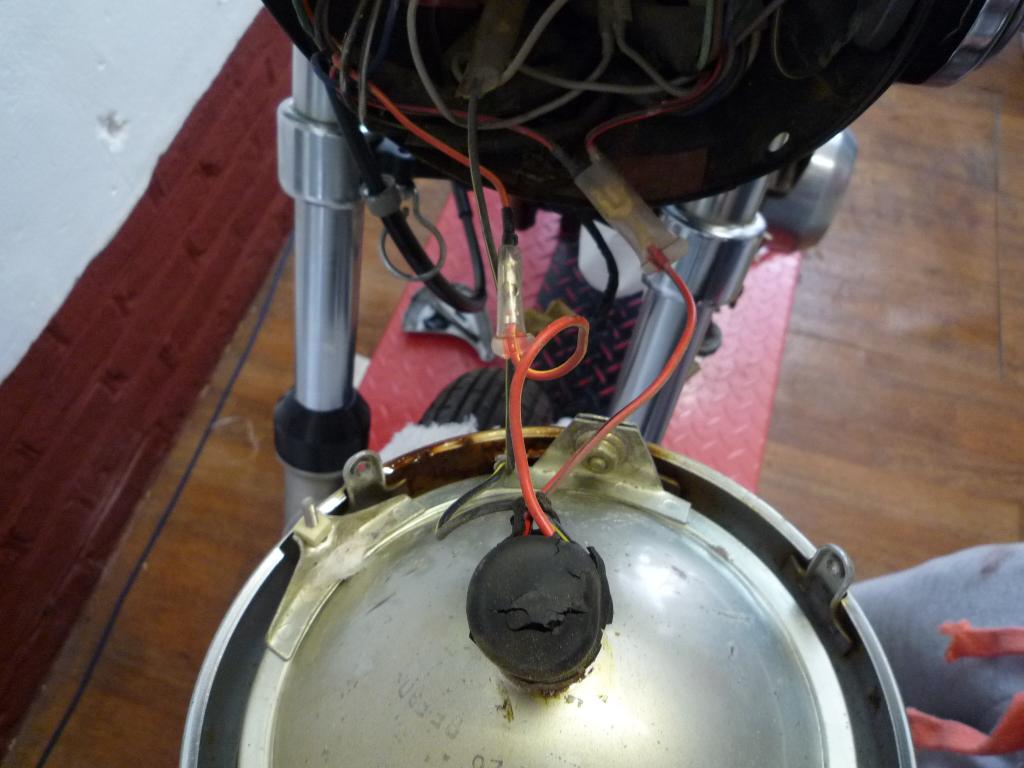
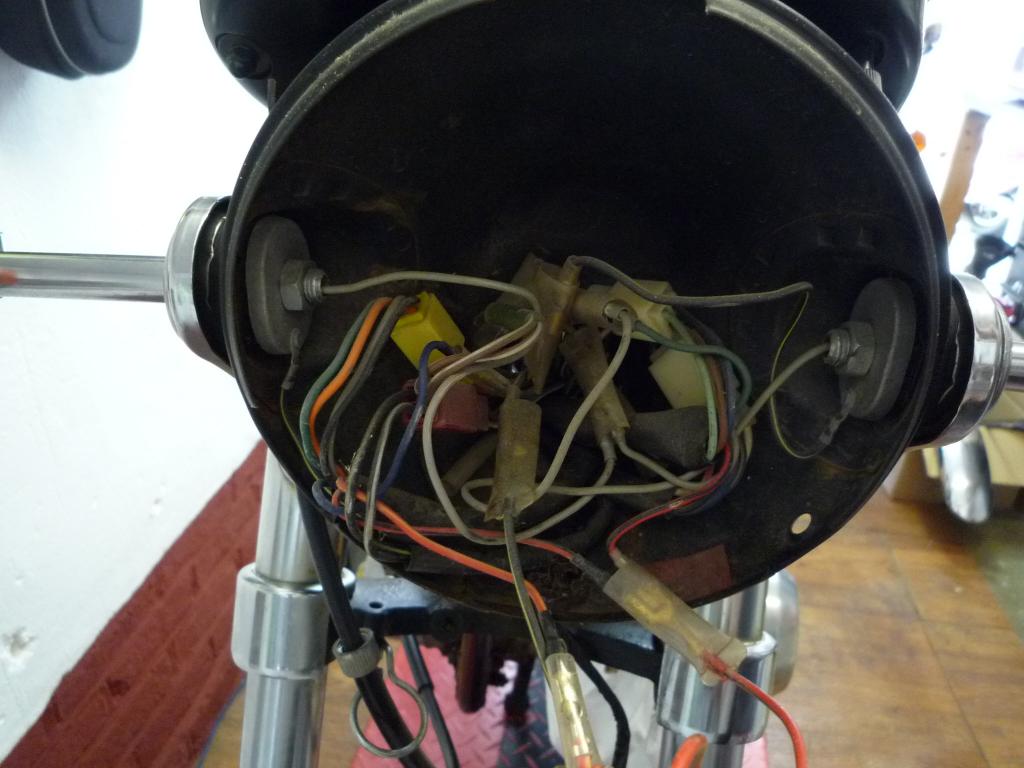
Bet I can't find one of those rubber covers?....Note the screw adjuster for the light.


Headlamp seem smaller than the 250's is the US spec different to UK?

But the Bulb looks HUGE
![]()
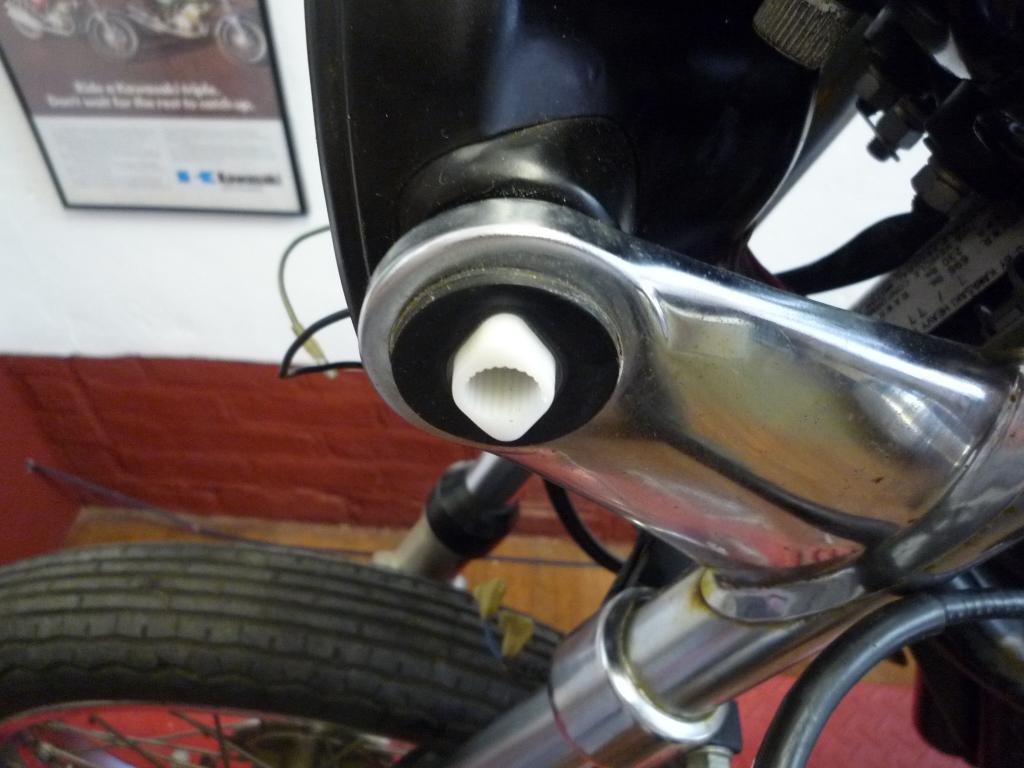
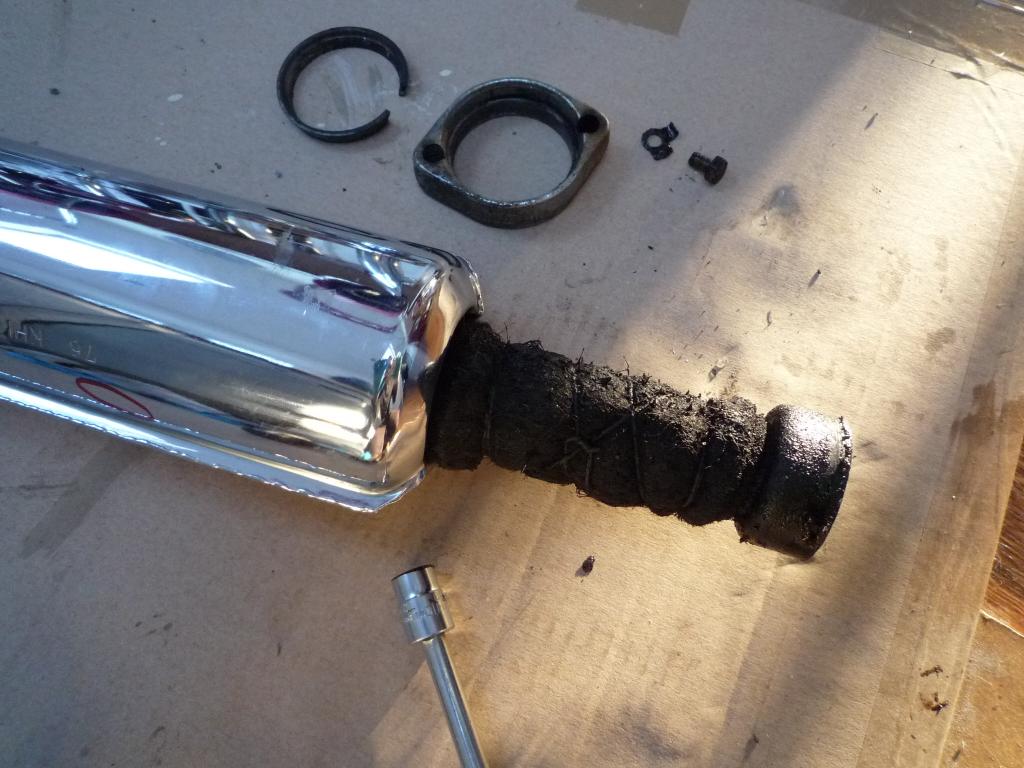
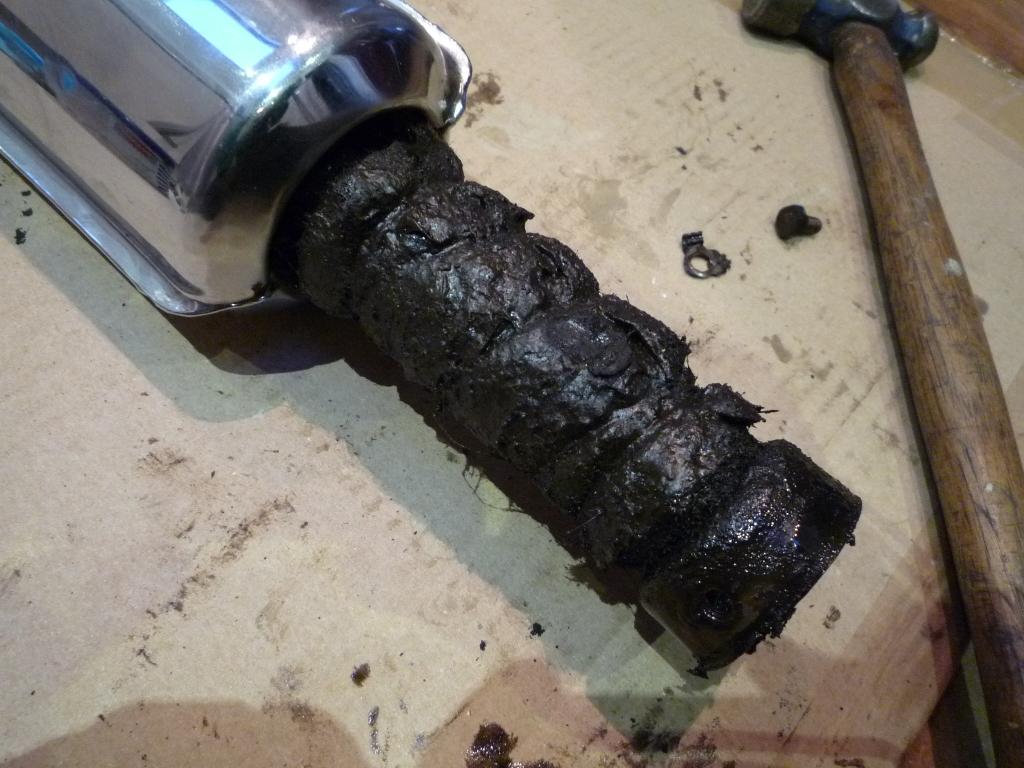
With the front indicators and headlamp removed the front end is now looking
bare.
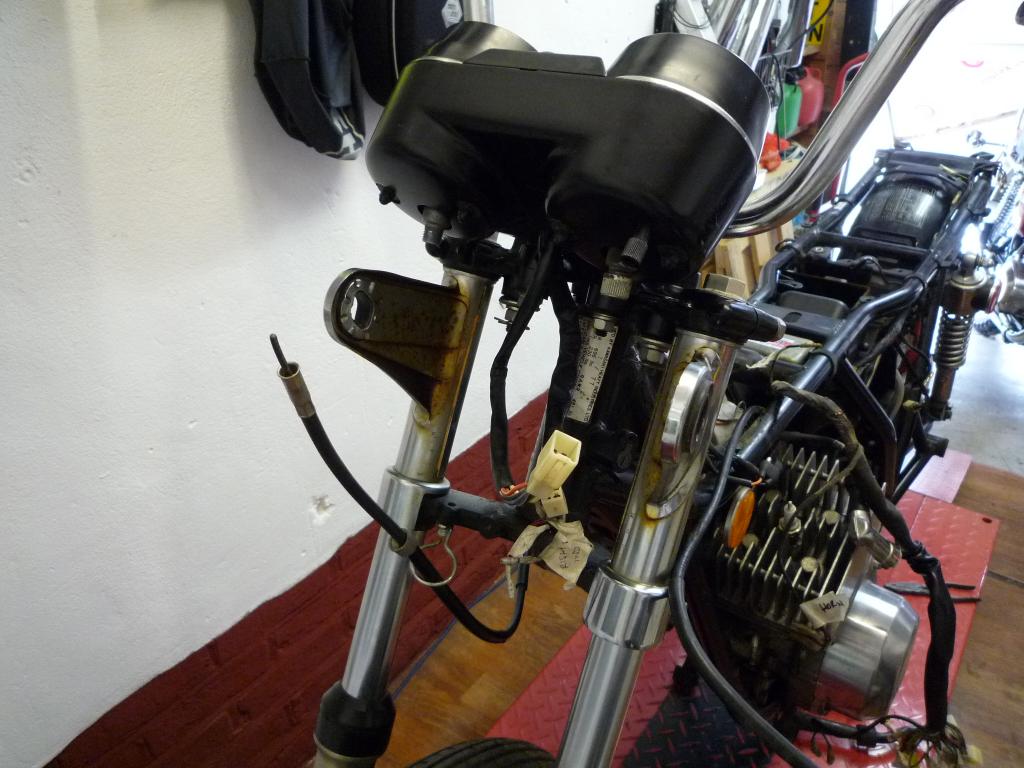
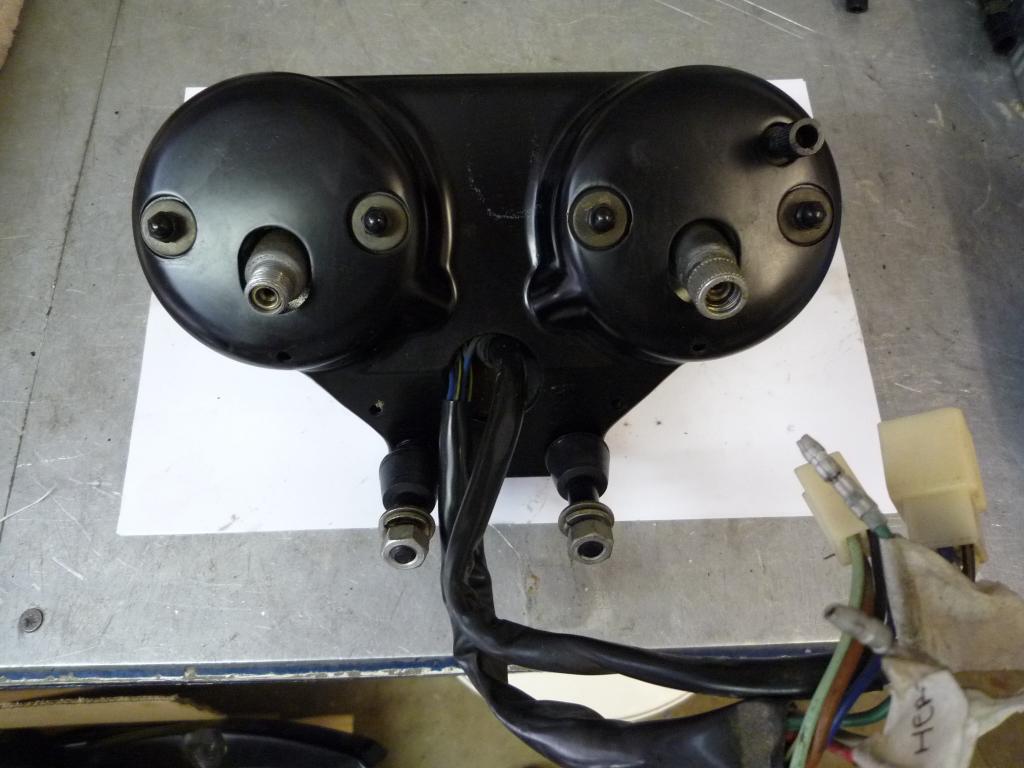
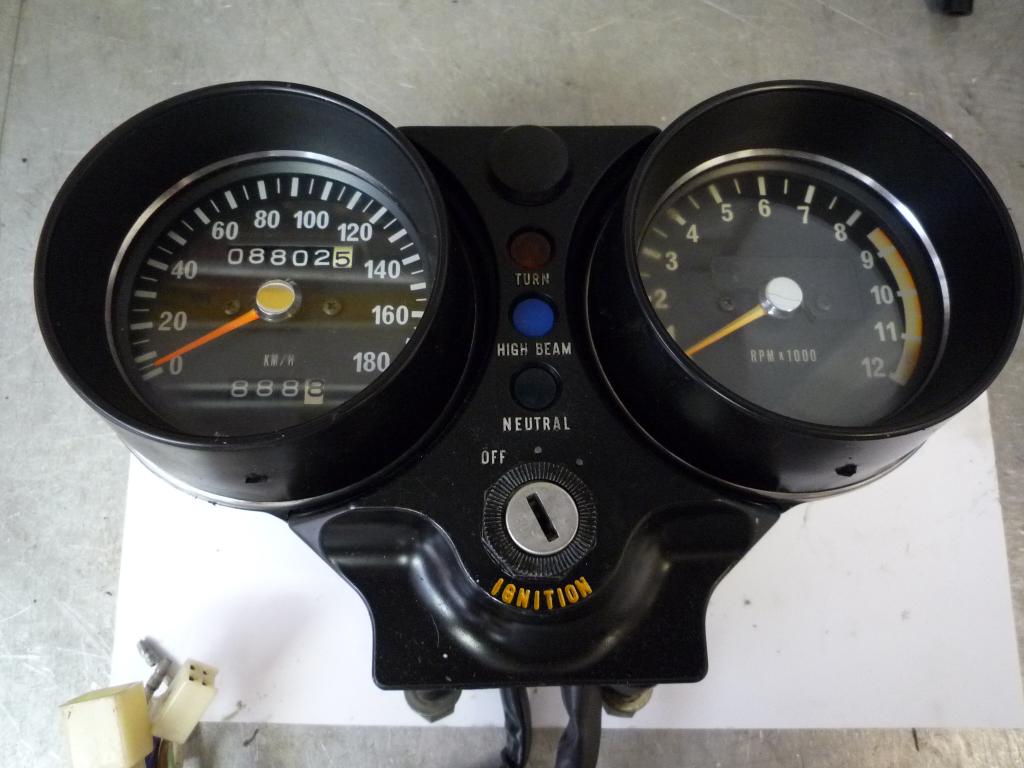
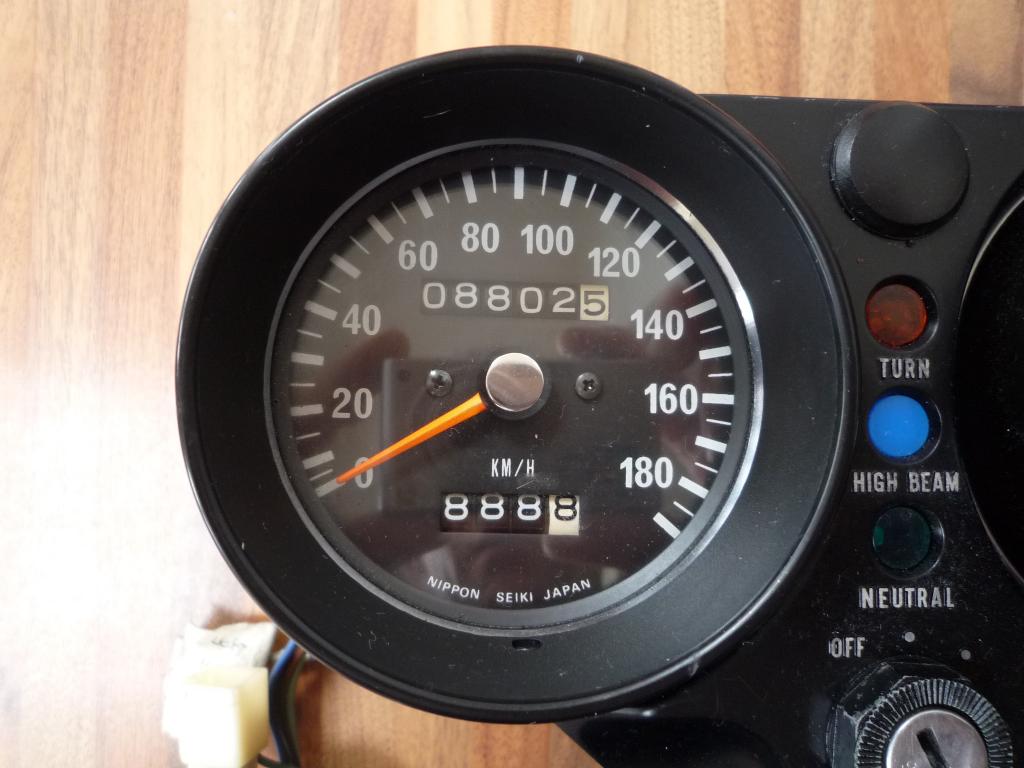
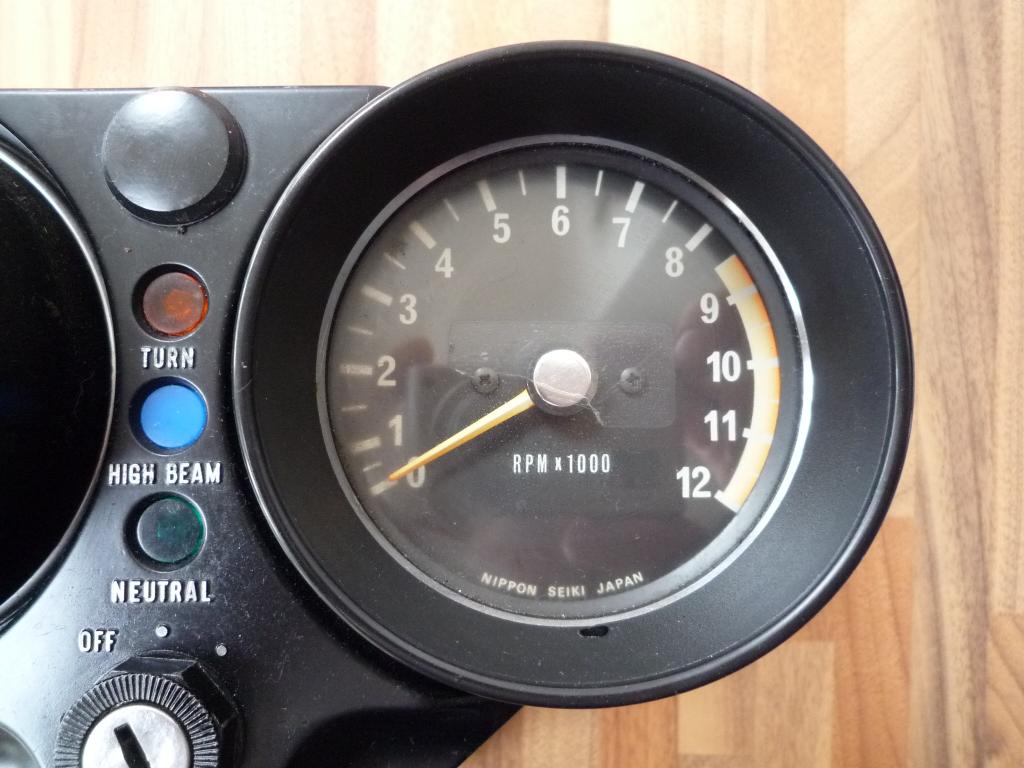
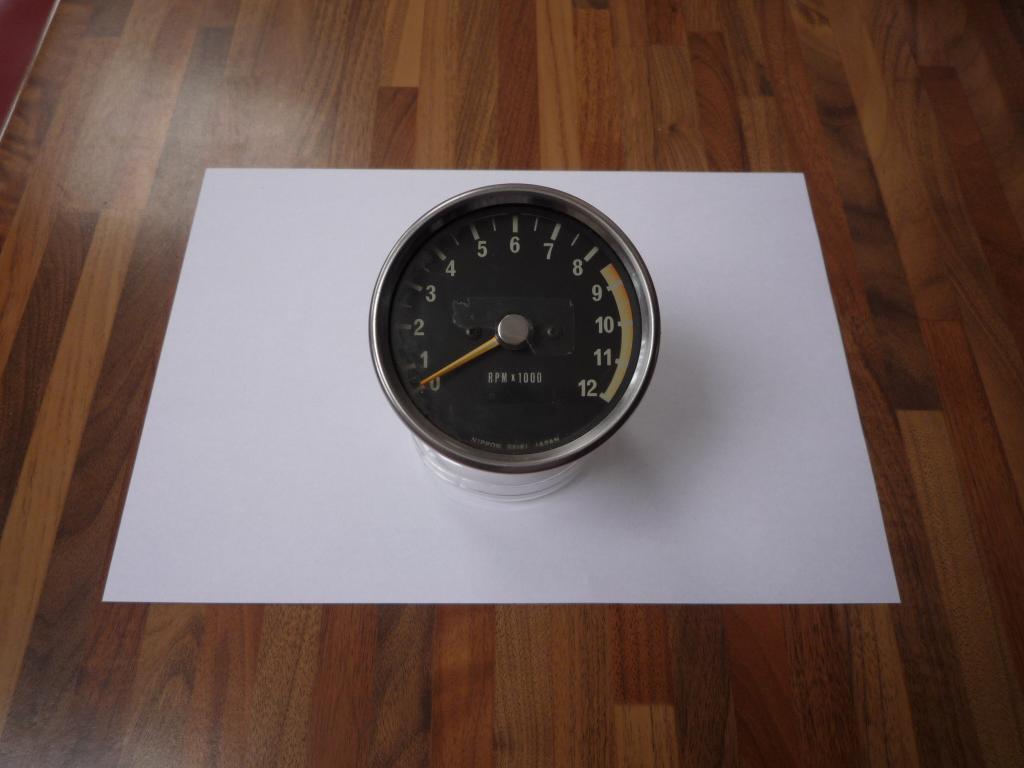
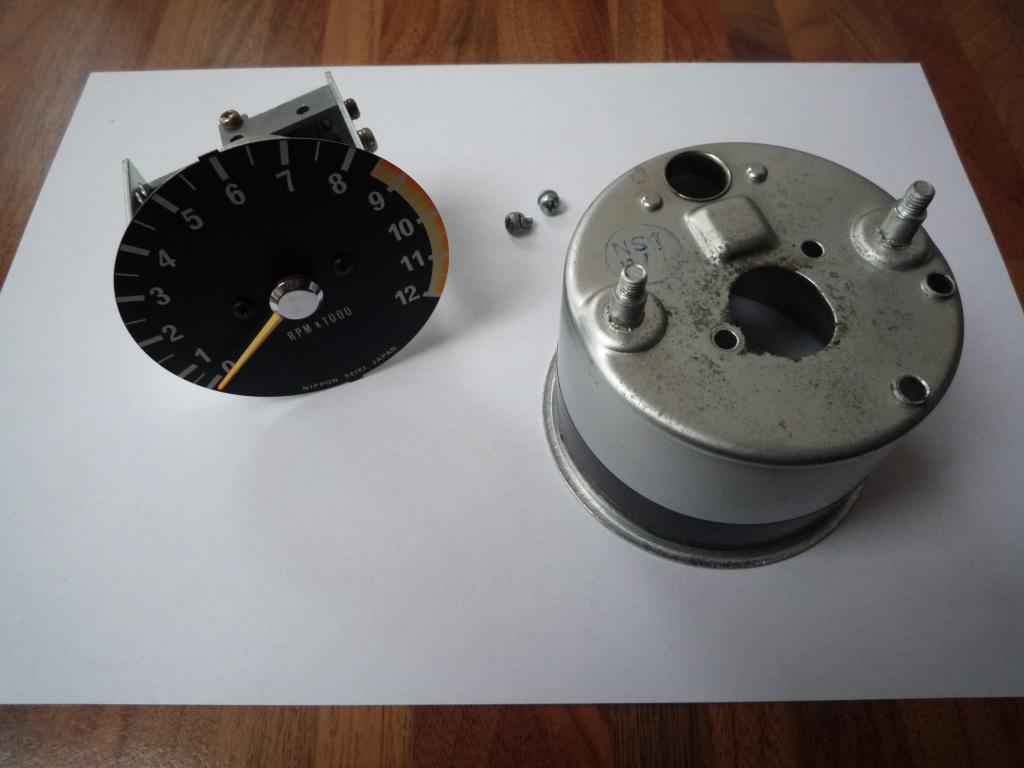
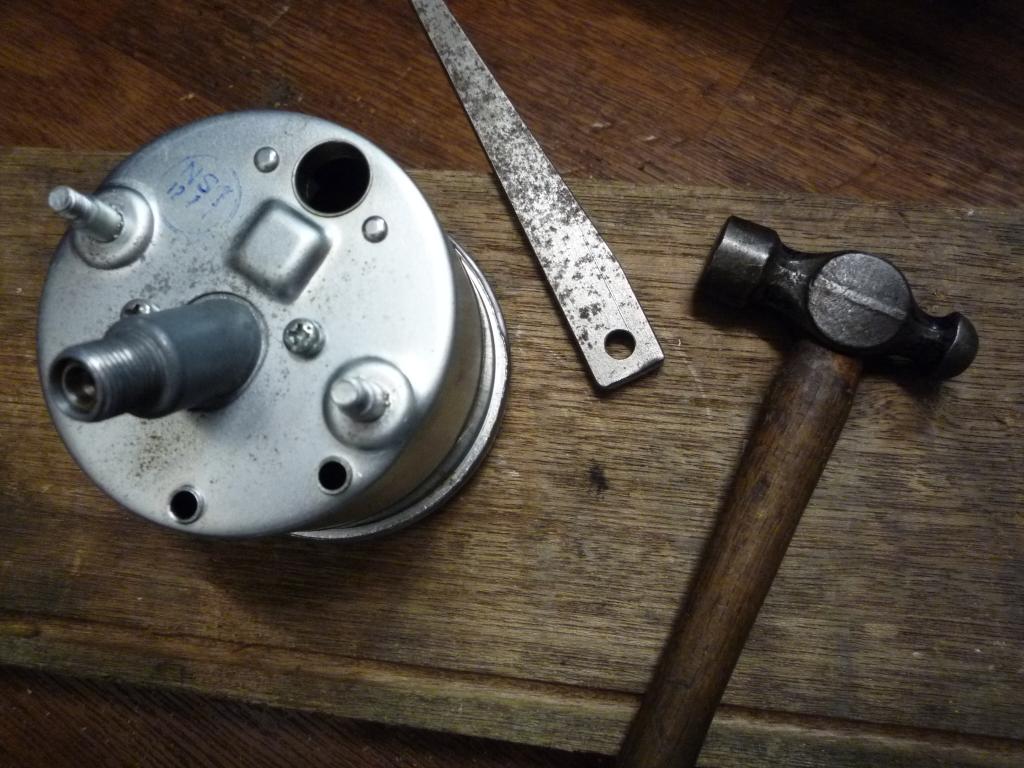
Clocks will be next
![]()
Clocks are now off and need a bit of a polish, though unfortunately the sun has faded the tacho line and needle so I may decide to go in and rectify that..
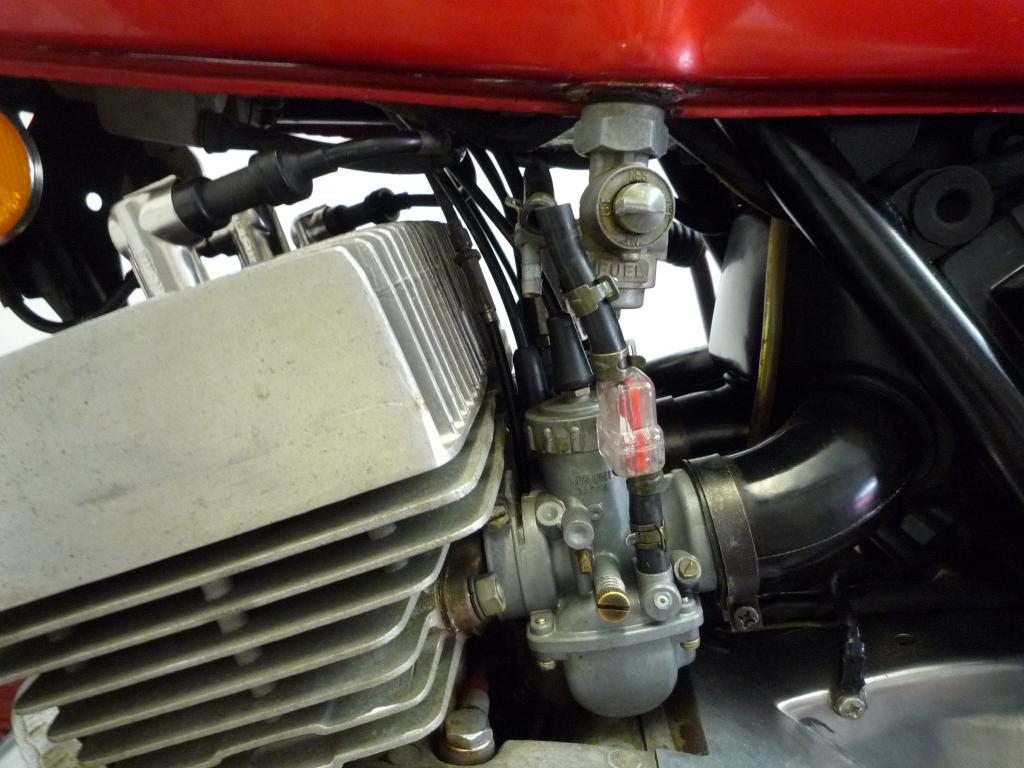
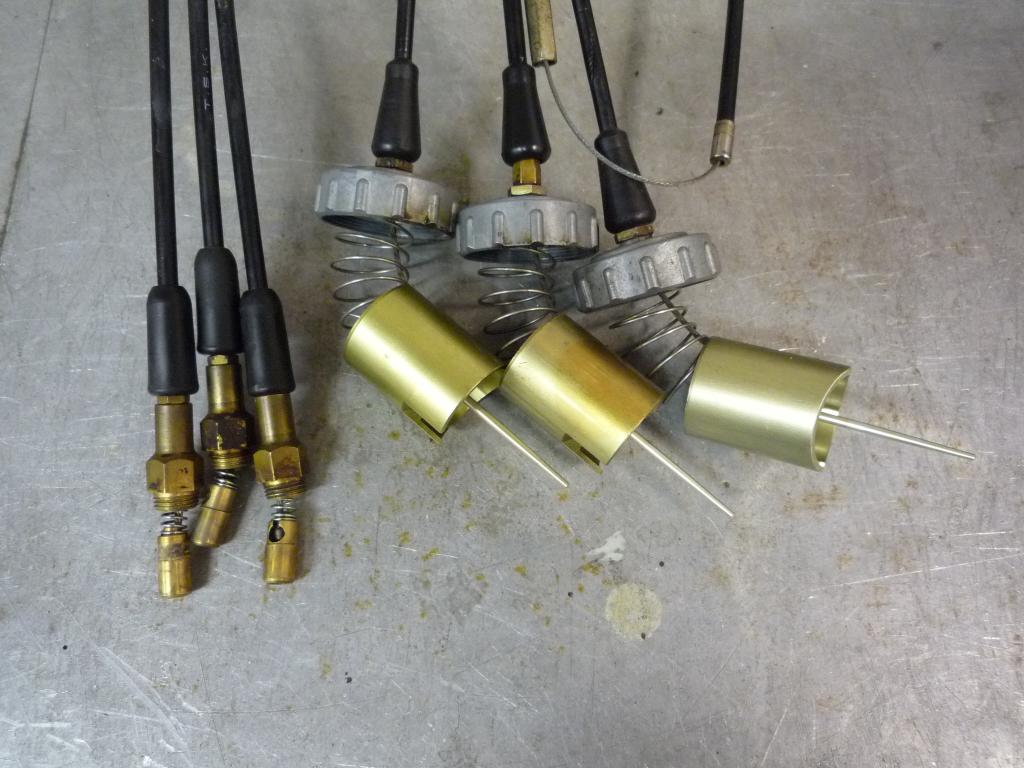
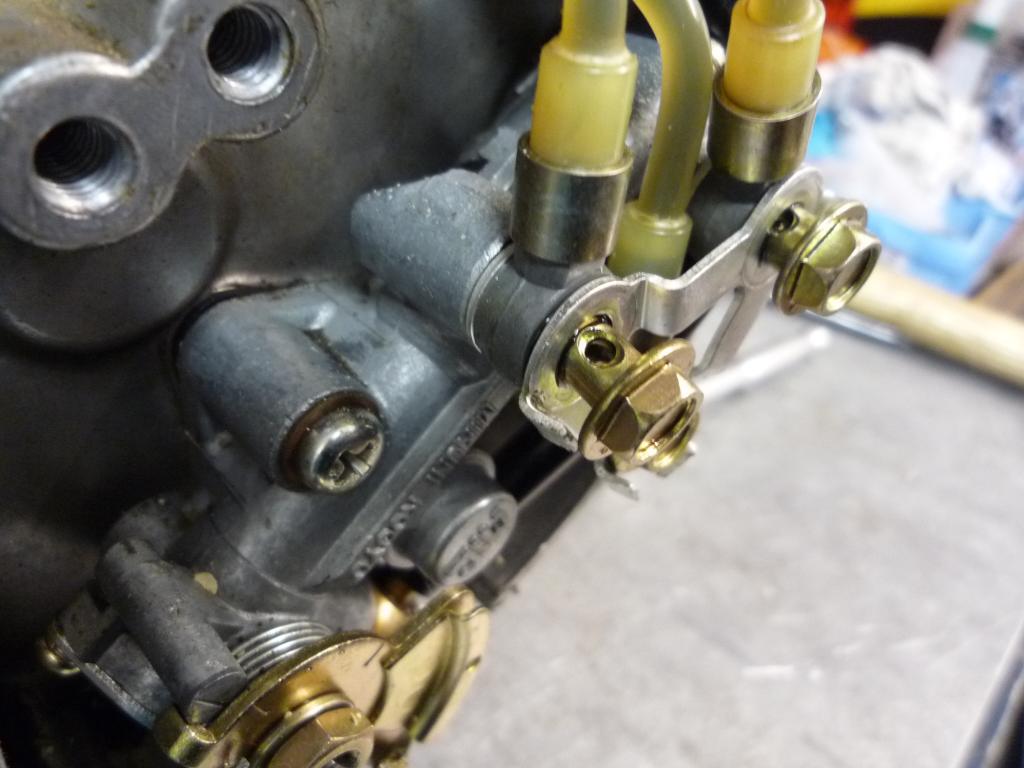
After disconnecting the oil line from the pump along with the choke cable and throttle cables... the carbs came off....inline filters free to whoever wants them.
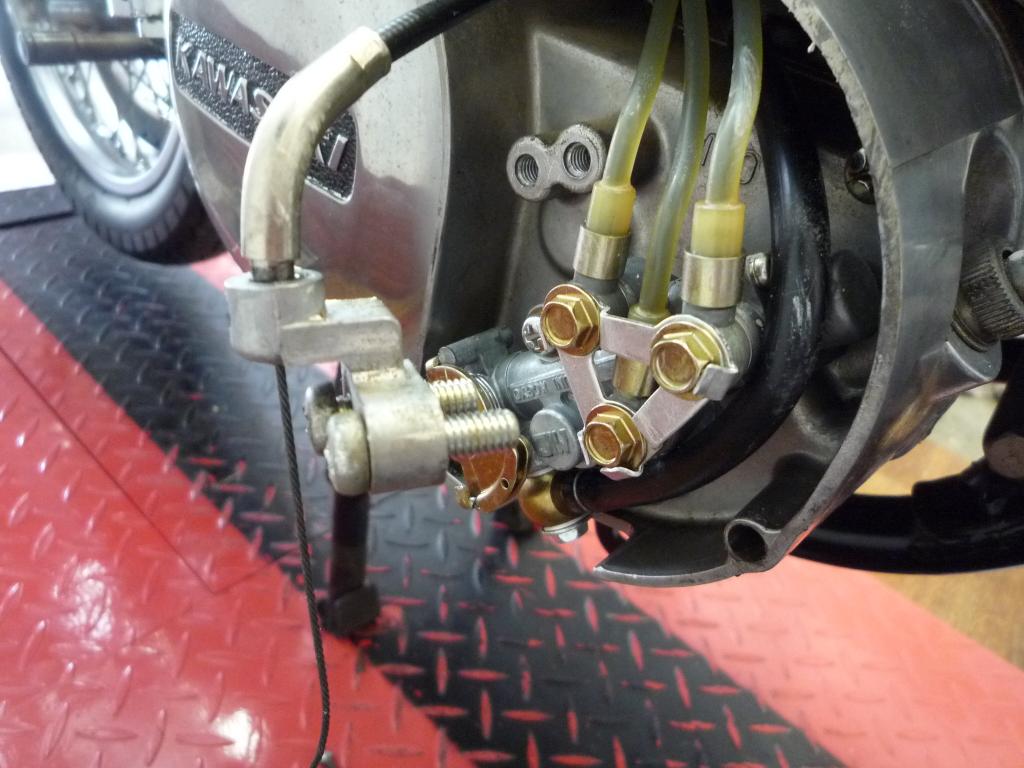


Carbs look to have been cleaned up but i will still give them a going over,
interestingly found two of the mounting nuts and one of the carb top sealing
rubbers lying in the top of the engine...Tut Tut
![]()
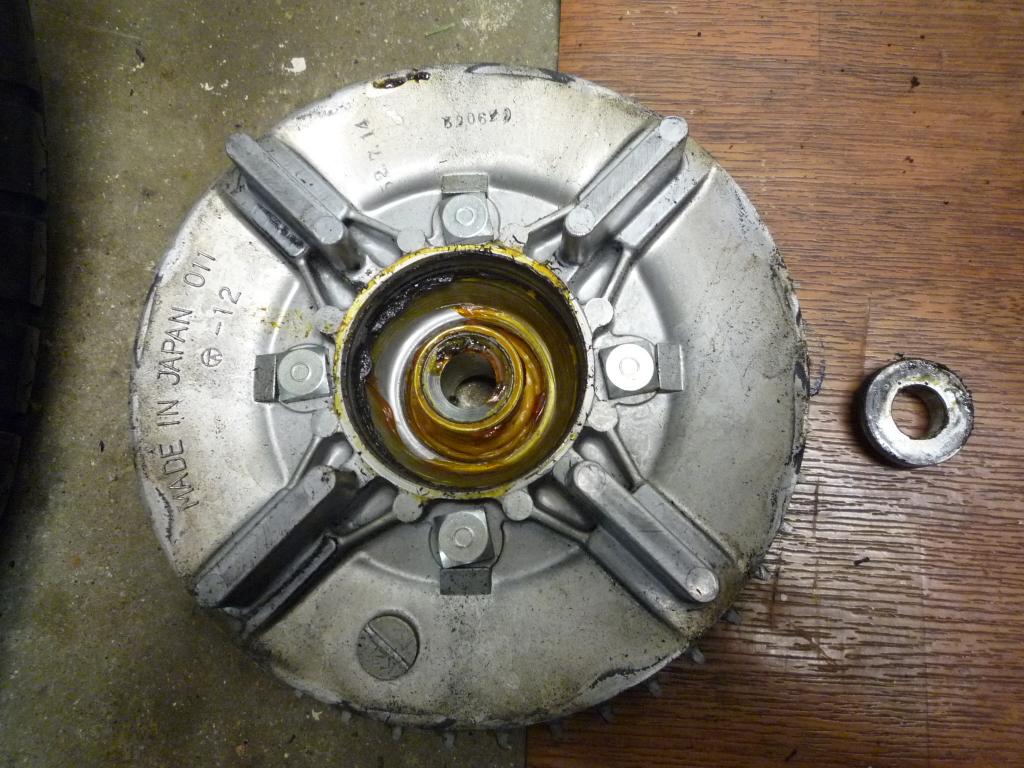
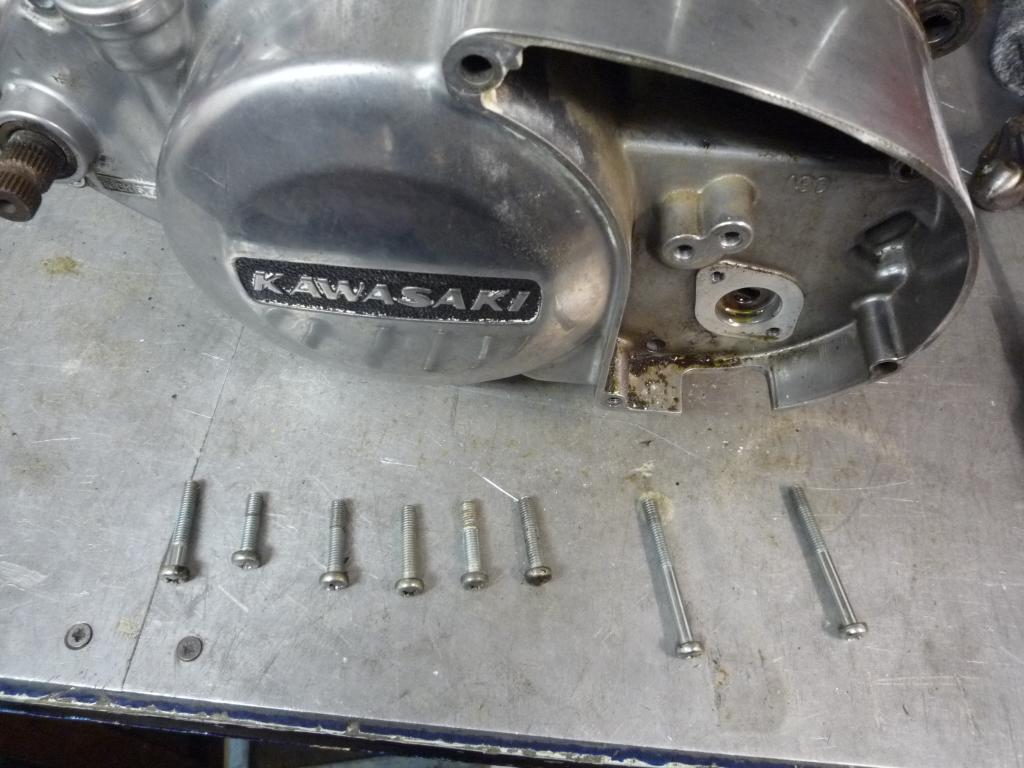
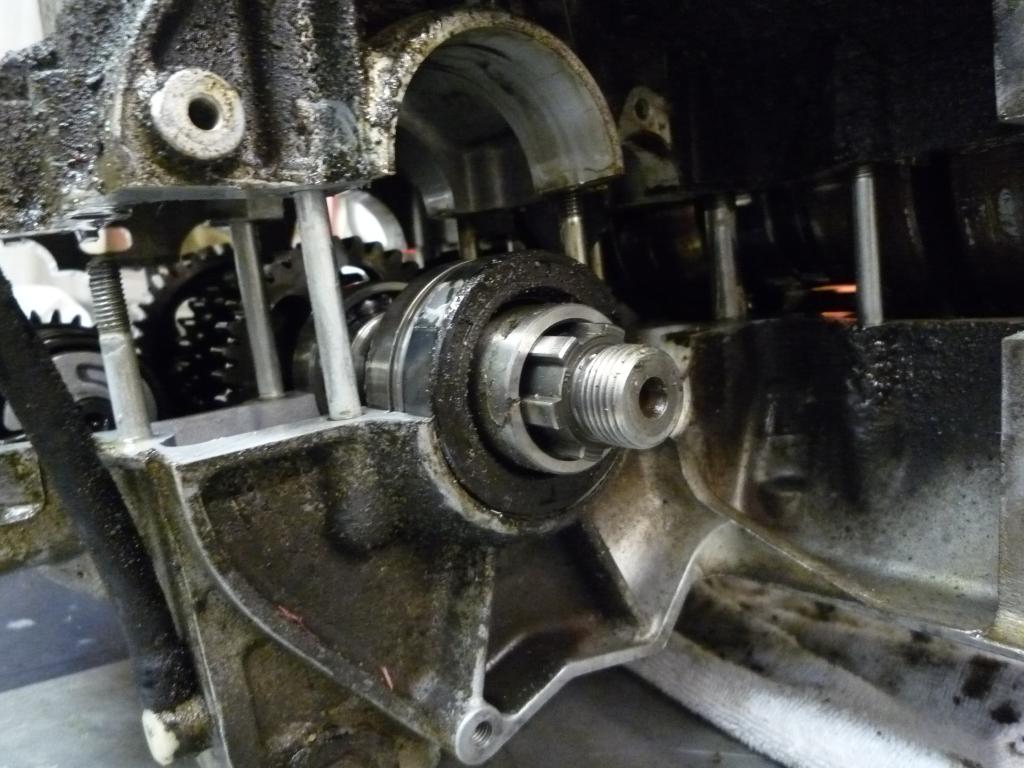
Forward sprocket removed and chain disconnected ready for engine removal.

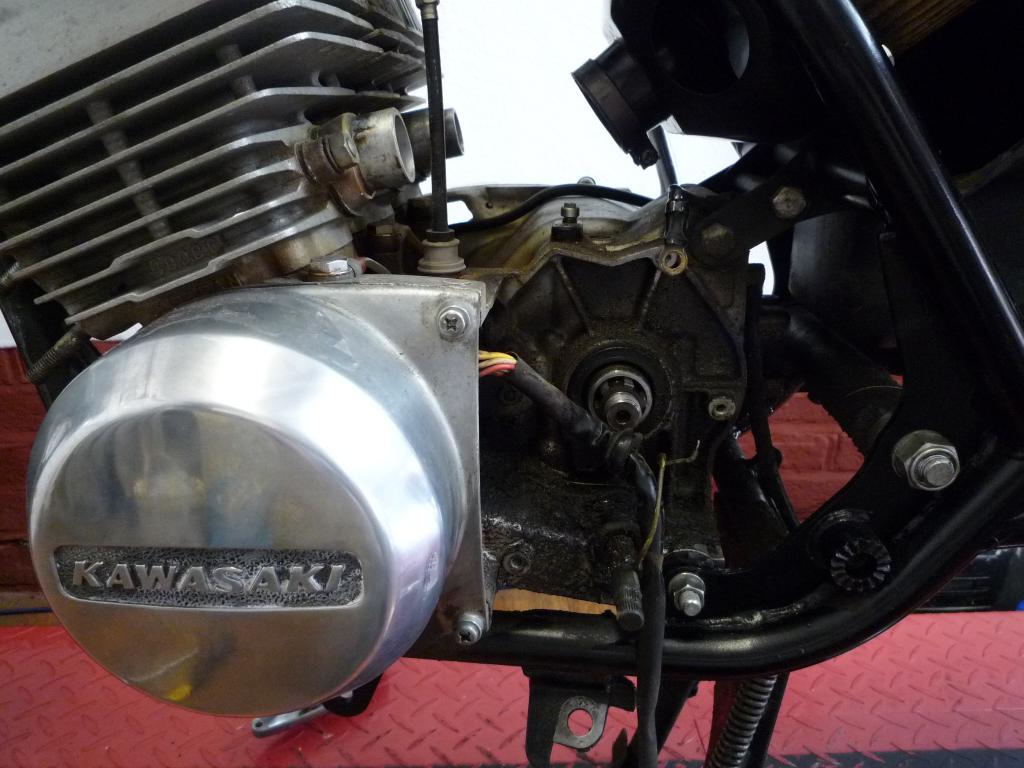
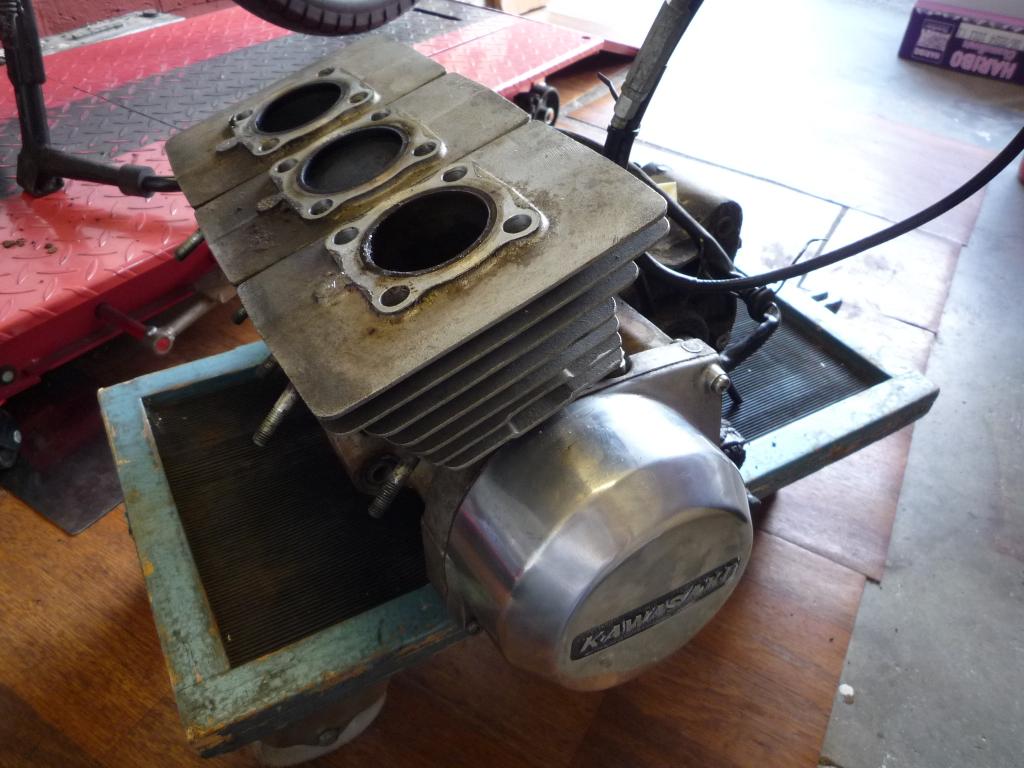
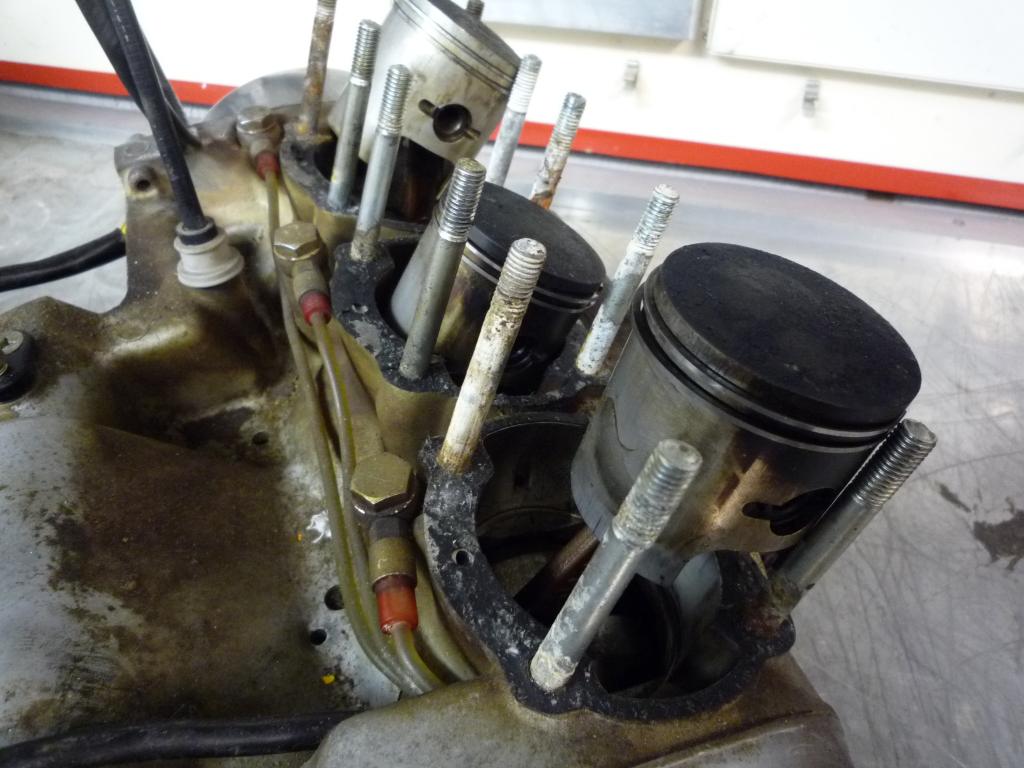
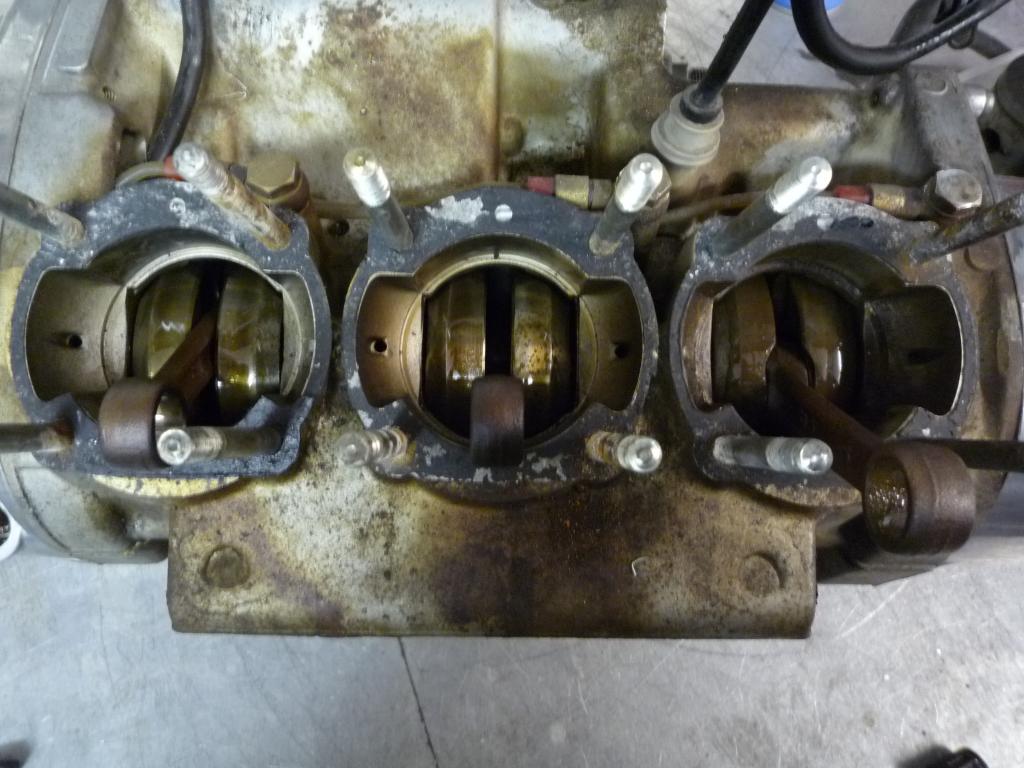
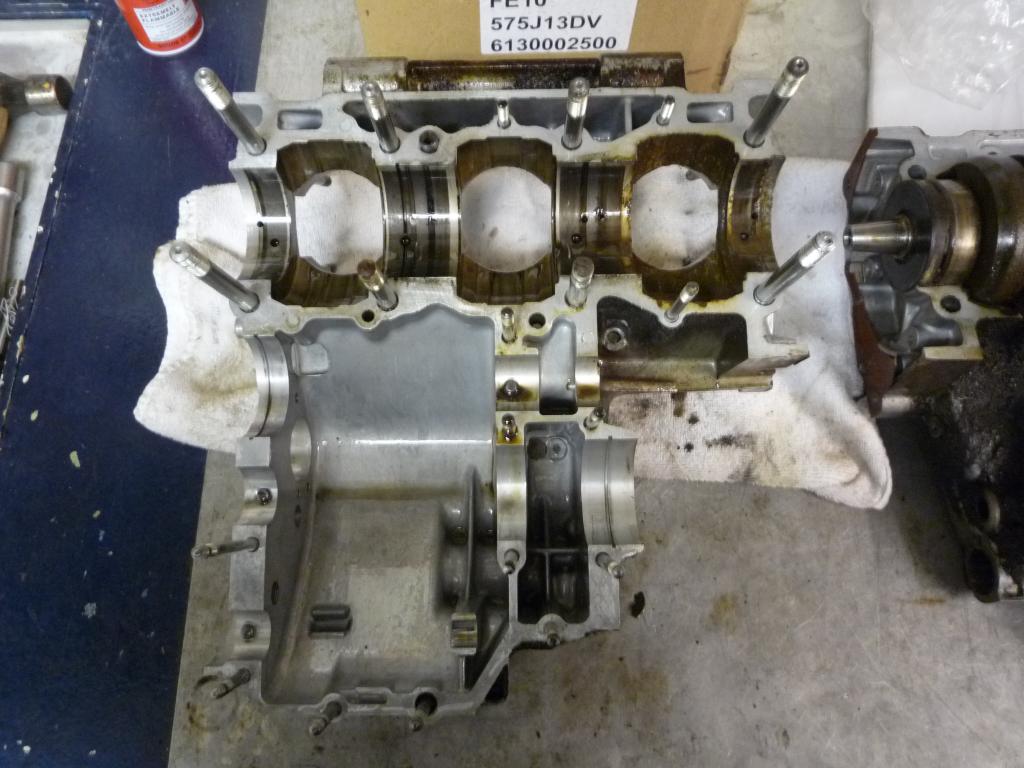
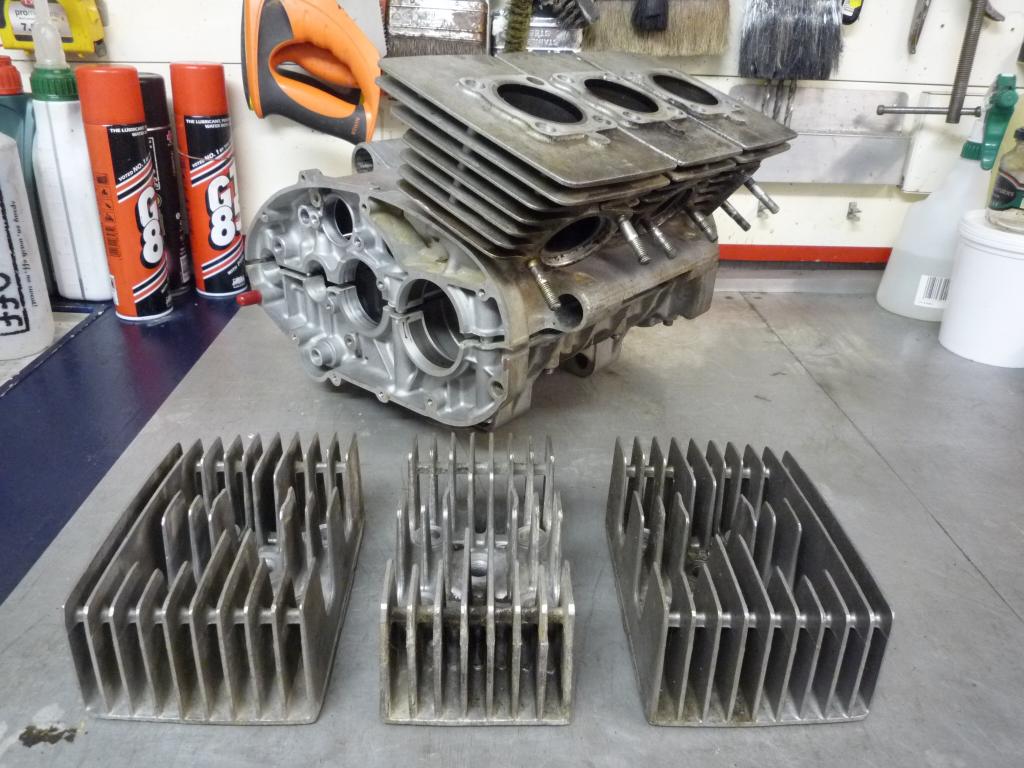
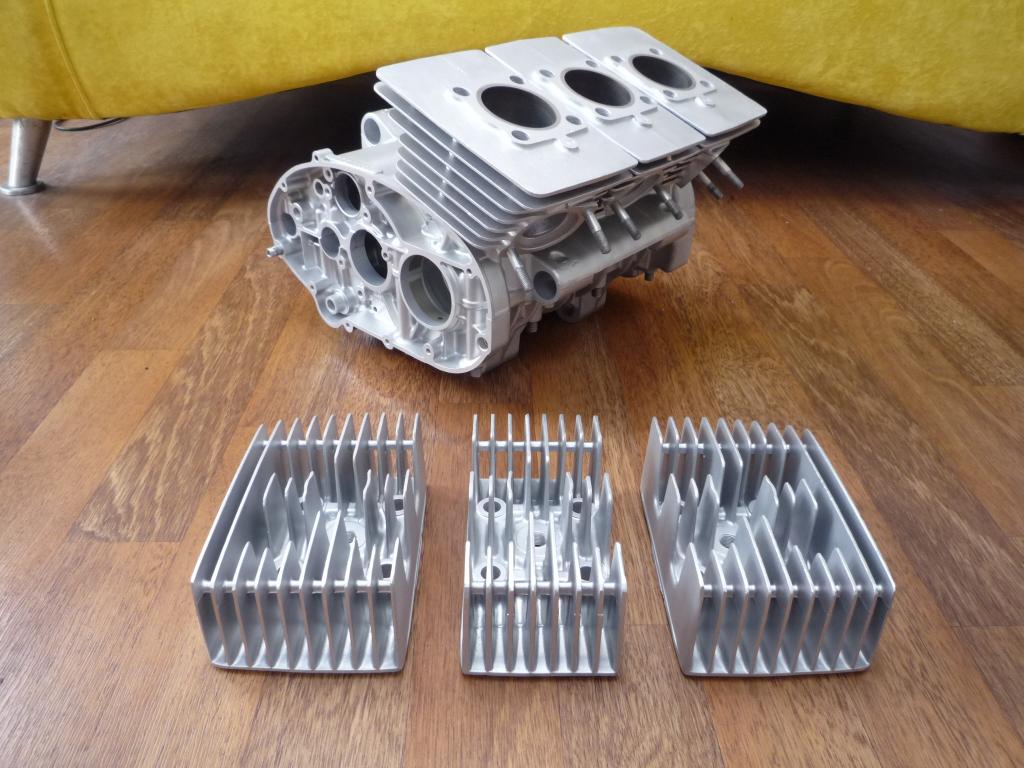
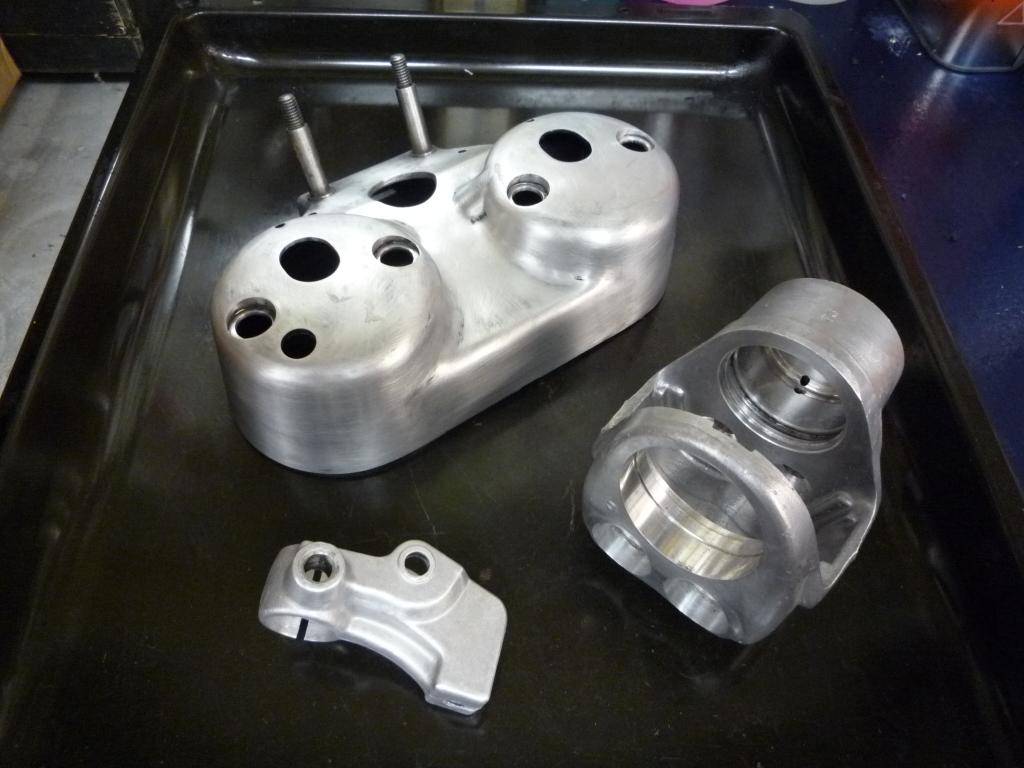
Time to take a first look inside of the engine aiming to remove the heads and barrels first.

First look looking promising, all heads off reveal 3 pistons Hurrah!
Barrels don't seem to want to move so I will leave them in place for now.
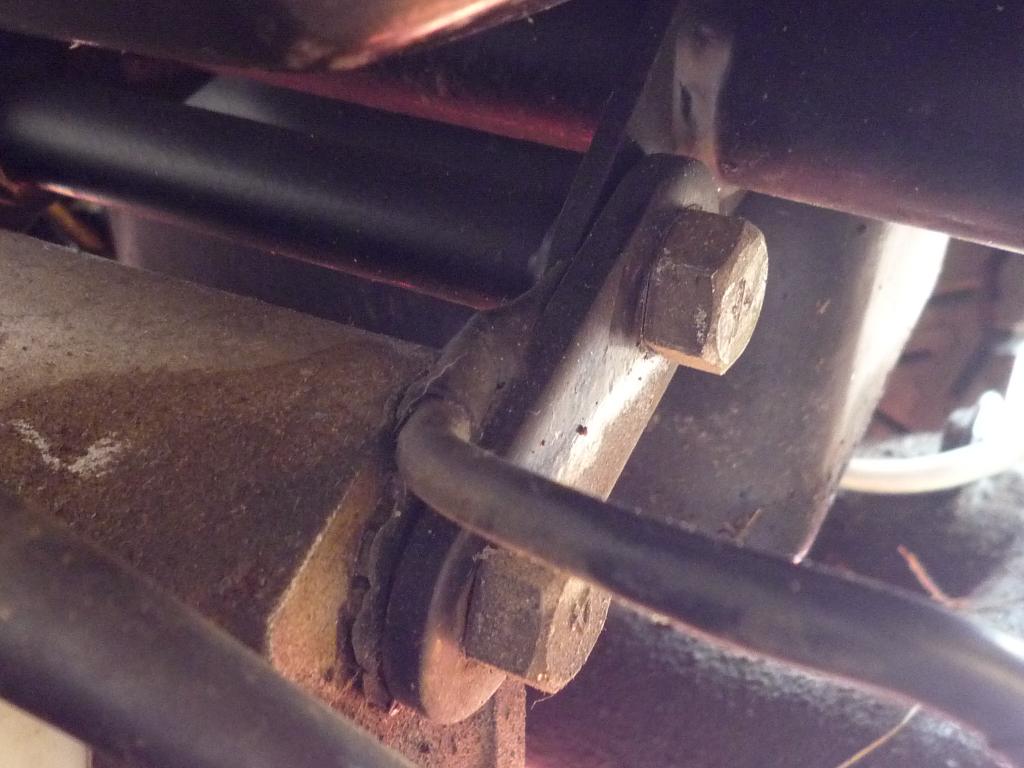
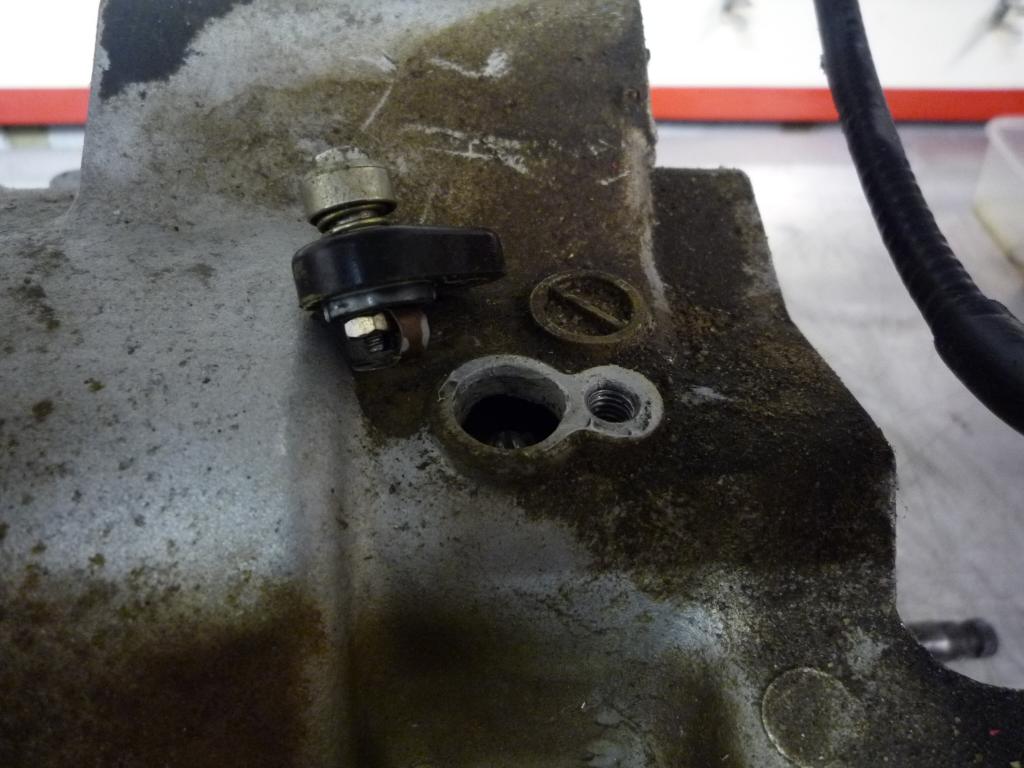
Started loosening the engine mount bolts taking note of the earthing lead on the upper rear mounting bolt.
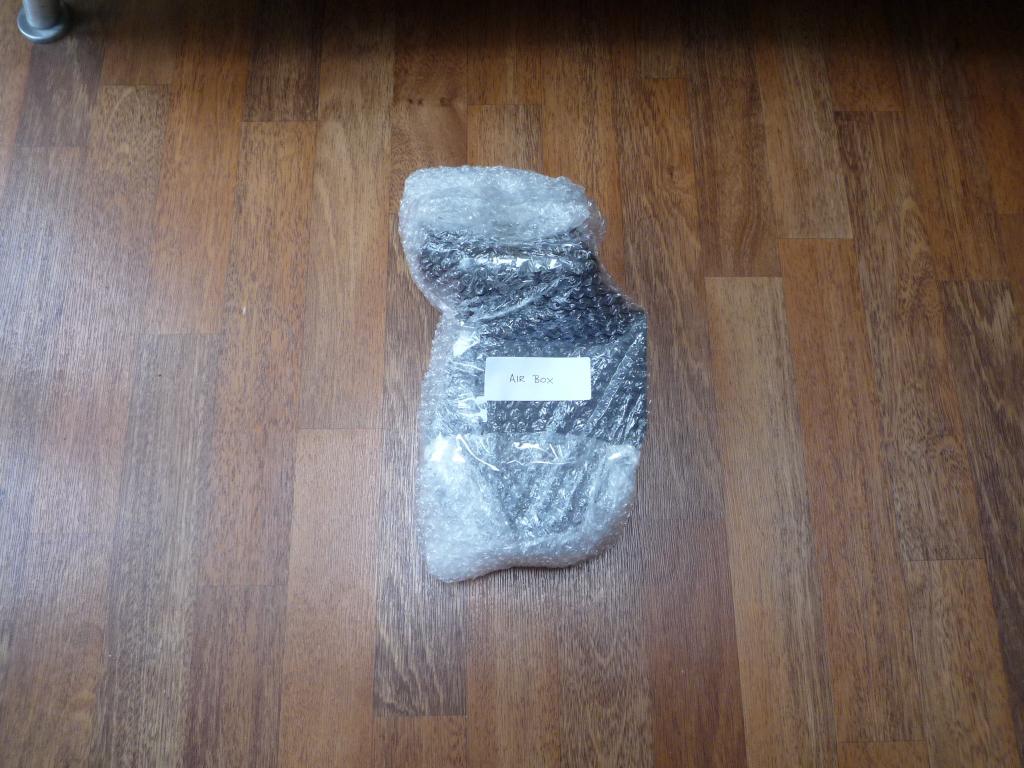
Then as luck would have it reinforcements turned up and the engine was out....

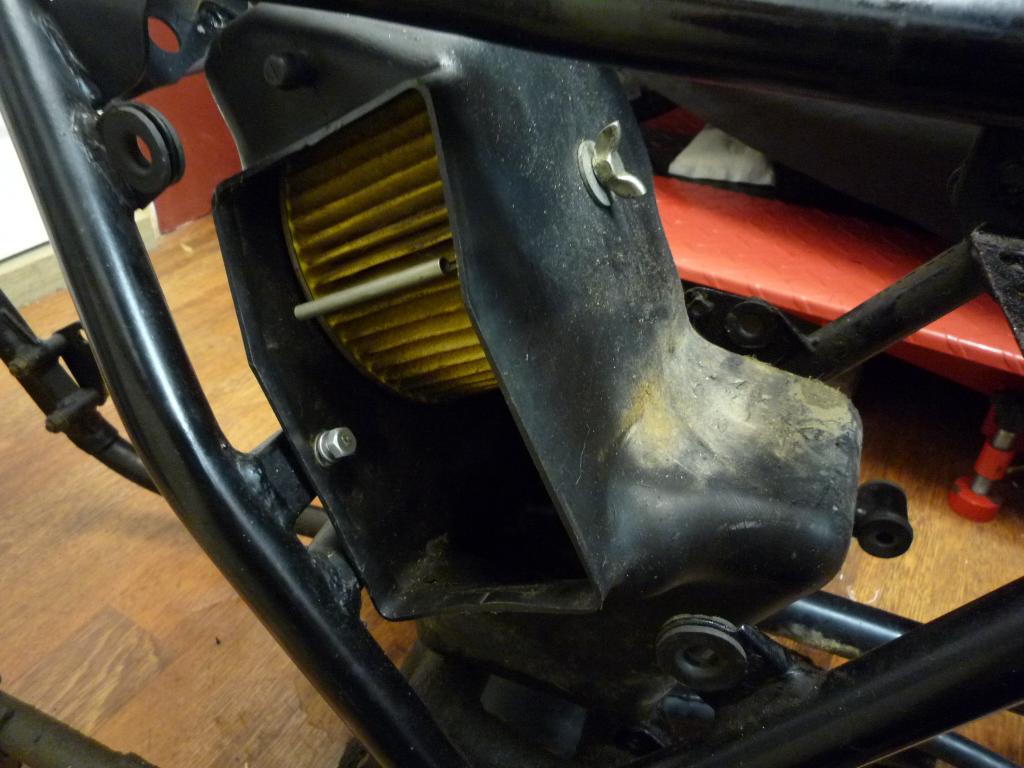
Still a little bit of work left for tomorrow........thought for today....."God
that airbox is BIG"
![]()
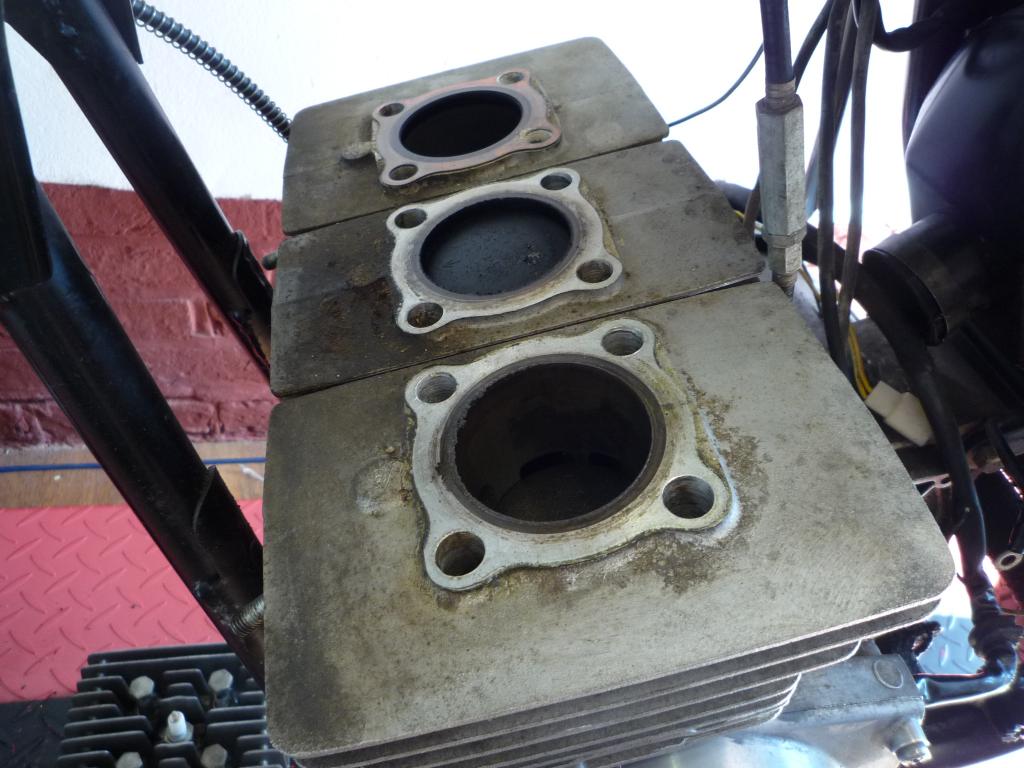
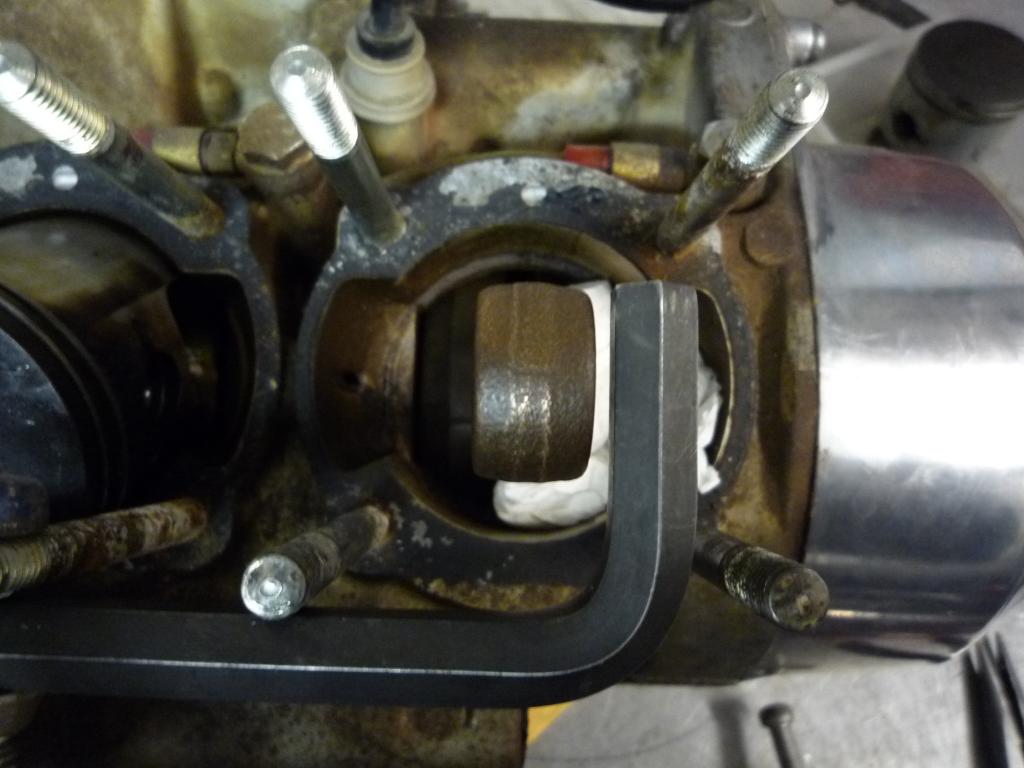
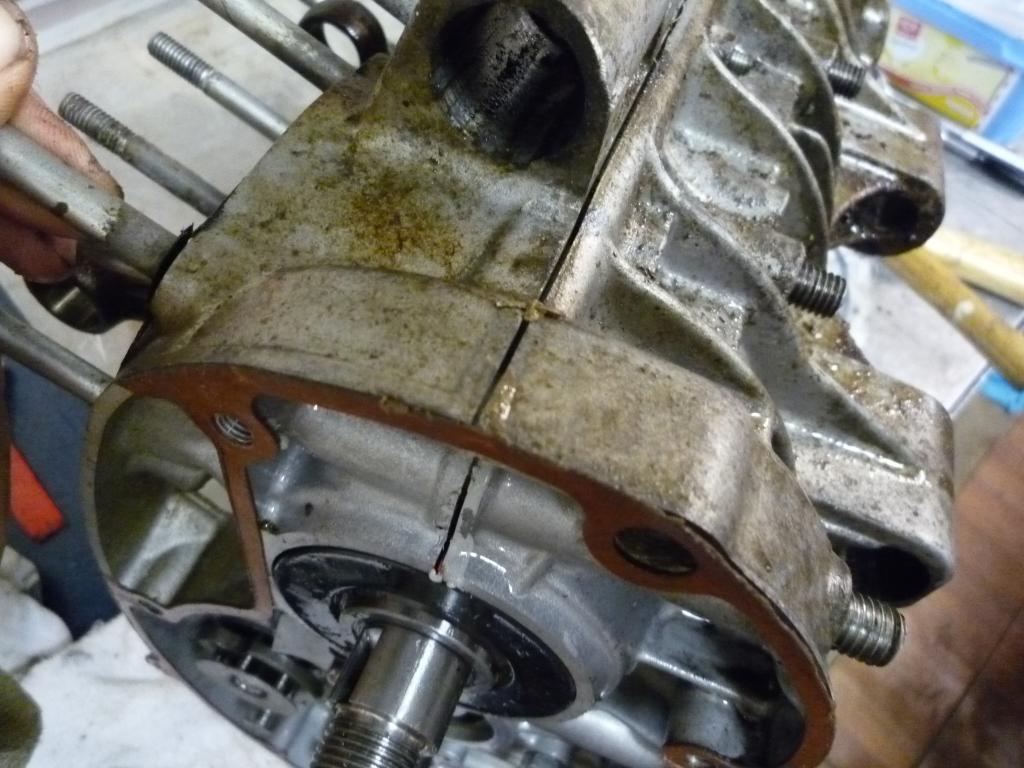
Well I wanted to remove the barrels today to check the
state of the crank, after a little bit of tapping they were off, right and
centre looking fairly good though the Gudgeon pins feel very loose in the piston
and rod end, left hand side not looking so good, very wet and mucky with a fair
bit of sideward play at the big end, not sure what might have caused this but it
looks like engine rebuild as I suspected ![]()
Right hand......... Left hand..........


Well I am still yet to strip down the rolling chassis
of the 400 but I will have to do it soon as I keep banging my shins on it as I
move around the garage
![]()
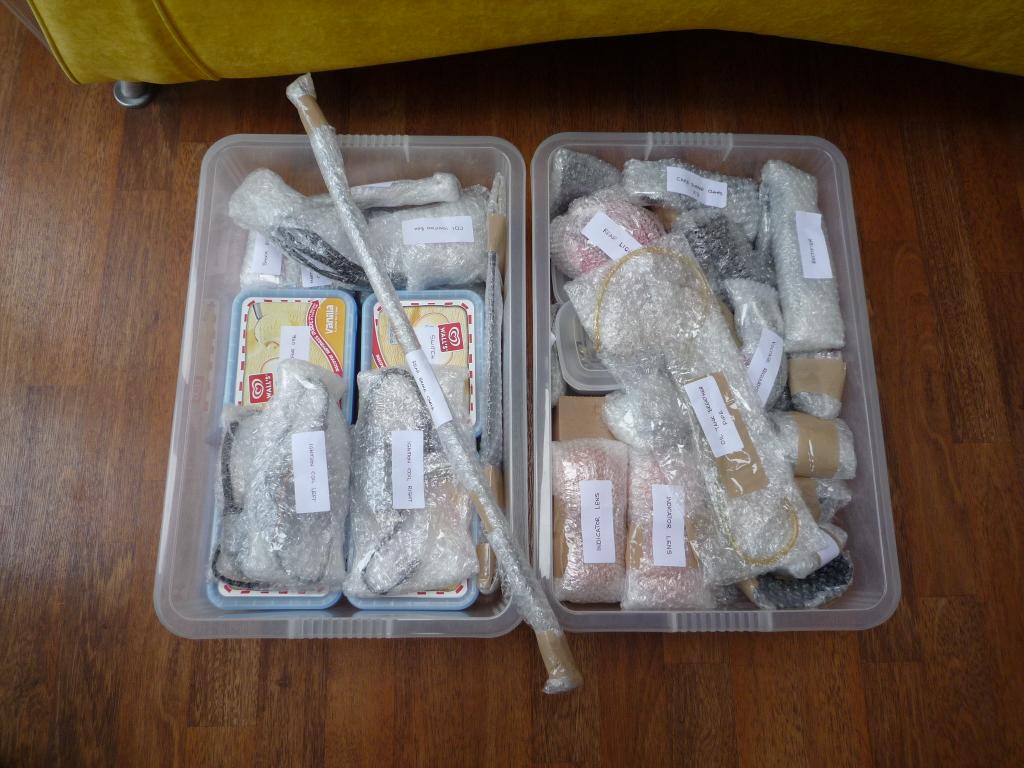
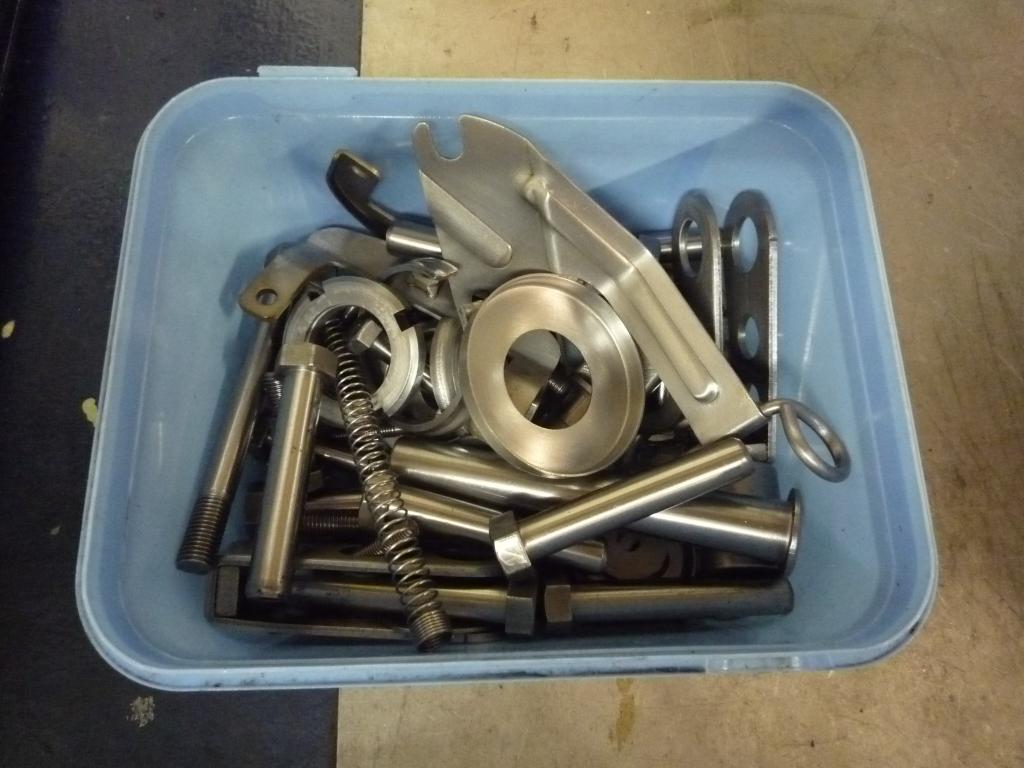
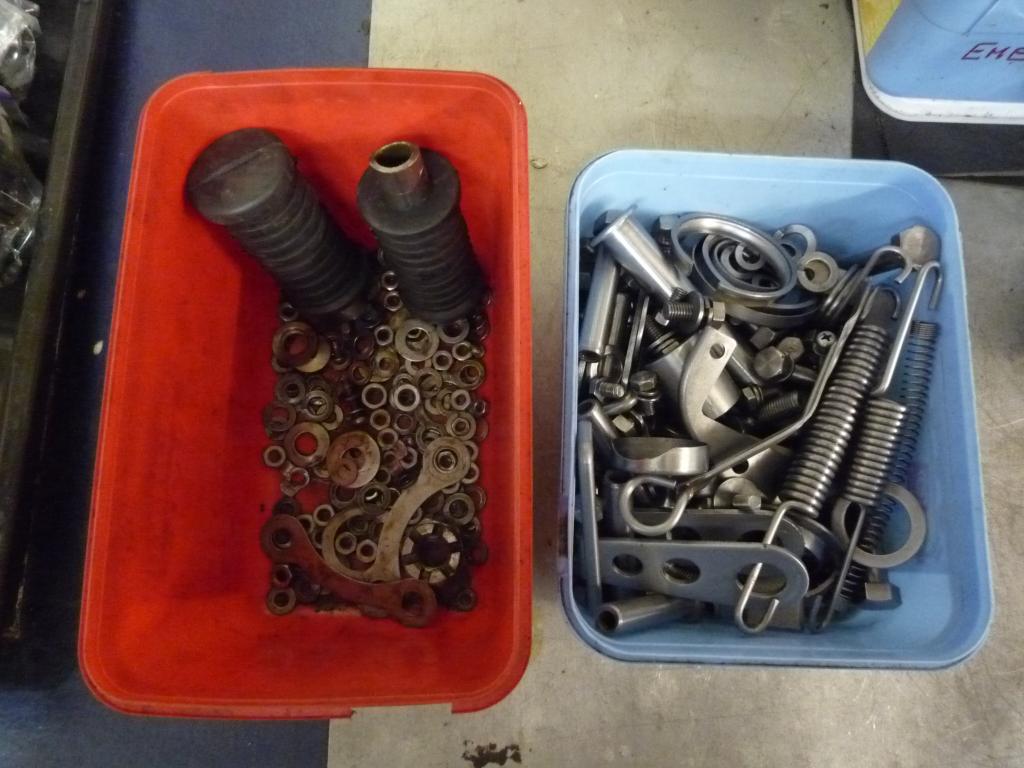
I have been busy cleaning up and sifting through the various parts and I am now
on to my second storage box so some progress is being made and I am thoroughly
enjoying time spent fettling in the Kitchen.
Happy to see a lot of parts just needing a dam good
clean to revive them and each part saved is keeping money towards paint and
chrome etc.
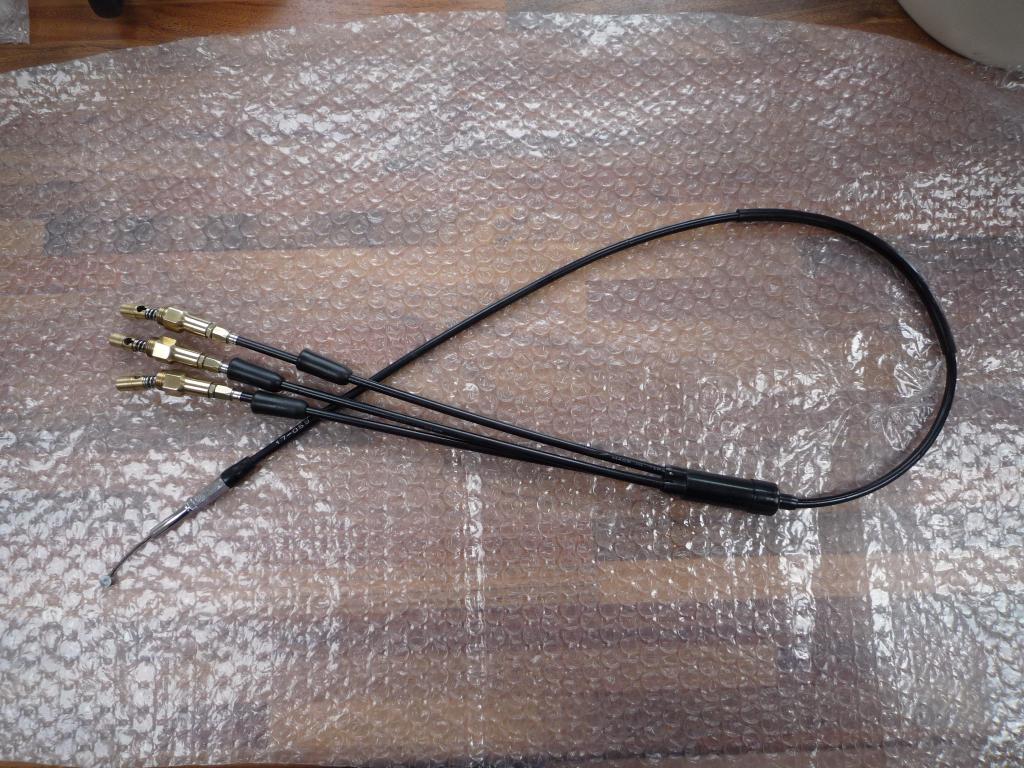
Choke starter cable is just one item less to replace and its now all cleaned up
ready to pack away the next time it comes out of the box it will be to fit it.
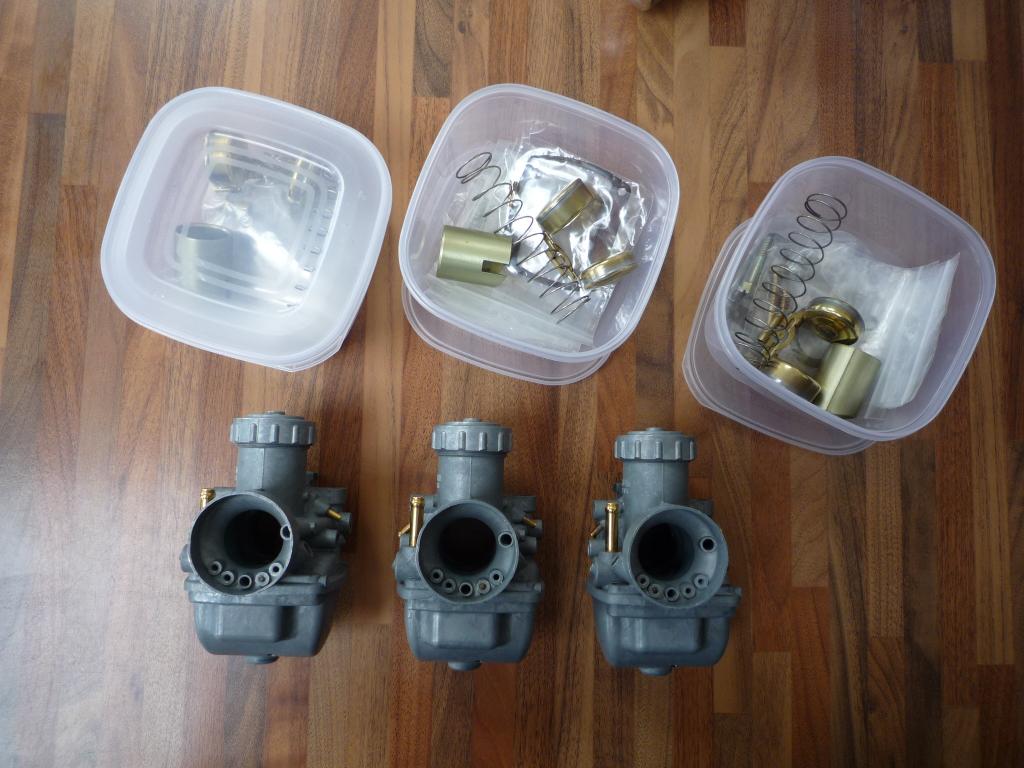
Carbs have been stripped, cleaned and sorted, anything
that requires further attention is directed to another empty ice cream tub, Kids
can't eat it quick enough
![]()
Indicators stripped, showing the different components and the longer stem set up fitted to this bike.
Clocks ready to take apart and be restored (spurred on
by Brian Sausagero2001 and Dave bluesunbeam) thanks for the tips chaps ![]()
Interestingly found a picture of another Canadian 400, same colour as mine with these clocks fitted, not sure of the model year but must be very close to mine. (apologies for borrowing the picture)
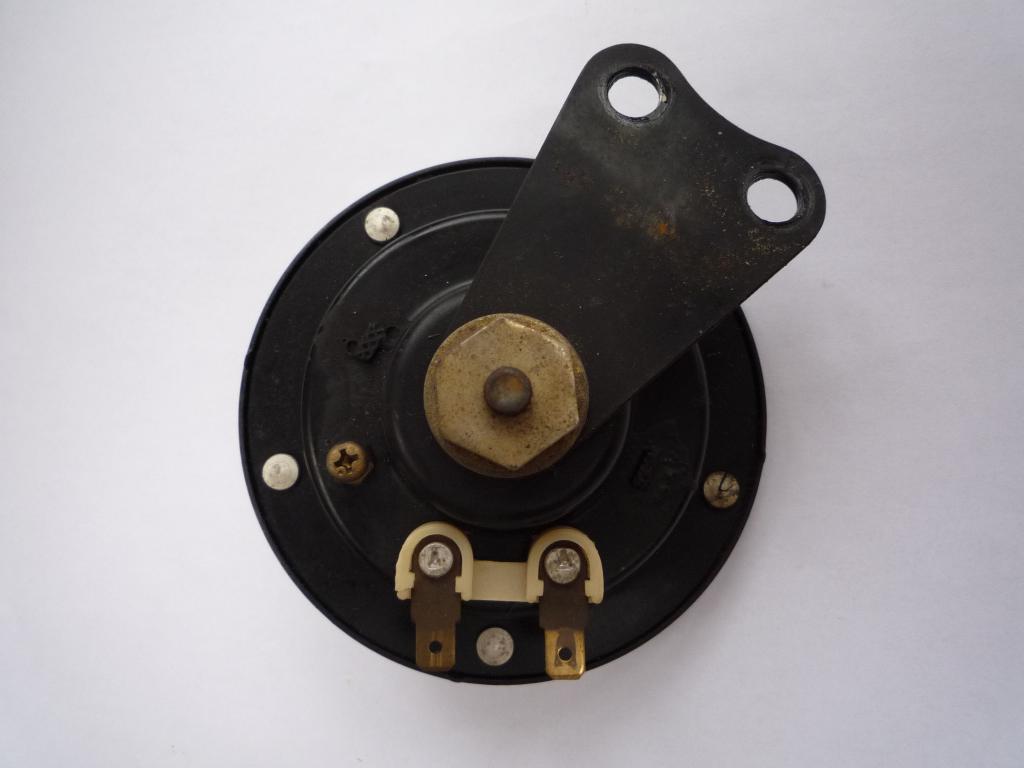
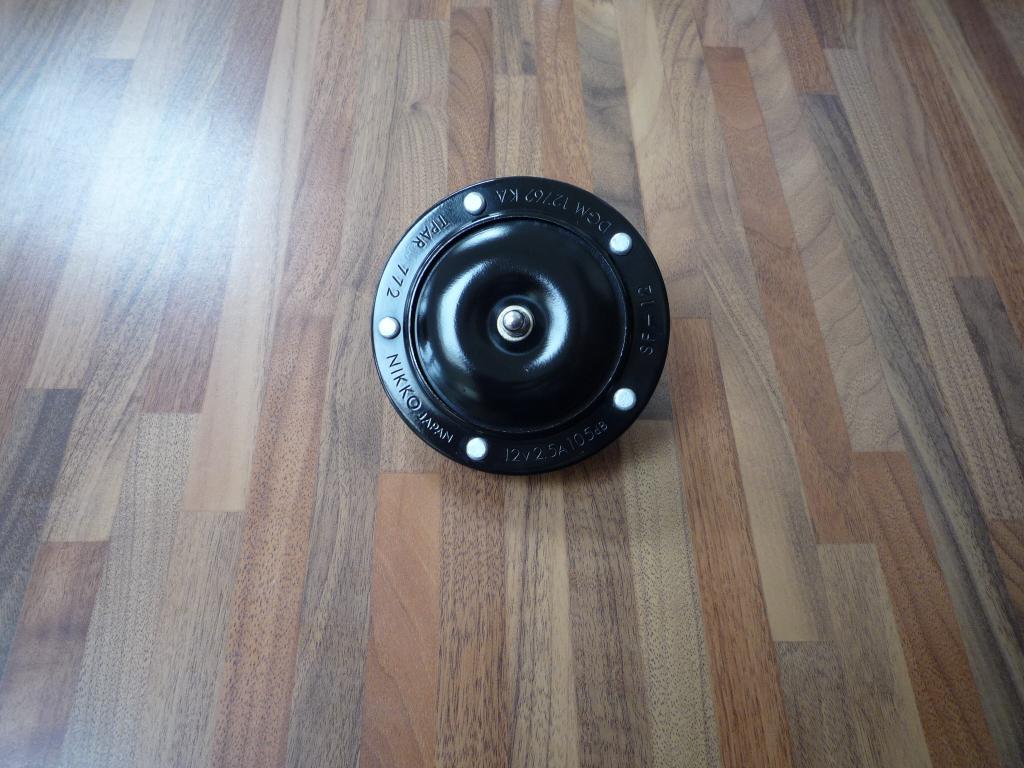
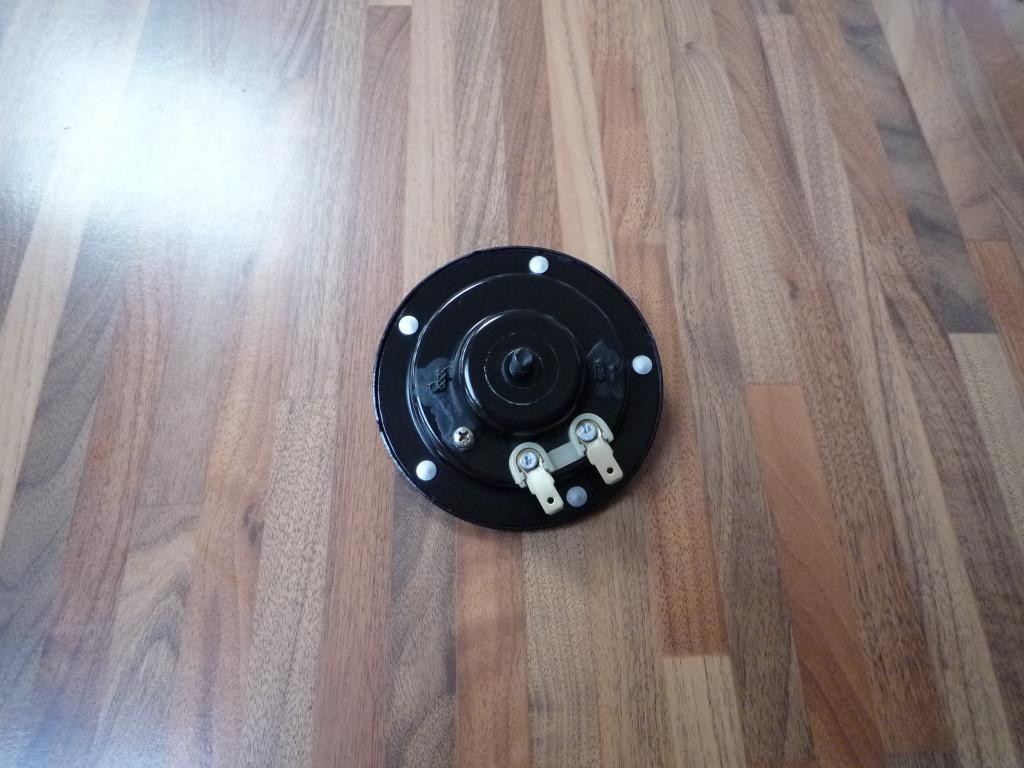
Horn was another lucky clean up.
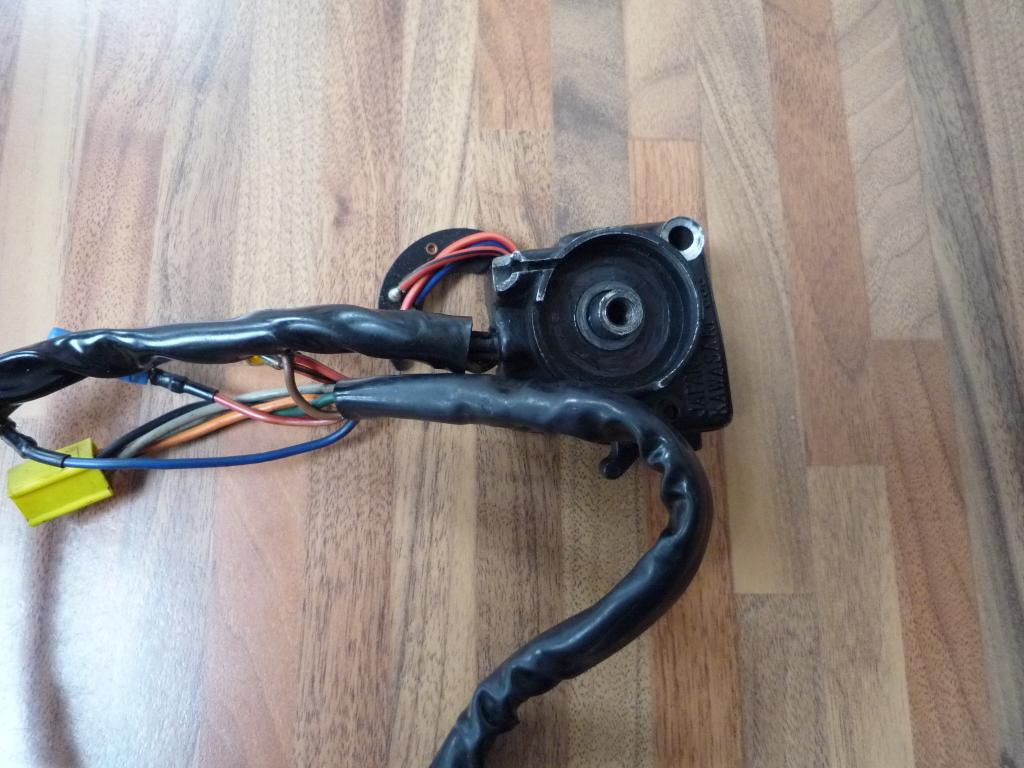
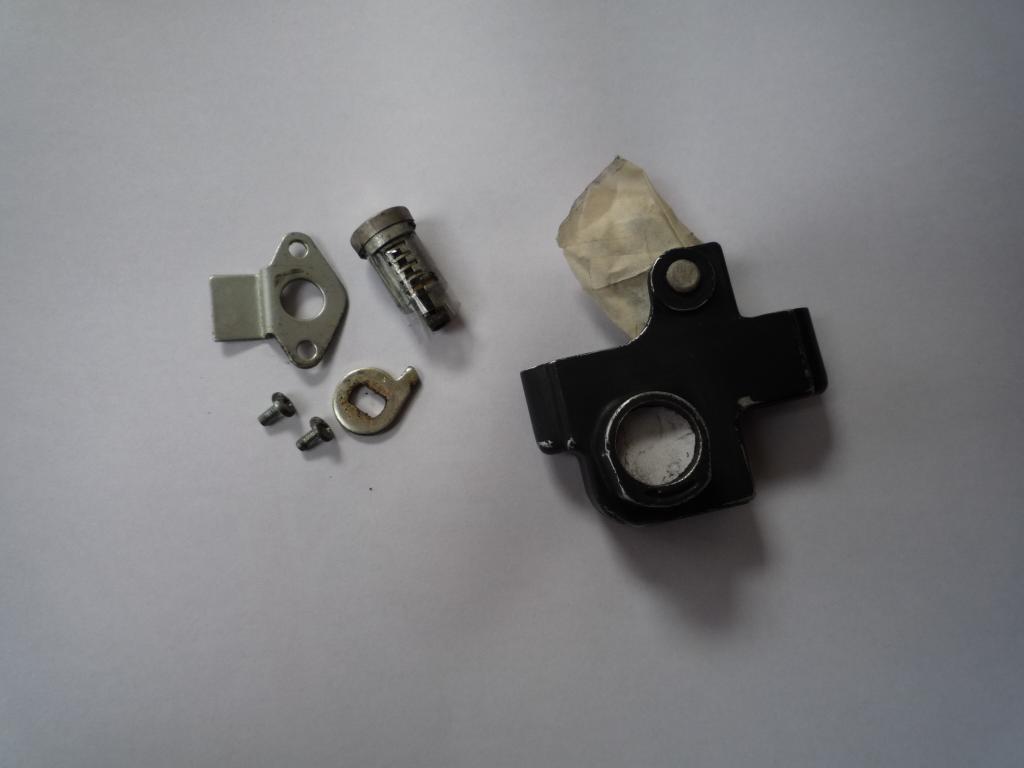
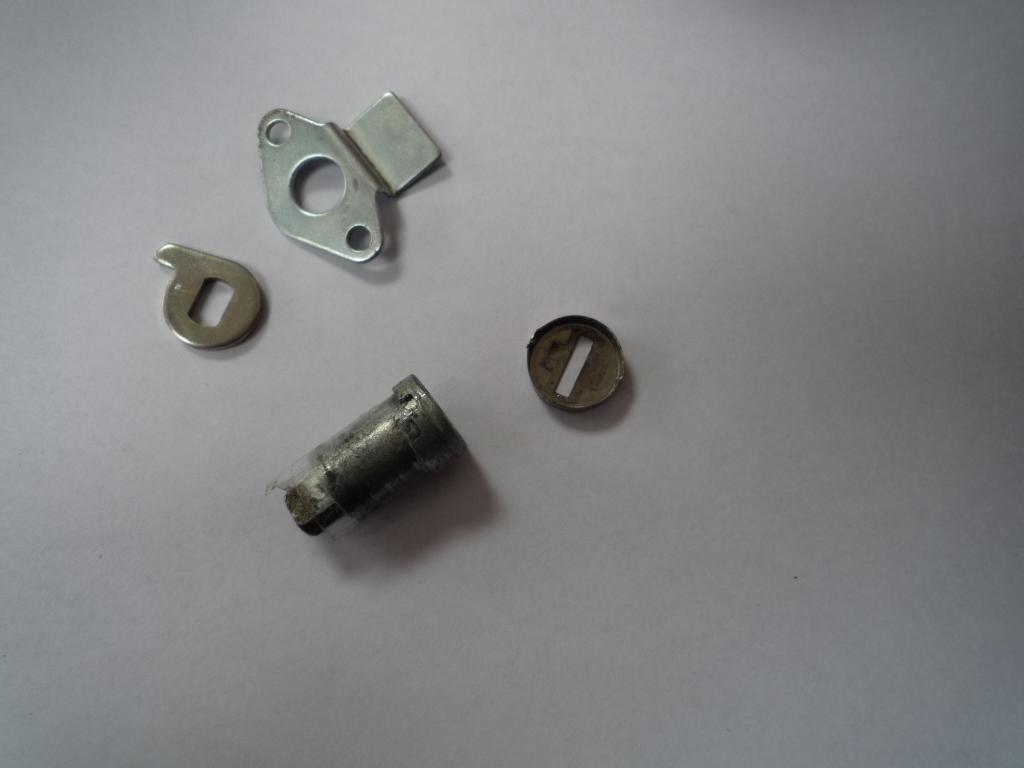
Then along came the ignition switch....
![]()
Noticed it was rattling as I cleaned it so I removed the back rubber waterproof
cover to find it was coming apart great!, but as I hadn't seen inside one before
I decided to delve deeper inside to see how it worked and also see if I could
knock out the dents around the key slot (just had a moment)
![]()
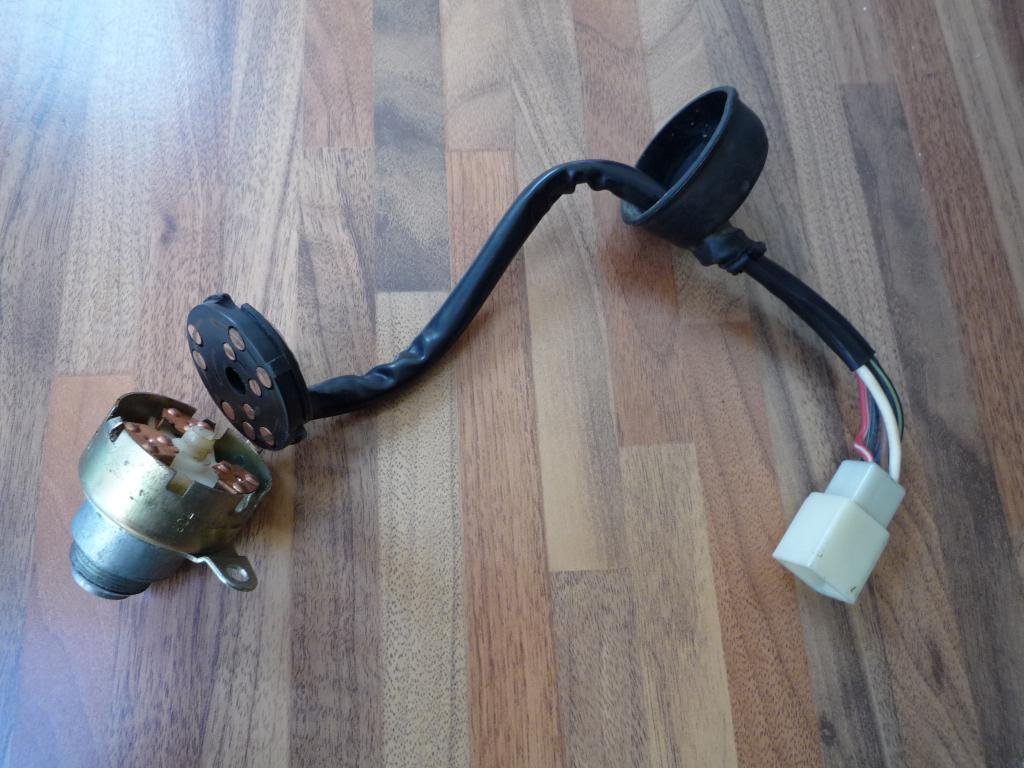
Here it is partially broken down, be warned lots of little springs ready to explode onto the kitchen floor! Luckily only one of my latches came out.


Backing plate showing the ignition contacts and path when switched, glad to say I managed to dress the dents out and reassembly it correctly so a worth while exercise, I found that the White contact disc can go back two ways so its best to check the switching works using a meter before fully assembling it or strange things will happen to your electrics.
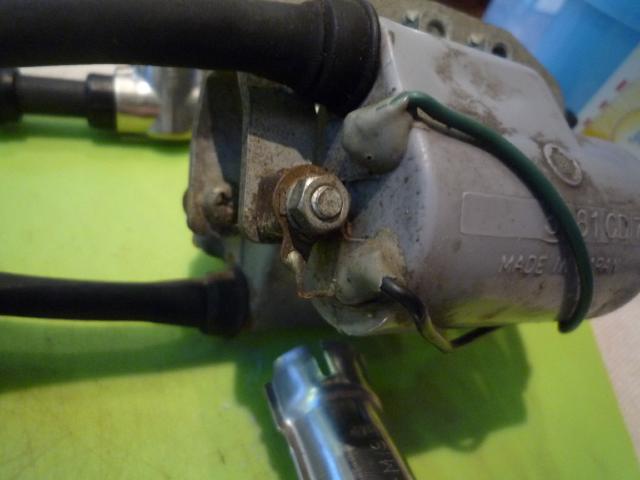
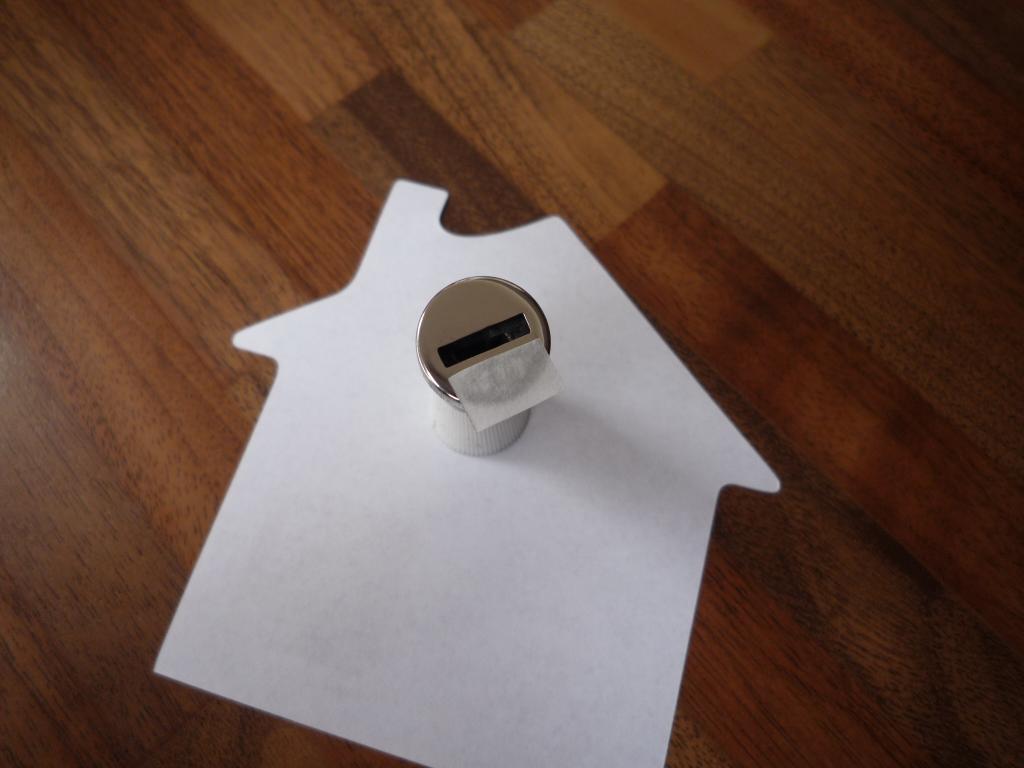
Finally the Master cylinder, another fiddly little job remembering the 250 and
the hidden circlip, I managed to free the piston then had a dig around trying to
find it, after much digging I was still none the wiser then had a look at the
plastic shroud which I found clips in, once this is removed the large horseshoe
plate comes up but not out and I was still convinced there was a circlip fitted.
Couldn't see one so gave it a tug and it came straight out so now I know ![]() the plastic shroud retains the lot.
the plastic shroud retains the lot.
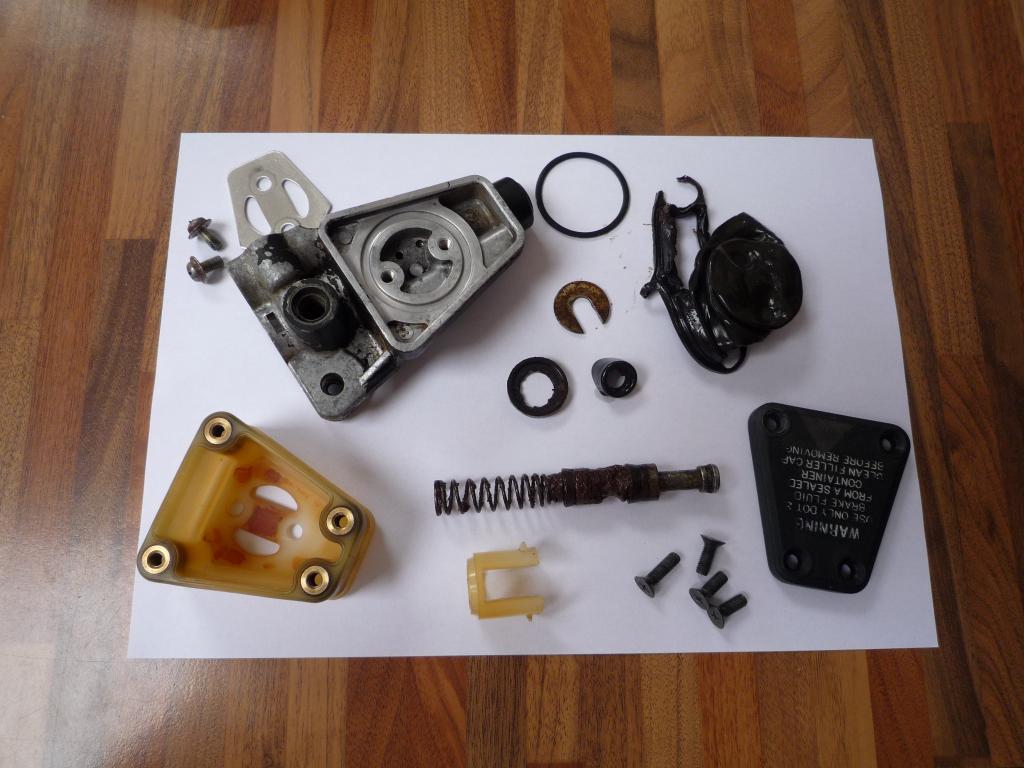
Bit of work to do on that, had to drill one screw out and the diaphragm has gone
to mush, something else to add to the list and much more fettling to keep me
happy
![]()
Had some spare time this morning so I decided to crack
on with the strip down and took a few more reference pictures along the
way..................
Front wheel first.

And axle setup to be stripped further later.

I will give the wheels a wipe over and decide whether to strip them down or not
afterwards
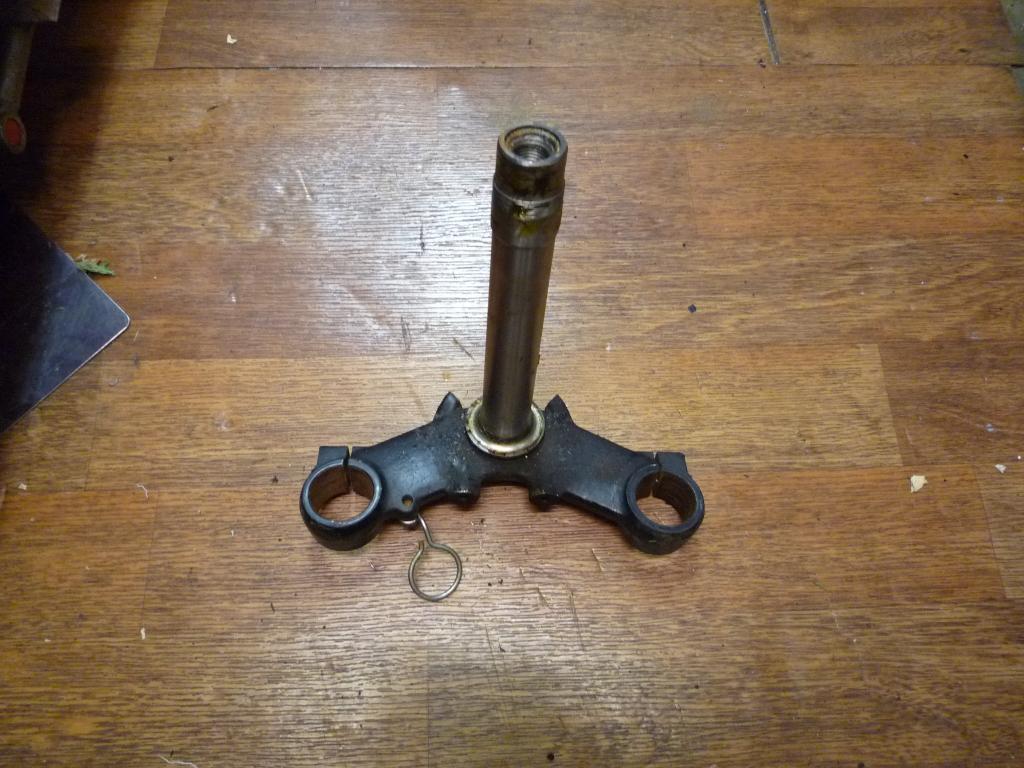
After removing the handlebars, the top yoke with its peeling paint was next.

Headstock bolt and washers removed.
And top yoke comes off revealing upper shroud rubbers.
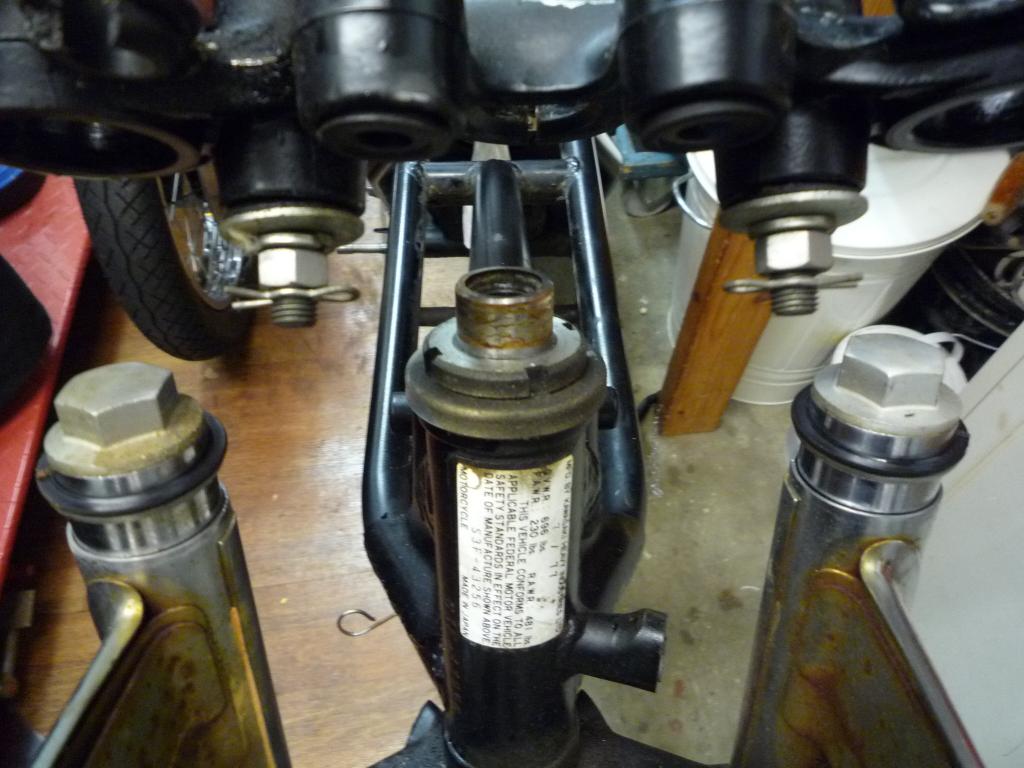
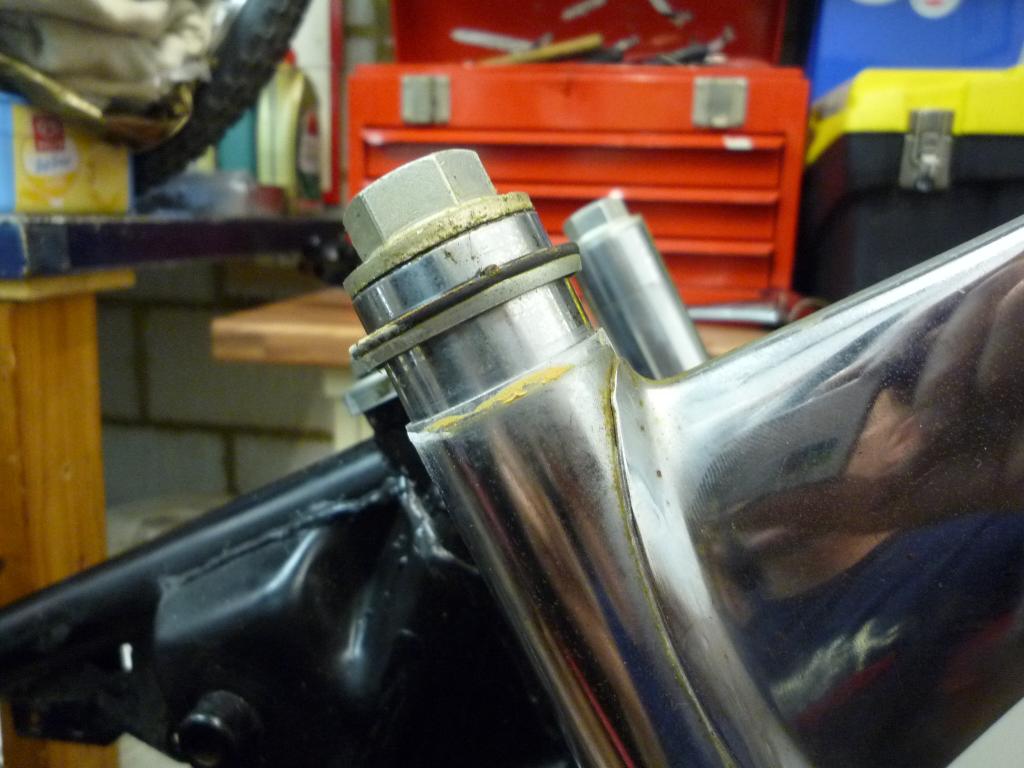
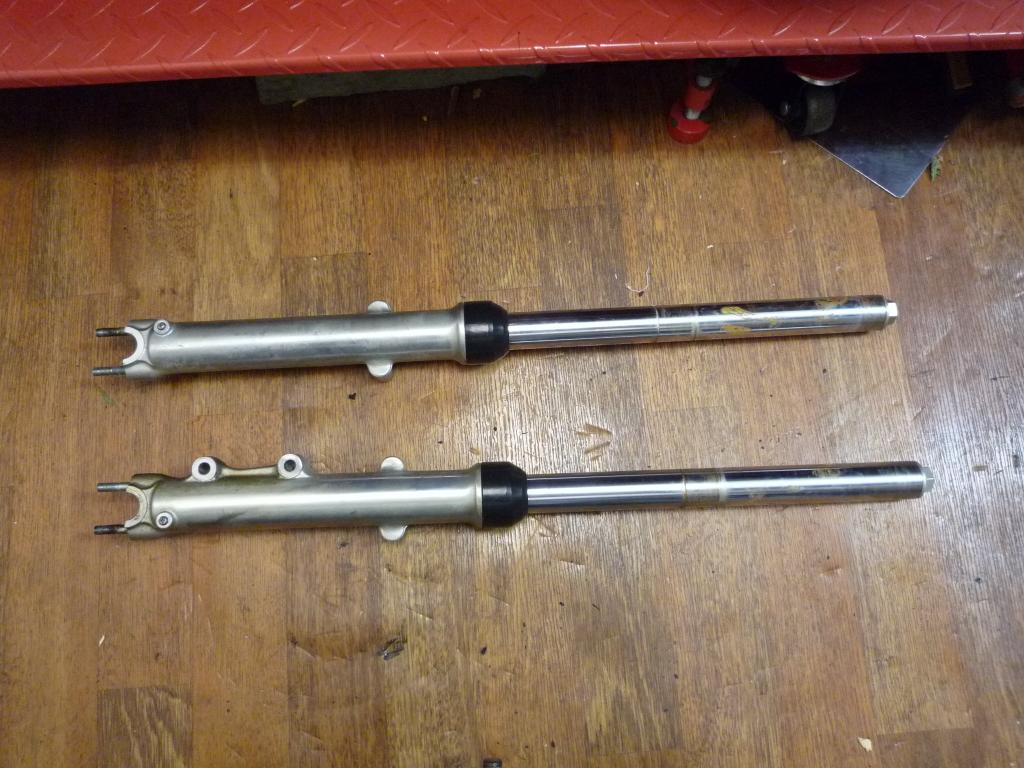
After loosening the fork top caps to make life easier later, I removed the bottom yoke clamp bolts and slid the forks out
Lower fork shroud fitted.... (how did that fork leg get back in!![]() ) showing rubber in place.
) showing rubber in place.
And with shroud removed.


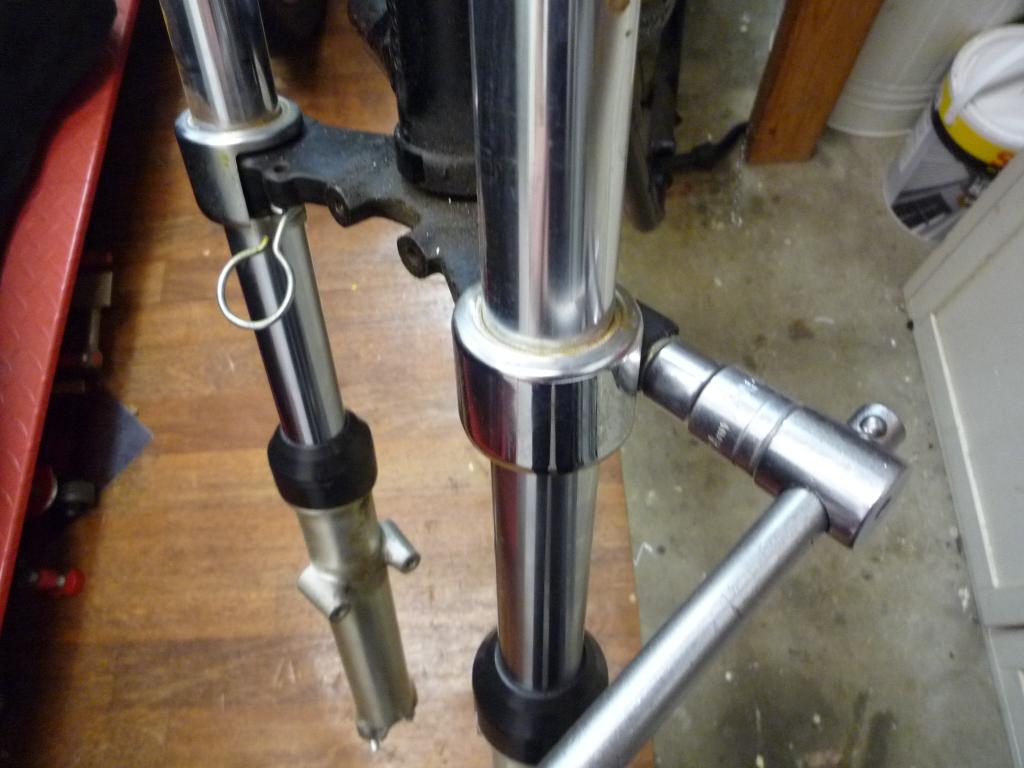
Moving the bottom yoke it felt a little tight and over adjusted and after removing the headstock adjuster nut and upper cover it revealed little grease.


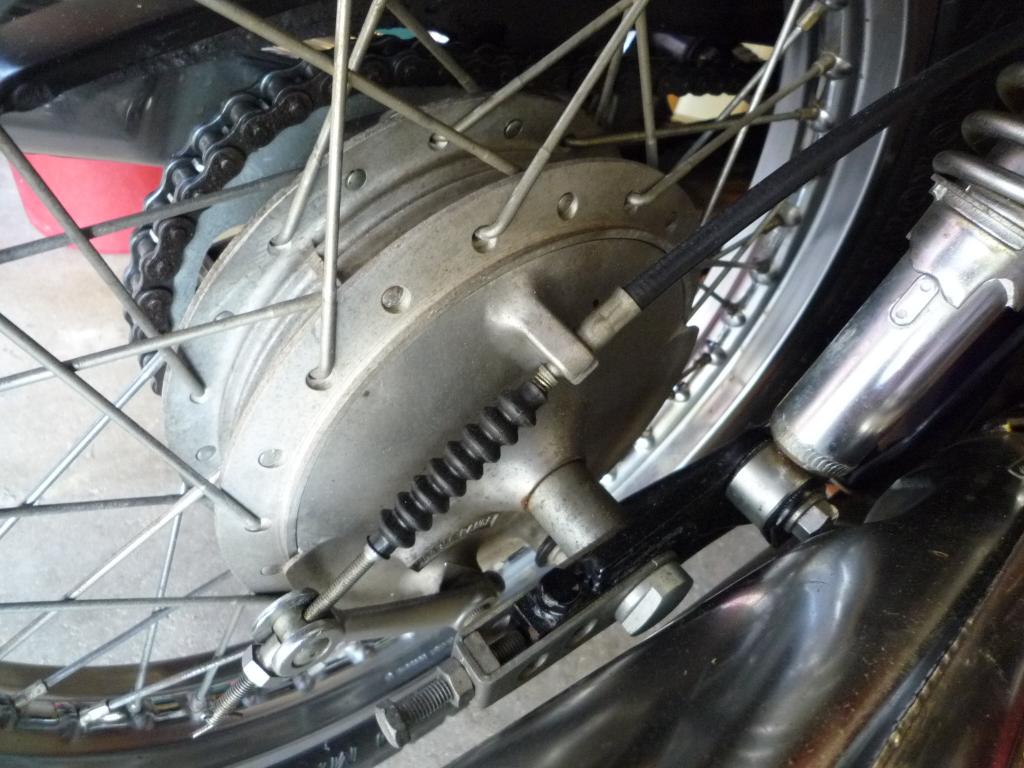
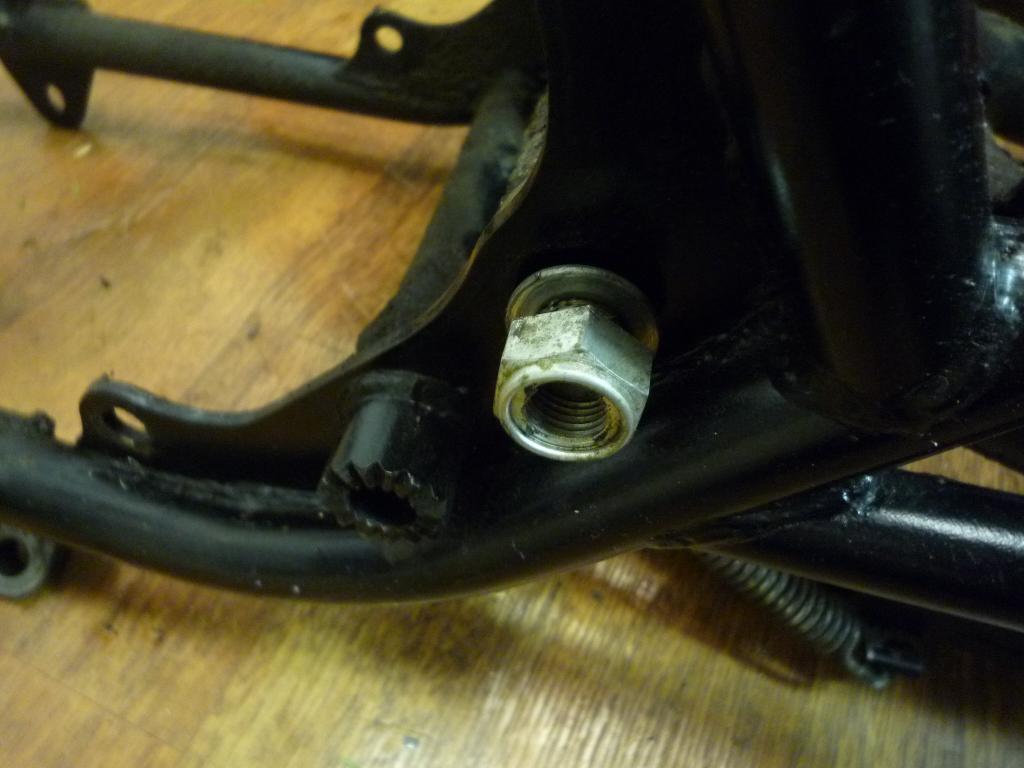
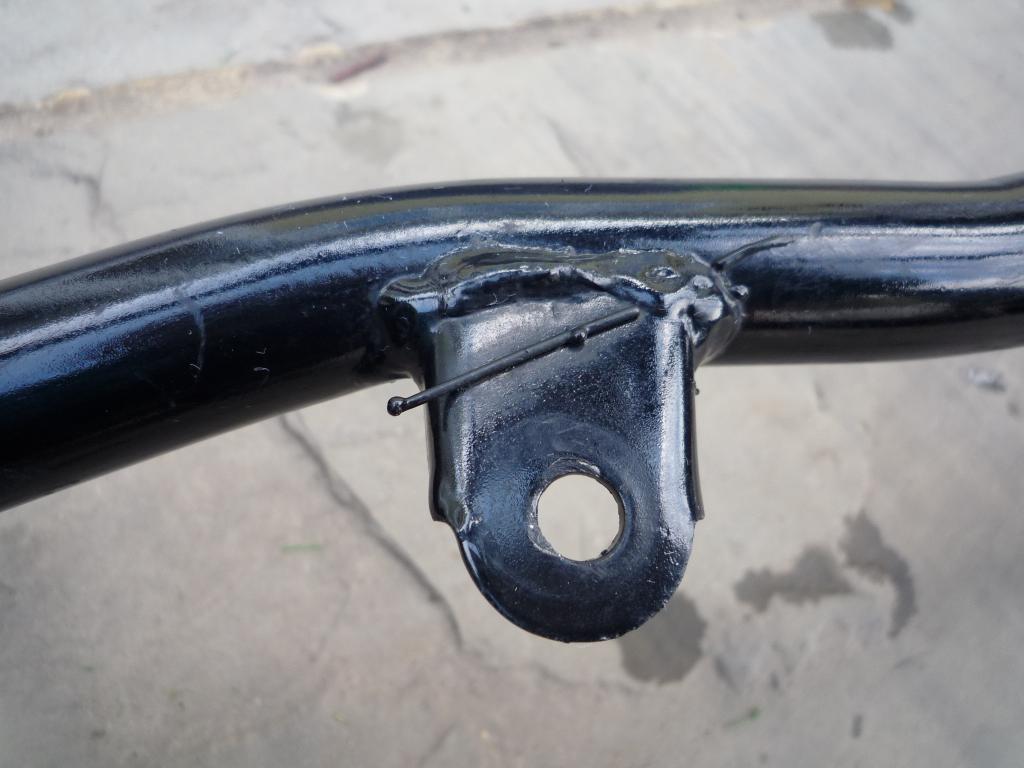
With the front dismantled I moved to the back end, note the rear adjuster blocks and bolts are painted black, does anyone know when this came in to be ??
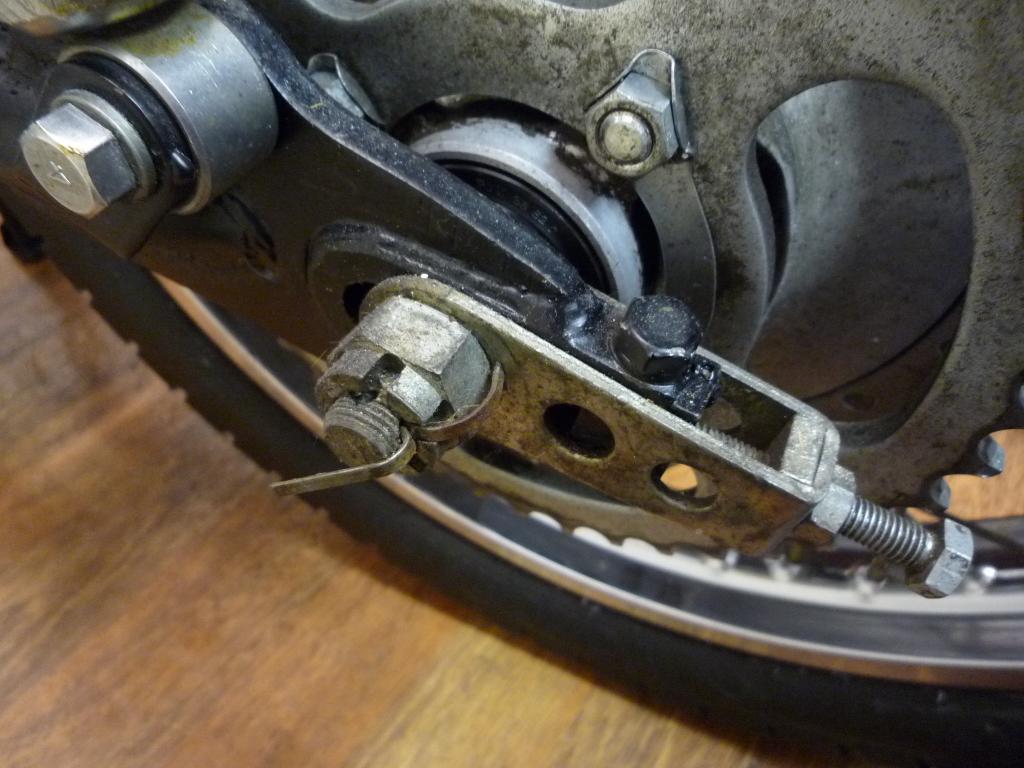
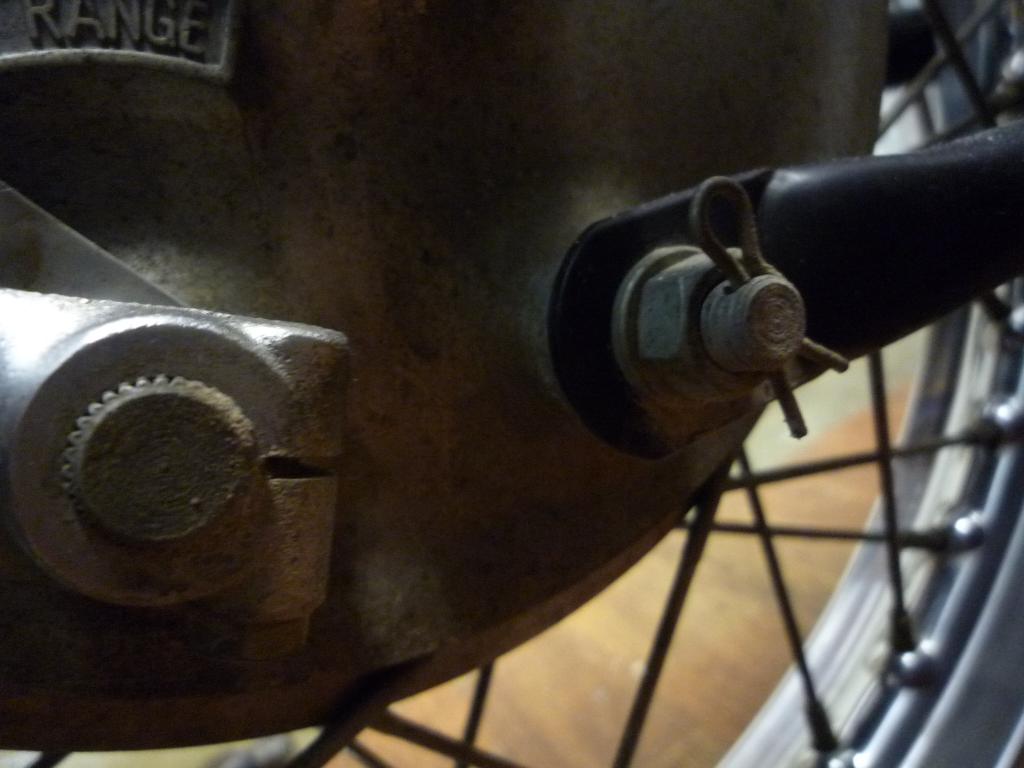
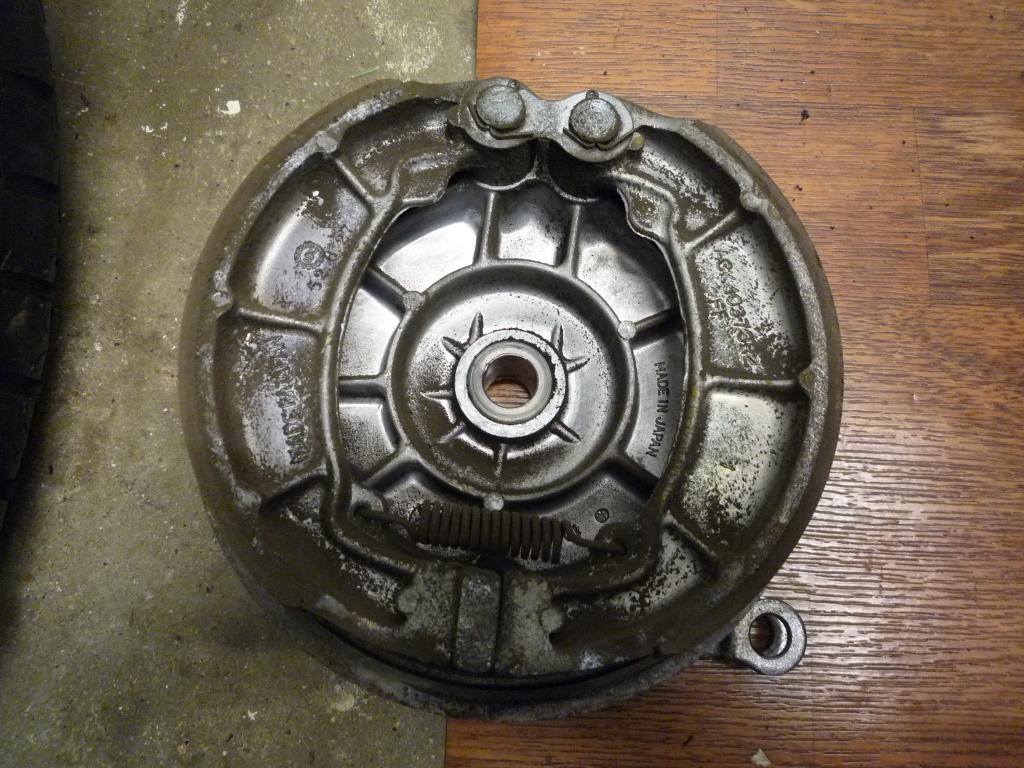
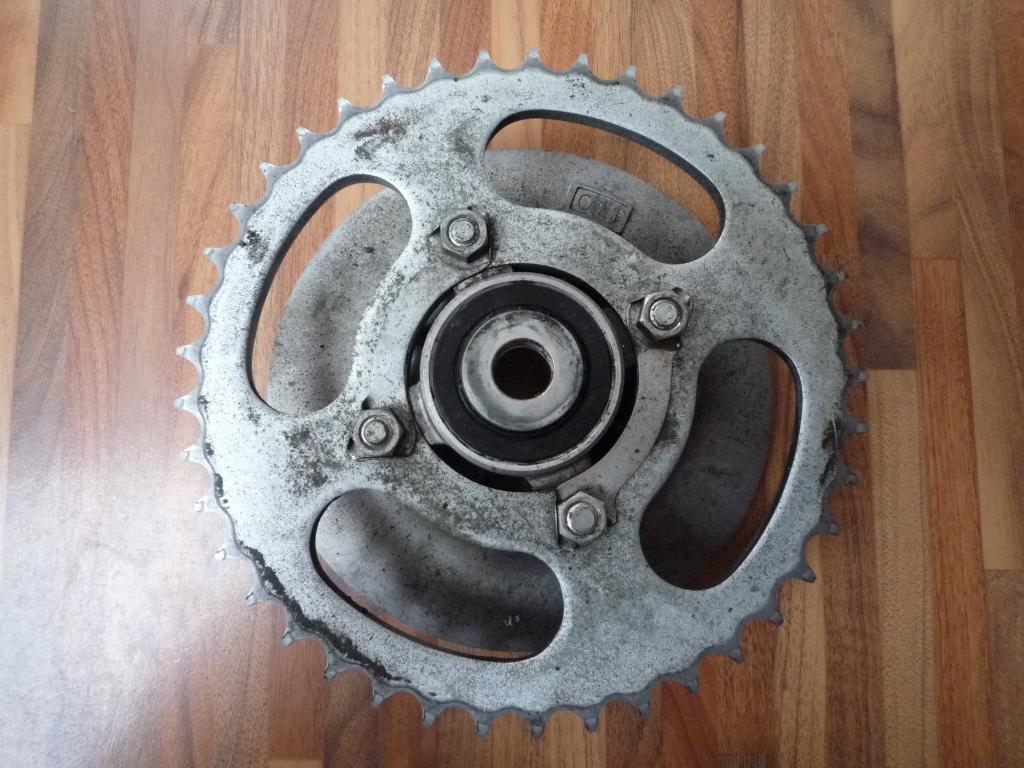
Torque arm to remove first, then axle out, noting spacers either side of wheel inside of adjusters.

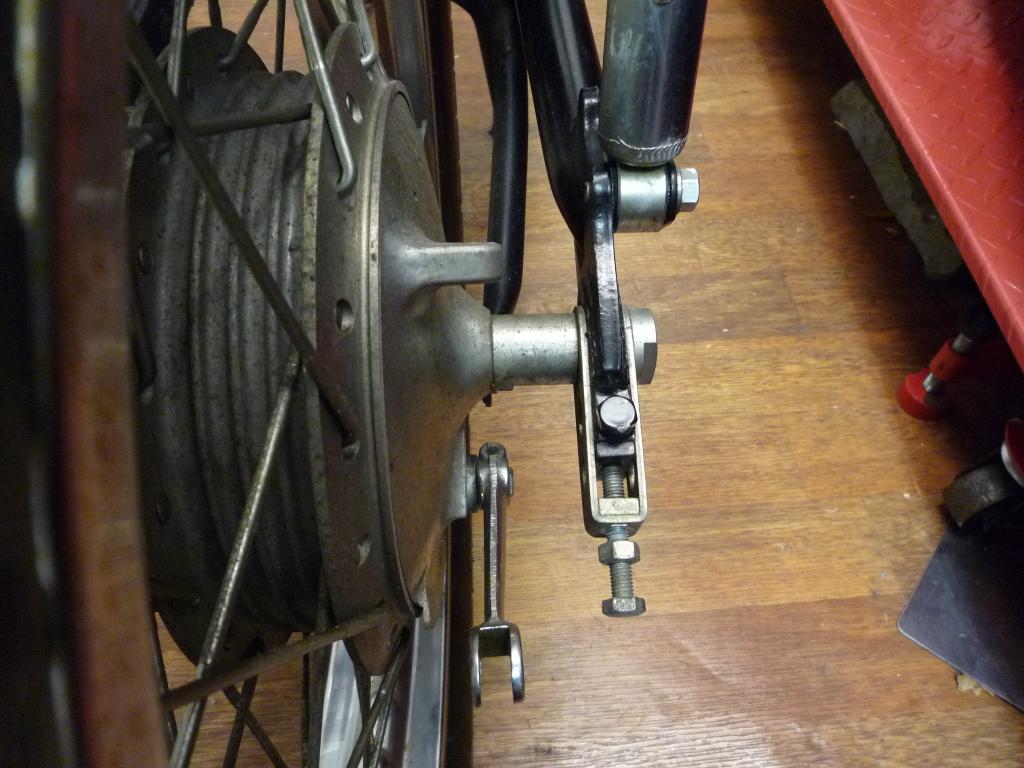
Rear wheel out.
And dusty brake shoes seen for the first time.
And showing small spacer, will check that cover later as it looks torn...........


Cush drive and rear bearing shows lots of grease.
Sprocket carrier and spacers for reference.
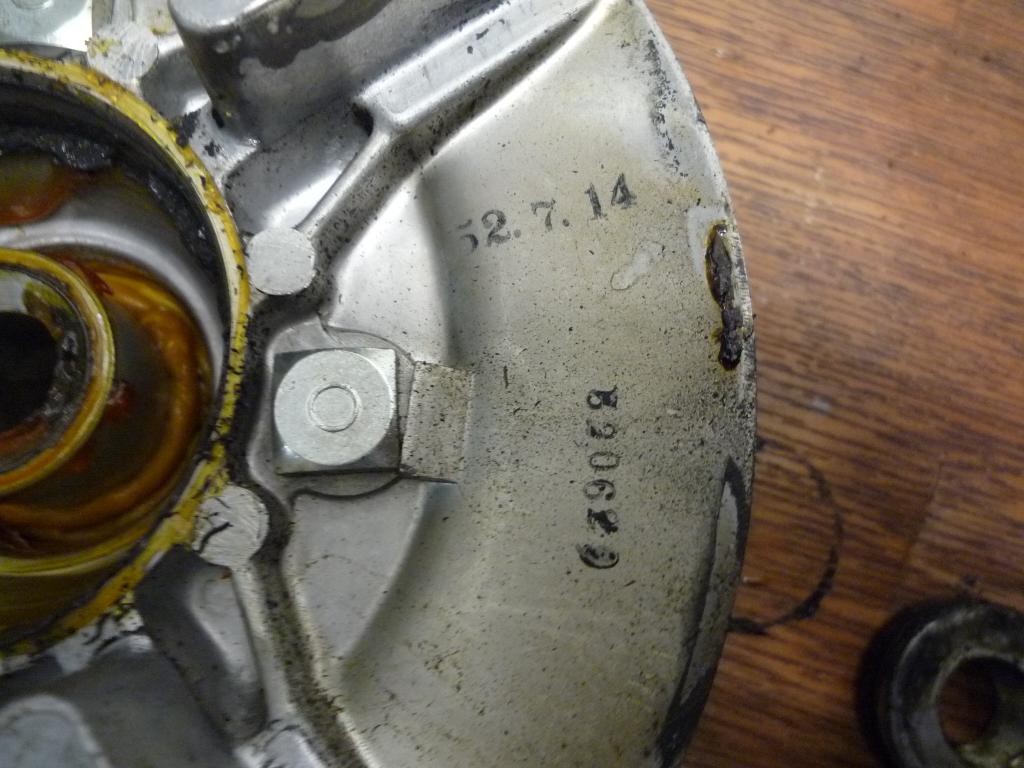
And always nice to see a date stamp, must check this out where's Malcolm when
you need him?........![]()
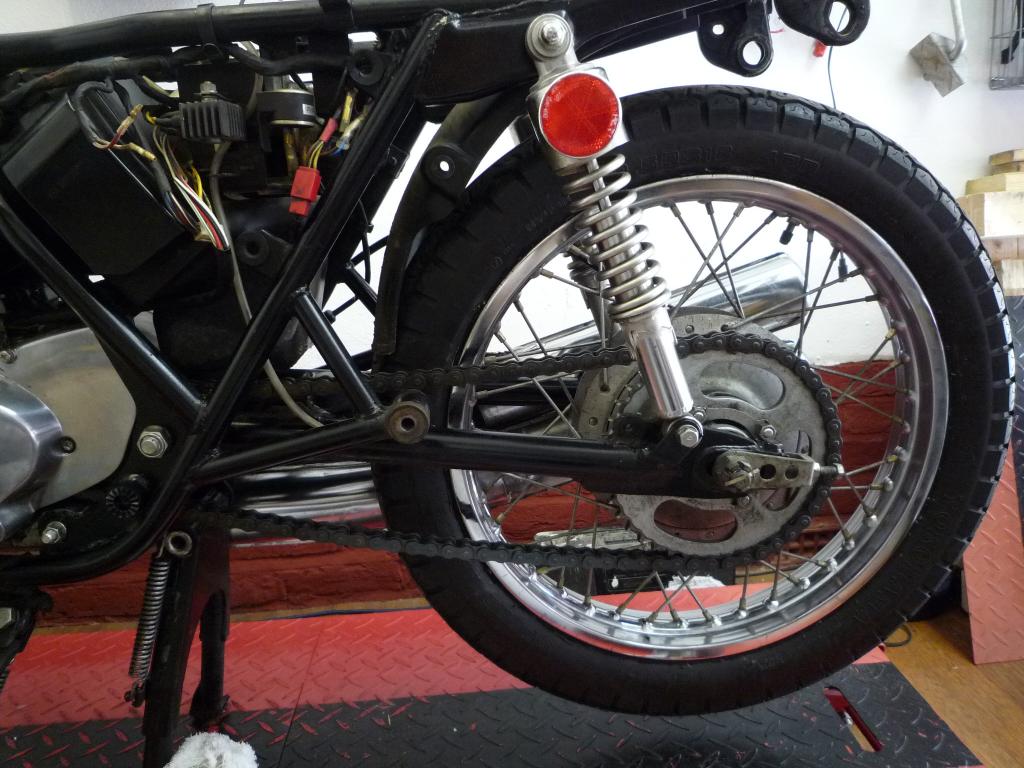
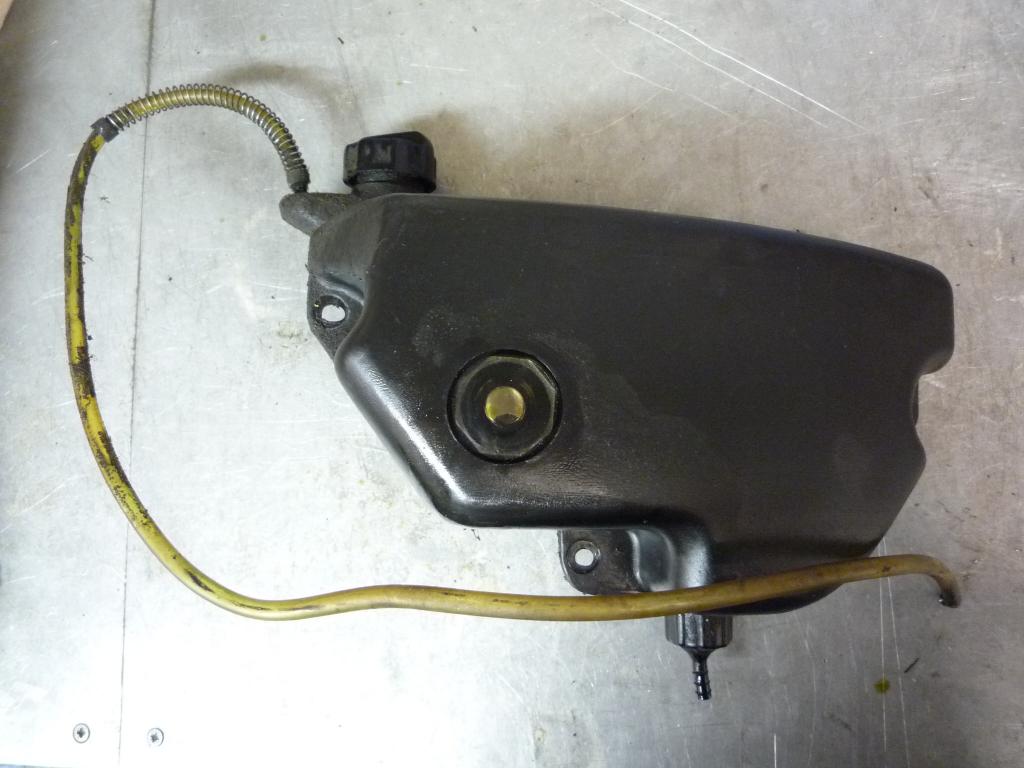
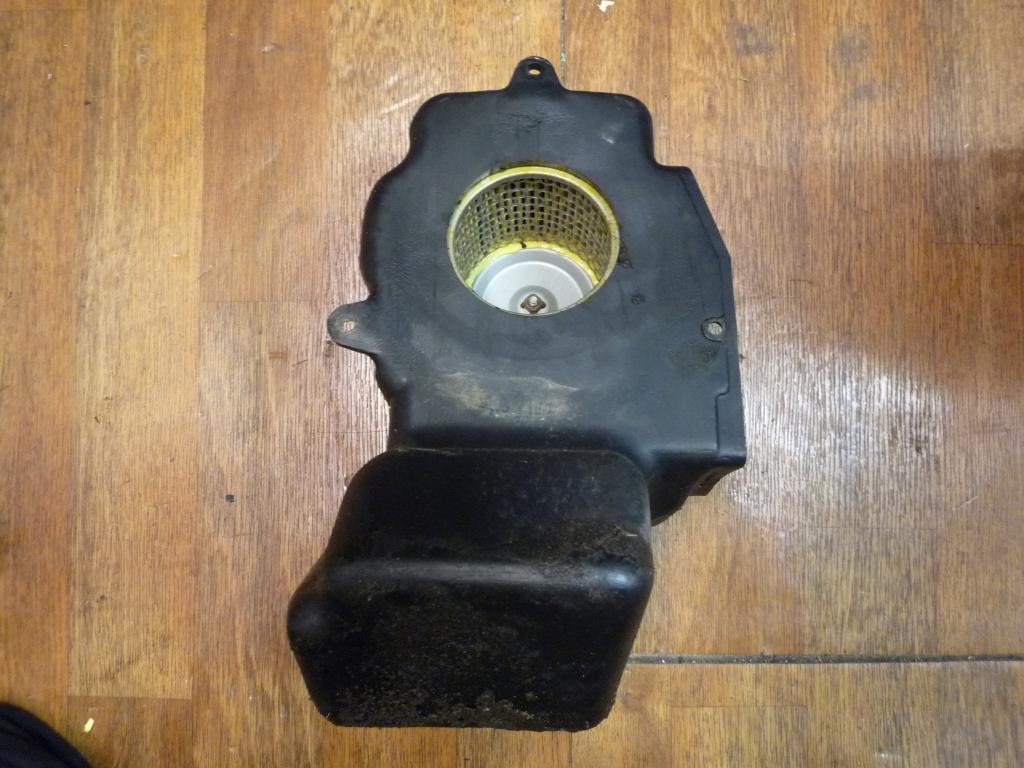
With the rear wheel out I can now remove that huge airbox.

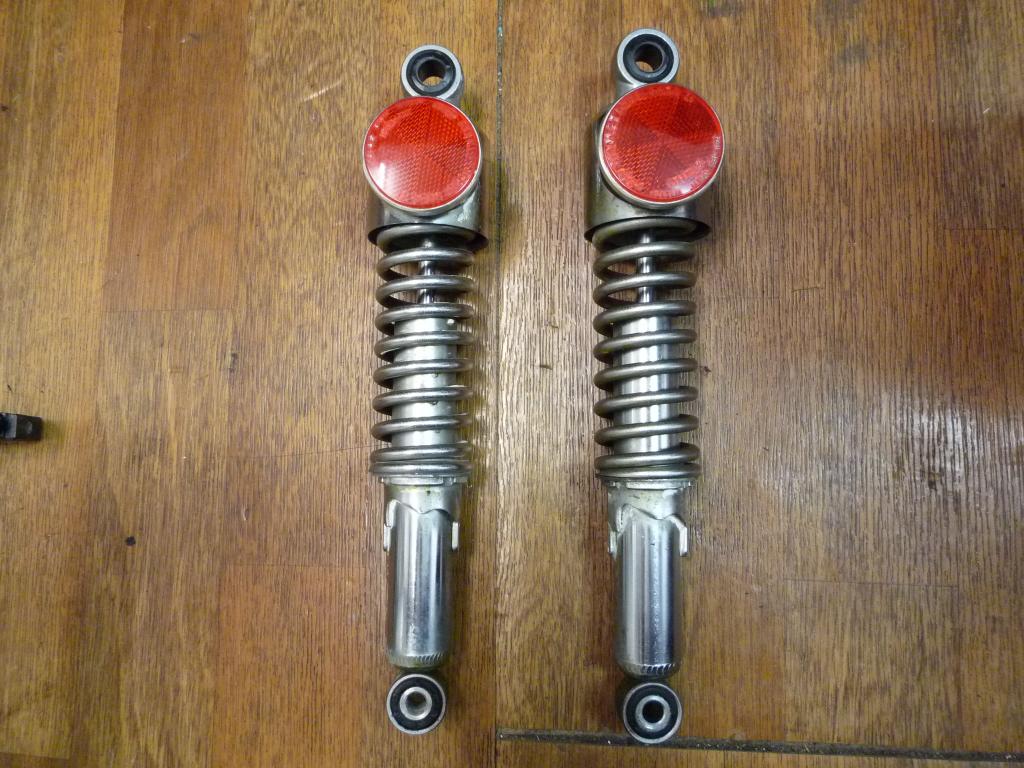
Do like the reflectors, hopefully the shocks can be refurbished successfully.
With shocks off it was the swinging arm next which came out without a fight.

Which just left the centre stand and a few rubbers to do.

No issues there.
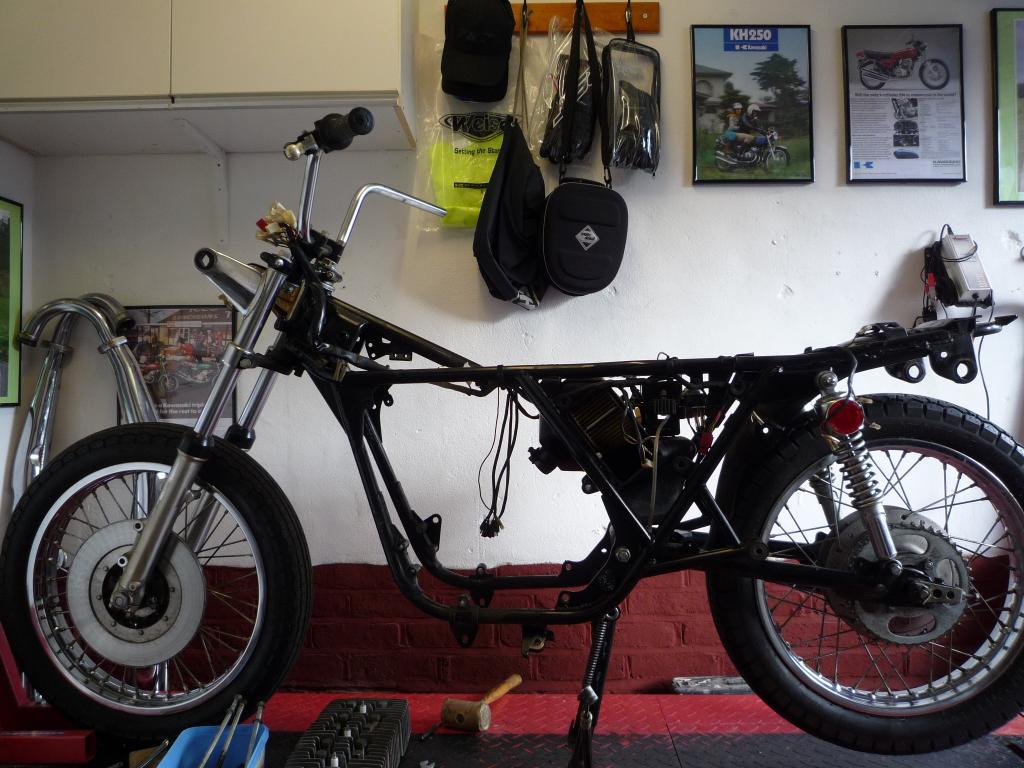
And she's stripped ![]()
![]()
Good progress but still a long way to go..............................................
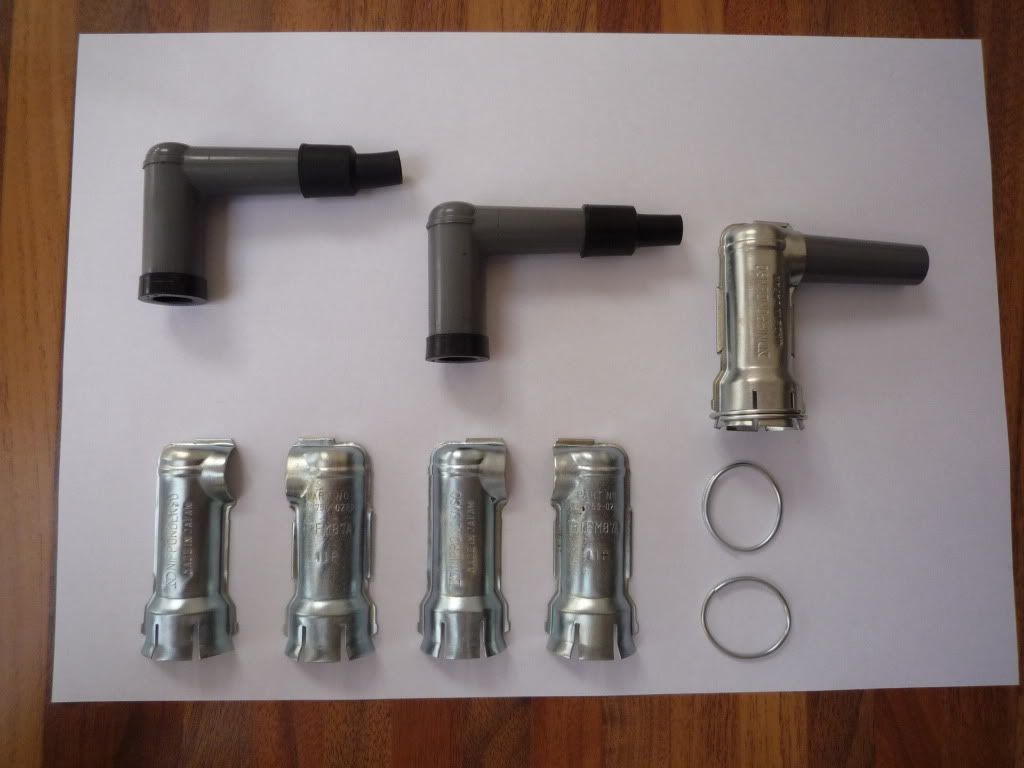
Started cleaning the coils up yesterday interesting to
see the difference in the metal plug caps fitted to the Canadian 400 over the
ones on the UK 250, no wire ring fitted and no need to replate as they just
polish up
![]()
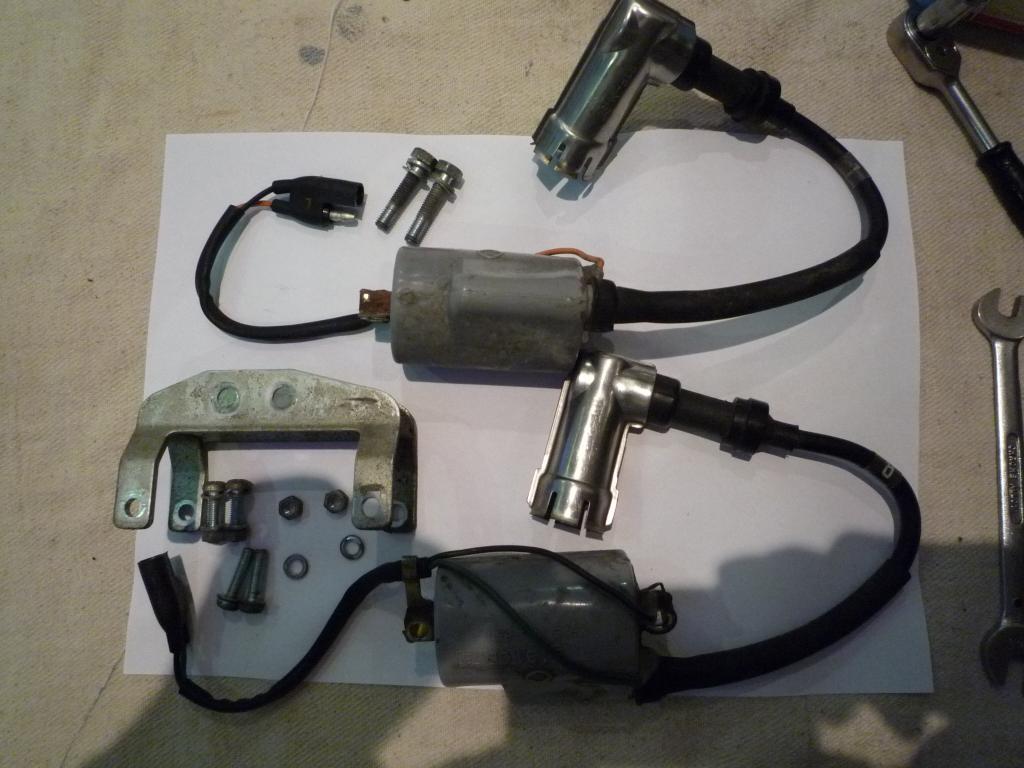
The Canadian KH400 Ones fitted to the UK KH250

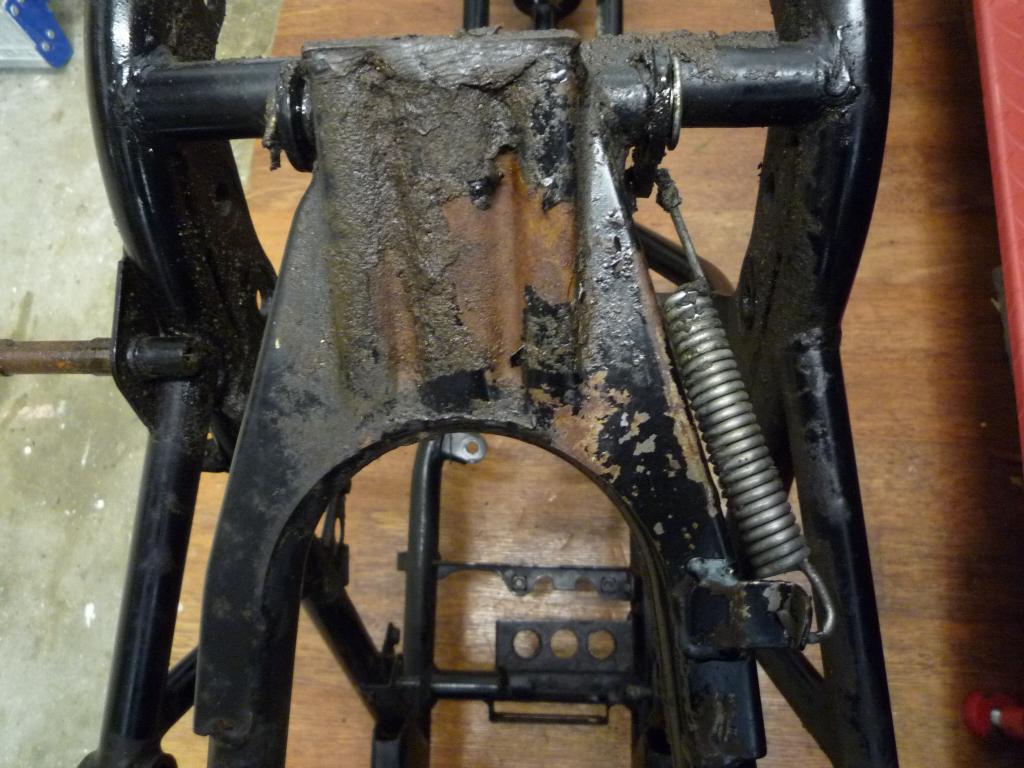
Also took the frame out to the garden for a wash down
and degrease, looks to be in good shape but the paint job and workmanship could
definitely be improved on with paint runs and what looks like welding wire still
attached to the welds Tut Tut
![]() at least I can tell which way it was hanging when it was sprayed.
at least I can tell which way it was hanging when it was sprayed.
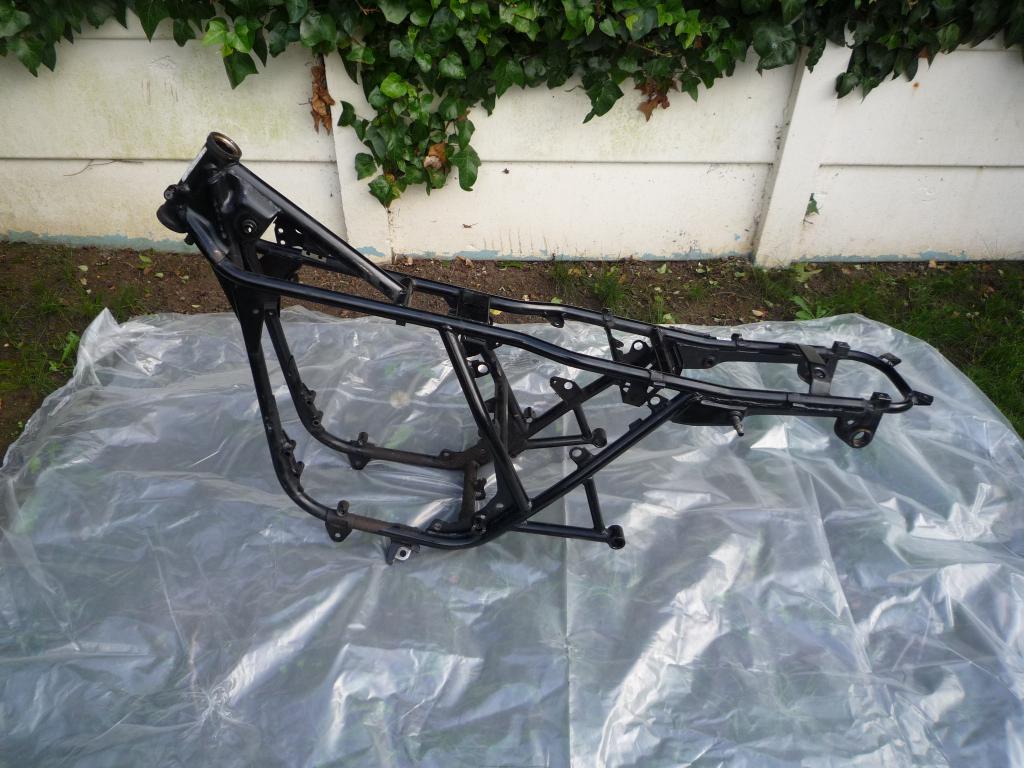
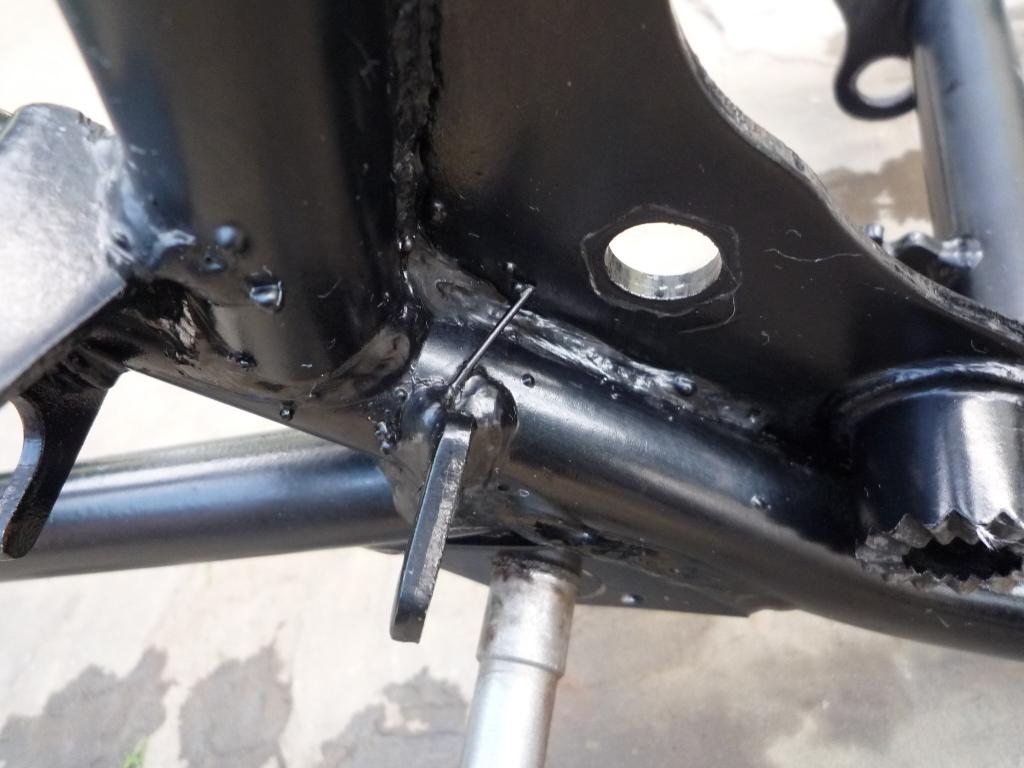
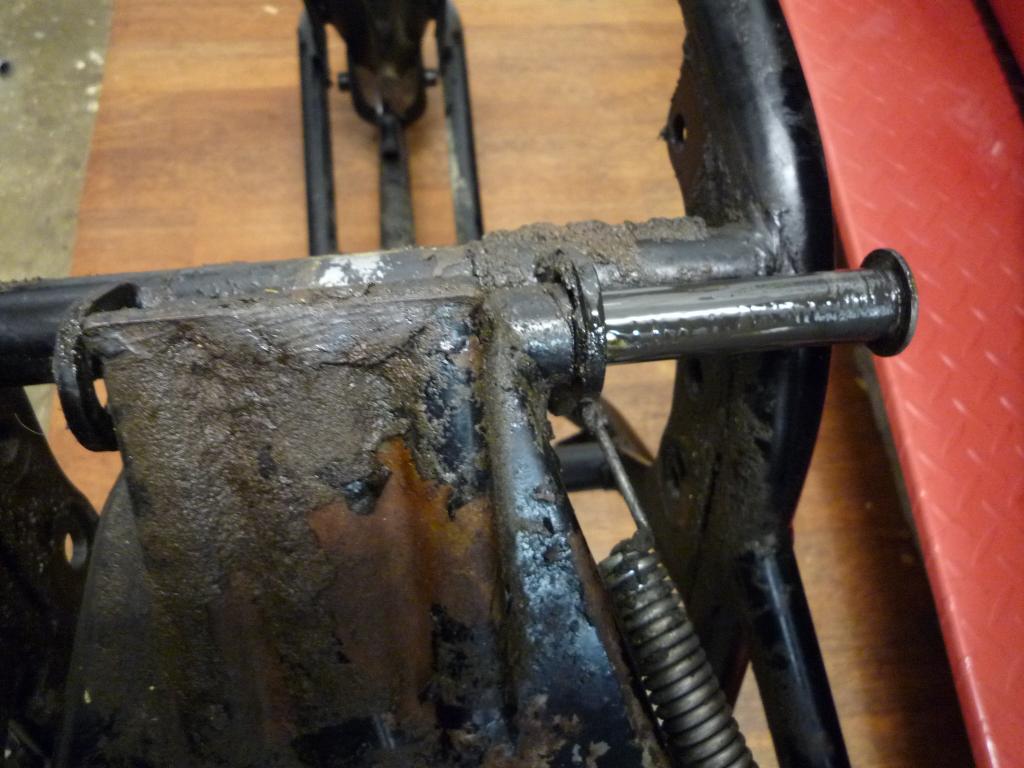
At least they masked the important parts
![]()
I'm not sure how critical it is as the centre coil
mounting plate has been painted completely
On the KH400 coil there is a factory soldered wire between the coil terminal and
the coil mount specifically for the coil to earth to the frame.
Good info guys,.....with regards to the earth wire, you must be referring to the one running from the black terminal to the mounting point shown here L and R coils.

And likewise on the centre coil, which must also need masking on the frame to allow proper earthing.
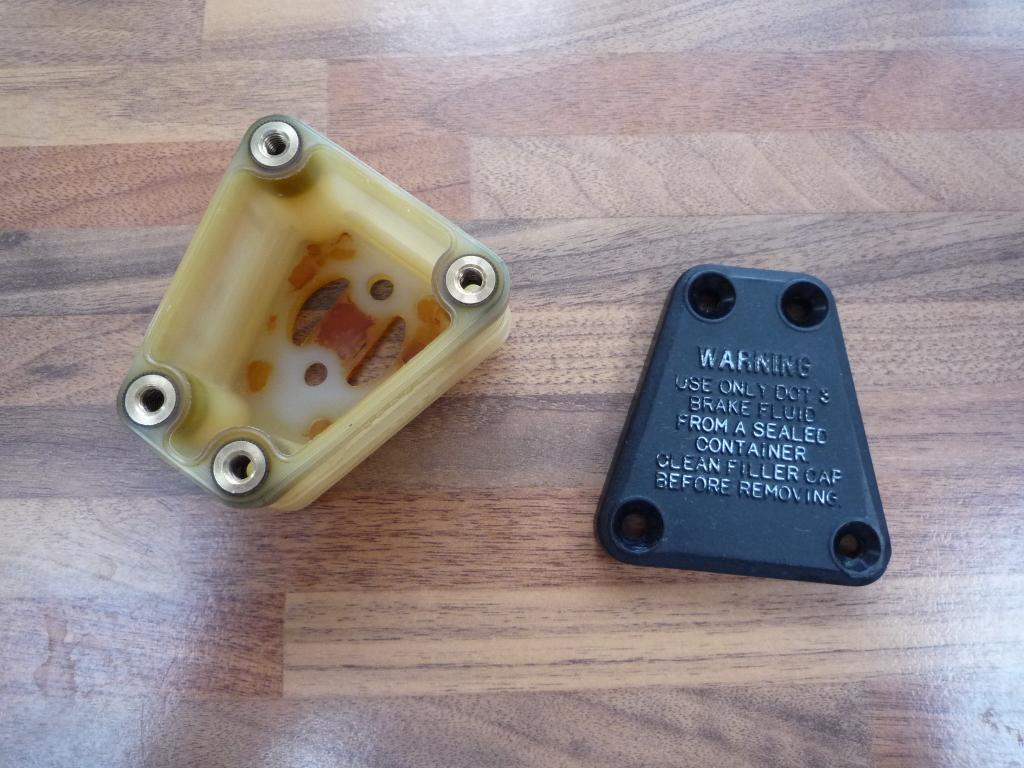
Talk about fiddly, painting switchgear is a breeze compared to the master
cylinder cap............four times it took me to get it right, what a pain
![]()
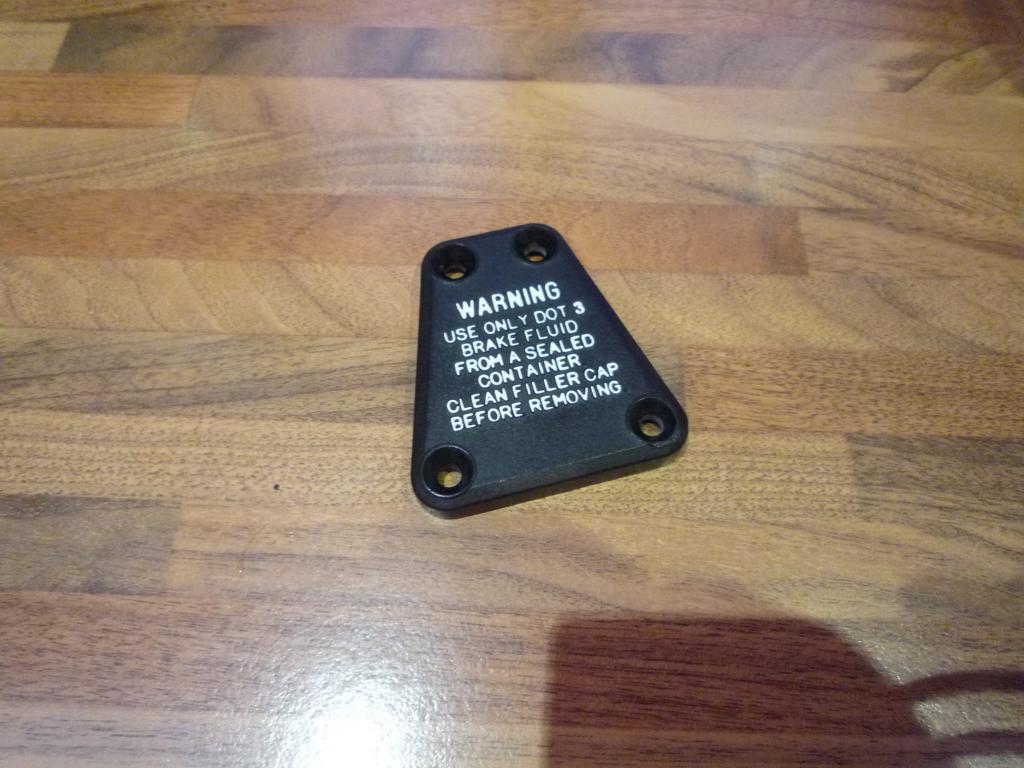
I used white paint, I painted a thin coat onto a flat
piece of plastic and then pressed it carefully onto the paint, too thick a layer
and it will fill the letter voids, I then let it dry upside down to prevent any
unwanted movement.
Tricky thing is if you get it wrong when you wipe the paint off it turns the
cover white then you have to get it back to black before you start again.
![]()
Now I need to find some screws...............
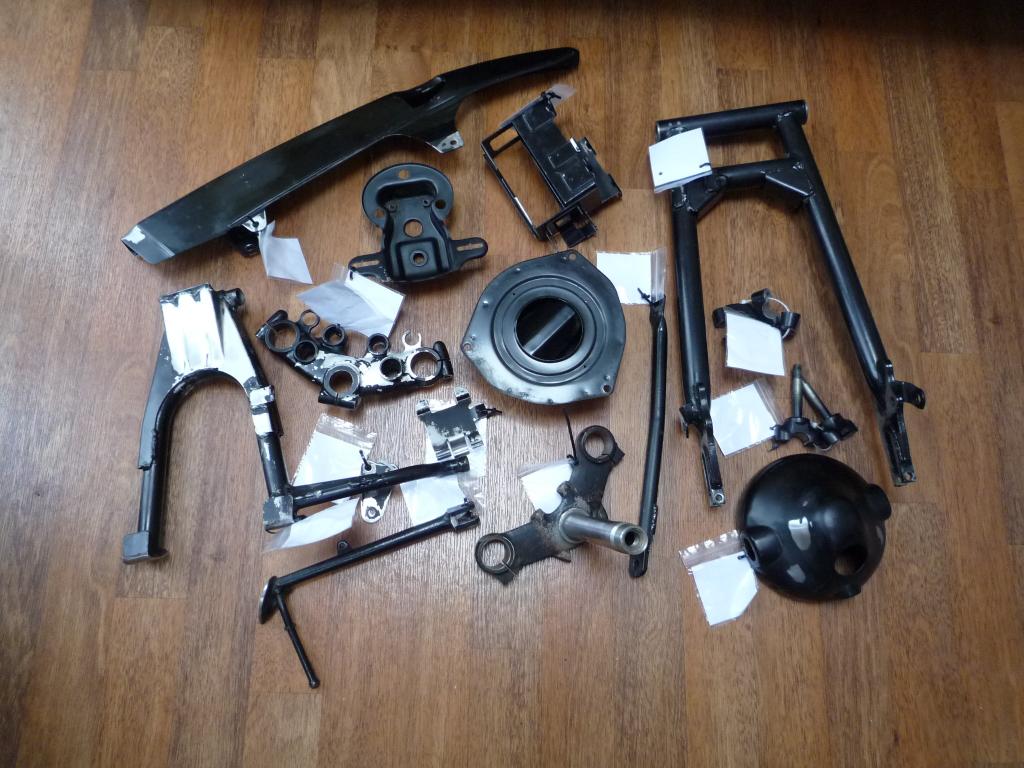
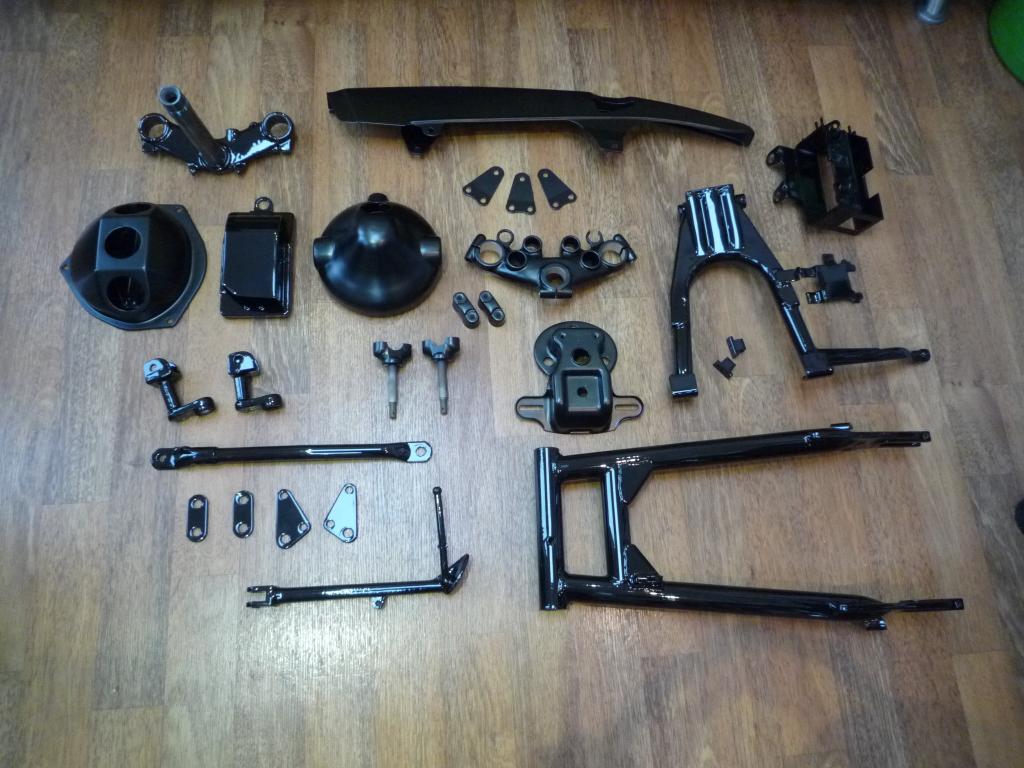
Not a lot to show with the 400 at the moment though I am making progress of sorts, Lots of parts cleaned and packed away in storage.
Not forgetting the worlds biggest airbox, do they
come much bigger
![]()
This is my to replate or replace pile labeled and bagged and growing daily mostly parts needing re zincing.
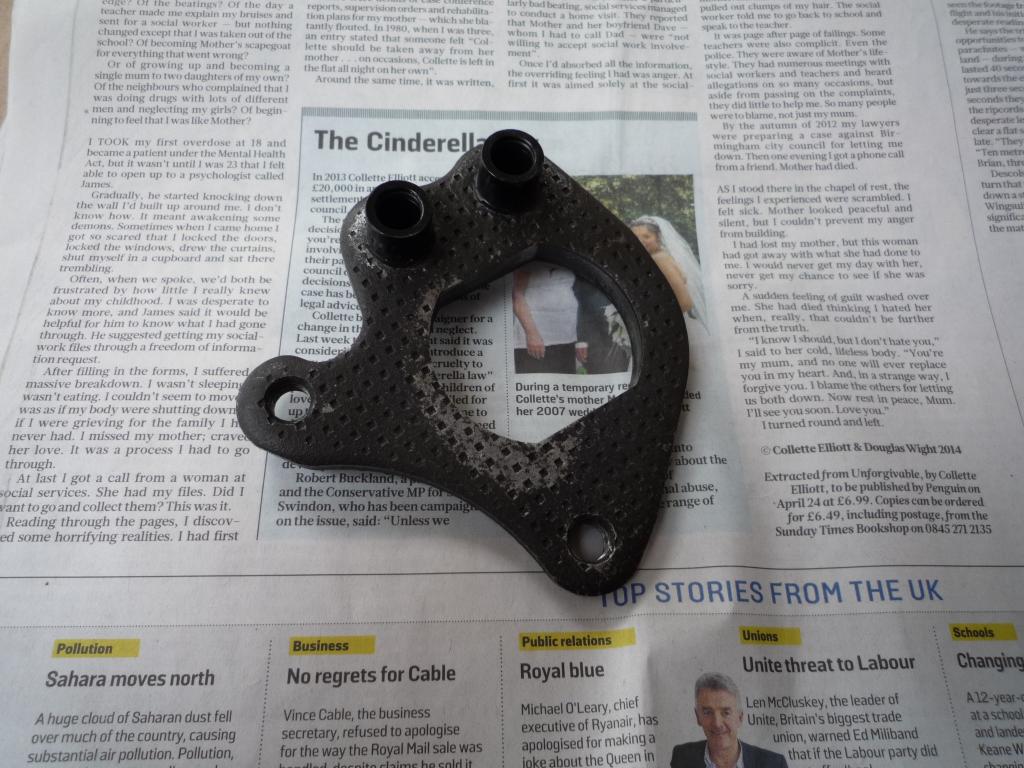
And my powdercoating pile which I may deliver this
week if I can but I have a few more pieces to add to it and one of the front
footpeg mounts has a slight bend in it so that need attention before I send it.
I have started paint stripping the switchgear and
master cylinder ready for refurb, the lower left hand needing repair as it has a
piece missing where the choke cable comes out, quite common I'm sure.
I found a replacement but that too has broken, its not great material to get
welded but I will give it a go or look for another suitable replacement.
So the fettling and sorting continues, after getting
the front foot peg mount straightened last week, I was then able to deliver the
frame and all the Black bits to the powder coaters for refinishing. Very pleased
to have reached this step in the resto before xmas now I can sit back and wait
and crack on with other things.
Here is what I sent out, a few minor bits like switchgear, master cylinder and
brake caliper are missing but I prefer to spray them up myself it saves any
issues with blocked holes and filled in lettering plus I enjoy it.

The rear brake pedal which was also slightly bent has now been straightened and should hopefully not sit as it did.

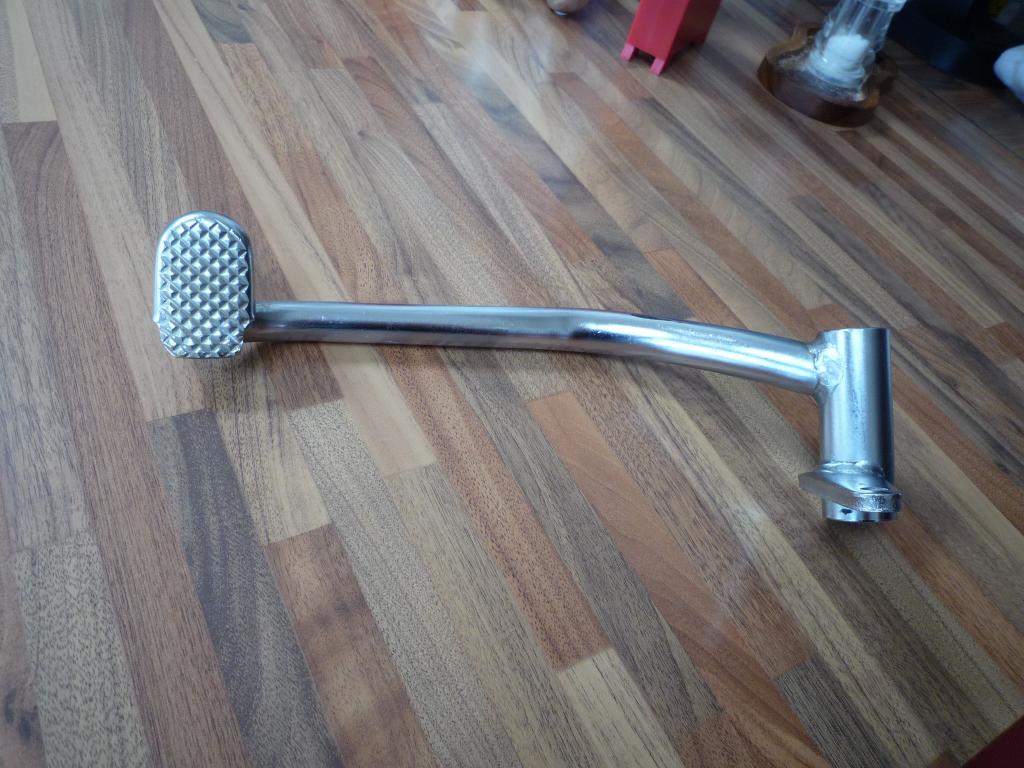
All better now....................
The ignition box gave me a few headaches and sometimes you do have to
compromise, I was hoping it was just greasy and would clean up well but after
cleaning it was evident that the finish was past its best.
Having researched them and deciding not wanting to break the box down for re
zincing or pay out for a nos item I decided to refinish it as best I could.
Managing to save the original decal I am quite happy with the result.
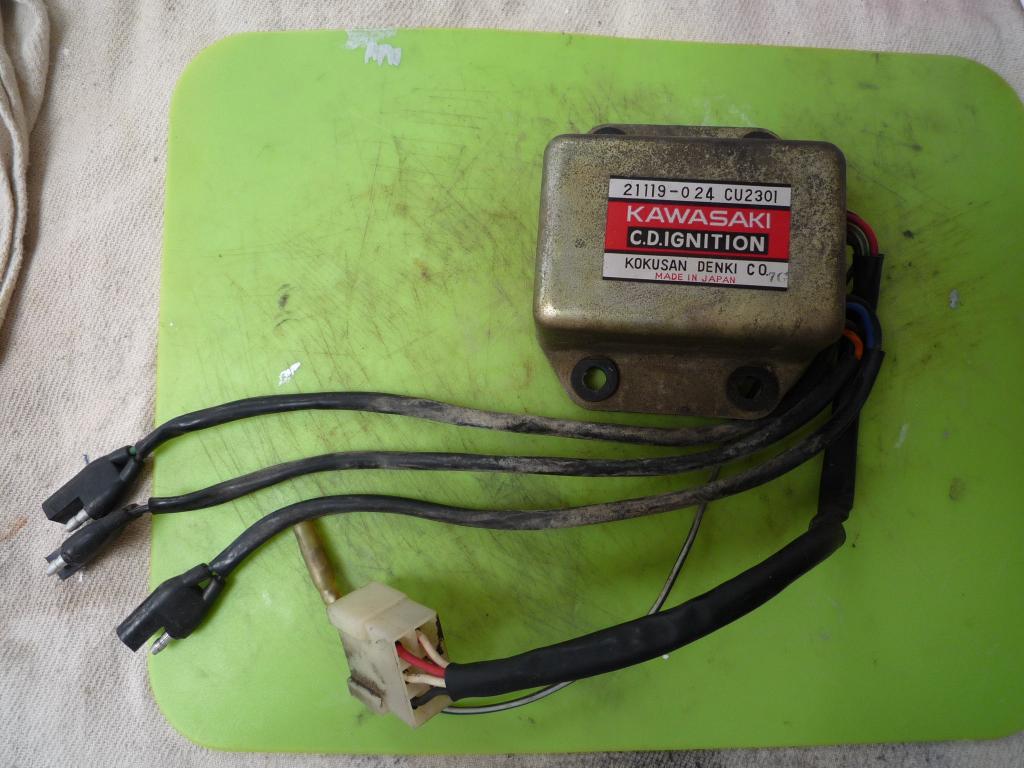
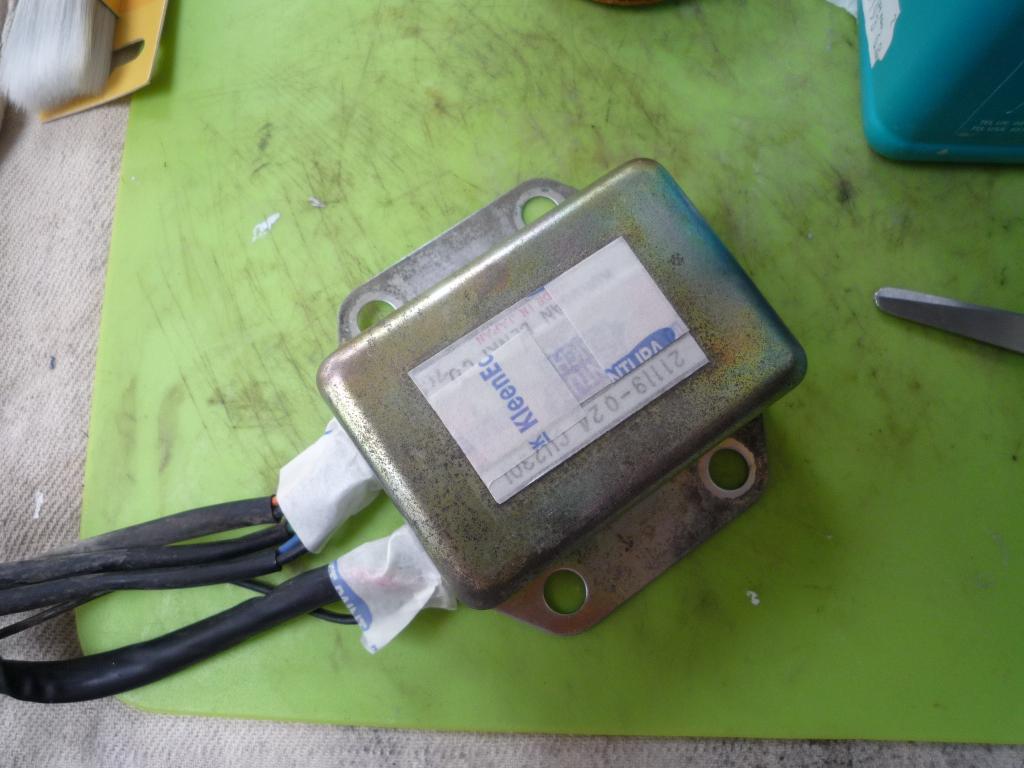
The ignition box, well its a little trade secret so
please don,t tell anyone........
![]() Only one other person has asked this, I used a process called Gilding which as
you may have heard of uses Metallic leaf or powders to produce or restore a
metallic finish. Purely experimental on my part and I happened to find a product
hiding in my cupboard, gave a good result but not easy to apply.
Only one other person has asked this, I used a process called Gilding which as
you may have heard of uses Metallic leaf or powders to produce or restore a
metallic finish. Purely experimental on my part and I happened to find a product
hiding in my cupboard, gave a good result but not easy to apply.
I would suggest if you wanted to do the same then Paint is the answer if you can
find an acceptable colour match.
I would have loved to have re-zinced it but wasn't prepared to break it down, I
also thought about making a new cover for it which could then be finished
correctly and fitted over the original. Haven't ruled this one out for the
future
![]()
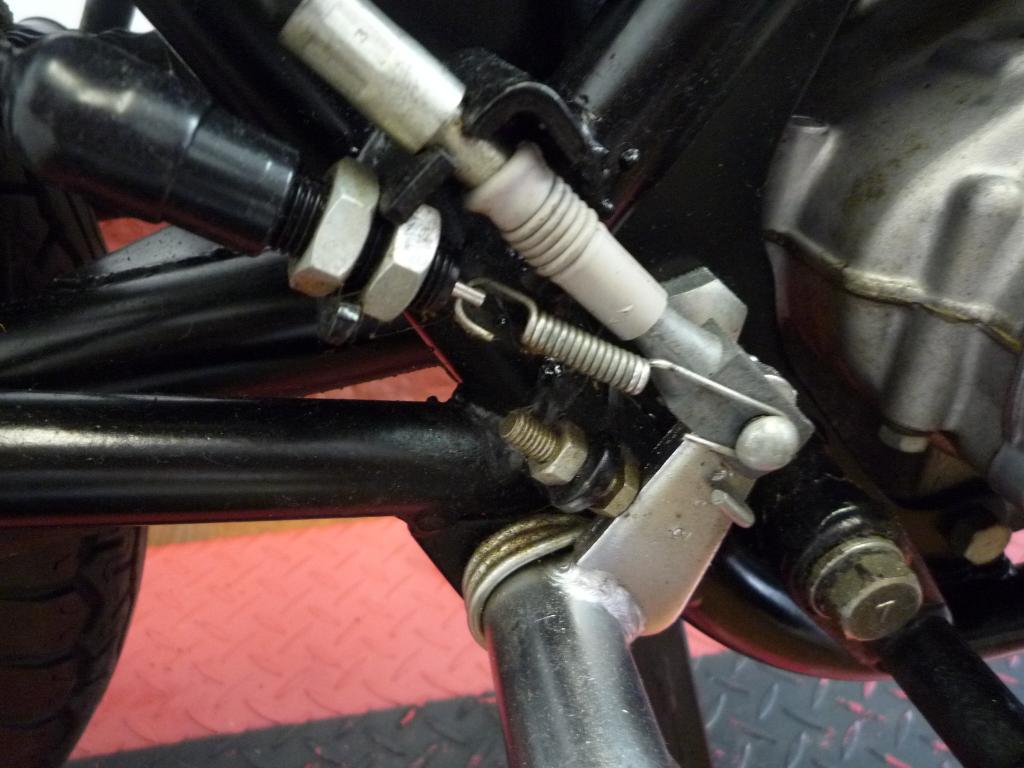
Lots of little jobs spring up along the way......repaired the engine earth wire with some new heat shrink.
And started to strip down the rear brake hub and sprocket carrier for polishing and cleaning.

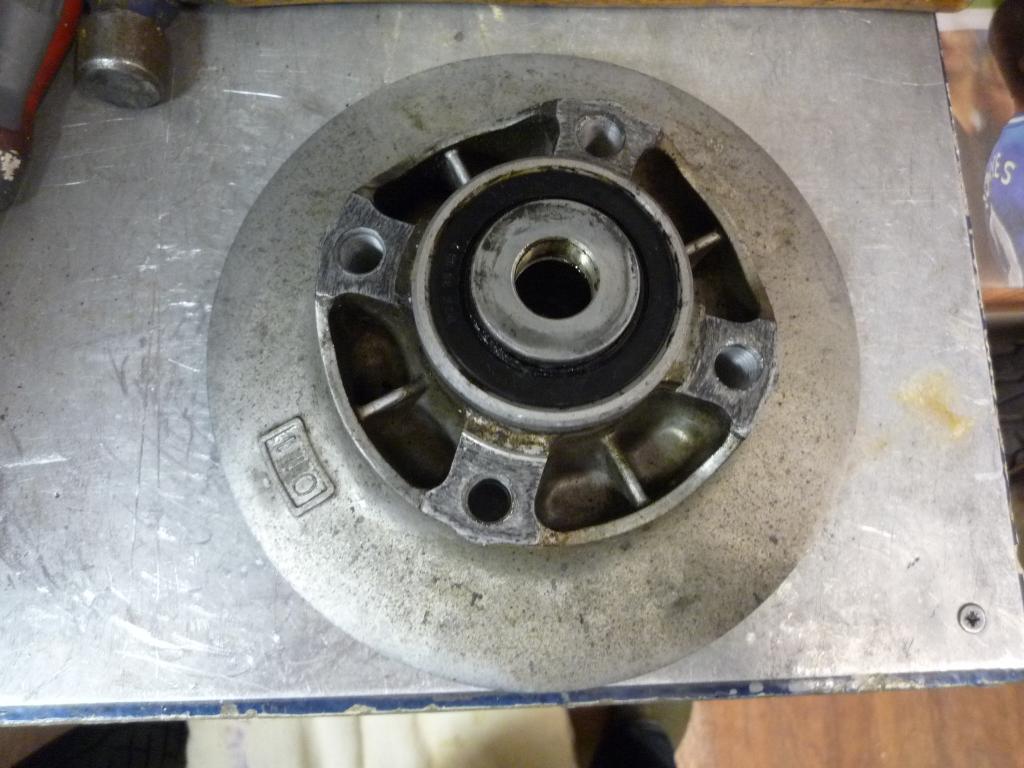
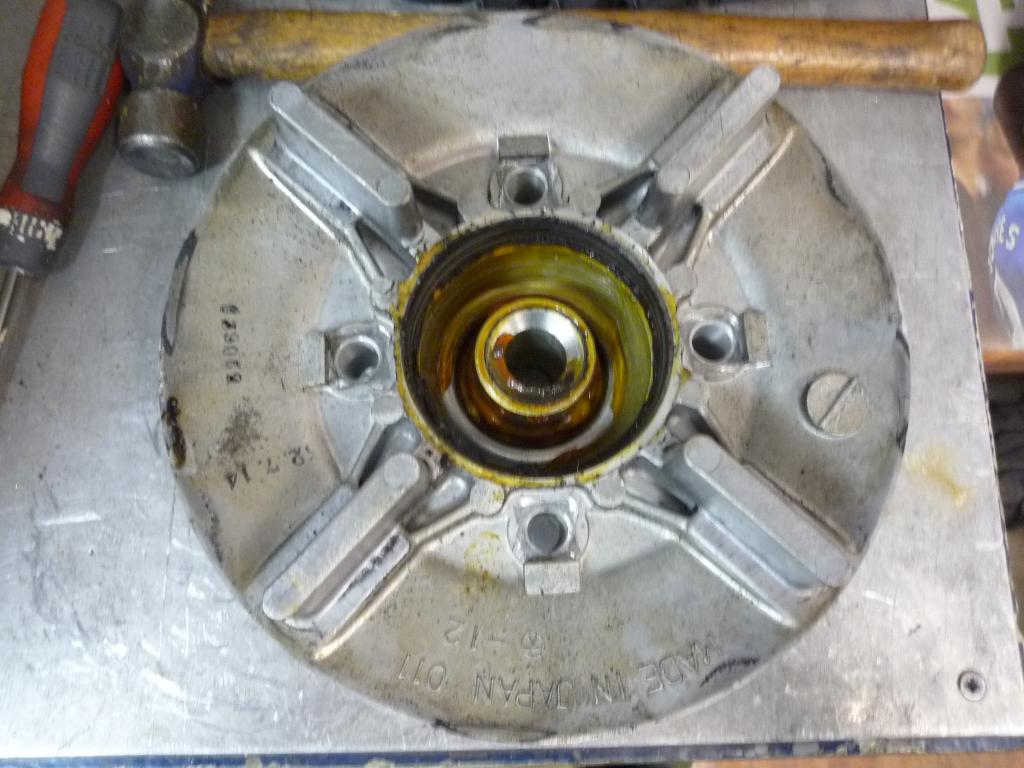
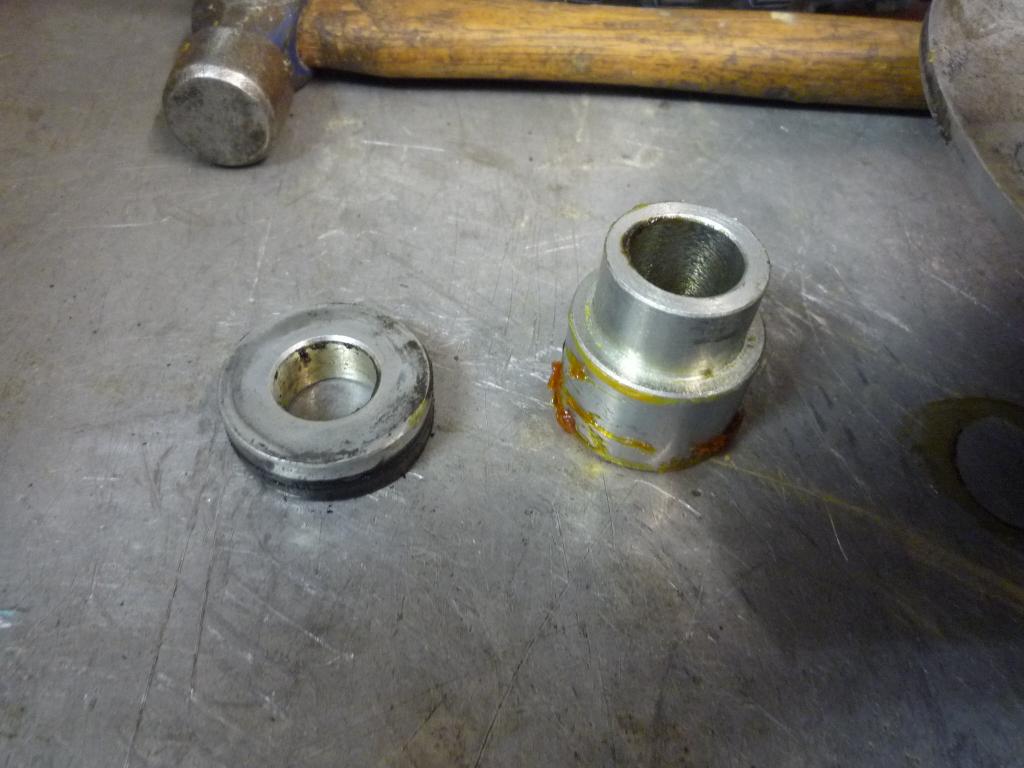
Bushes for reference.....................
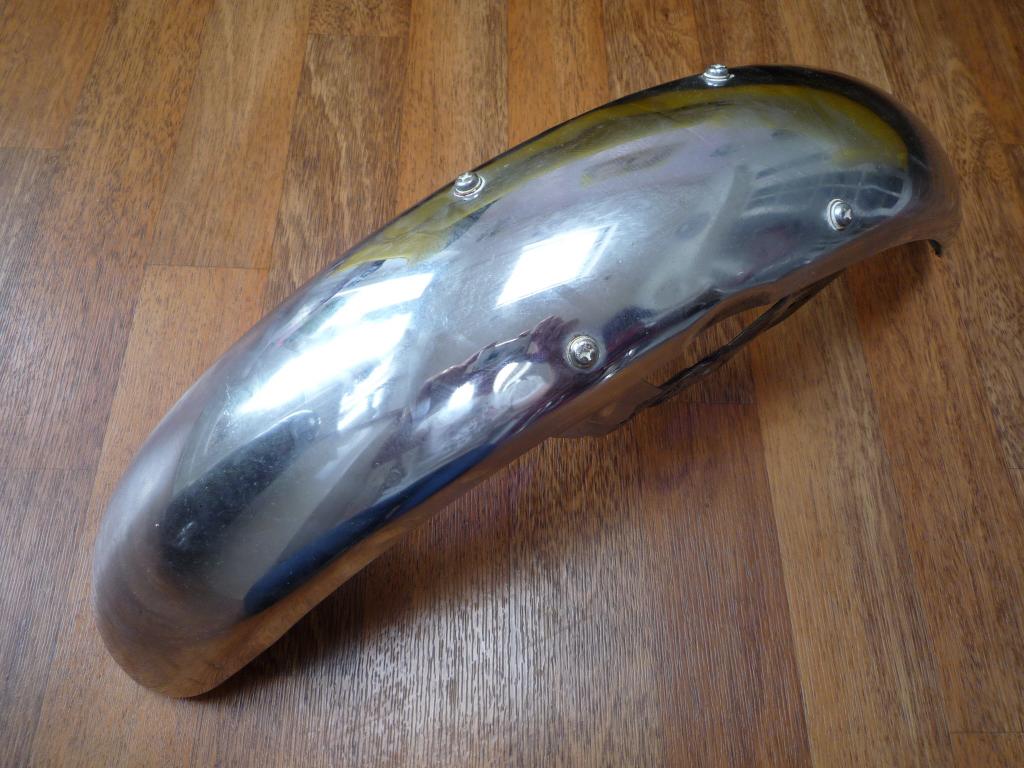
Finally for now I stripped the front mudguard, hopefully it wont be getting this
dirty again in the near future
![]()
![]()
Must crack on still lots to do.........................
![]()
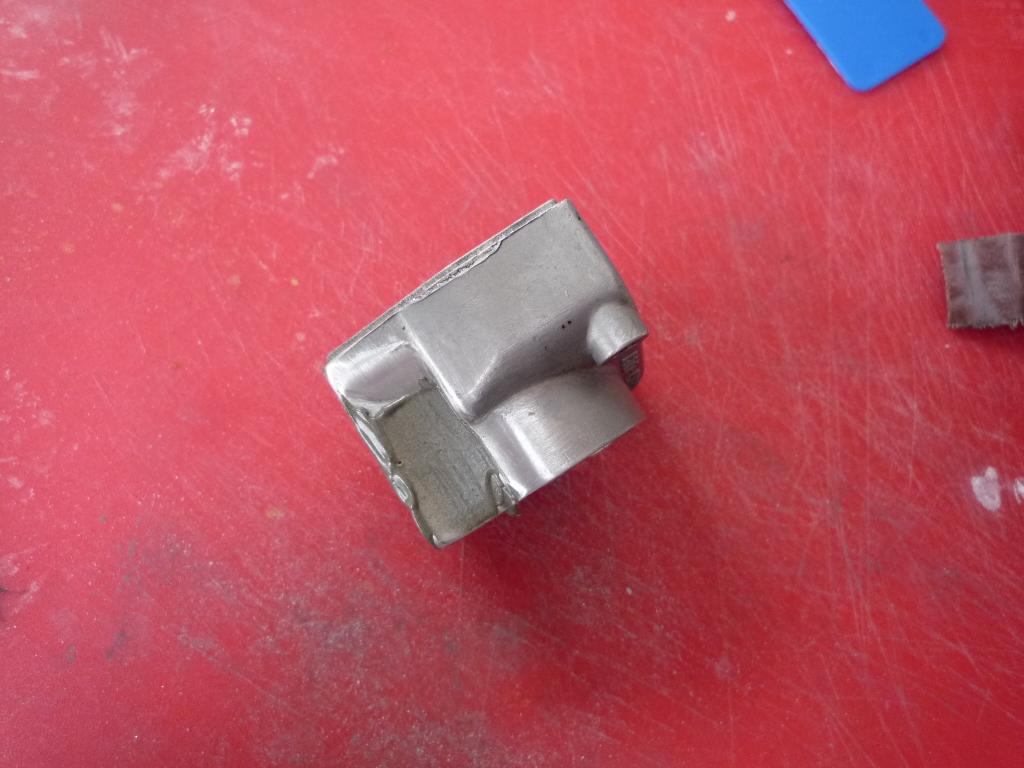
Well the broken switch gear half that I sent off to be welded has returned, not a pretty site really but not surprising as the material its made from is very poor and it is a Bugger to weld. I decided to go ahead with it anyway as I had nothing to lose.
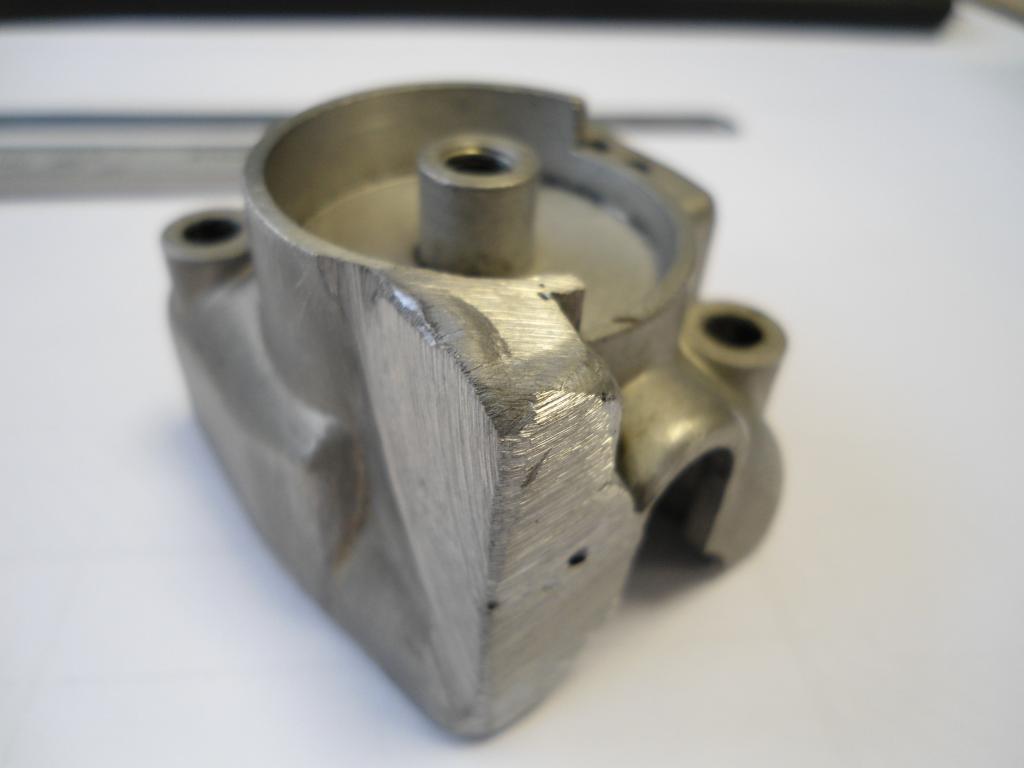
After a bit of fine machining (Cheers Paul) I set to it with the files and emery cloth to clean it up and re profile it.
The weld is very tough but there was a fair bit of pitting around which I filled with PP chemical metal, first time I had used it and very impressed.
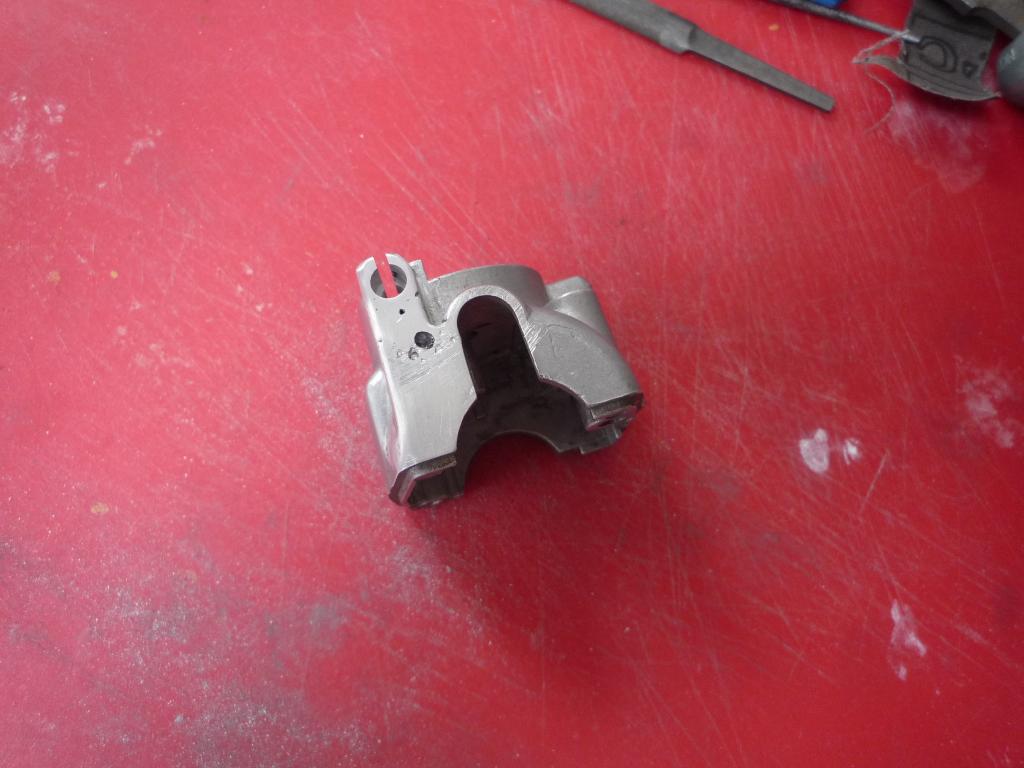

After a little bit of sanding I added a coat of primer to check it.


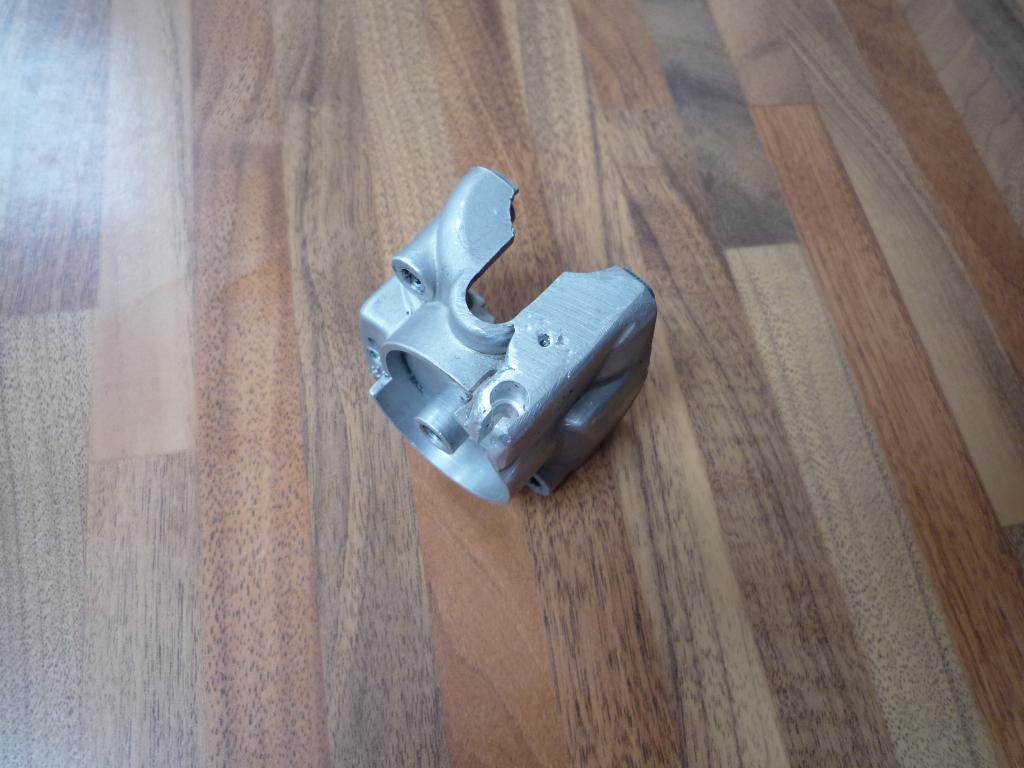
Tother side
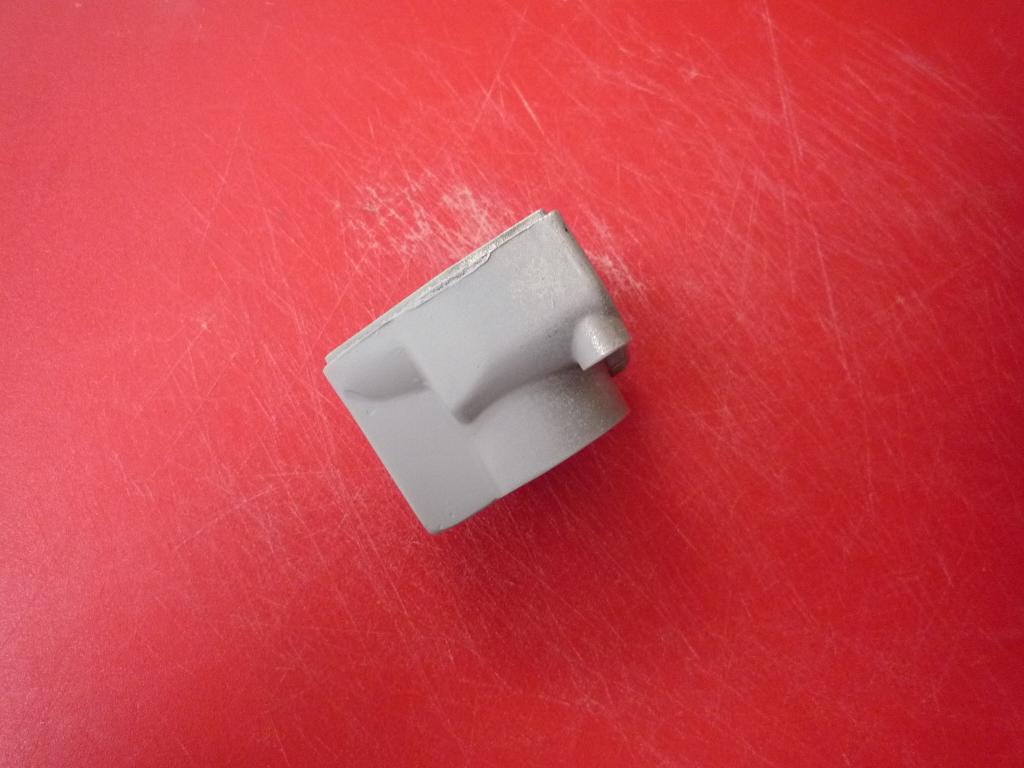
Worth all the effort, saved from the bin another job done.

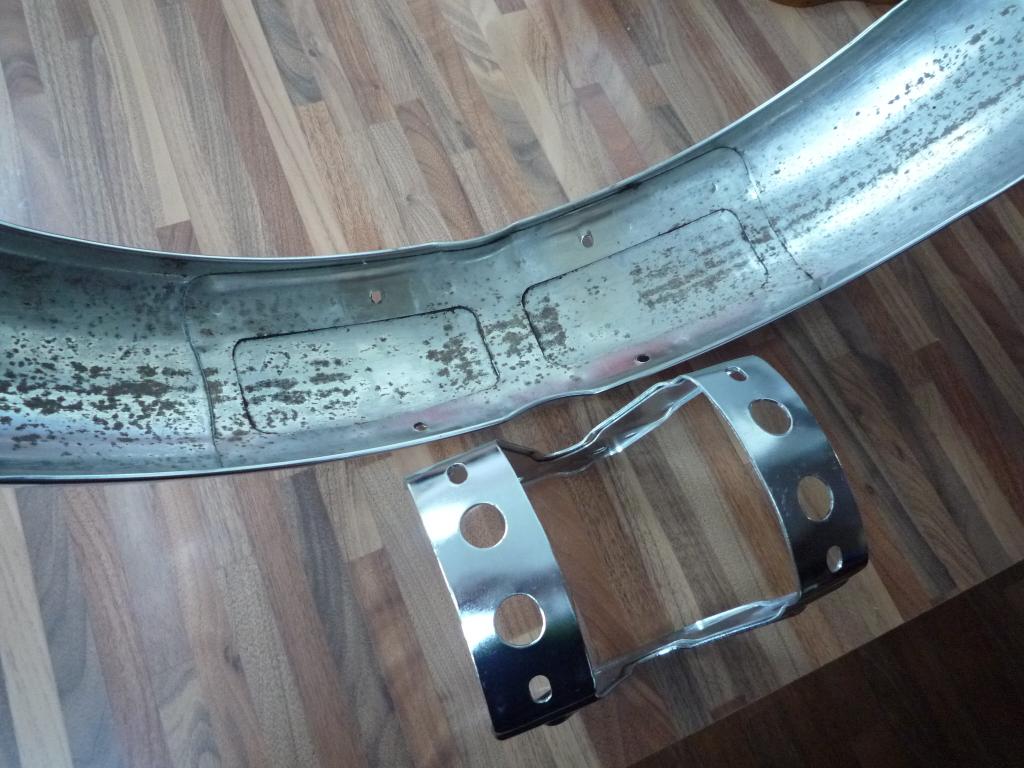
I have started to get the idea in my head that I can deliver most of my Chroming (less exhausts) to the platers before Christmas, with that in mind I have started to sort through and push forward with a couple of bits, the front mudguard which was covered in Canadian Muck is now cleaned up and free from damage with only very slight surface rust present so should plate up nicely.
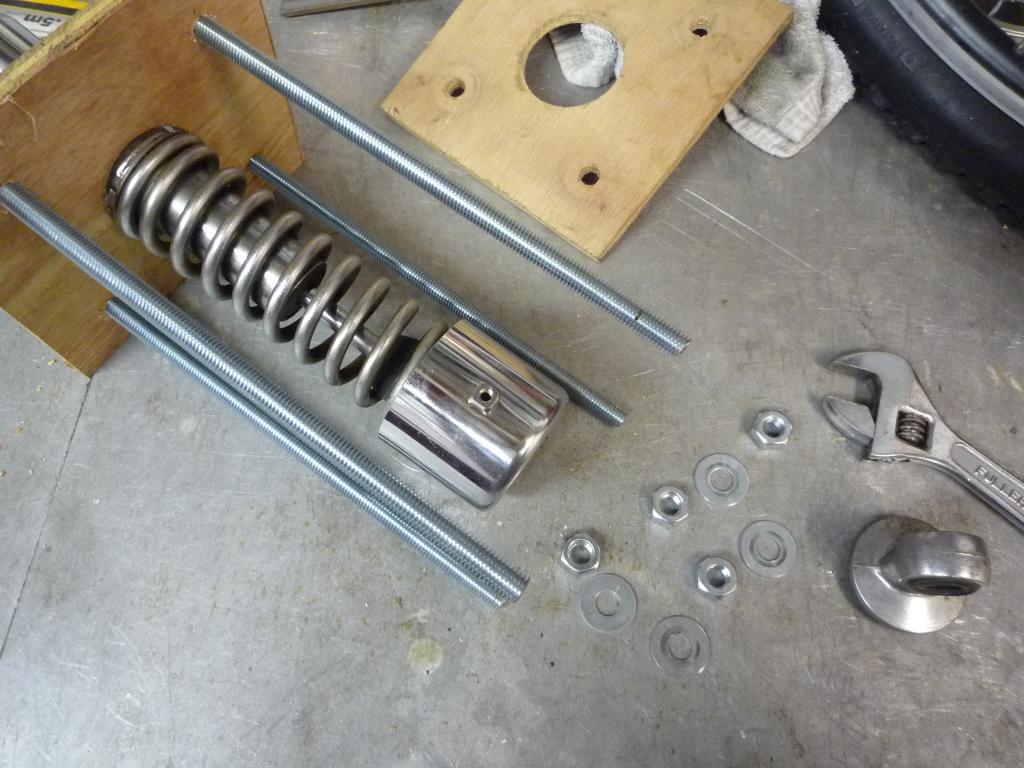
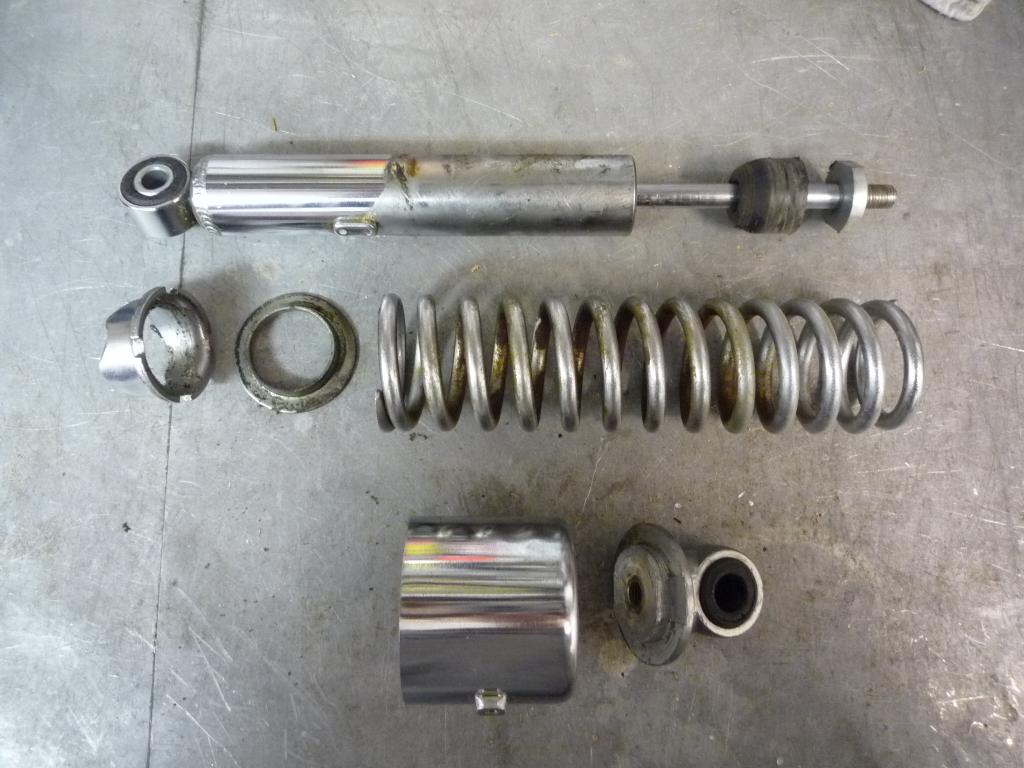
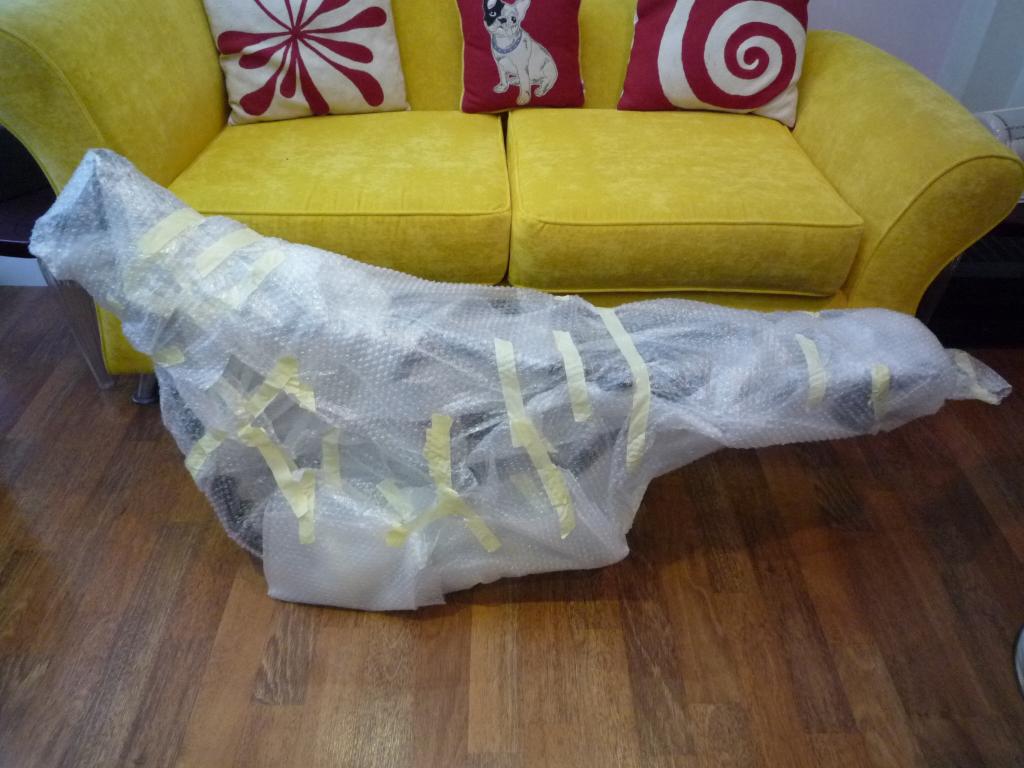
Then it was on to the rear shocks which needed disassembly and for that I made
up a simple jig out of some plywood I had knocking about.
Cut some holes......................
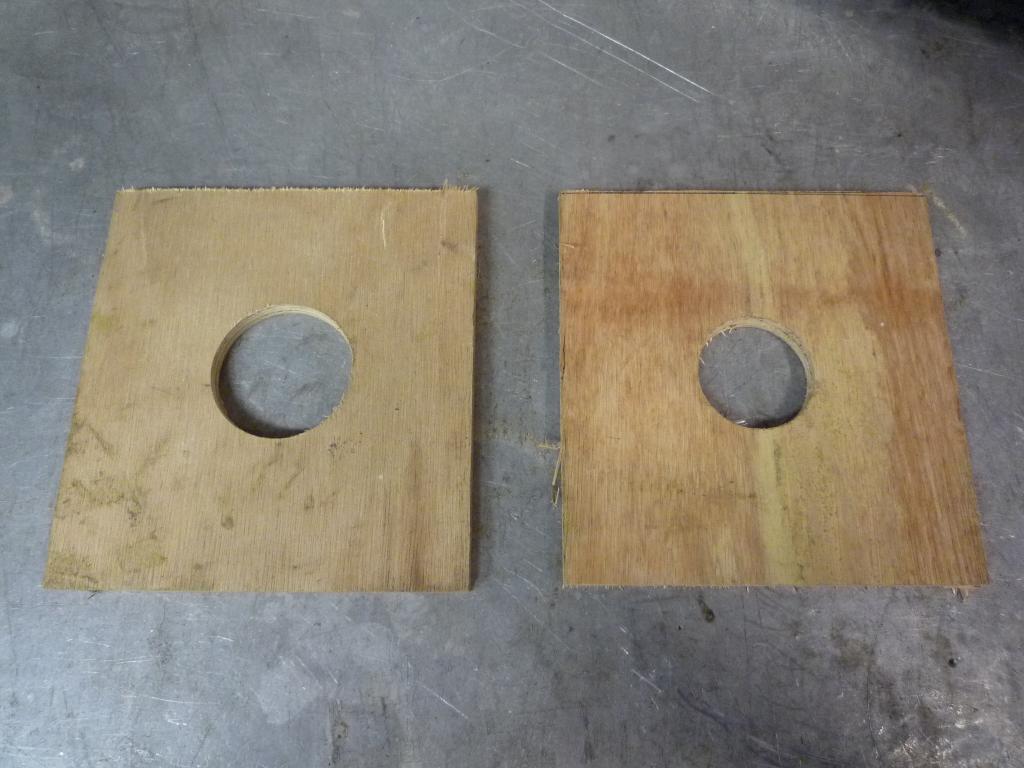
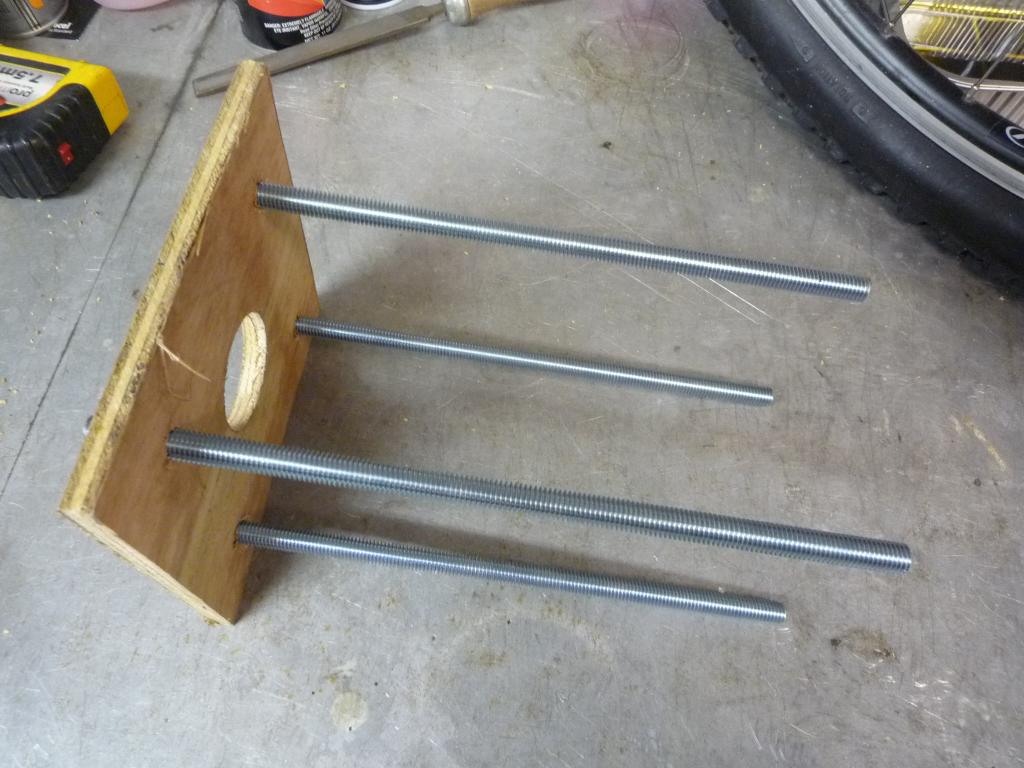
Fixed up some 10mm threaded rod
And clamped the shock in place
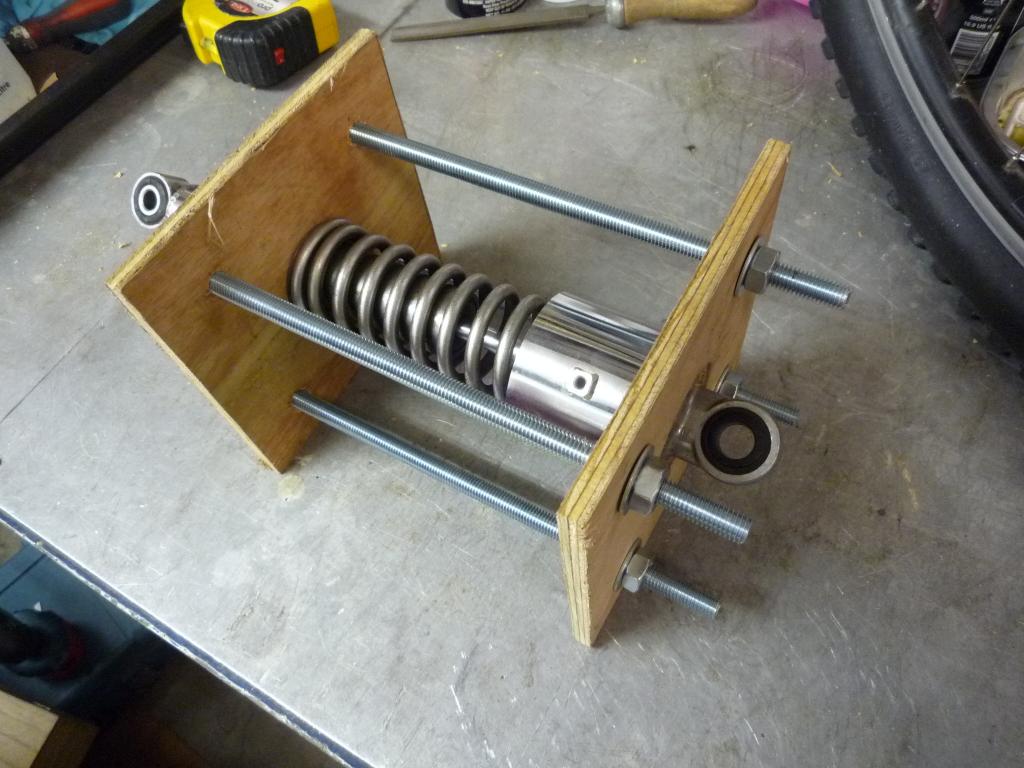
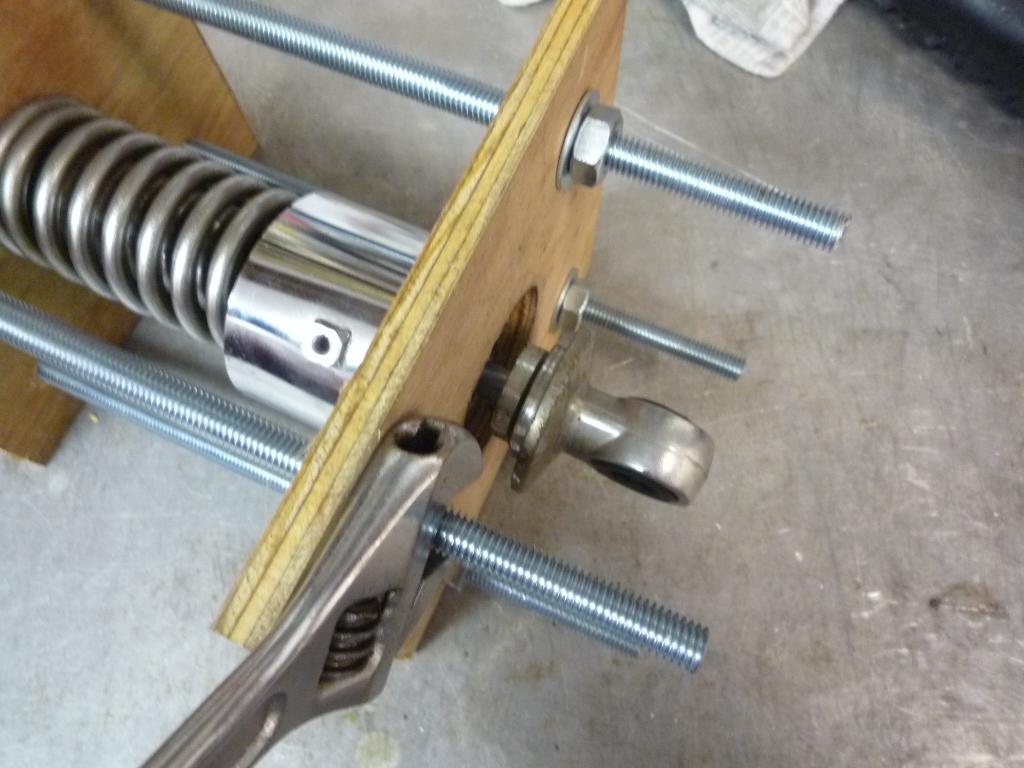
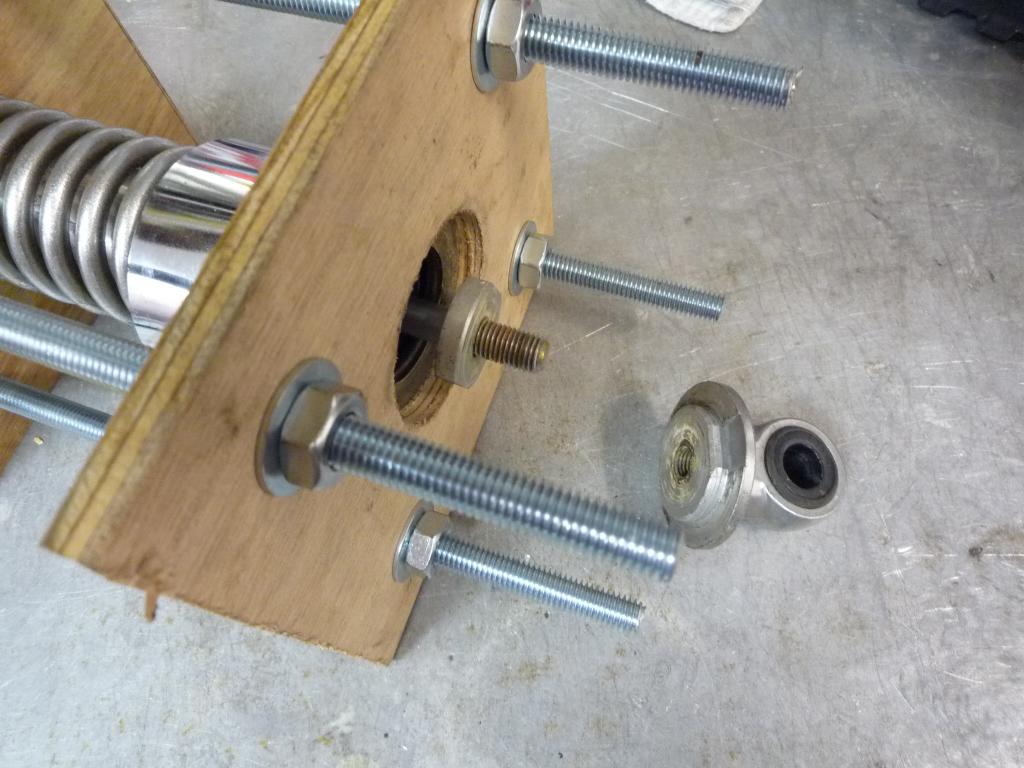
Then it was a case of simply tightening the nuts to compress the spring to allow access to the securing nut for the top mount.
Remove the mount and disassemble, job done
![]()
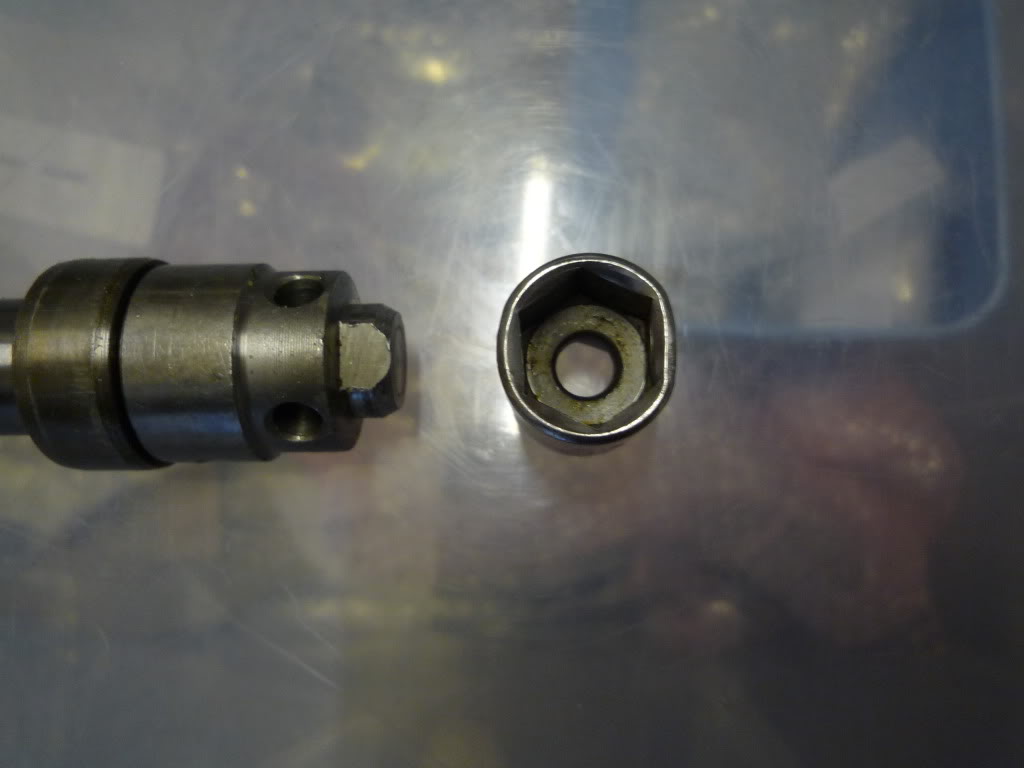
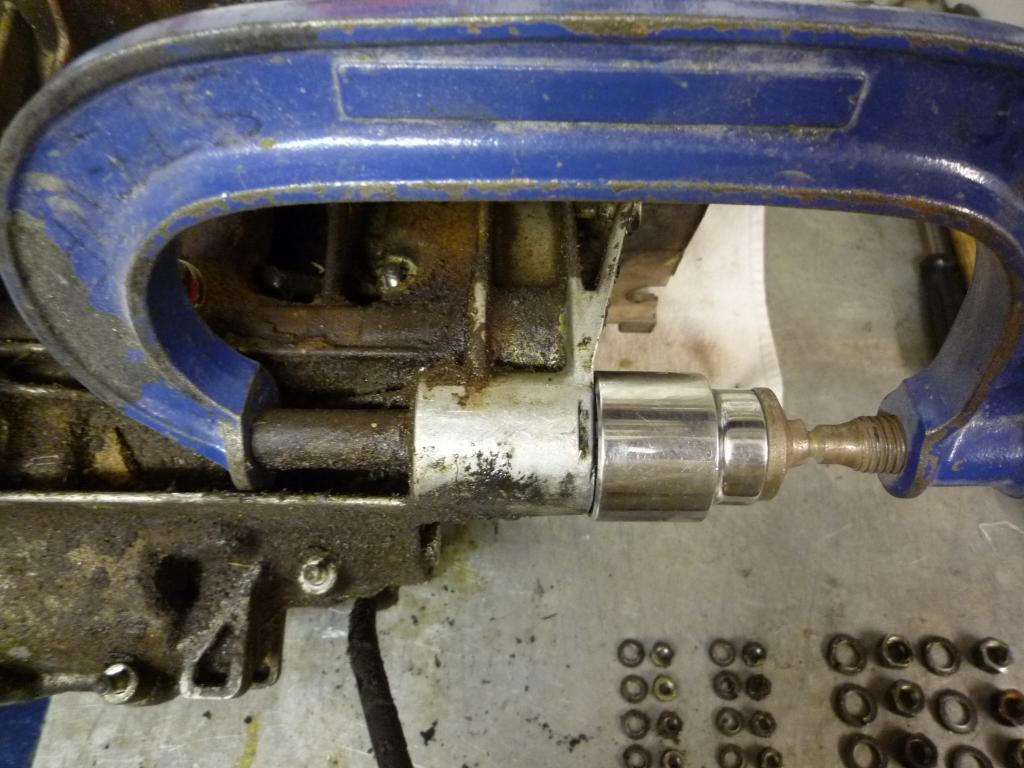
One thing you will encounter soon is the spinning
cylinder in the front forks......You will try to get the bottom allen bolt
undone and find that you will need to clamp the cylinder from the inside.
Thanks for the tip and information but I have come across the spinning cylinder
before on my 250, here's what I used last time, did the trick nicely and very
simple to make. Just need a 14mm socket slightly squashed.
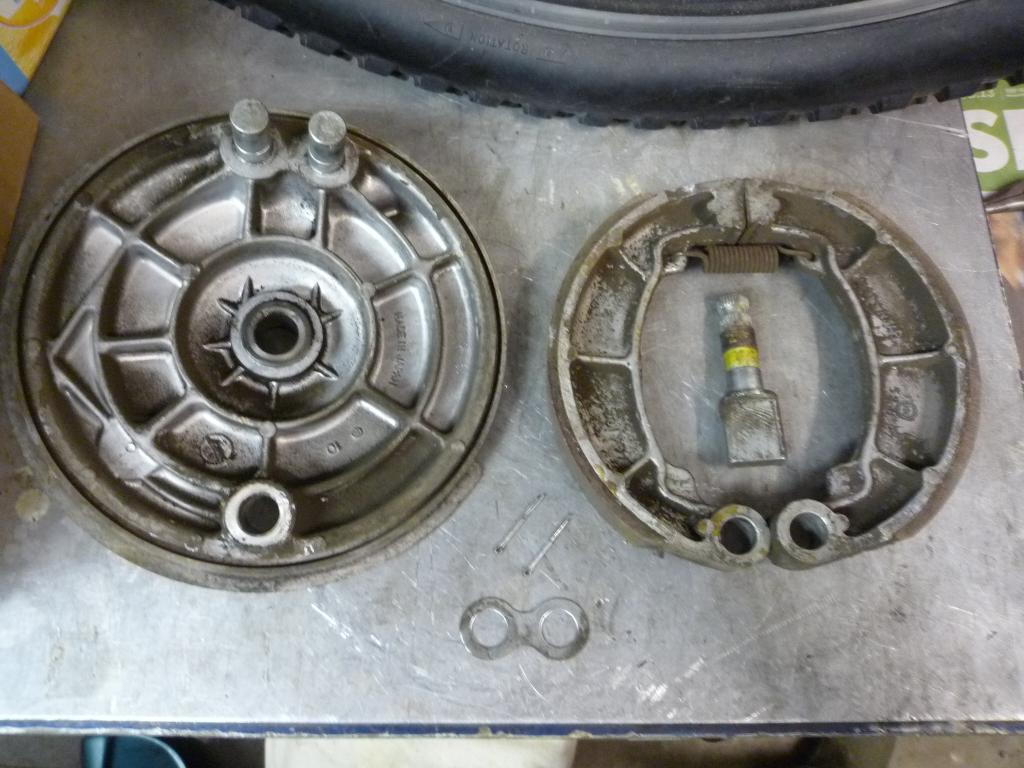
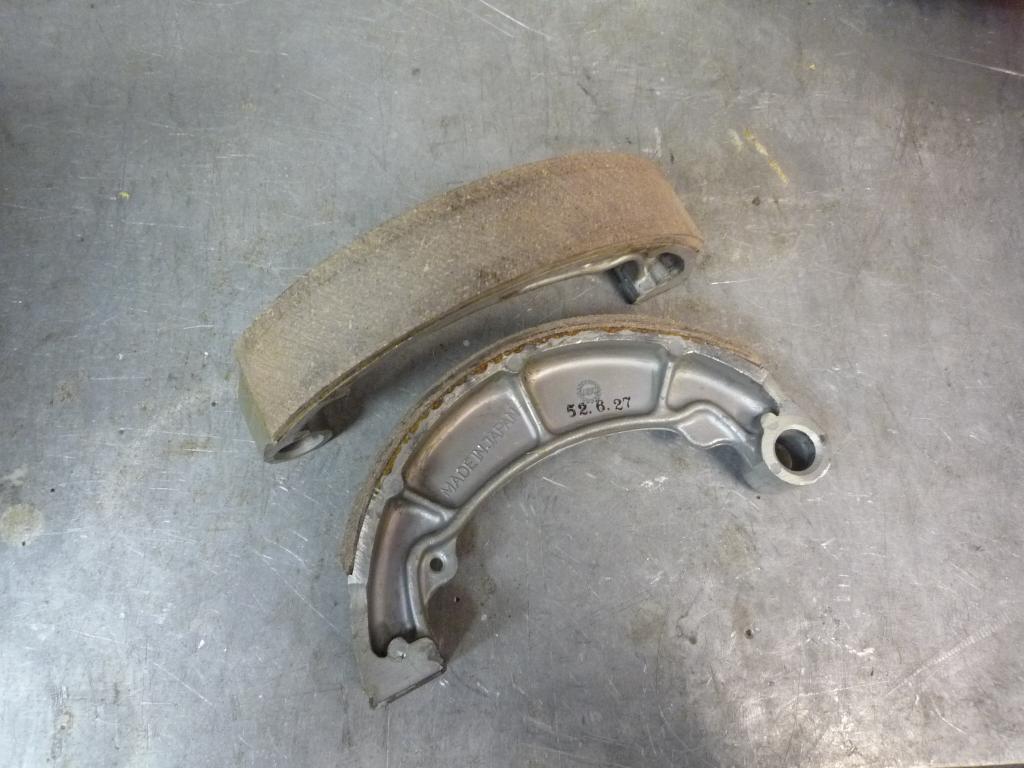
Yesterday I cleaned up, de glazed and inspected the rear brake shoes, and happily passed them fit for a few more miles yet.
Then with Rog666 getting me all worked up and excited
over his wiring loom it urged me on to do mine.
![]()
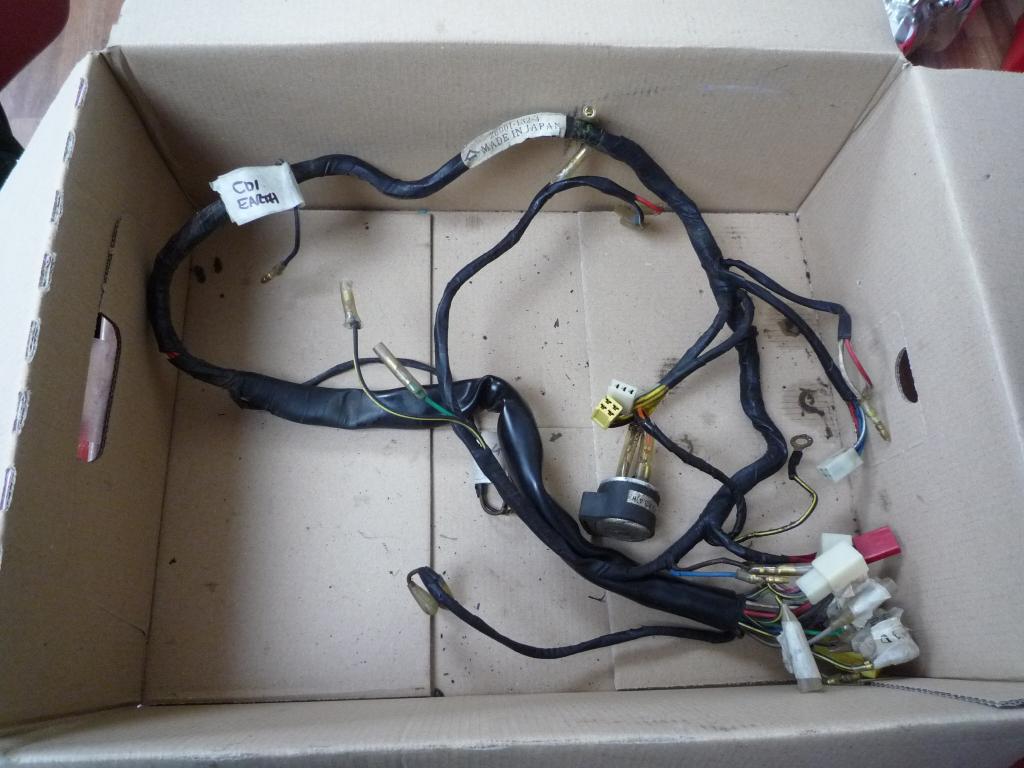
Now I thought about it and nearly did it and I know a
lot of people do it but I still can't get my head around sticking the loom in
the washing machine to clean it up, wires and water don't mix
so I bottled it and decided to do it my way and start from one end work through
it and clean as I go.
I know its sad but some jobs are very therapeutic and this was one of them,
loved it..... after cleaning, checking and making good any tape repairs of which
there were very few, all that was left to do was follow the wiring diagram and
label everything up. Its amazing how much you get to know the bike just by
following the loom around and what else it sets off in the process, where did I
put that rectifier!!
![]() :must
order a battery, must finish the switchgear, I hope I haven't lost it
:must
order a battery, must finish the switchgear, I hope I haven't lost it
![]()

Yet another job done, Thanks rog I owe you one
![]()
Well as I am still waiting for the powder coating to
arrive 2 - 3 weeks being extended (as usual) I'm not in a great hurry so it is
not a problem for me at the moment as long as it comes back as expected.
I decided to join the queue early and drop the main batch of Chroming in as it
will only sit in the Garage gathering dust over Christmas. Have gone for a place
in Alton on recommendation by a fellow triples owner and restorer they do seem
to be a nice bunch so fingers crossed. Set to be ready mid Jan which is perfect
for me and can be a late Xmas present .....well fettling is such hard work it
deserves to be rewarded.

With the indicator heads and the fuel cap the first
thing the platers tell you is that they are Mazak and not pure metal so there is
a risk that they may not come out as good especially if there is damage or heavy
pitting. Good results can still be had though but sometimes you have to question
should I get them done.
I would say cost wise they are cheaper to redo than replacement NOS parts but
buying repro would generally be cheaper and less hassle too, it's a choice you
make along the way.
First batch in well most of it bar exhausts, fuel cap,
and banjo bolts they will be planned in later in the new year, I have after much
thought decided to get the original shocks re chromed it does work out a little
more expensive than buying the repro's (did have a look Malcolm, cheer's) but
decided they were worth saving.
Now the scattered parts pile is getting less in the garage I will soon be ready
to tackle the engine
![]()
Progress has slowed up a little at the moment but
I will continue as and when
I can..............
![]()
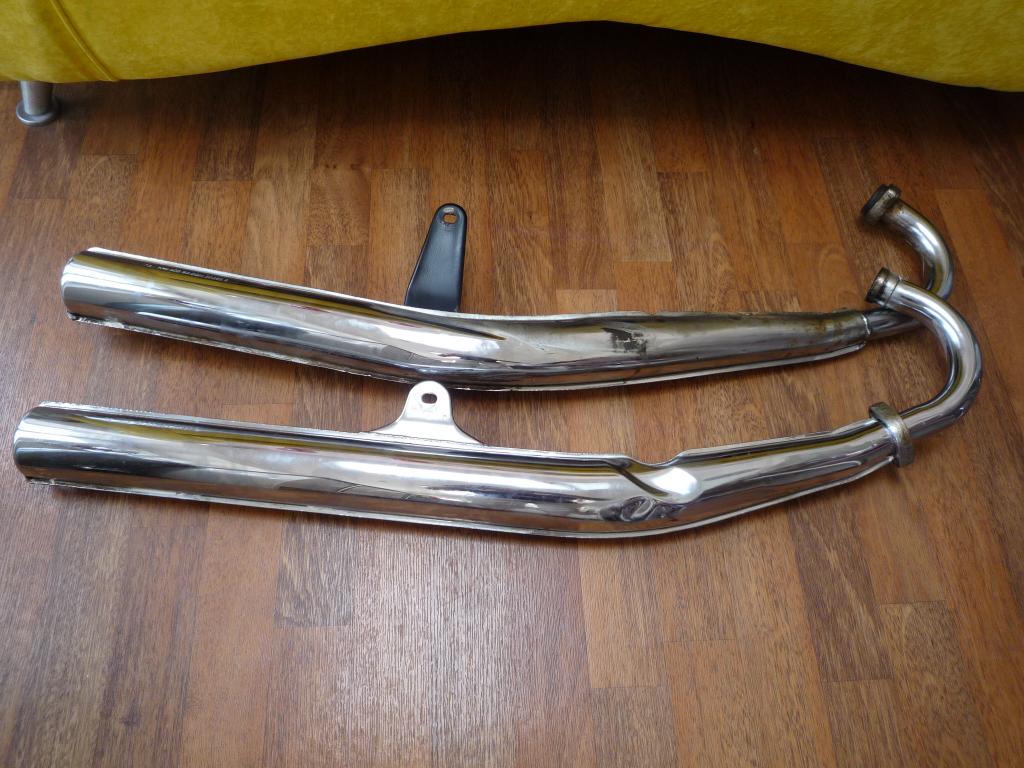
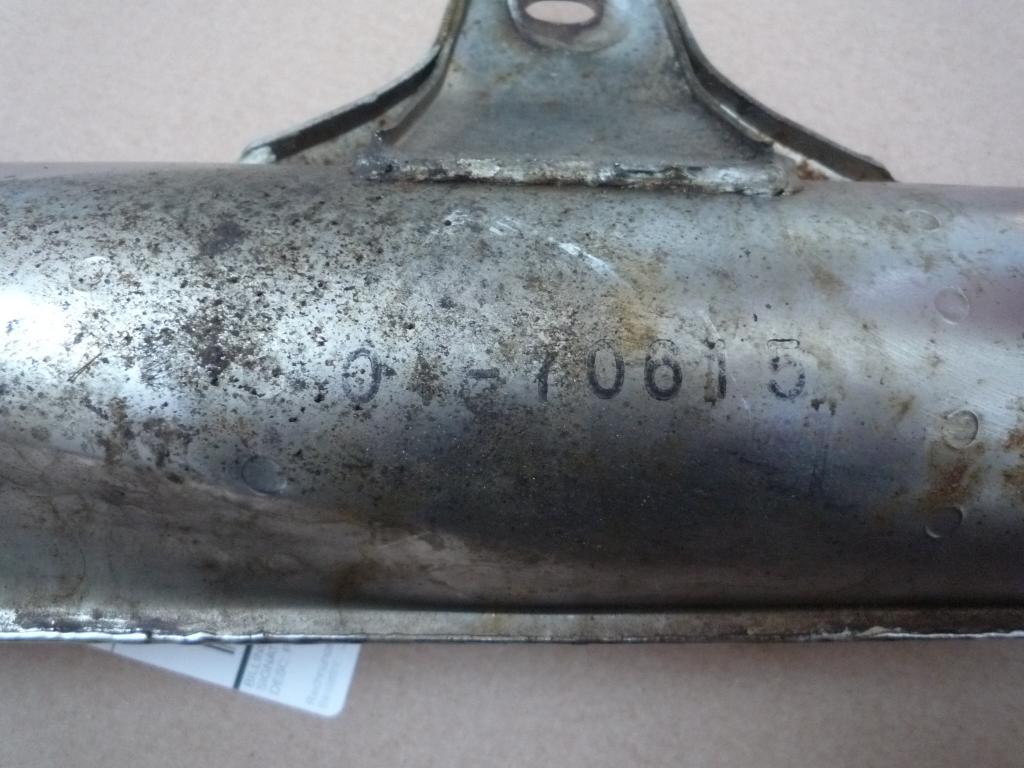
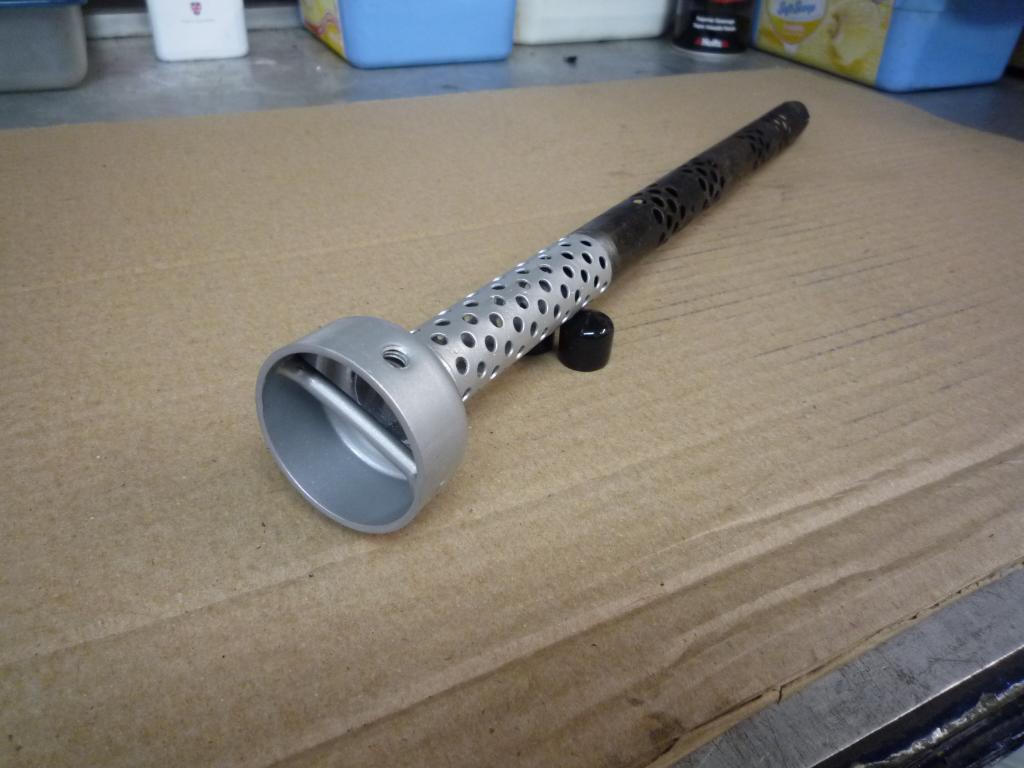
I decided to clean the exhausts up and coat them with Gt85 till I am ready to
sort them out, nice to see the part numbers still stamped on the back. If I was
being anal about this restoration lark I would be thinking about re stamping
them once they are fixed up....mmm
![]()
Saw how the collars were retained, and removed them all for cleaning.
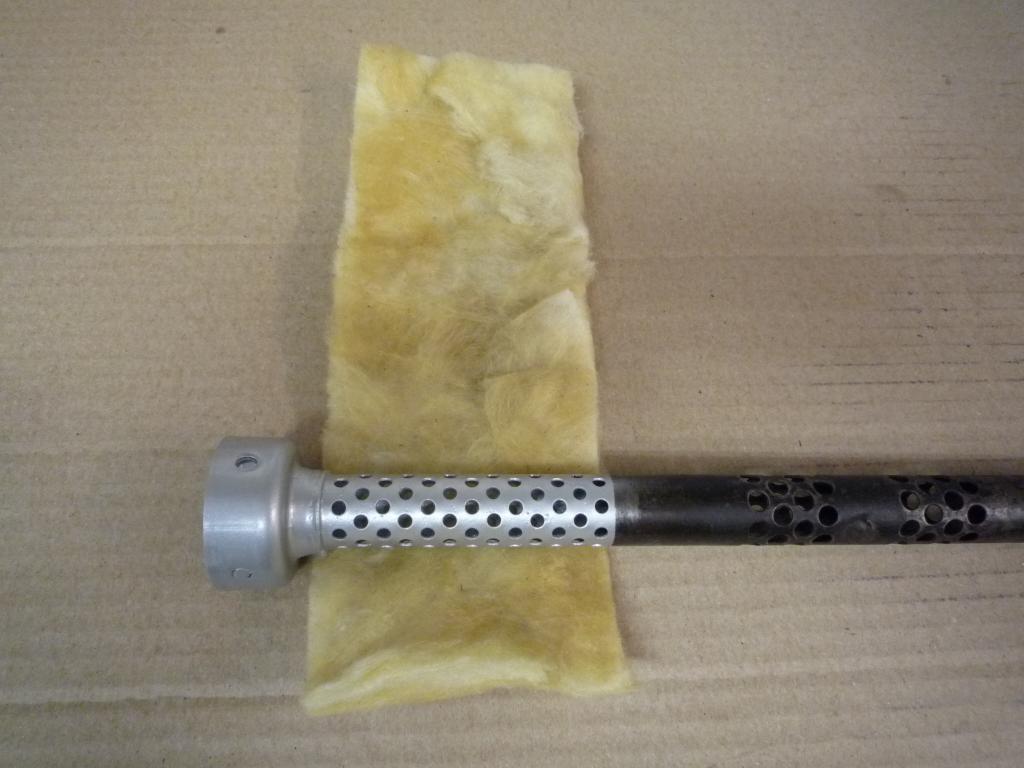
Then started to remove the baffles all three coming out nicely complete with wadding.

This one looking a touch muckier!!
Pipes cleaned up nicely but still some work to do.....oh joy can't wait
![]()

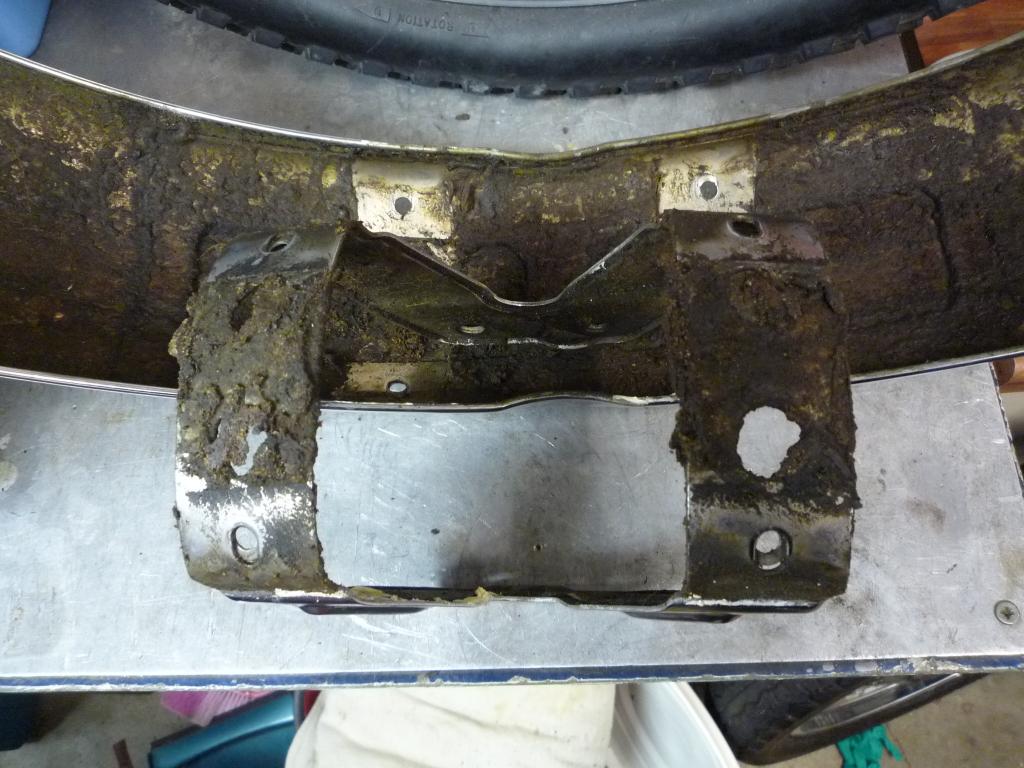
Impressive mounting bracket that should have been powdercoated.... and minor areas of wear.
Not too bad though from a distance, and I seem to remember seeing a lot worse!
Also gave the rear brake hub a little polish.

And was lucky to find and really couldn't resist this.........Happy days
![]()

Picked up my Powder coating yesterday after a long 2 -
3 weeks turnaround ![]() (
Malcolm's nearly finished his bike)
(
Malcolm's nearly finished his bike) ![]() .......but even though it was delayed I am very happy with the results and the
frame looks amazing so happy days
.......but even though it was delayed I am very happy with the results and the
frame looks amazing so happy days
![]()
I now have a lot more bits to hide away under the bed
![]()
Very satisfying progress
![]()
Decided it was time to start on the engine strip down,
this will be my first full engine strip believe it or not, so I will be taking
loads of pictures along the way and be learning as I go.
Any helpful tips or useful "you don't want to do it that way" comments would be
gratefully welcomed..........so here goes, I'm going in ![]()
![]()
![]()
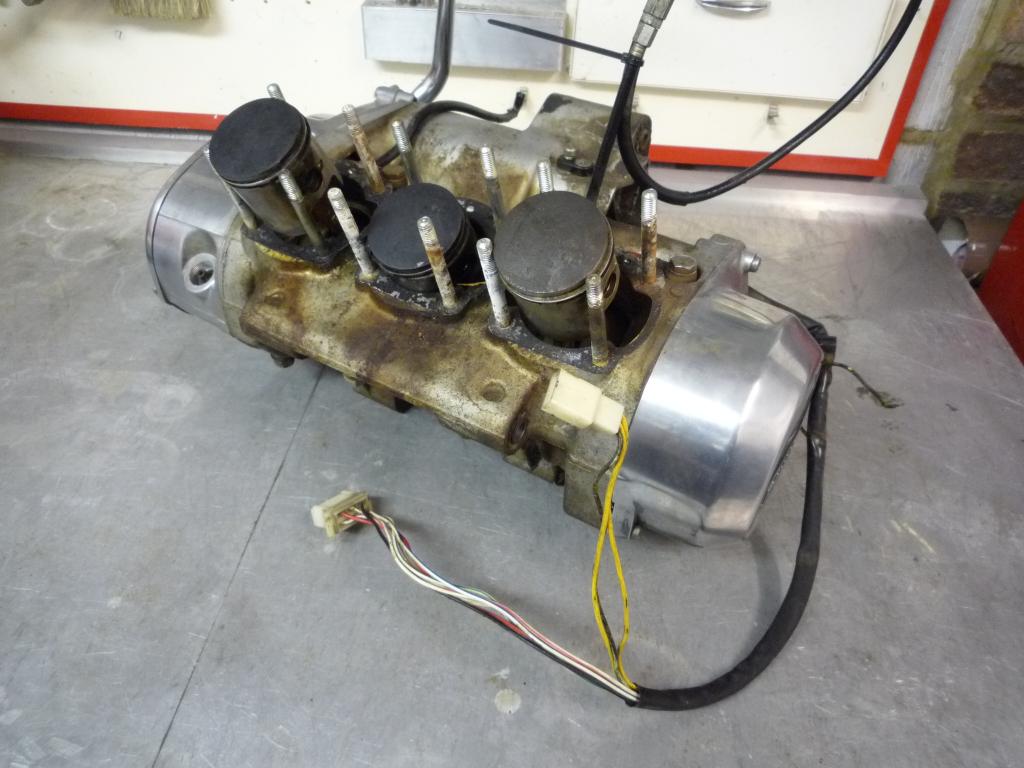
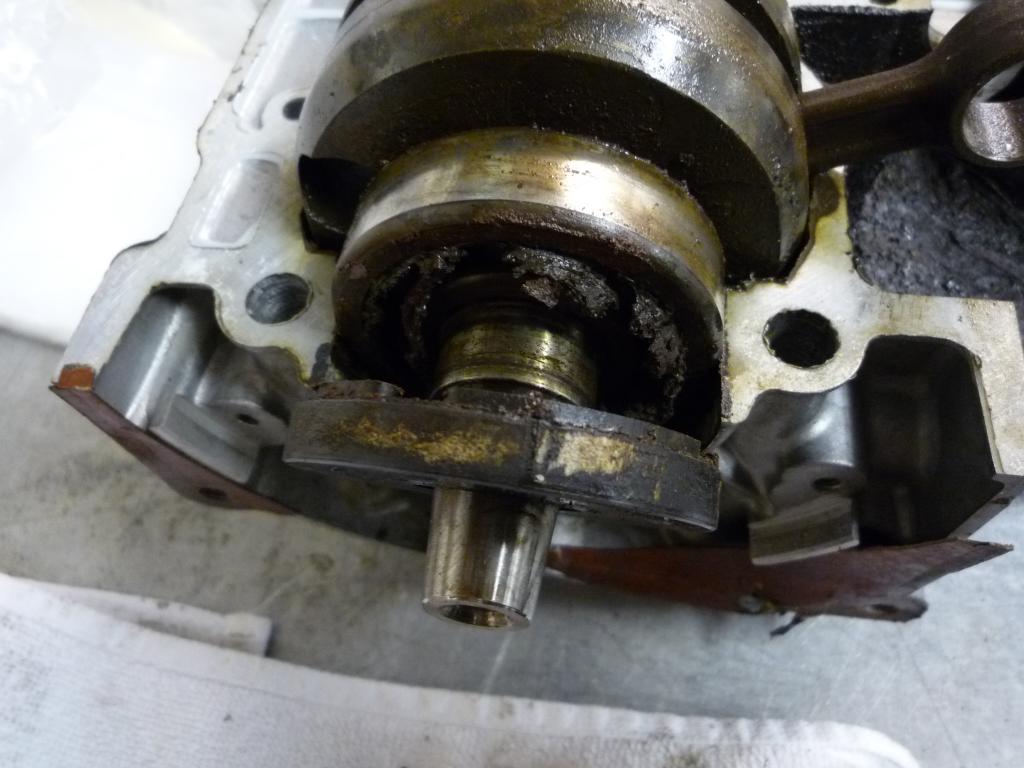
First step,remove the pistons.......
Left cylinder first and this shows how much play was in the rod, equates to about 3mm sideways play.
Little ends removed show more signs of muck from that cylinder.

That's the top end strip complete and straight forward, the top ring on the left piston was found stuck in the groove on one end, a couple of days soaking and its now free.
I will take pictures as I go along and
I will try and
condense them but if you are happy to see them I will post them
![]()
![]()
to be continued....................
Now I'm back from my little trip away its time to
crack on with the engine strip down.
I did some of this before xmas but haven't had time to post until now......
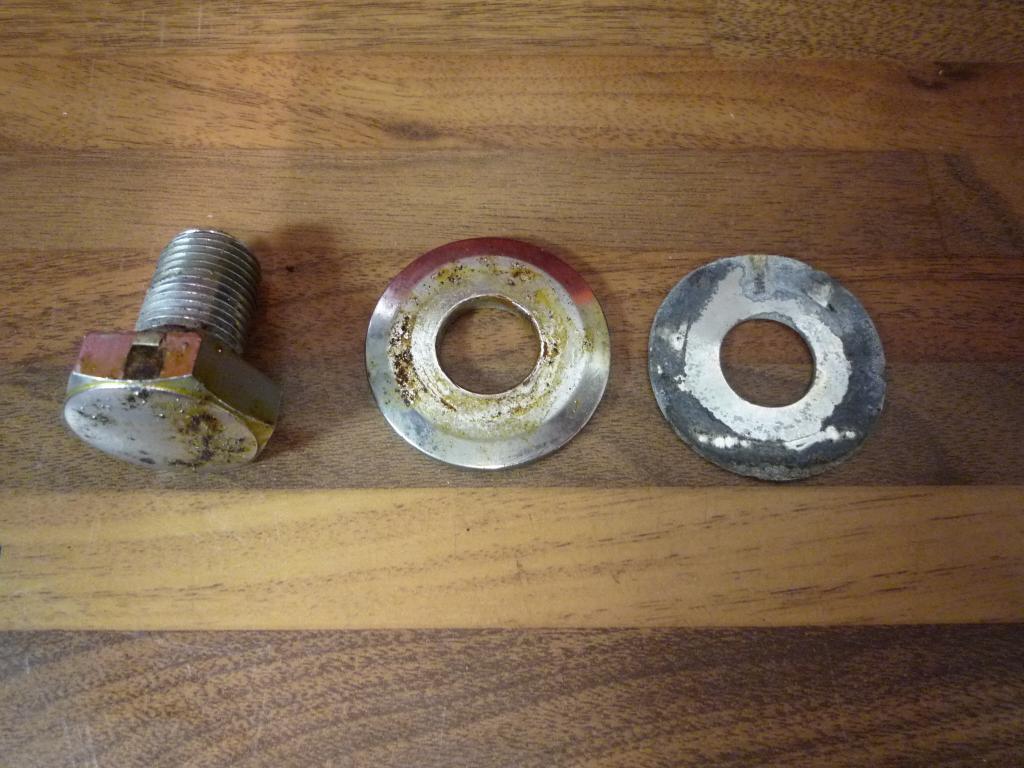
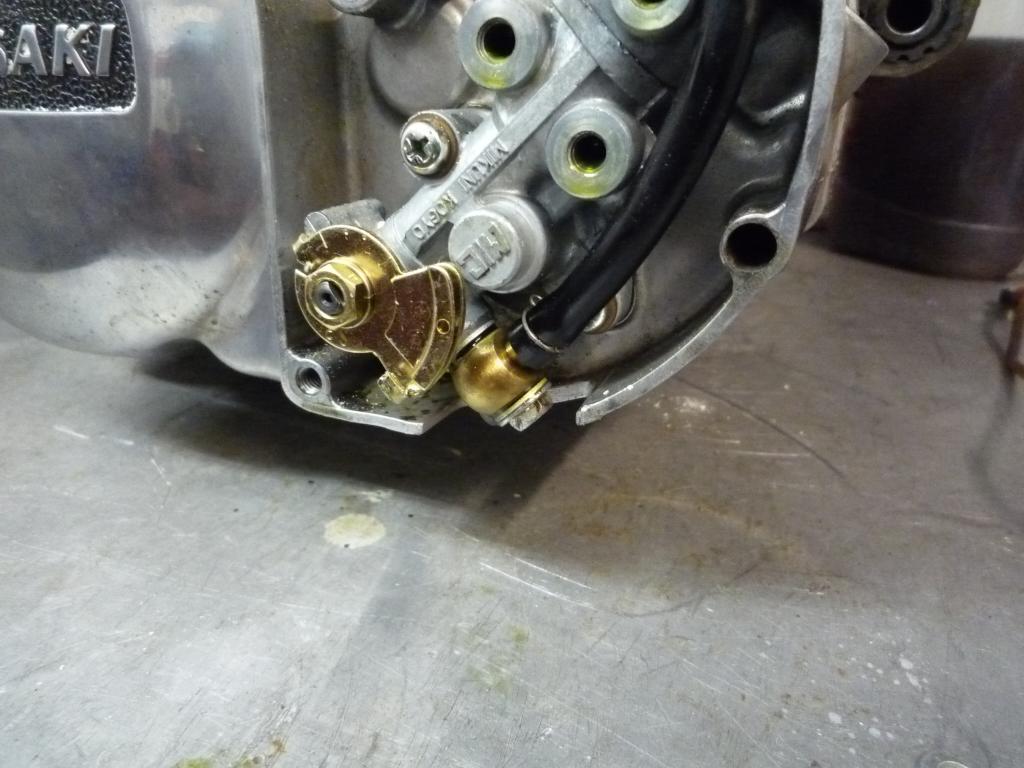
Started off by removing the oil feed banjo bolts.... noting the different washer sizes.


then onto the neutral switch

The clutch cable was still attached so this was removed which allowed me to remove the clutch release mechanism.
The sharp eyed amongst you will have noticed that I have forgotten to show the
clutch pushrods but I did take them out a while back, Honest
![]()

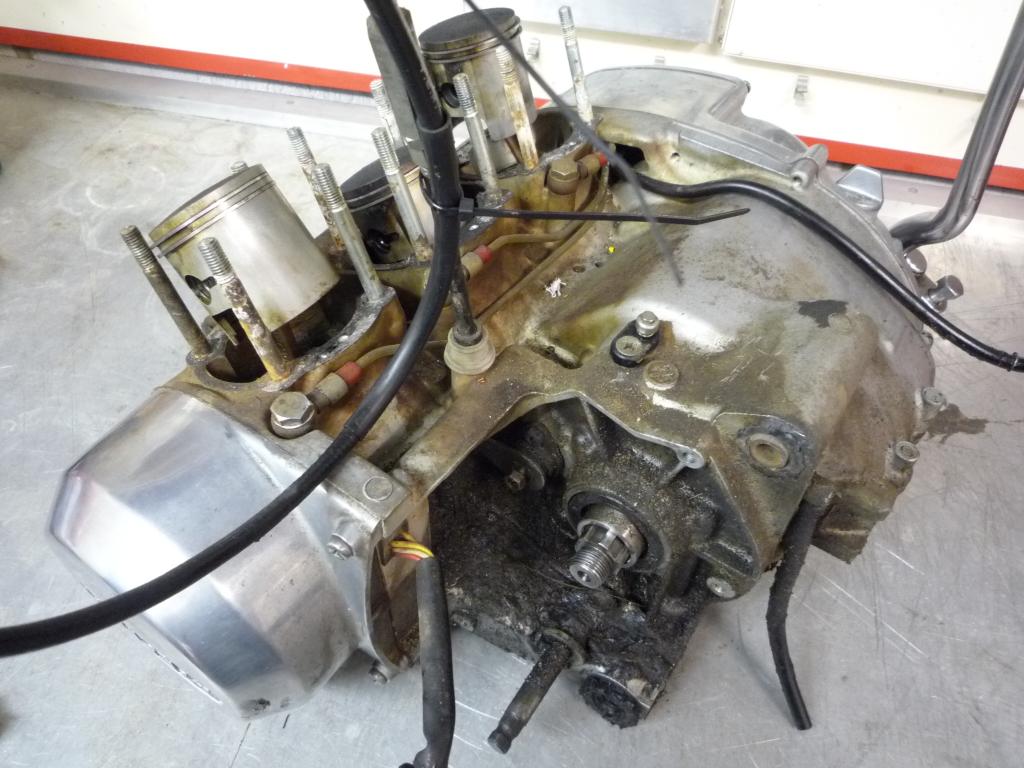
Thought I had better drain the oil before it gets messy, pleased to see it reasonably clean.

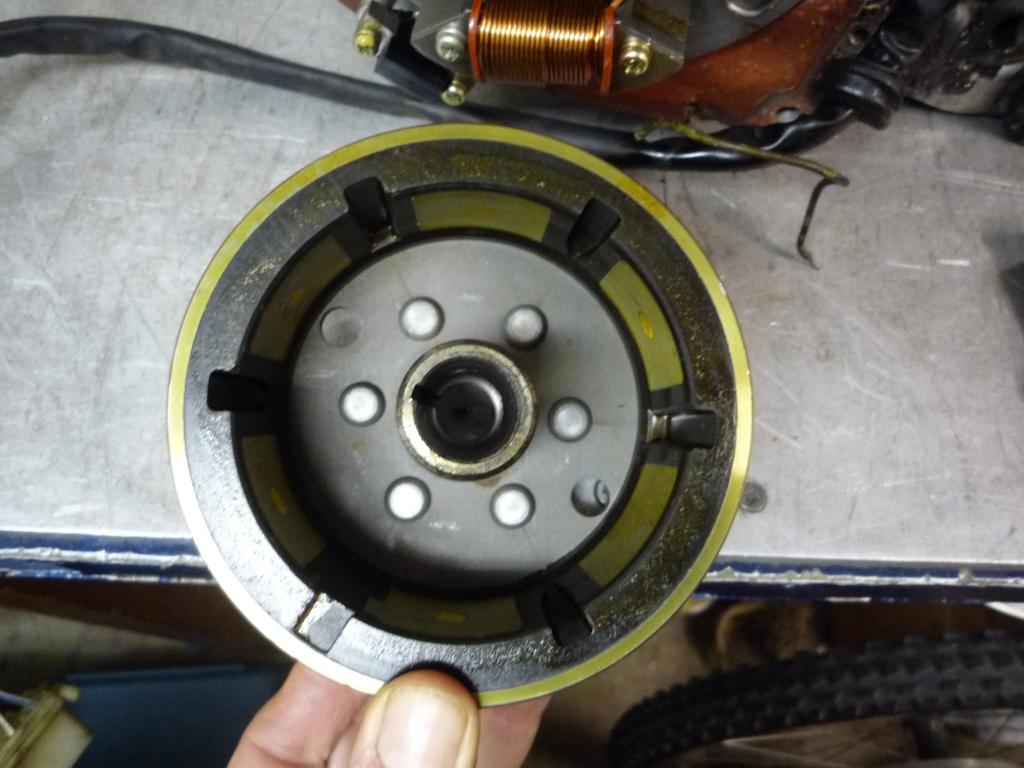
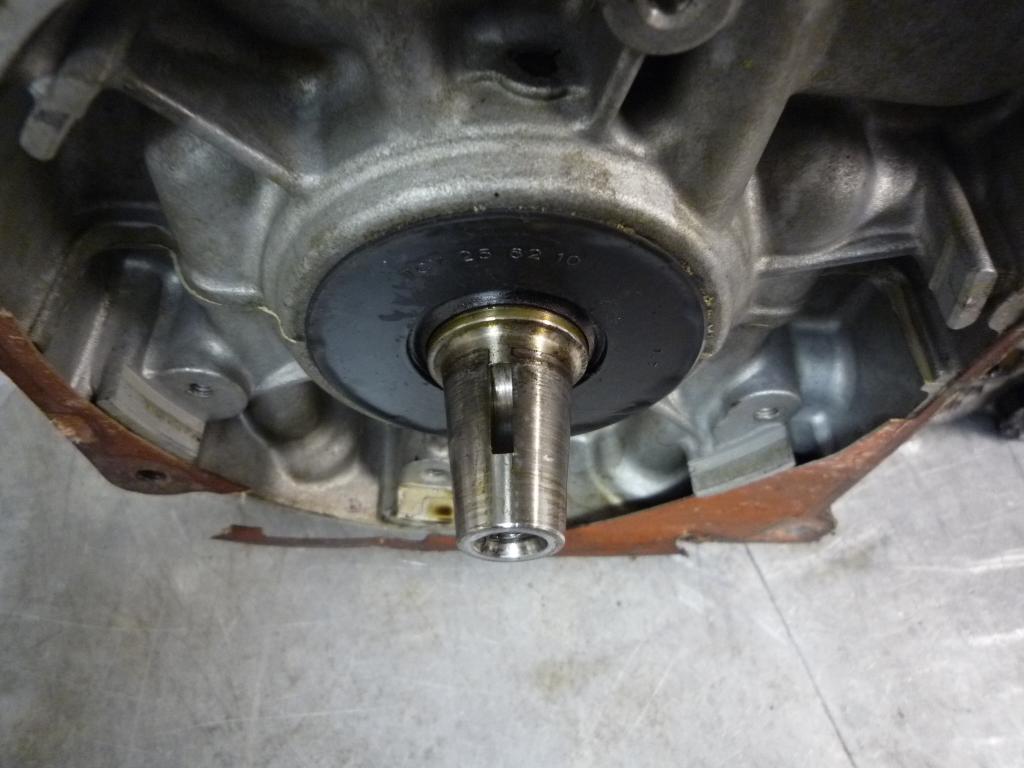
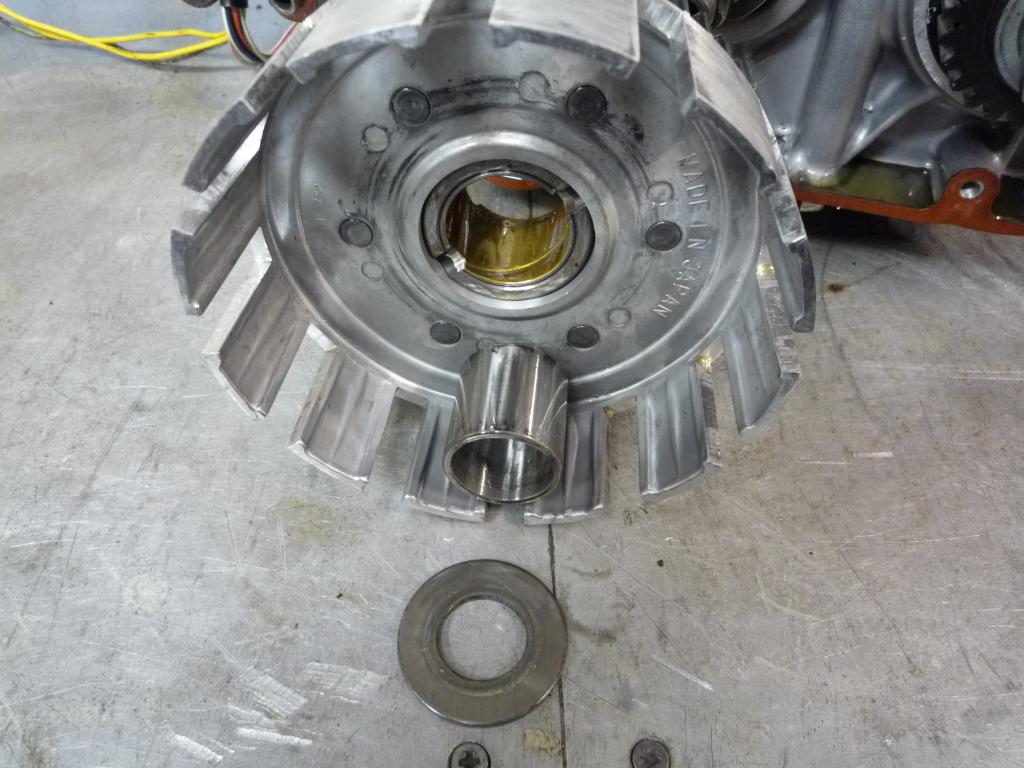
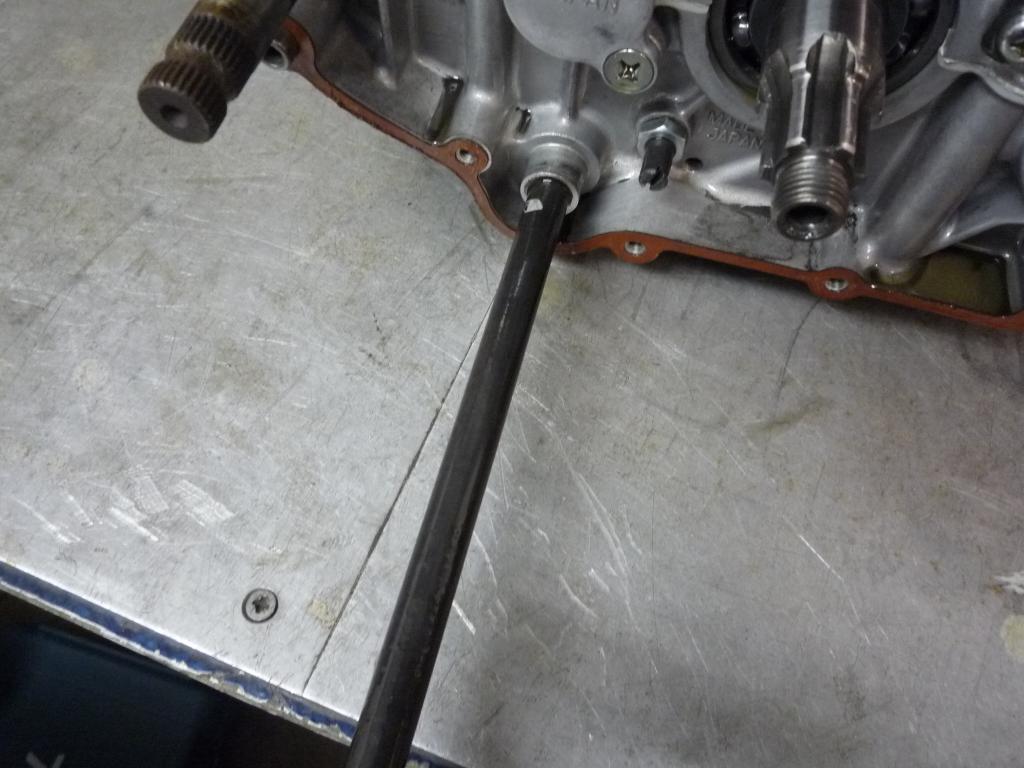
Removing the left side casing reveals the flywheel and the ignition pick ups............... then taking out the centre retaining bolt.

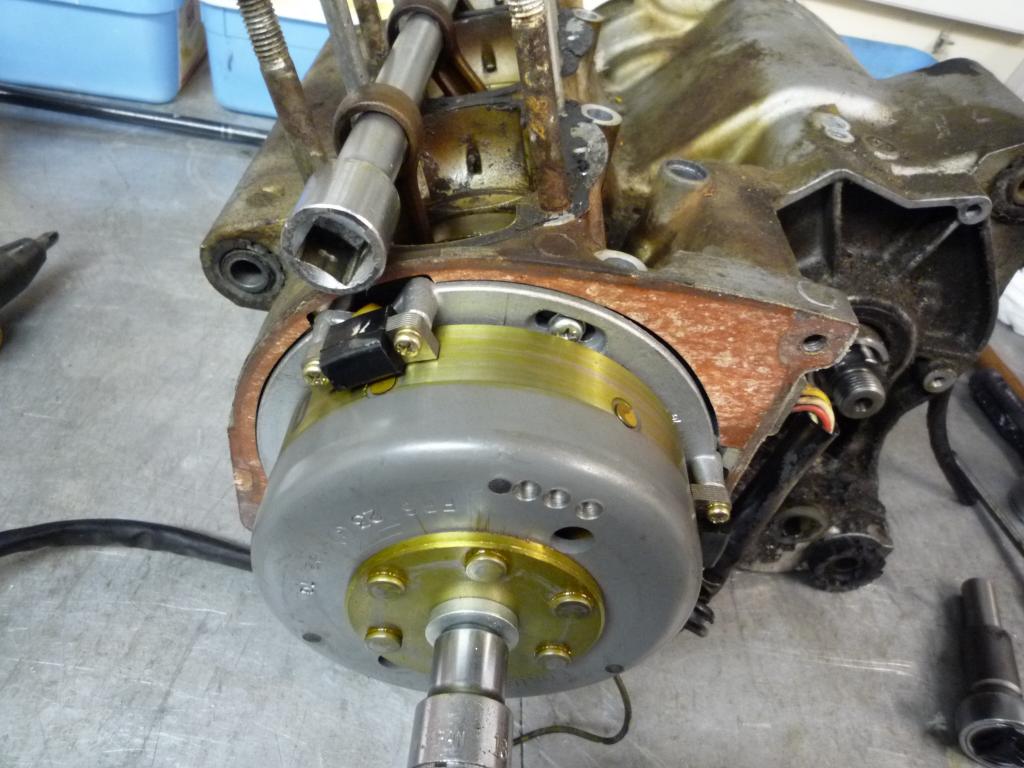
Allows me to screw in the rear wheel spindle (axle) and remove the flywheel.
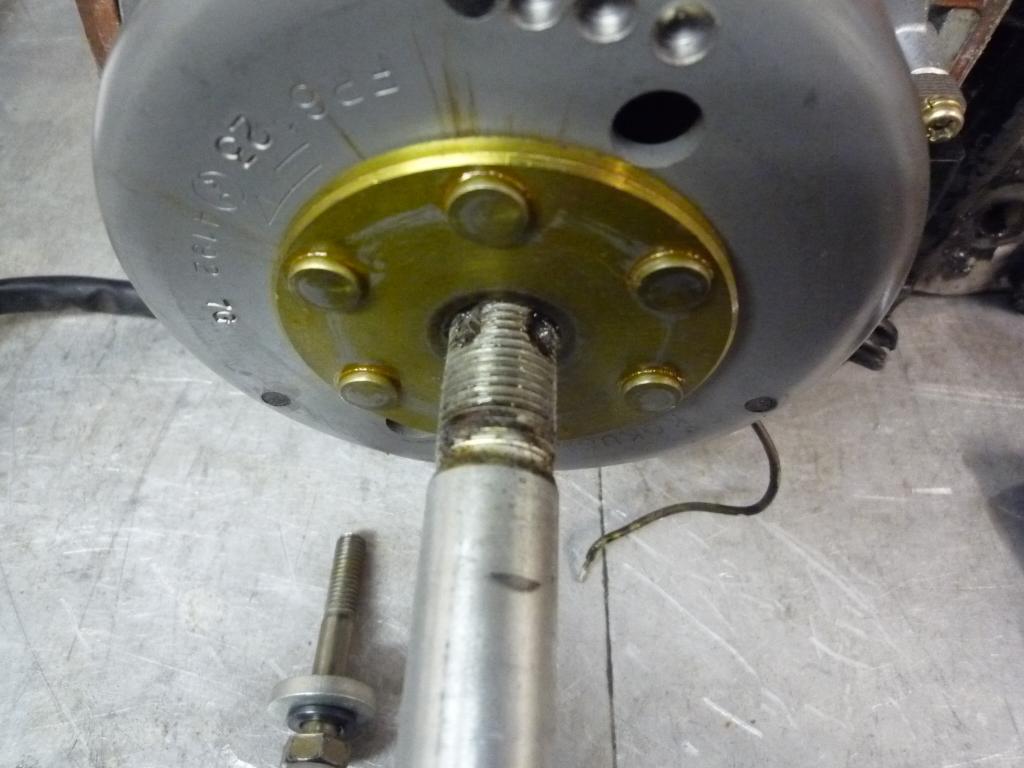

and reveal the two stator coils.


You can just see the keyway and the locating key (mustn't lose it).

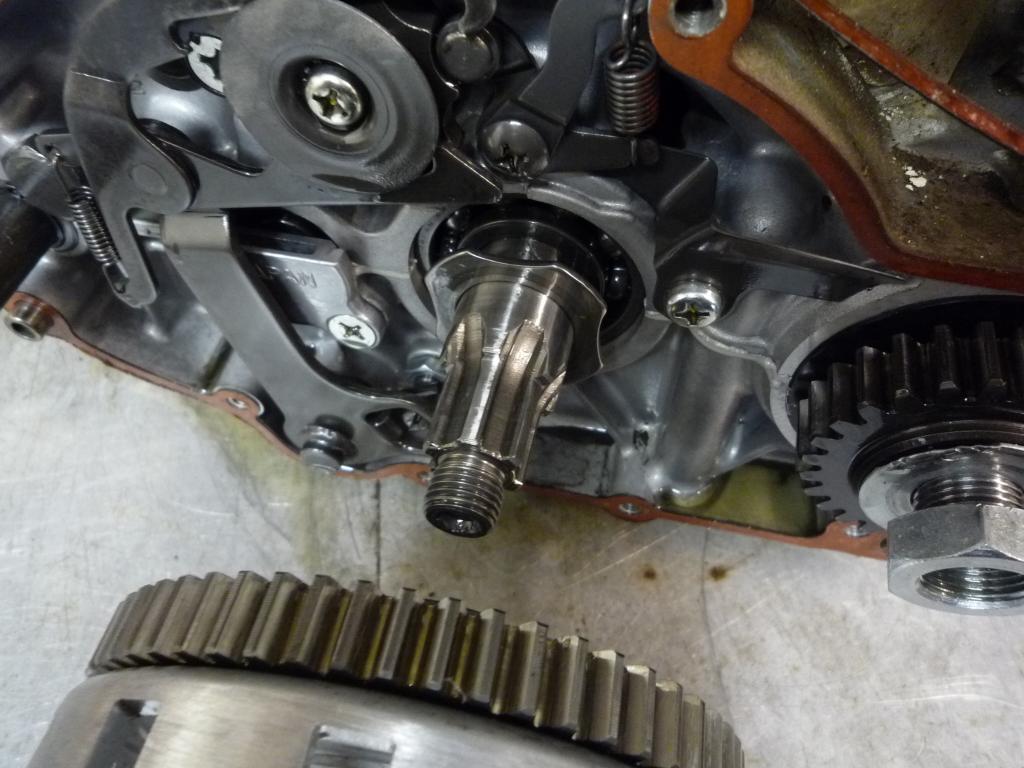
By removing the three mounting screws and the wire grommet

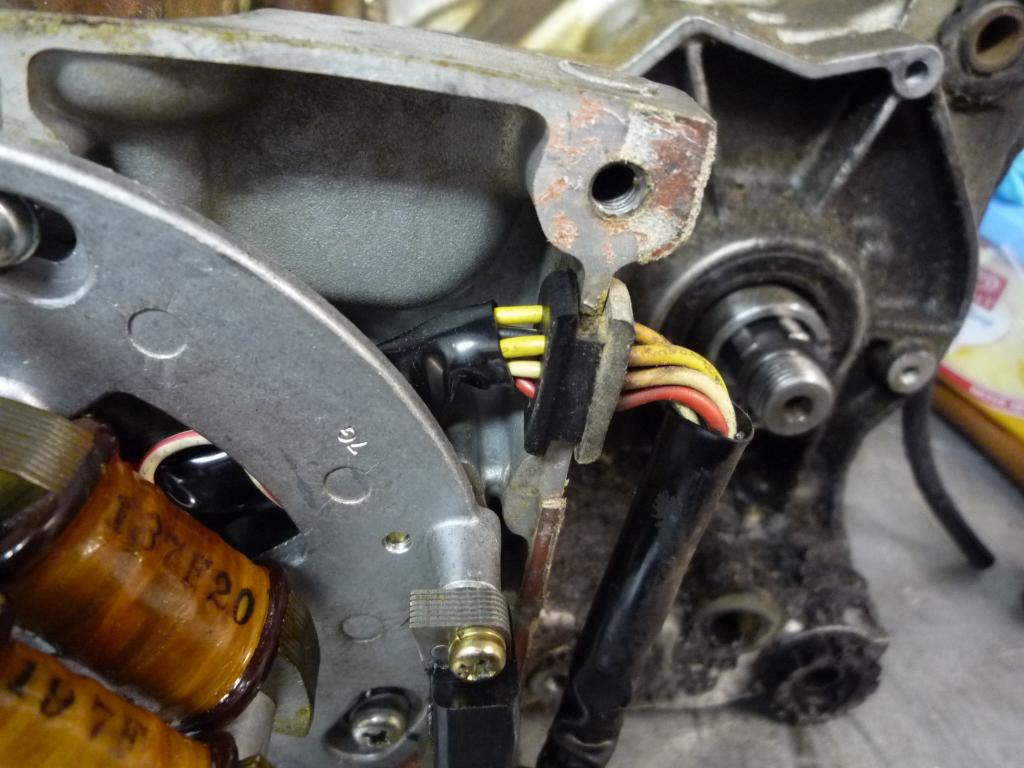
The stator plate is detached showing a better view of the keyway and the left outer crank seal.
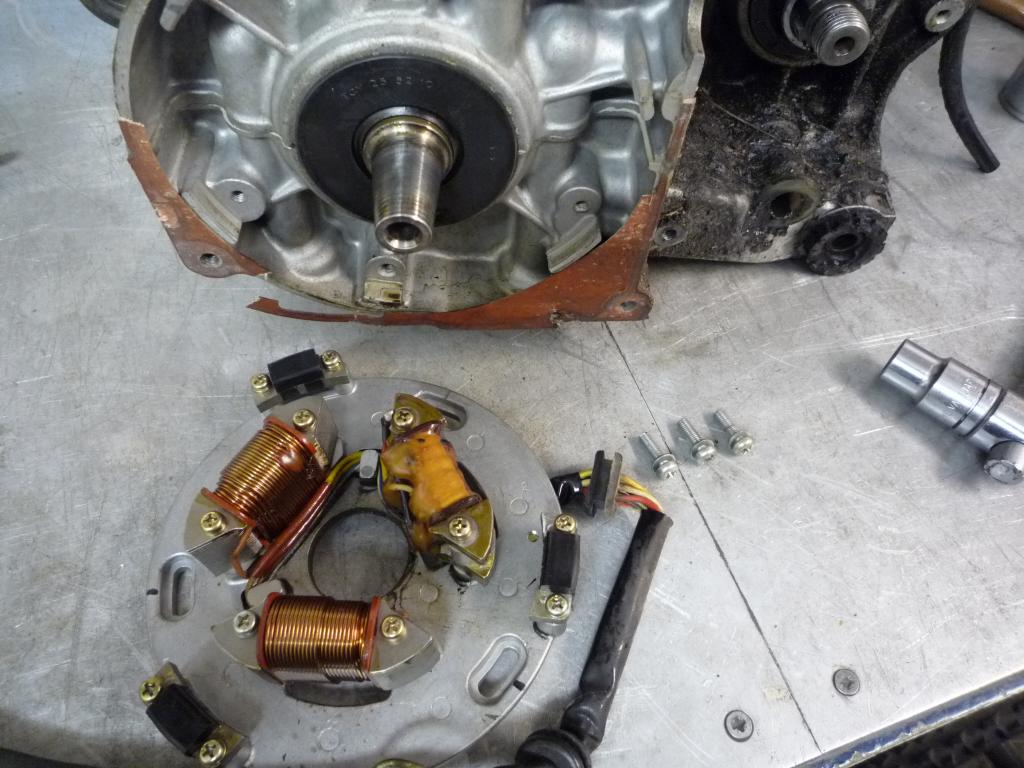
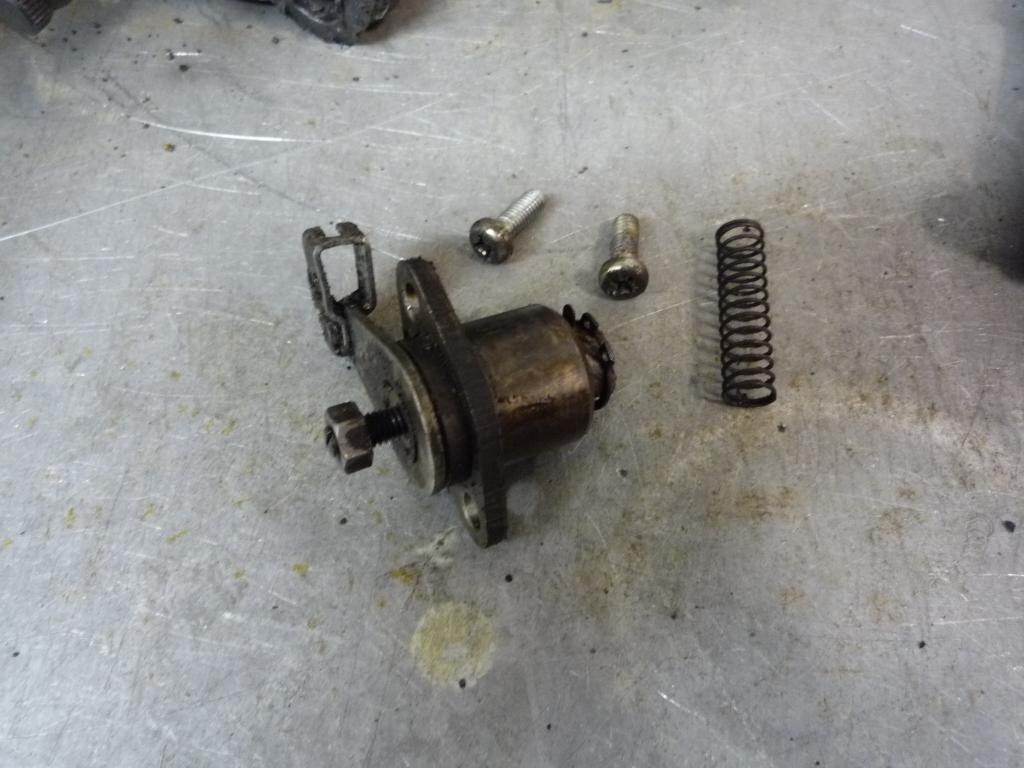
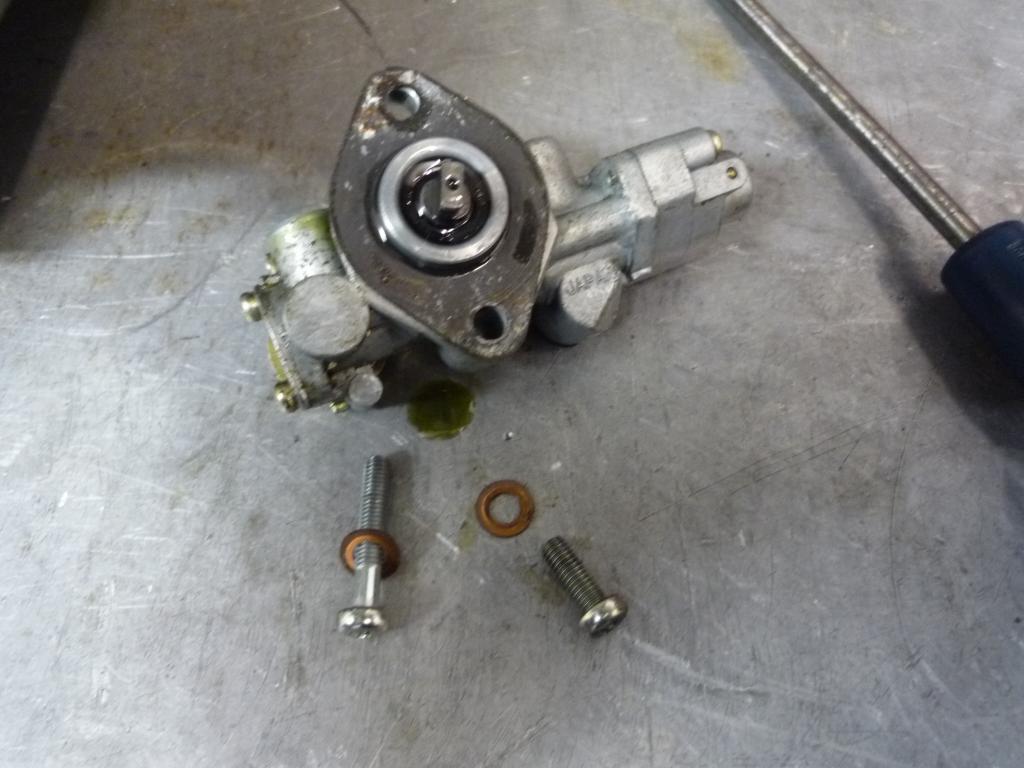
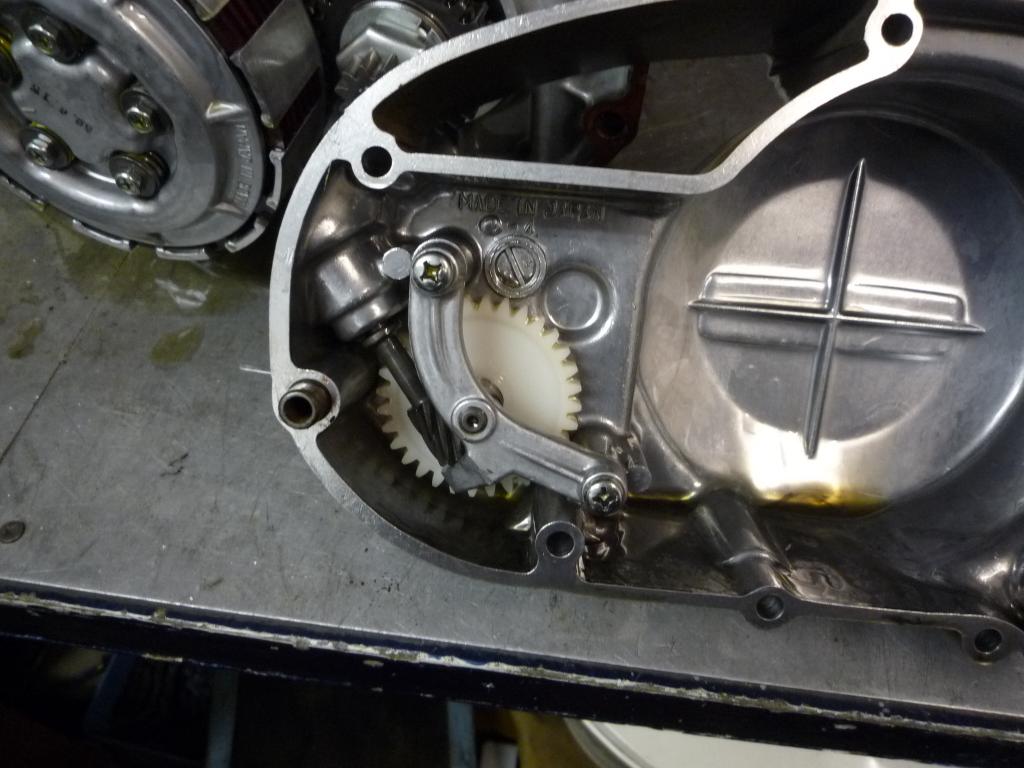
Okay round to the other side to gain access to the pump,

With the tab washer loosened and banjo bolts removed the 3 oil outlet pipes are taken off.
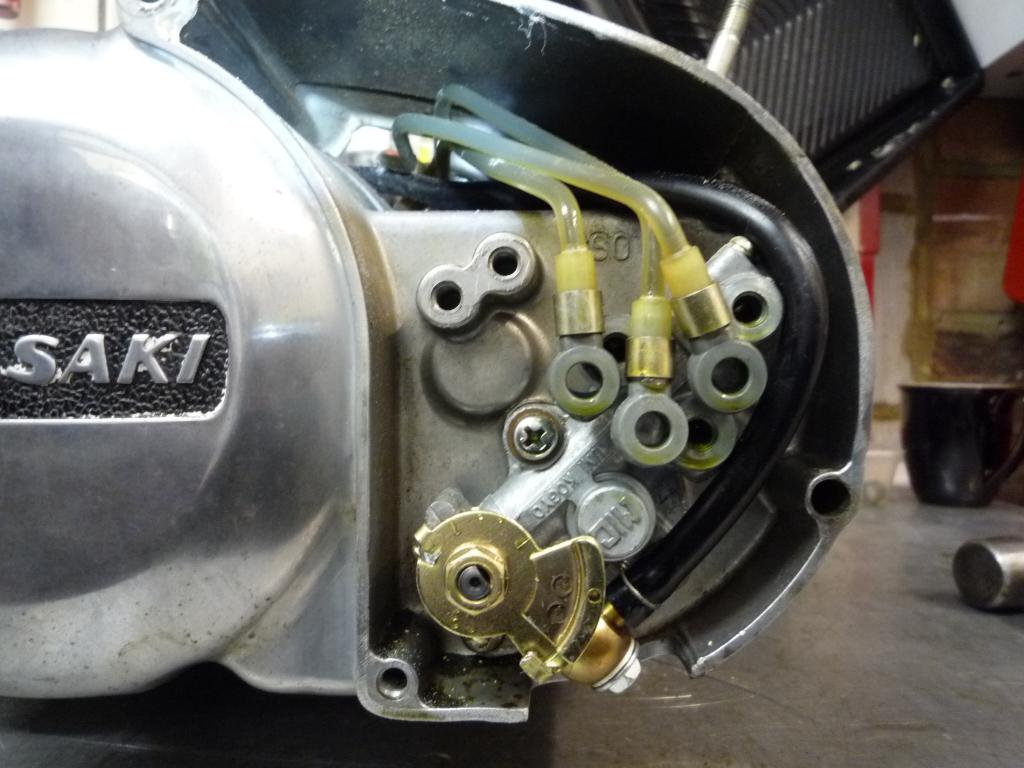
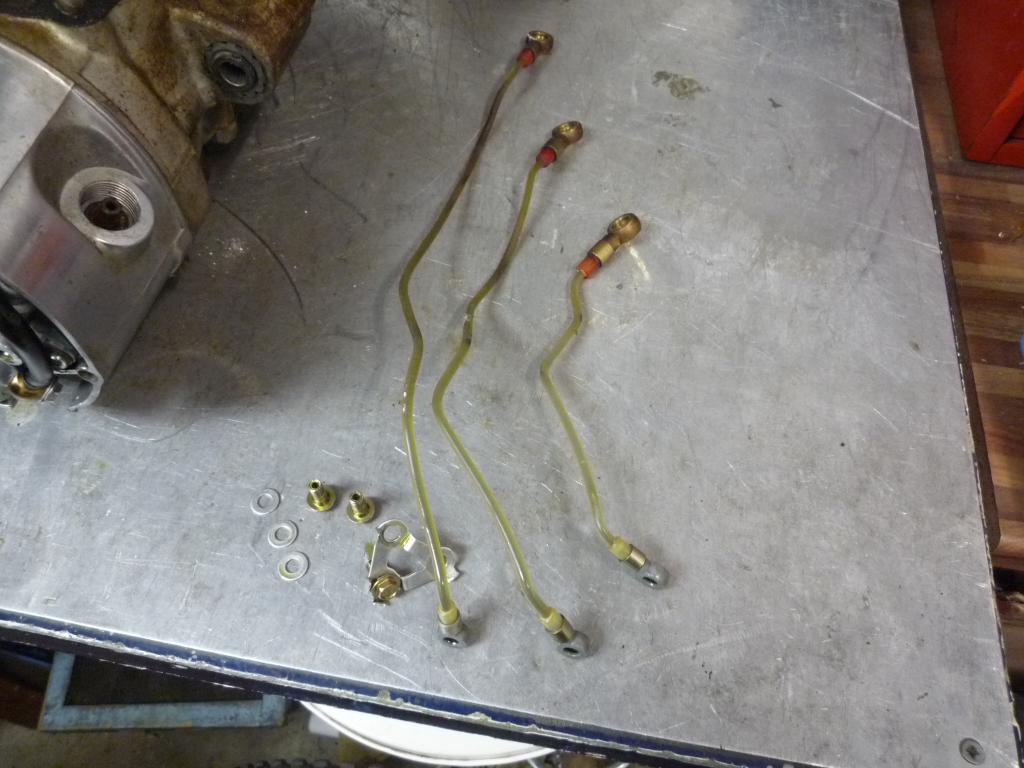
Pump oil inlet pipe is next.
Parts removed shown for reference
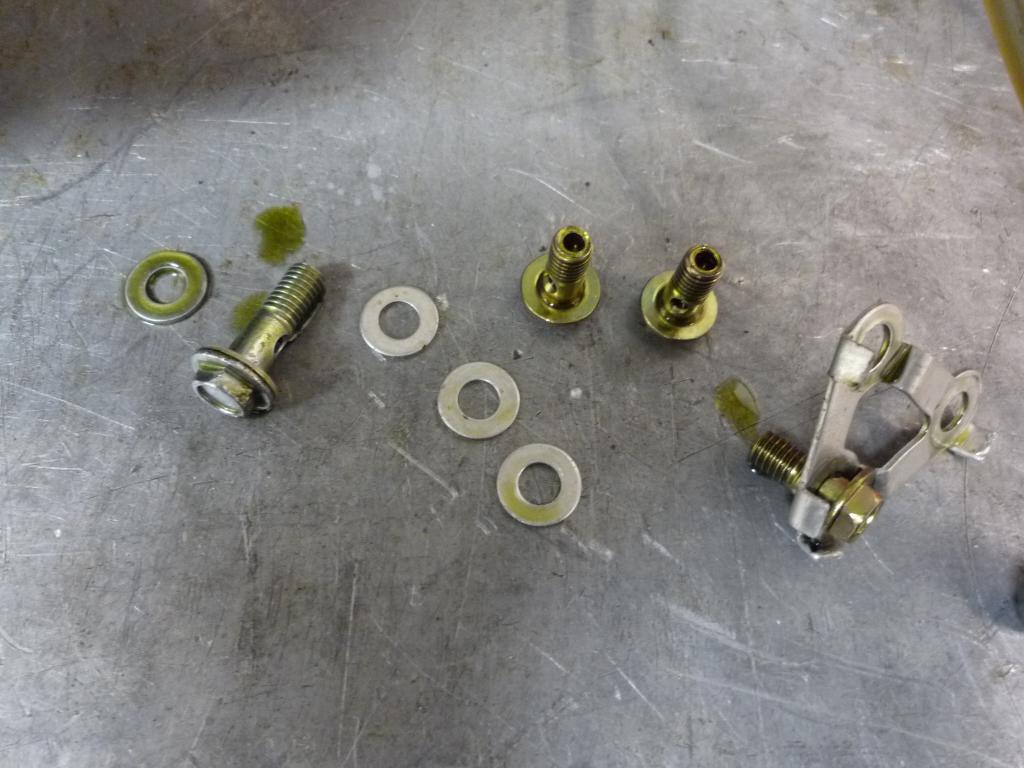
Then remove the pump. Note the washers and the gasket.

On to the main right hand cover. Once the screws are removed....
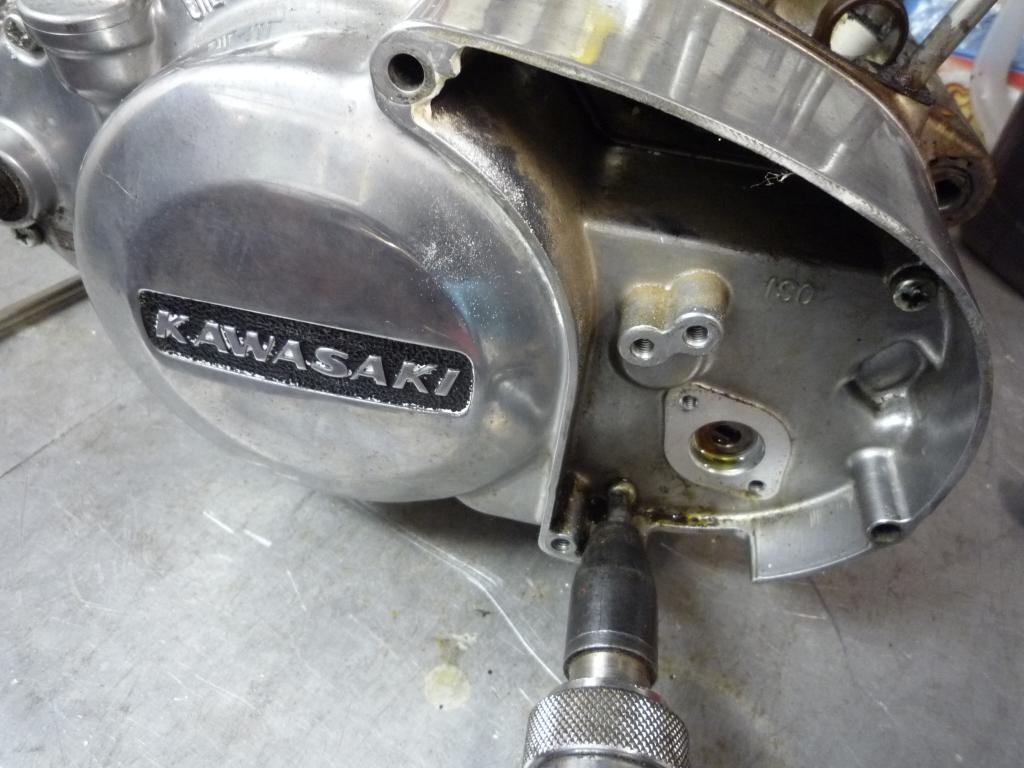
Tap gently to remove the cover. Inside the cover is the oil pump gear and the tacho drive gear, note the 2 locating dowels (easily lost).

With the engine strip I am trying to do it in the most
logical way but as I am learning as I go along. I apologize to all the engine
guys on here if I do get things the wrong way round.
Hopefully this will become apparent as I go and I will notice and hopefully
someone will shout STOP if I forget something important, or are about to C**k up
![]()
These steps are just how I am doing it and are for reference only, always use
the manual and always ask the internet bill payers permission before posting!!
![]()
![]()
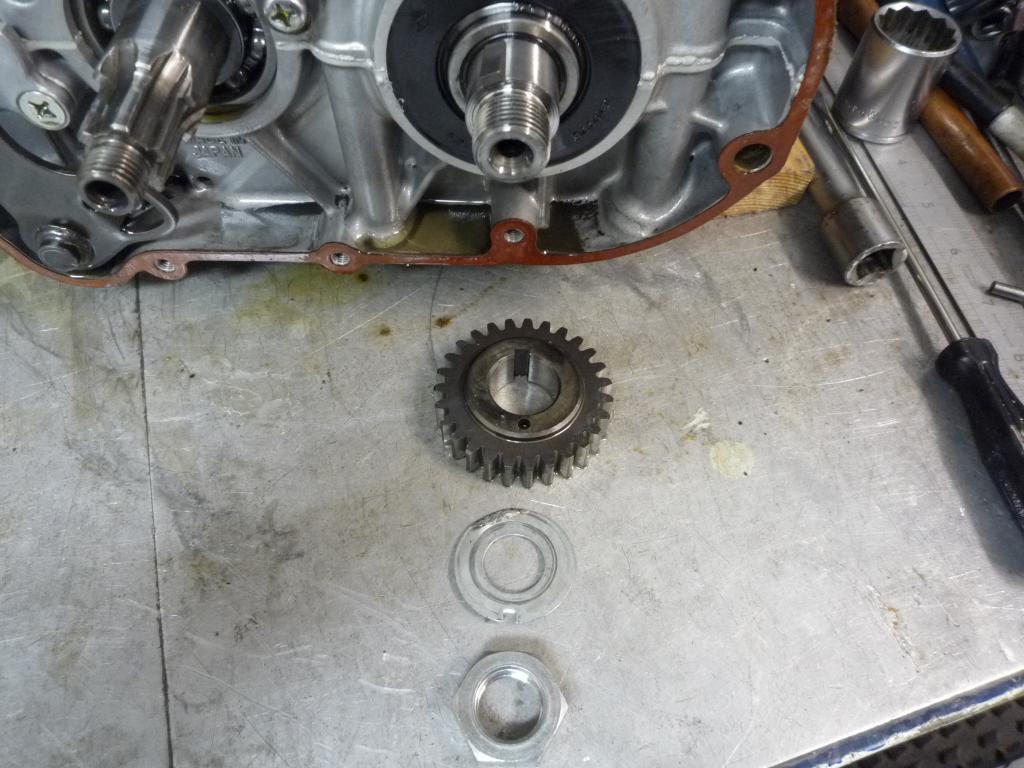
Okay, so under the right hand cover.
And I remove the oil pump pinion

and cap. Then flattened the tab washer holding the primary gear nut.
Then used an extension bar to help with loosening the nut and will remove it later. On to the clutch and the five mounting bolts and springs.

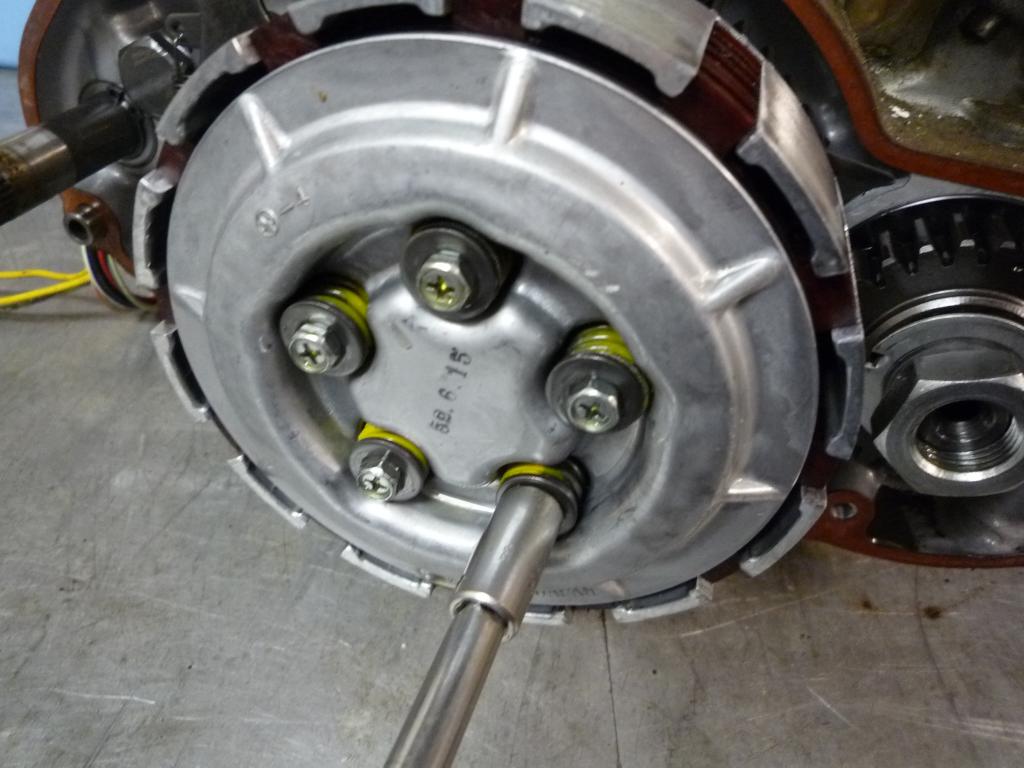

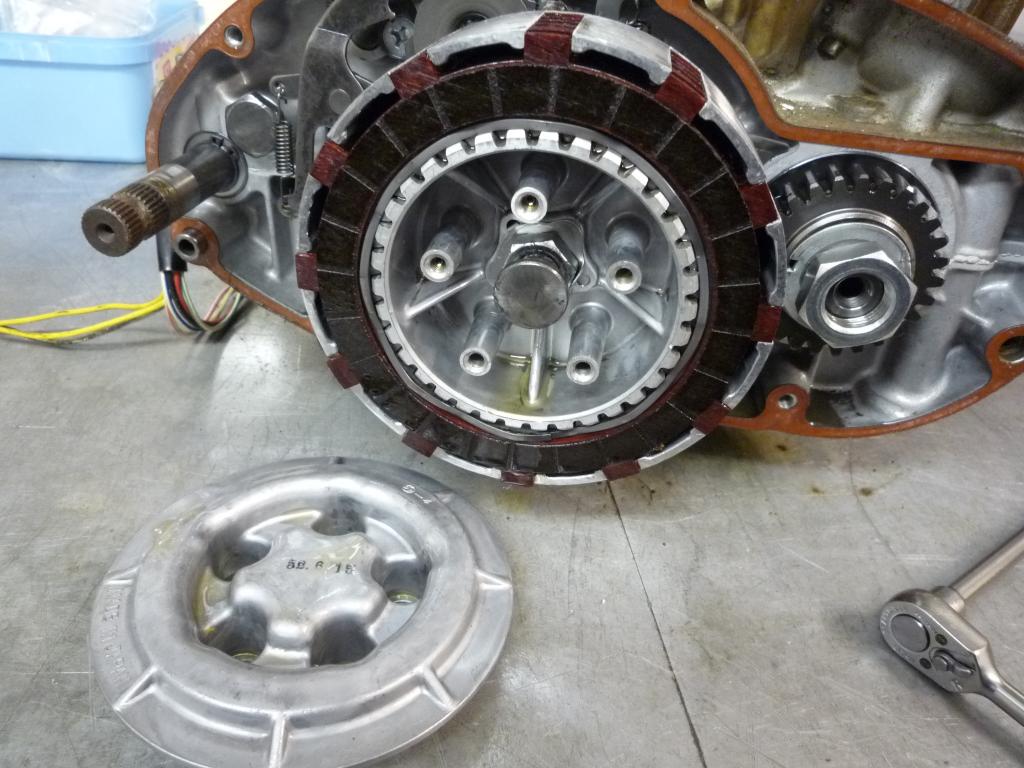
and cover off along with the spring plate pusher
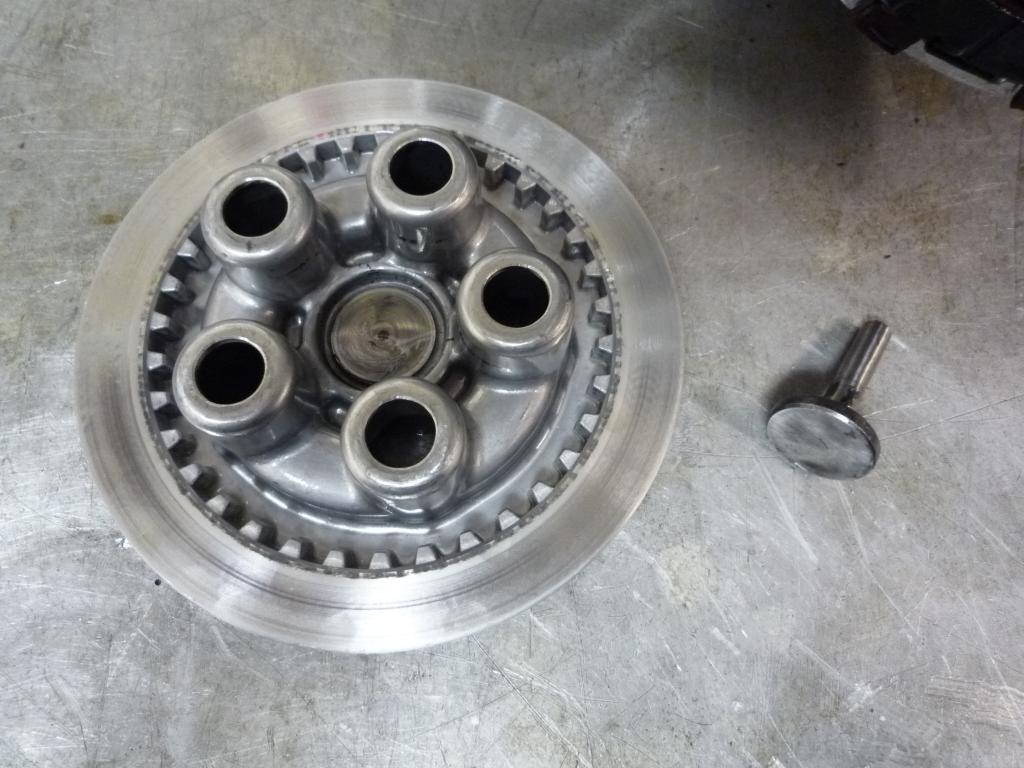
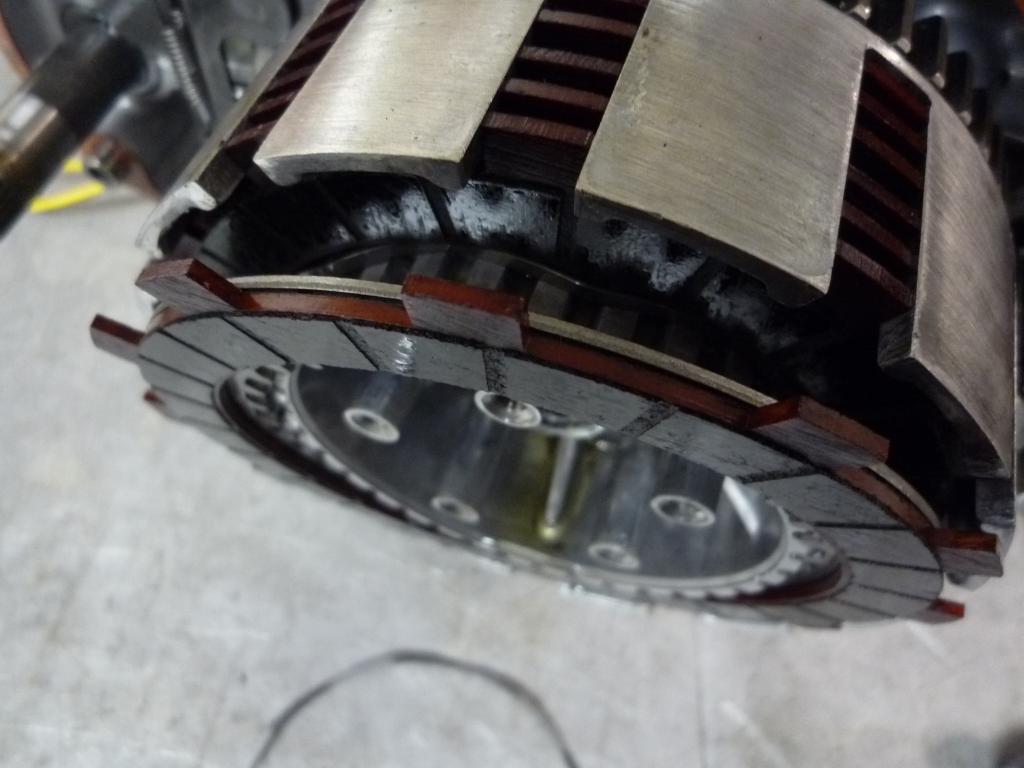
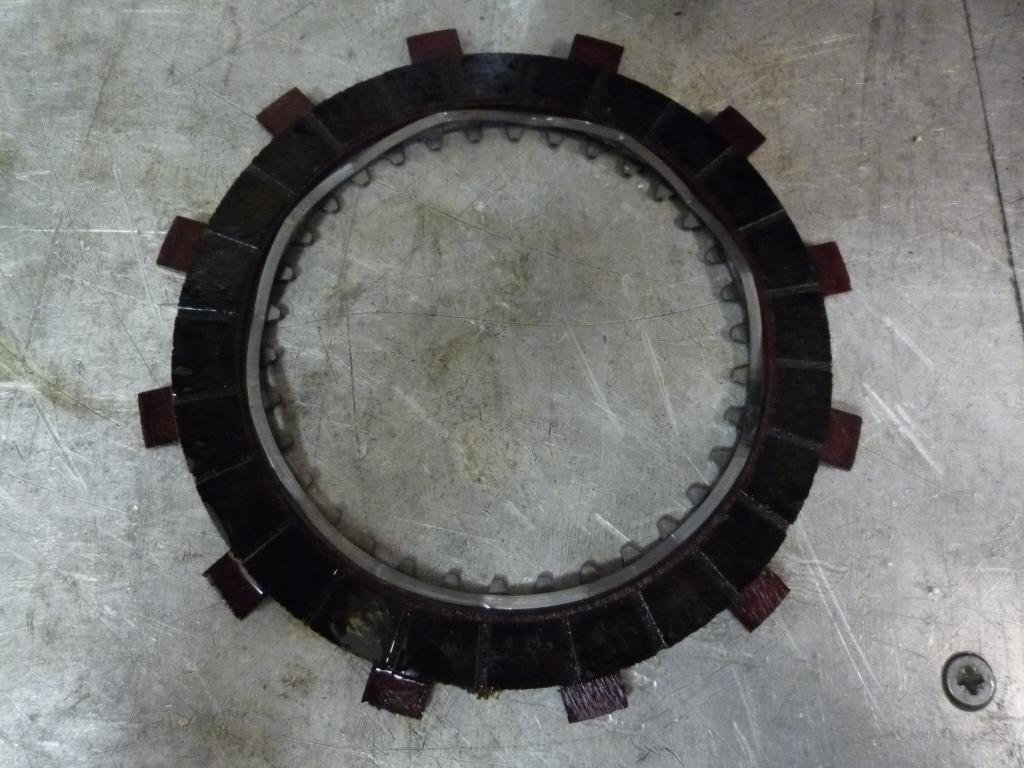
Then remove the clutch plates made up of steel plates, friction plates and steel rings. Flatten the tab washer and remove the clutch hub nut.................
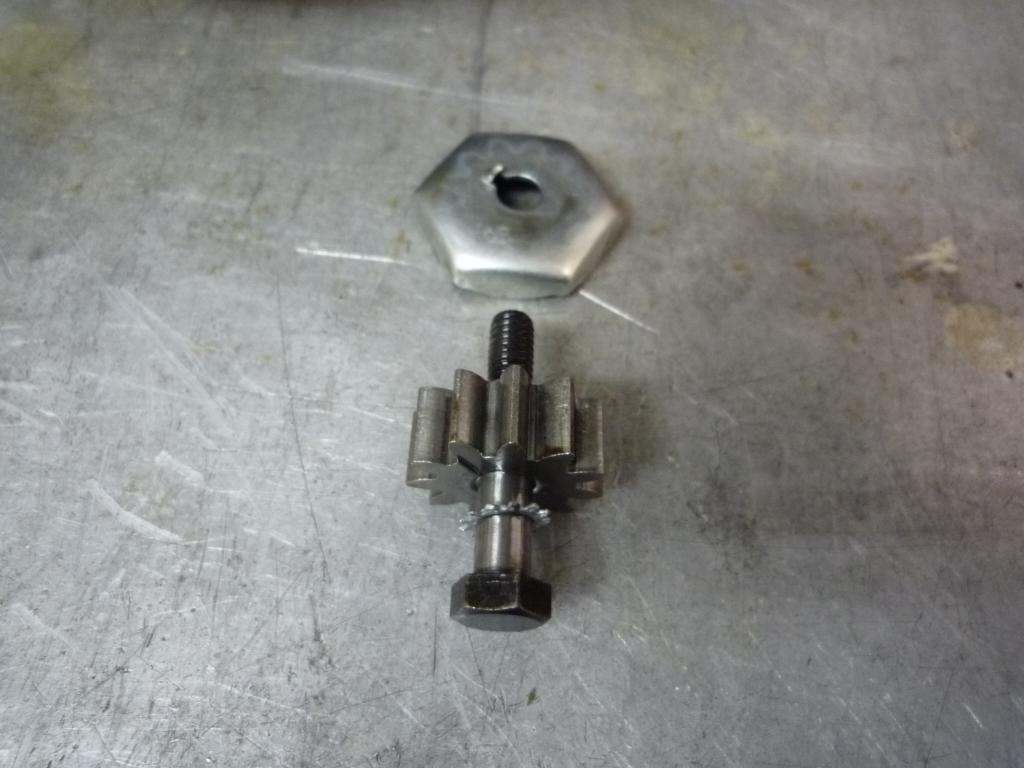
Now ideally for this you need a special hub mounting tool to hold the clutch hub
still and enable you to undo the nut, I have seen these made using steel clutch
plates or proper purpose made tools, but whichever method you use do not put any
loading on the spring pillars or outer hub fingers or you will risk breaking
them.
I didn't have the special tool and used a rather unorthodox method consisting of
a rag, a tyrap and a clamp,......
![]() (Not posting that picture) ....... did the job nicely but I will use the
professional method to do it up again obviously
(Not posting that picture) ....... did the job nicely but I will use the
professional method to do it up again obviously
![]()
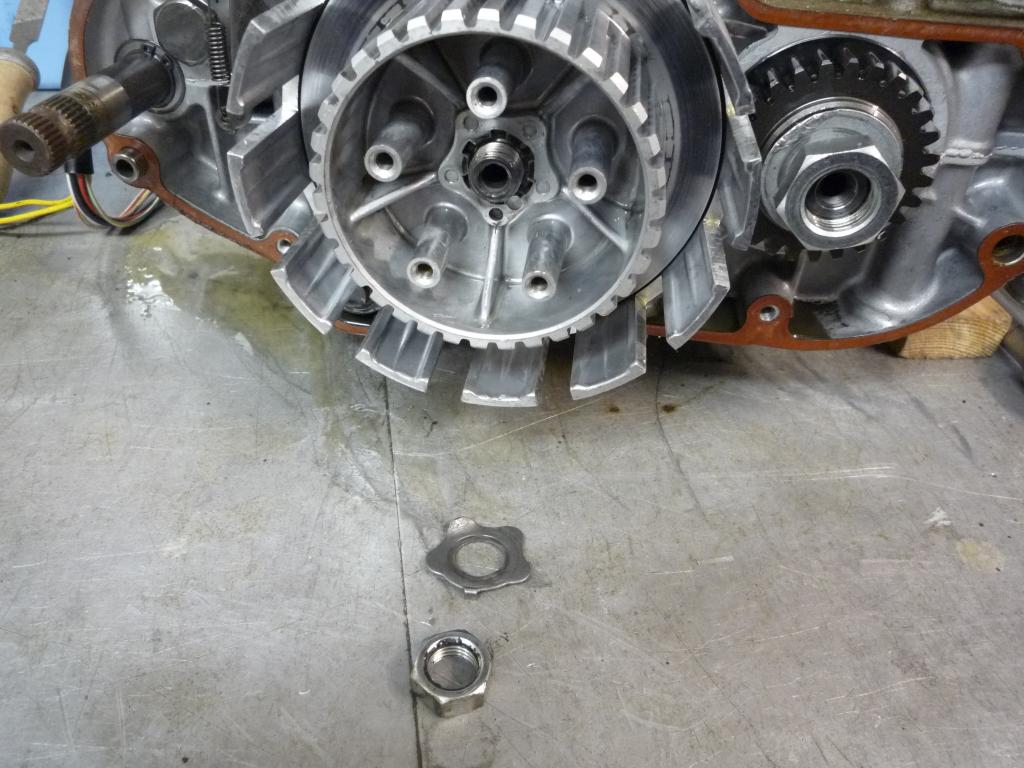
With the hub now off I can remove the basket along with the washer and bush.

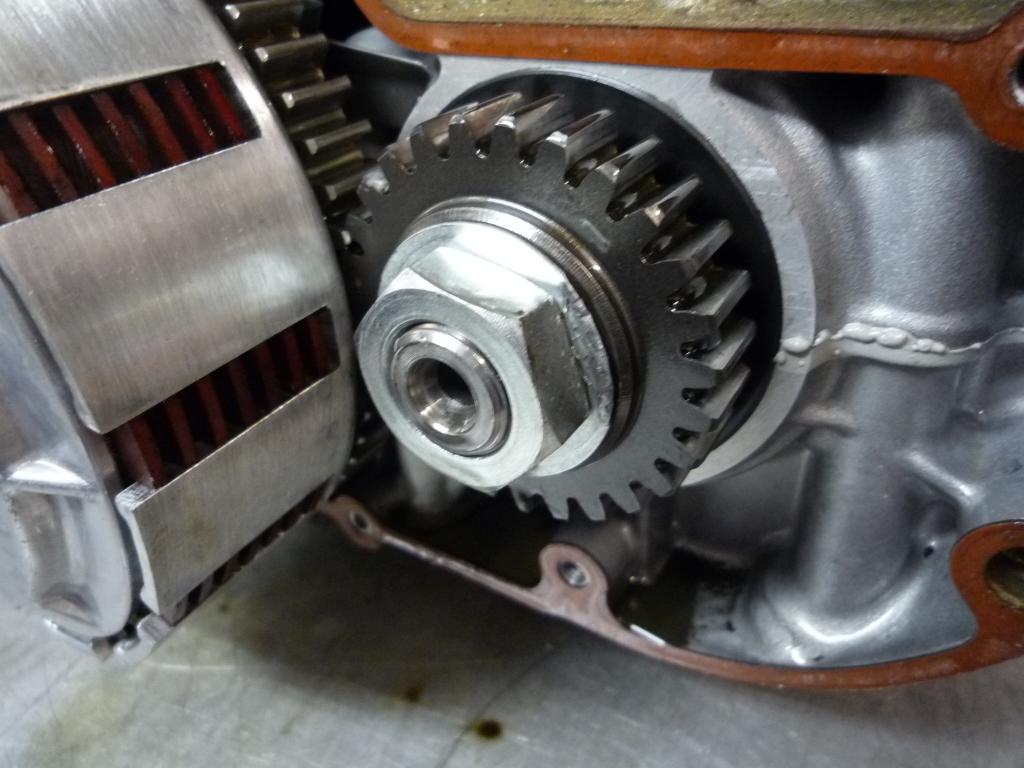
Special washer also sitting behind the basket. With the clutch now removed, the primary gear comes off .
And we are getting somewhere.

![]()
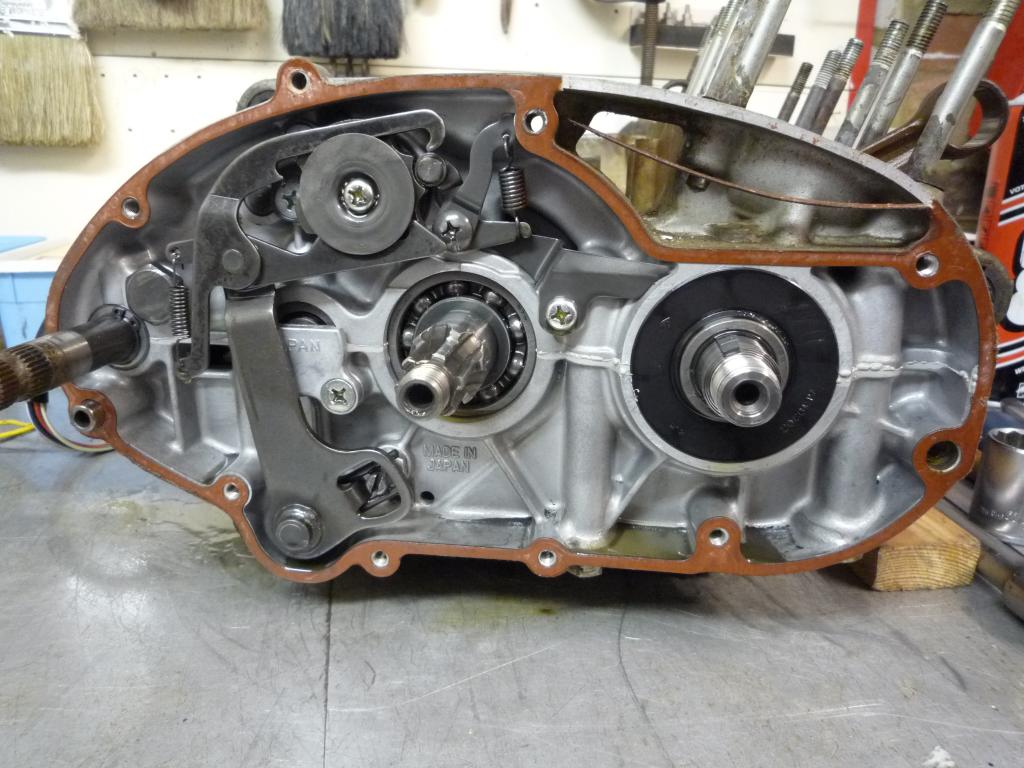
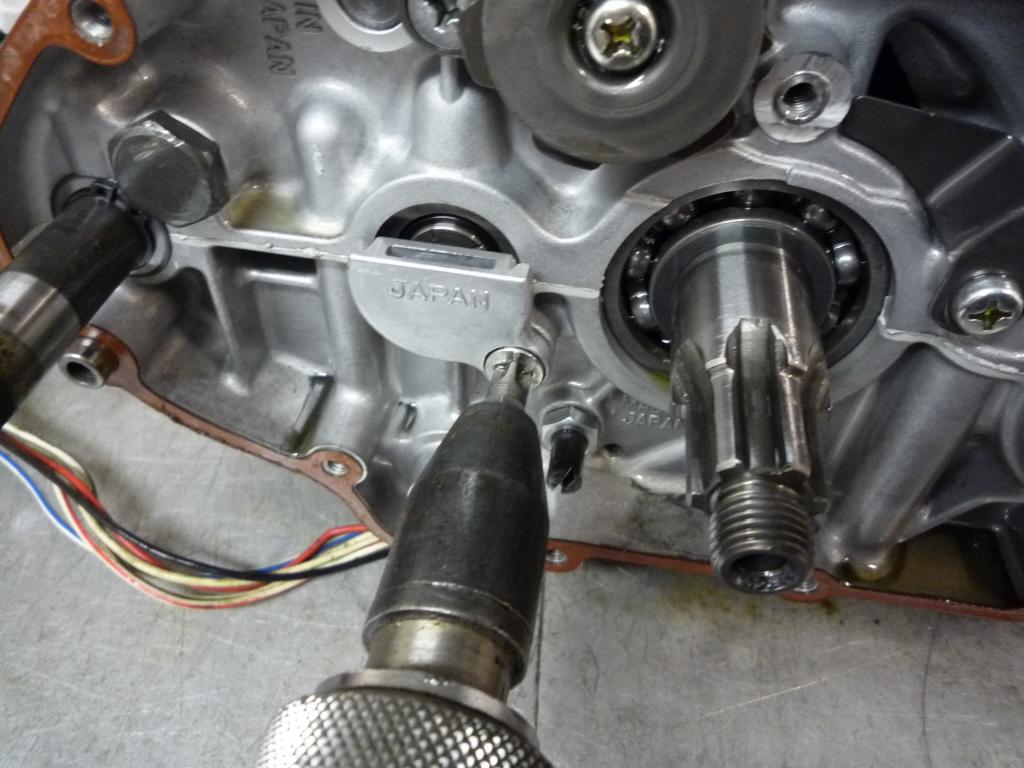
Right from where I left off...........With the Primary gear now removed you can see the right hand outer crank seal and another keyway and key.
I unhooked and pulled out the Shift lever assembly.
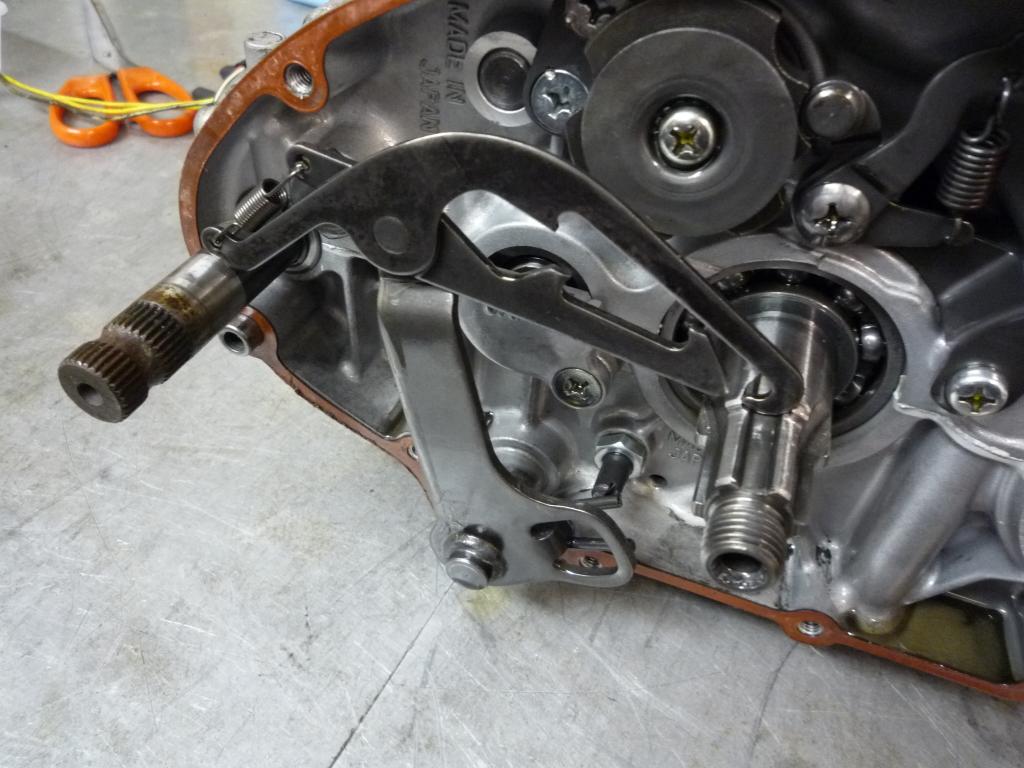
Removed the shift drum lever assembly.
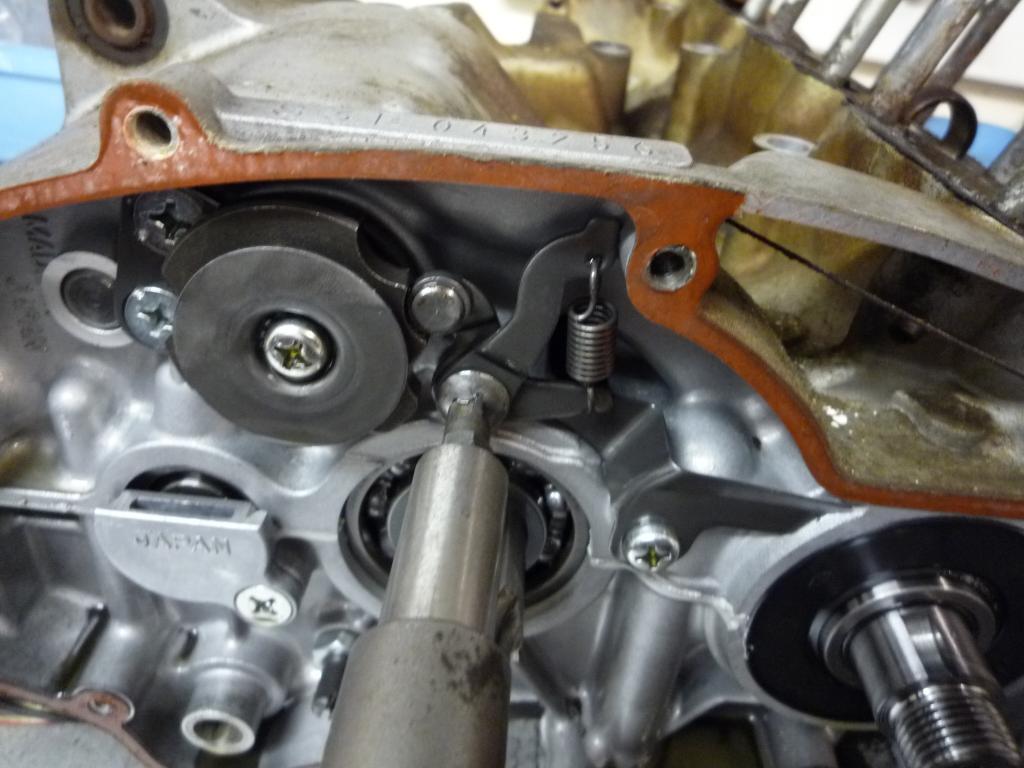
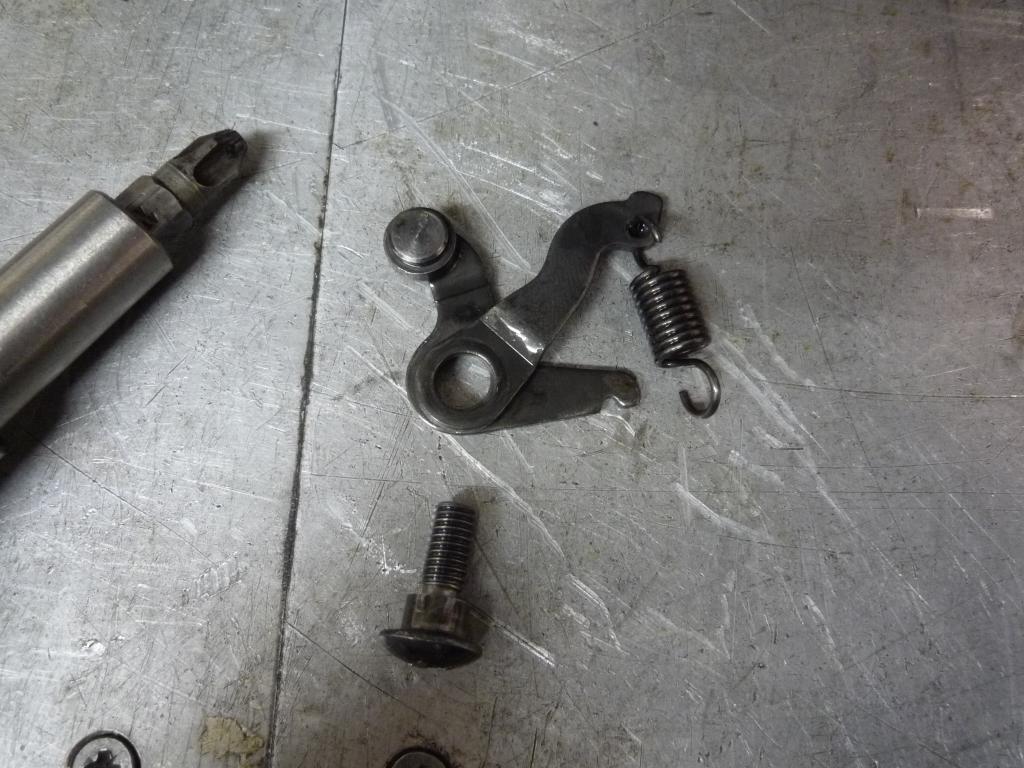
and the transmission oil receiver
Funny, I get twitchy about showing tools now
![]()
Loosening off the kick stopper raises me a question, why just loosen it and what
does it do?

I'm sure this will become evident later but it seems to have something to do
with tensioning the kick starter spring and raising up the kick starter.
I will need to check on this later so that Its reassembled correctly.
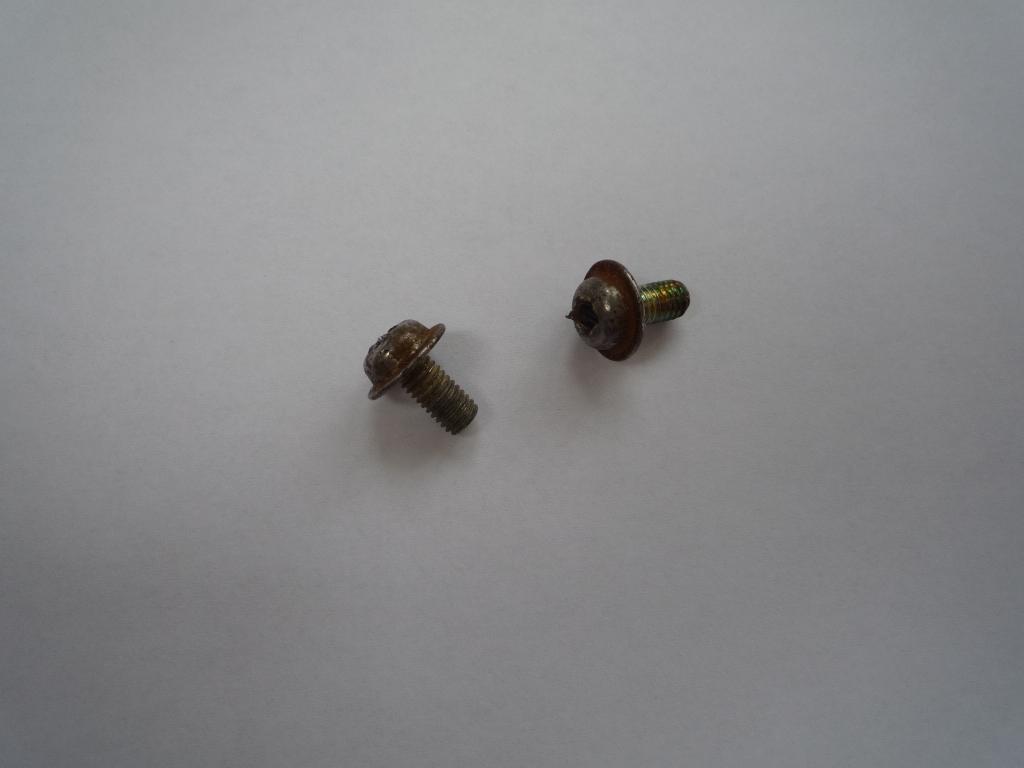
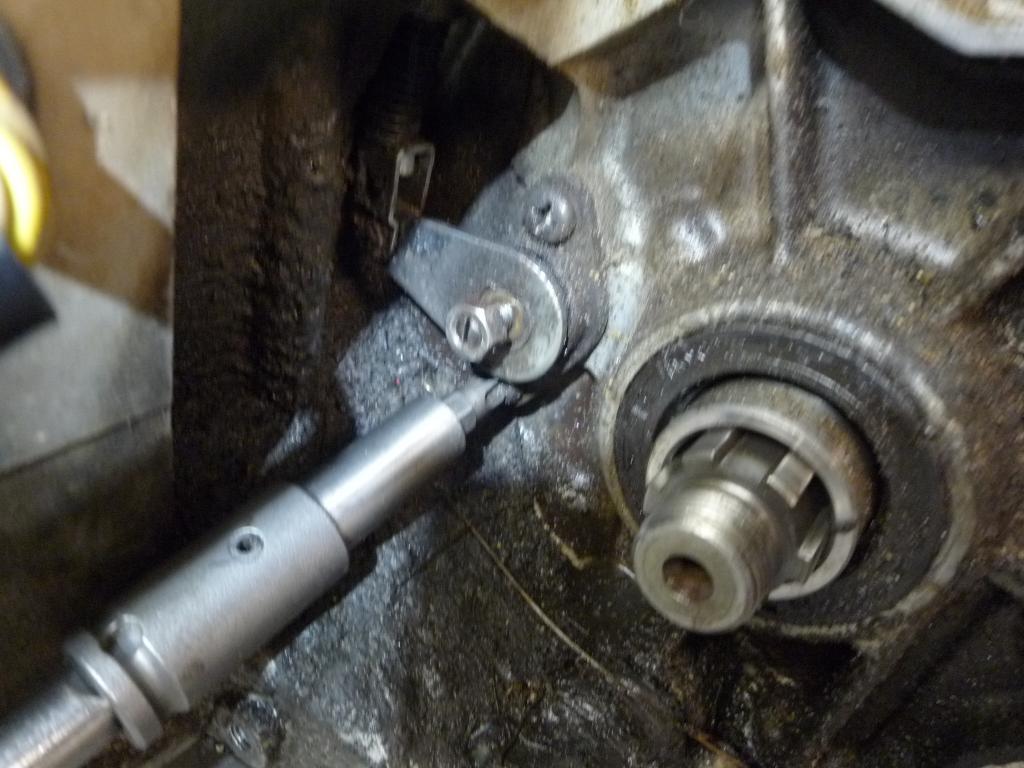
Hit my first snag yesterday when I came to remove the positioning plate, both
screws are centre punched to prevent them loosening and one of them wouldn't
play ball and had to be removed with an easy out, no great issue and two new
screws are on order.

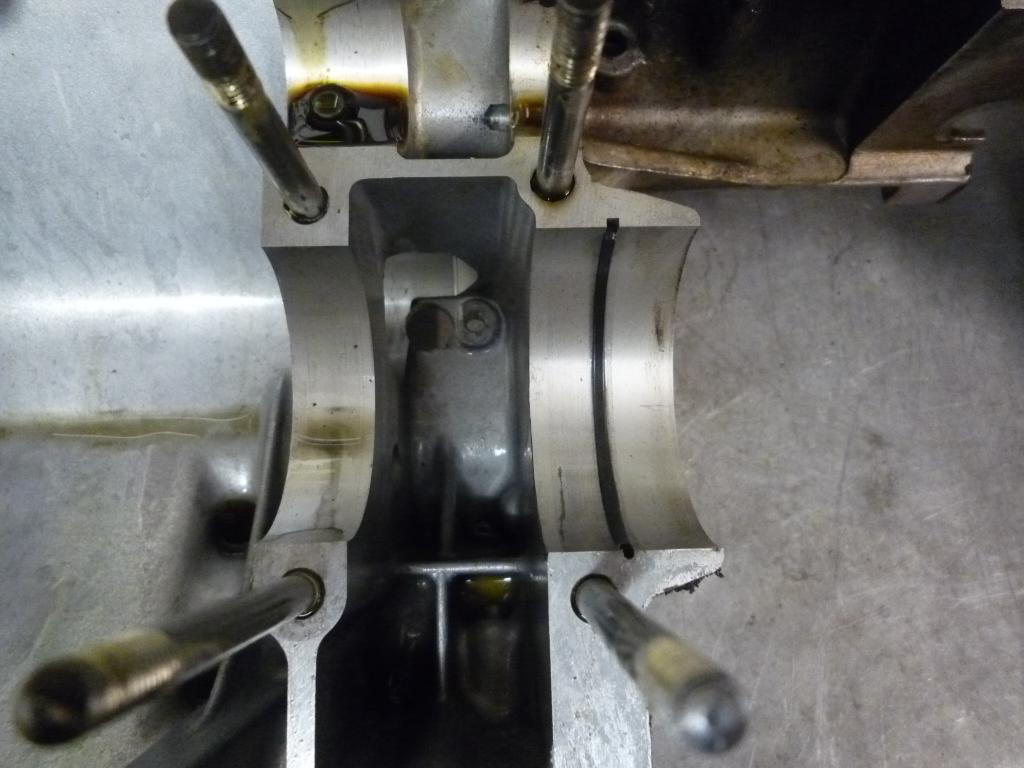
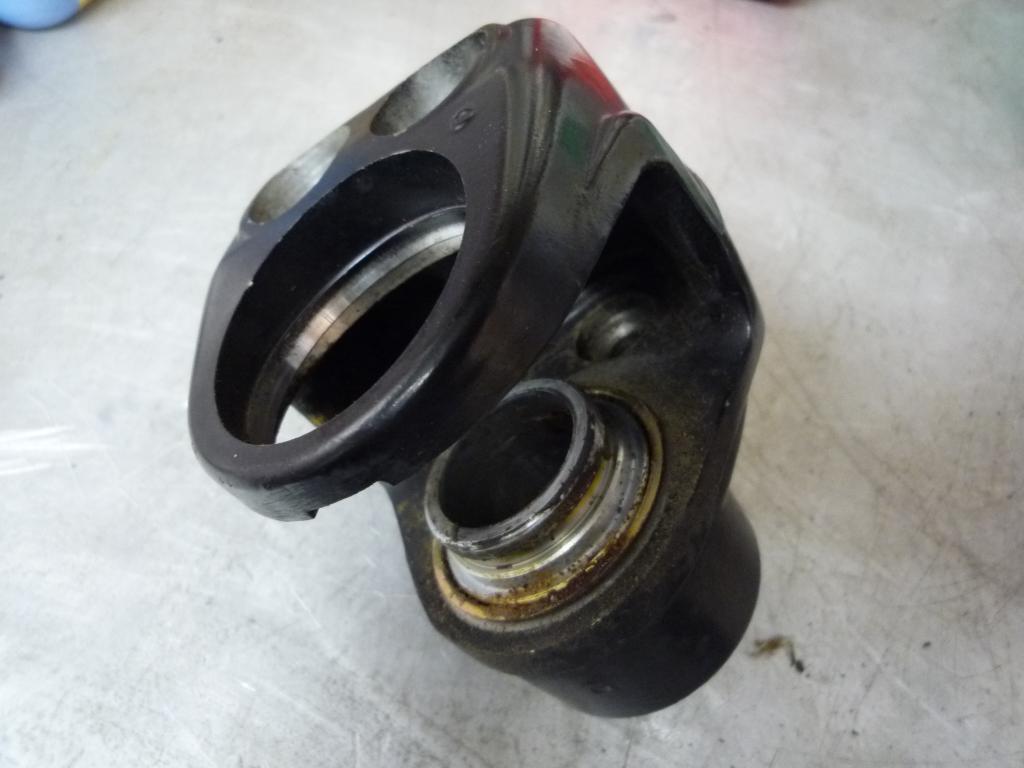
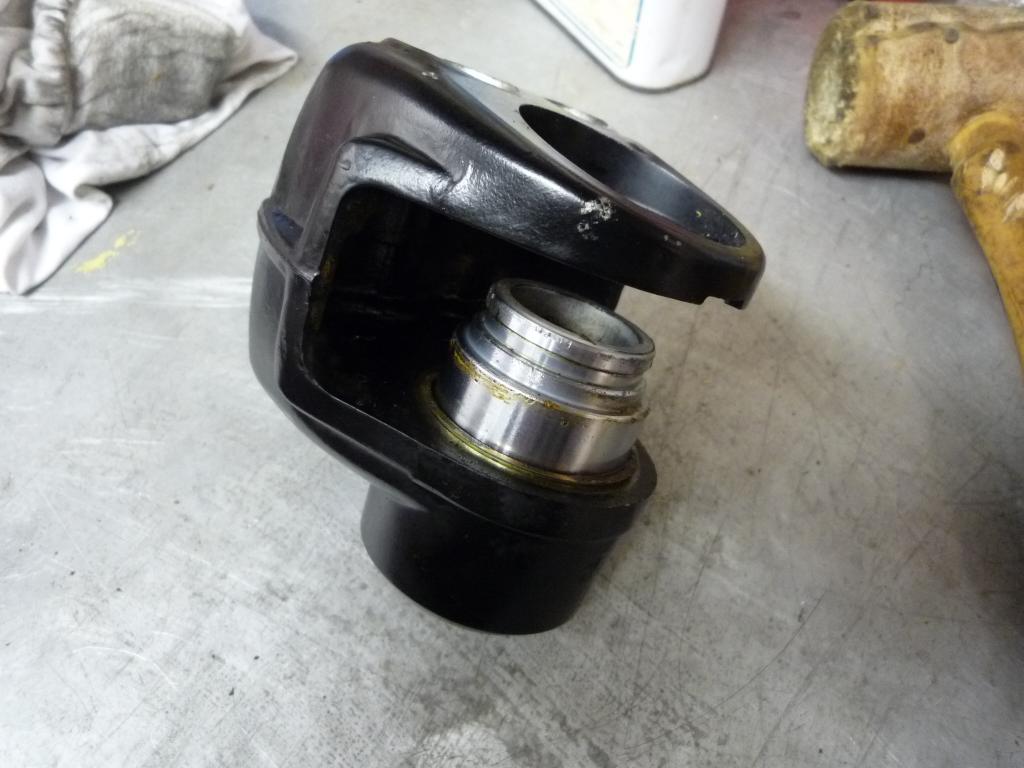
So now it gets exciting and we work towards splitting the cases, very grubby underneath but it will all be cleaned up and inspected later. We start by removing the mounting nuts of which there are two sizes, and some are hidden behind the rubber mounts so beware you could miss them.


I thought there was one, turns out there are two.....
Sliding out the mounts, one being gently pressed out using a G clamp but monitoring the pressure carefully so as to prevent damage in case it was seized.
two hidden nuts revealed
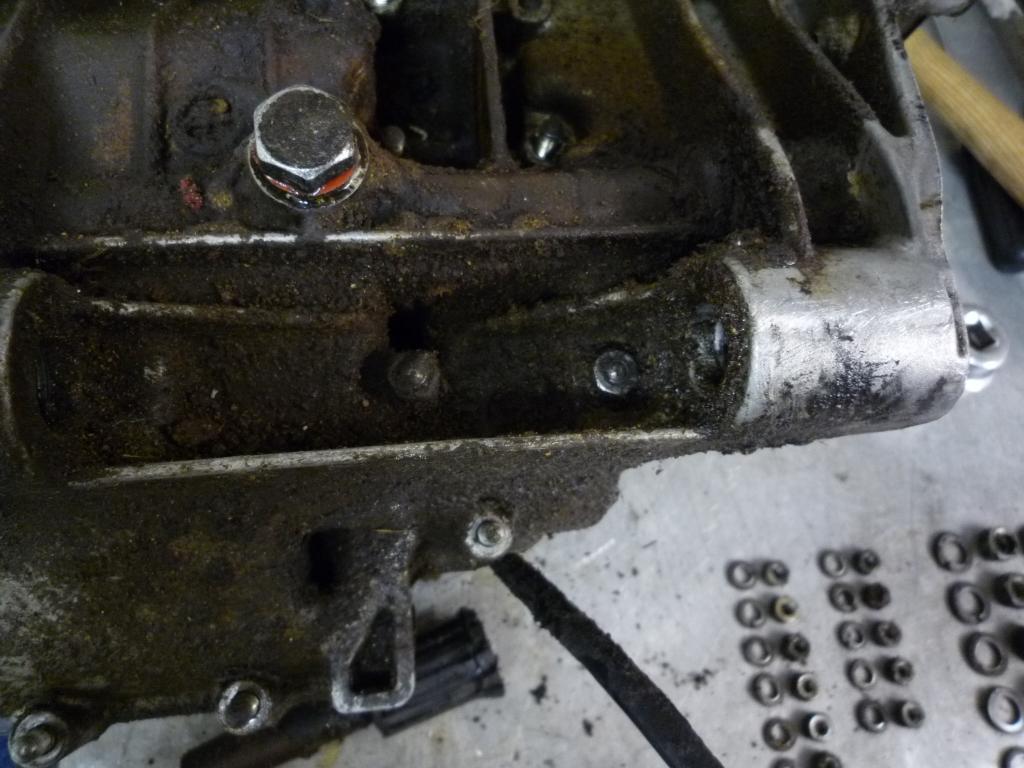
Front mounts taken out too.
After much gentle to mid tapping and some GT85 down the studs the cases started
to separate and relieved to see some movement it doesn't seem right to hit an
engine ![]()
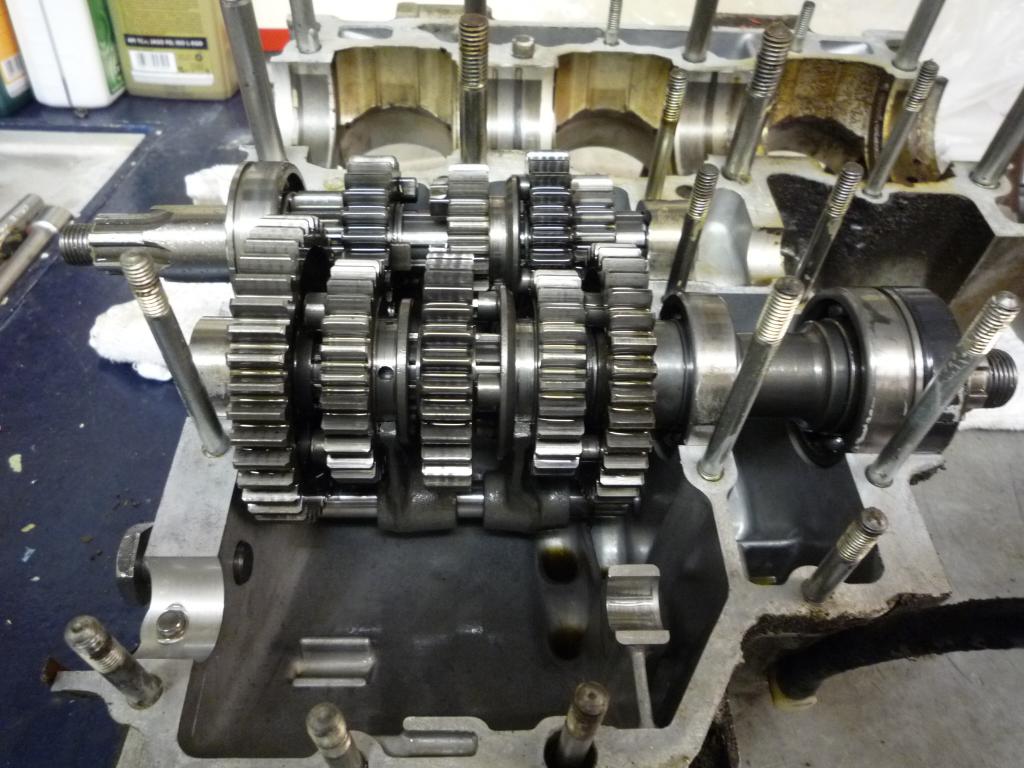
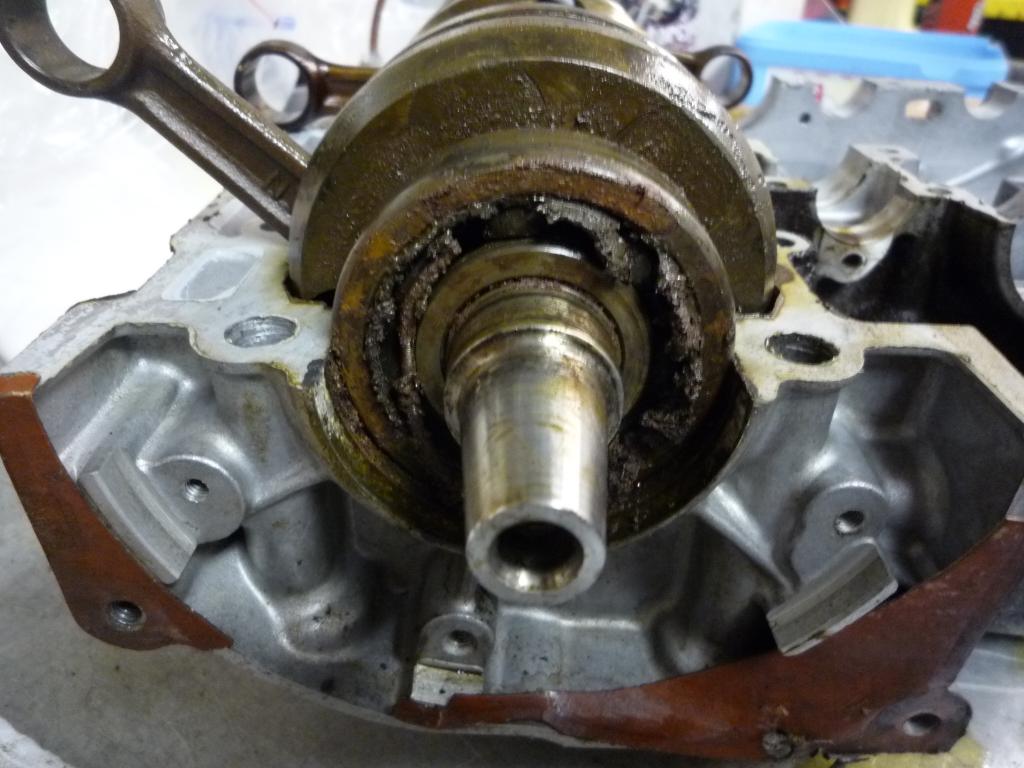
Keeping the transmission in the lower case, the crankshaft wants to stay in the
uppercase.
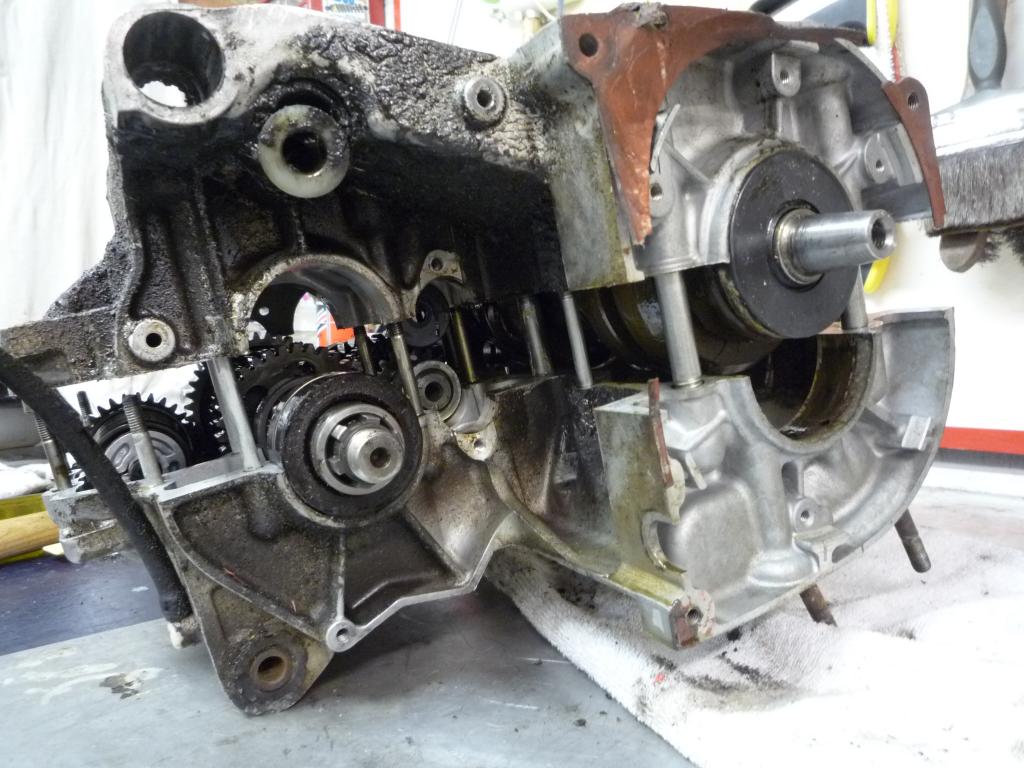
And then they are apart.........
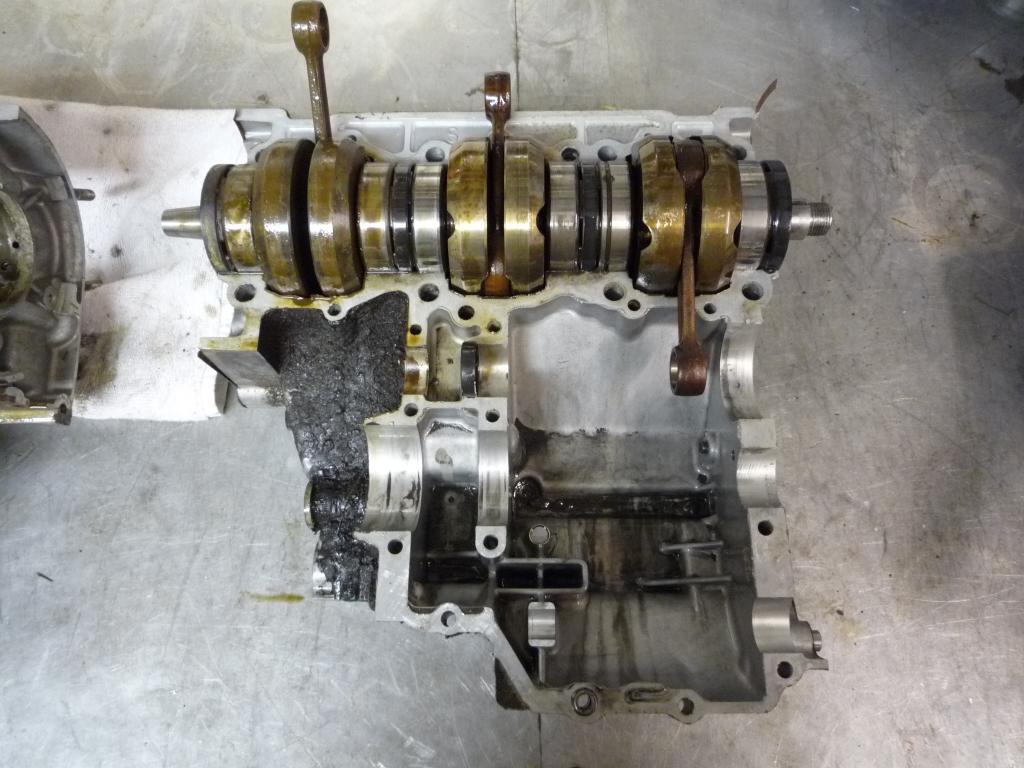
Happy days ![]()
![]()
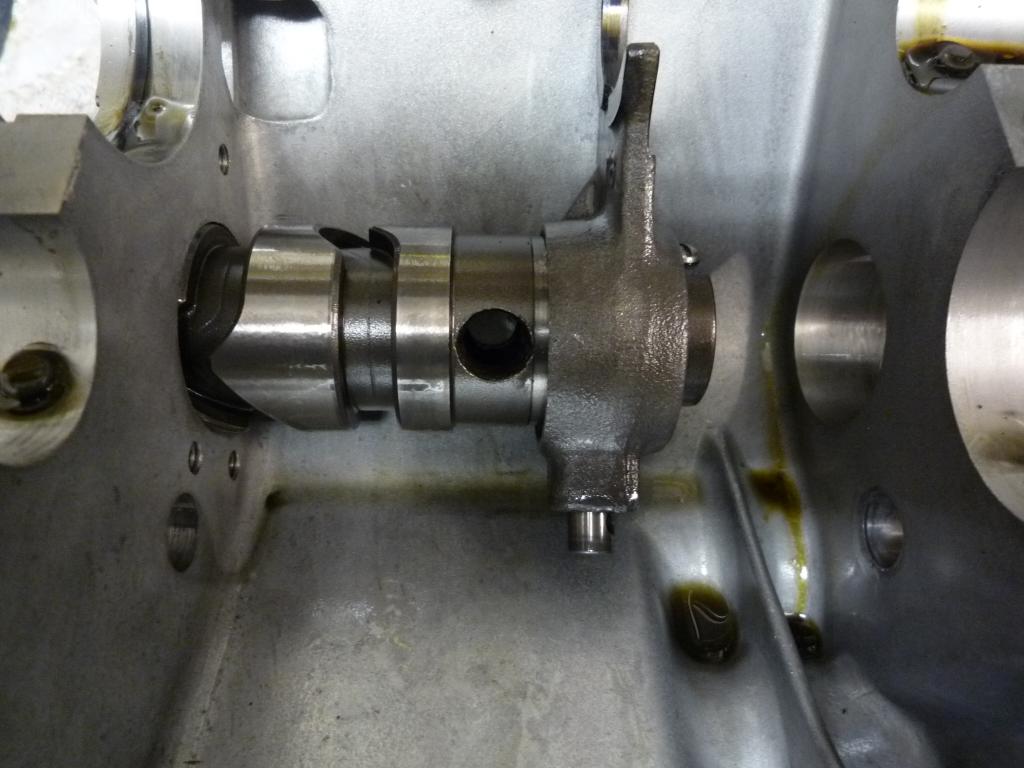
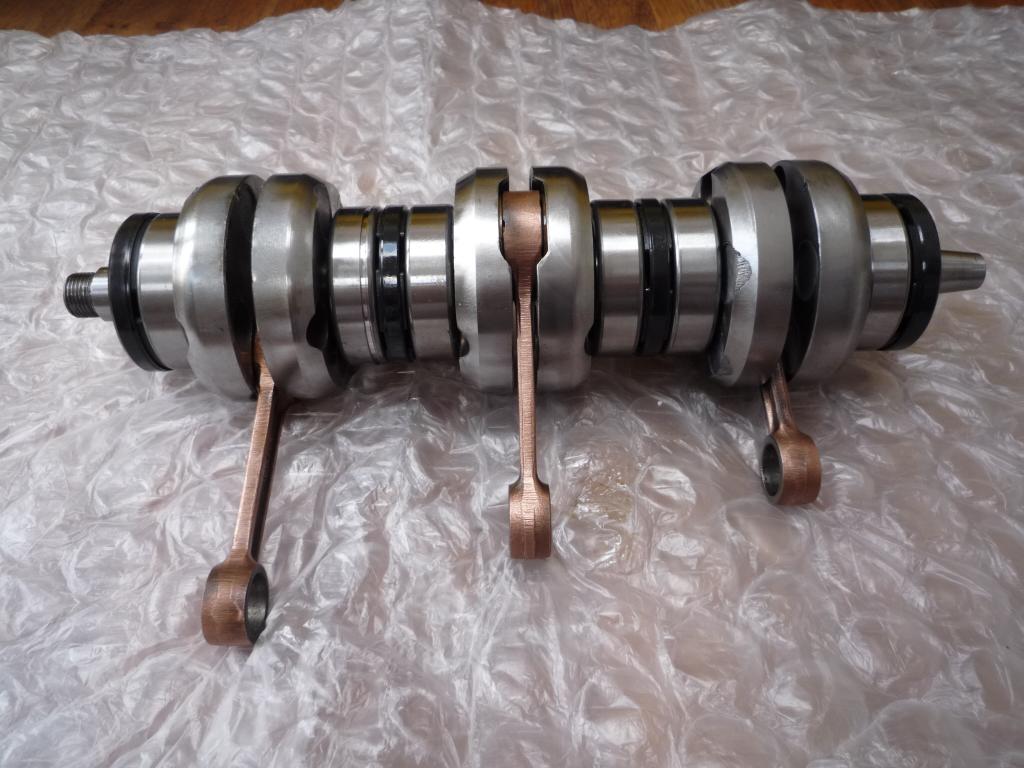
First impressions are what a diddly little crank, I presumed it to be much larger.
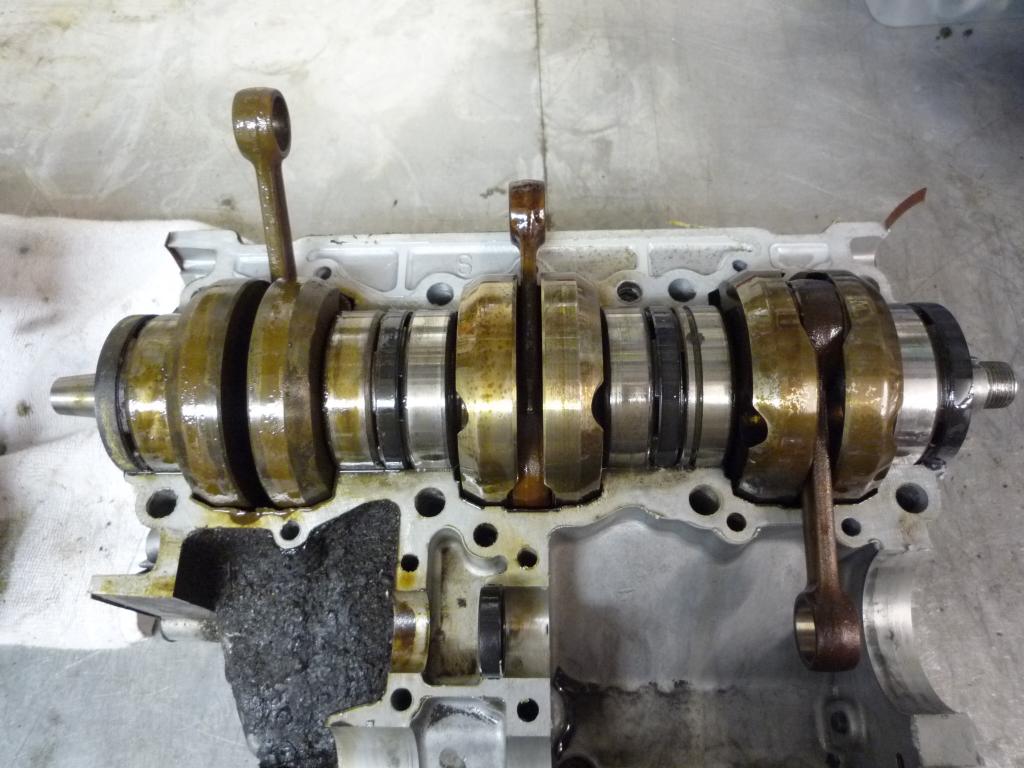
Noted the crank bearing locating ring.


and for reference a couple of extra pictures

Now I can see what the stopper bolt locates onto.

Now to clean up, inspect and a deserving cup of Tea
![]()
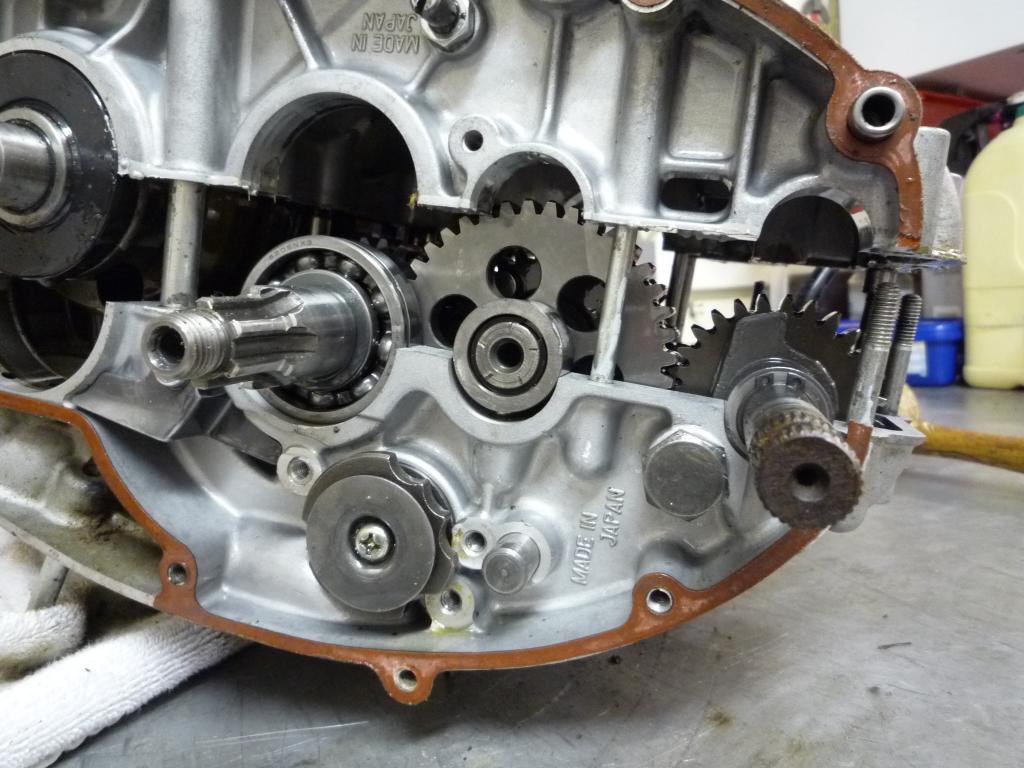
Okay the last leg of the engine
strip,.....if its okay I will continue until I am left with bare cases + studs.
I know its a few more engine pictures but most of us will want to get down to
this stage during a strip down once they have started or may well be starting
out with a box full of bits so its always good for future reference.
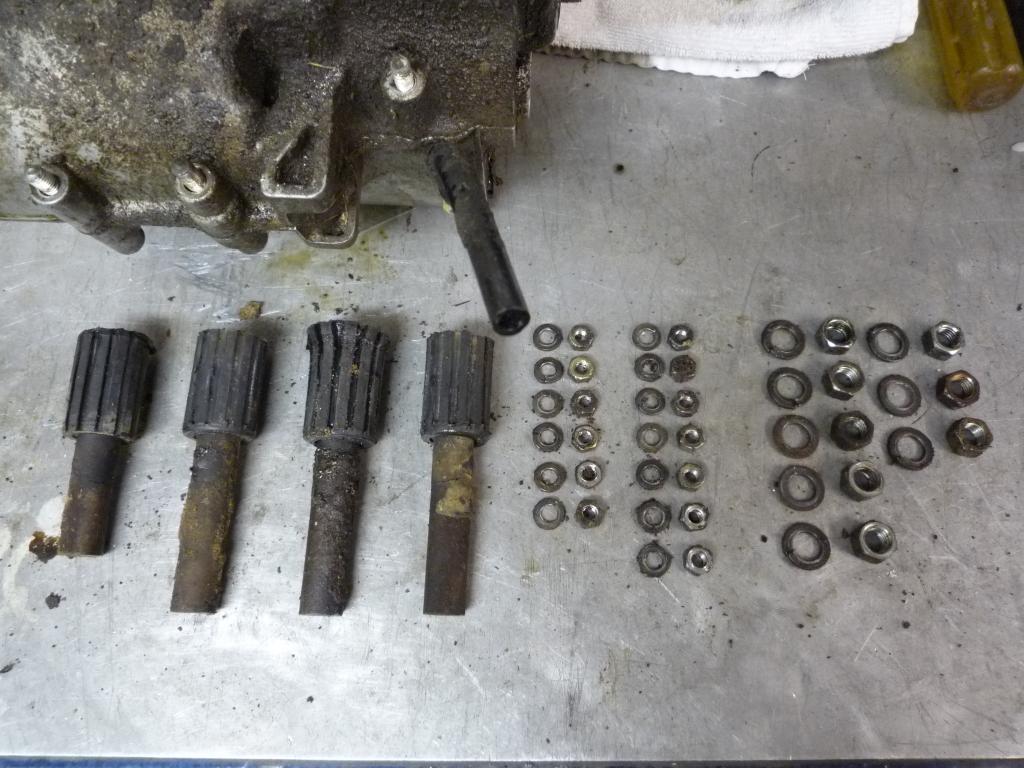
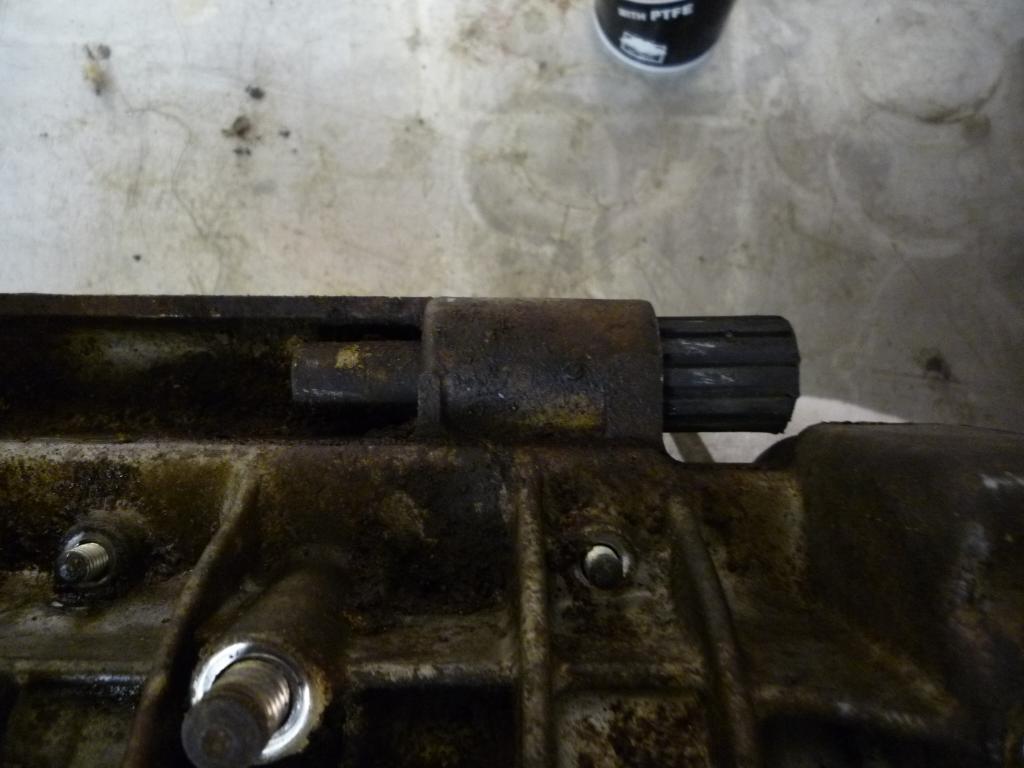
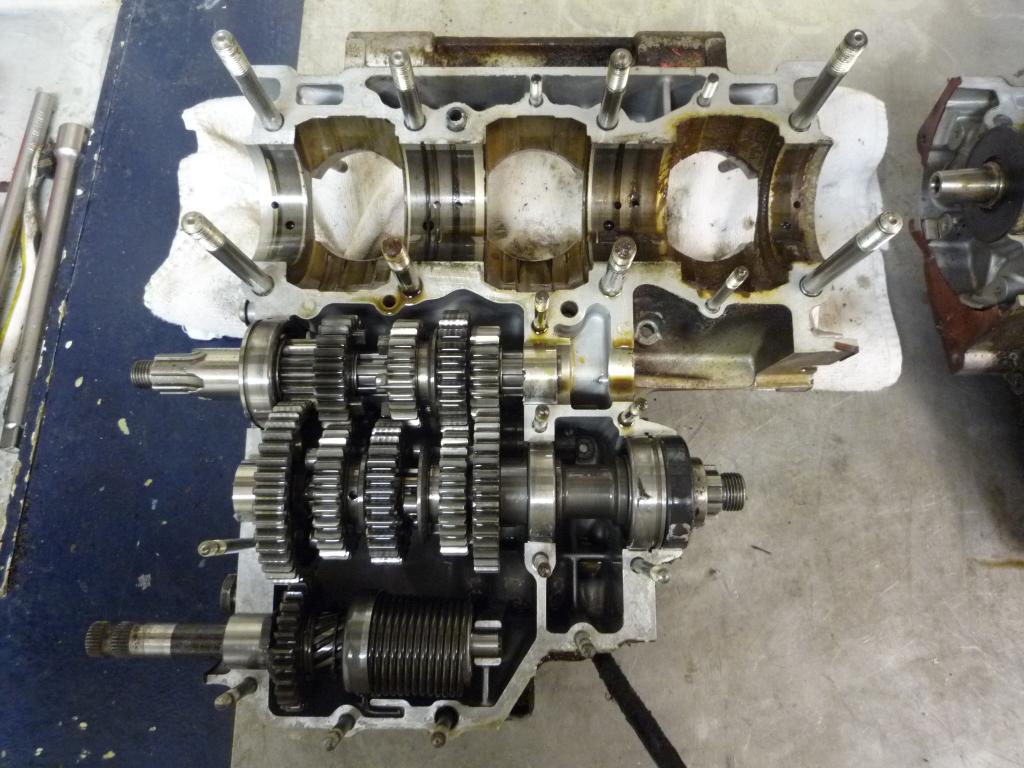
The complete Kick start mechanism is removed first. Then lifted out the
transmission drive shaft and gears.
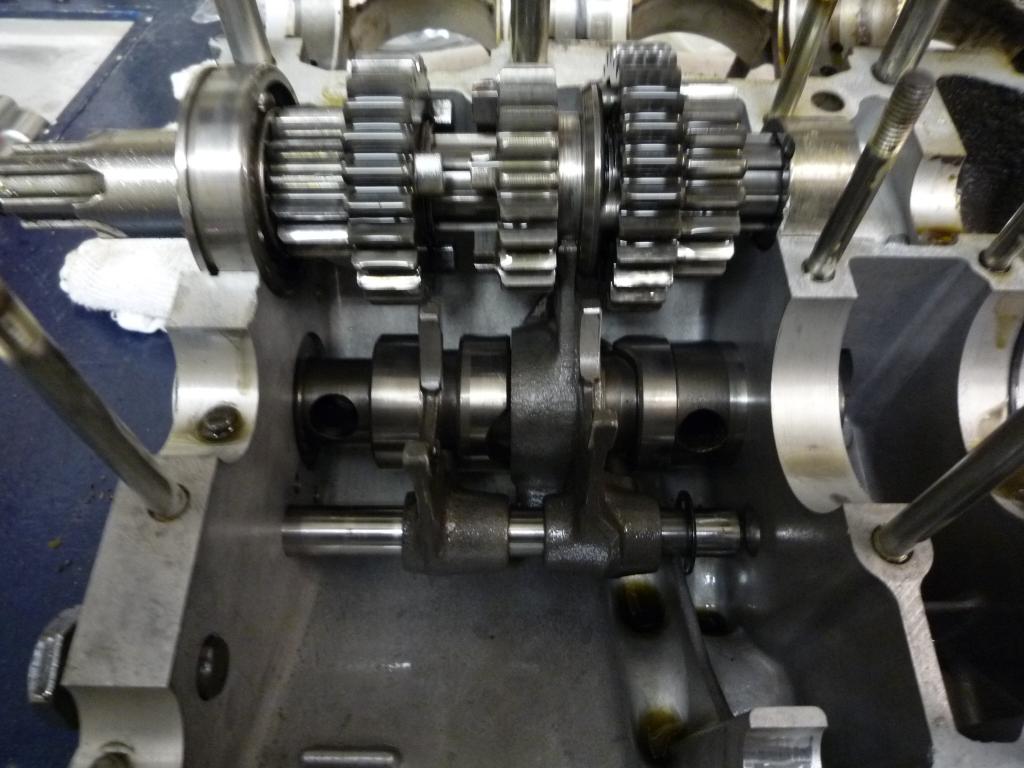
and the output shaft and gears
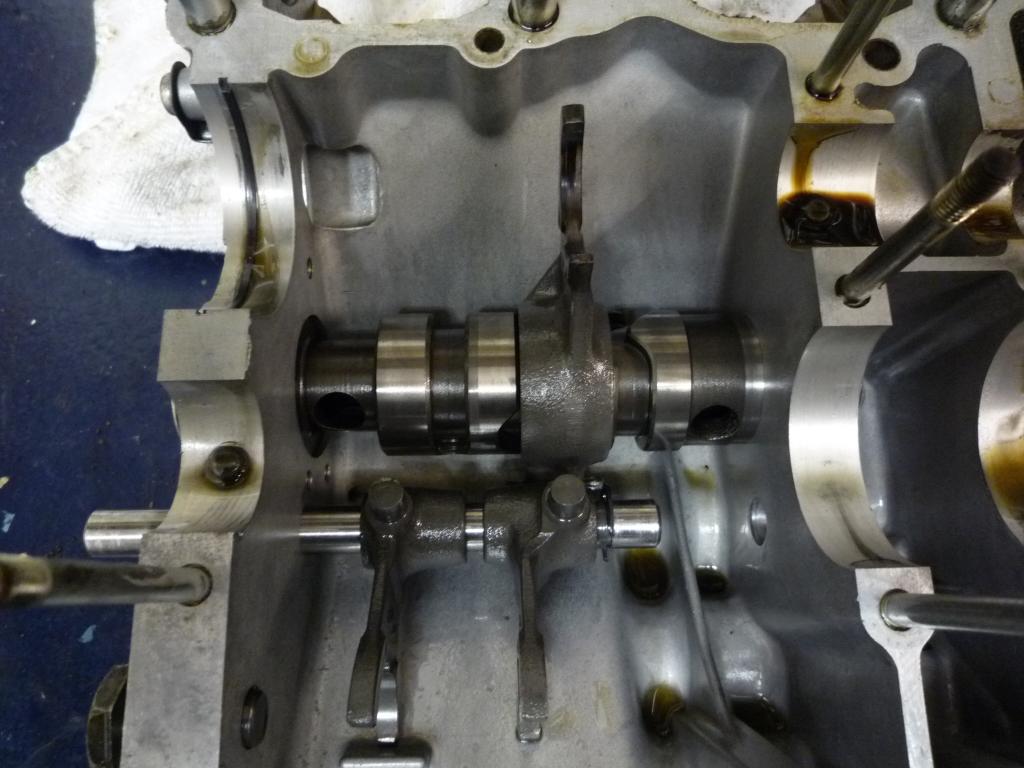
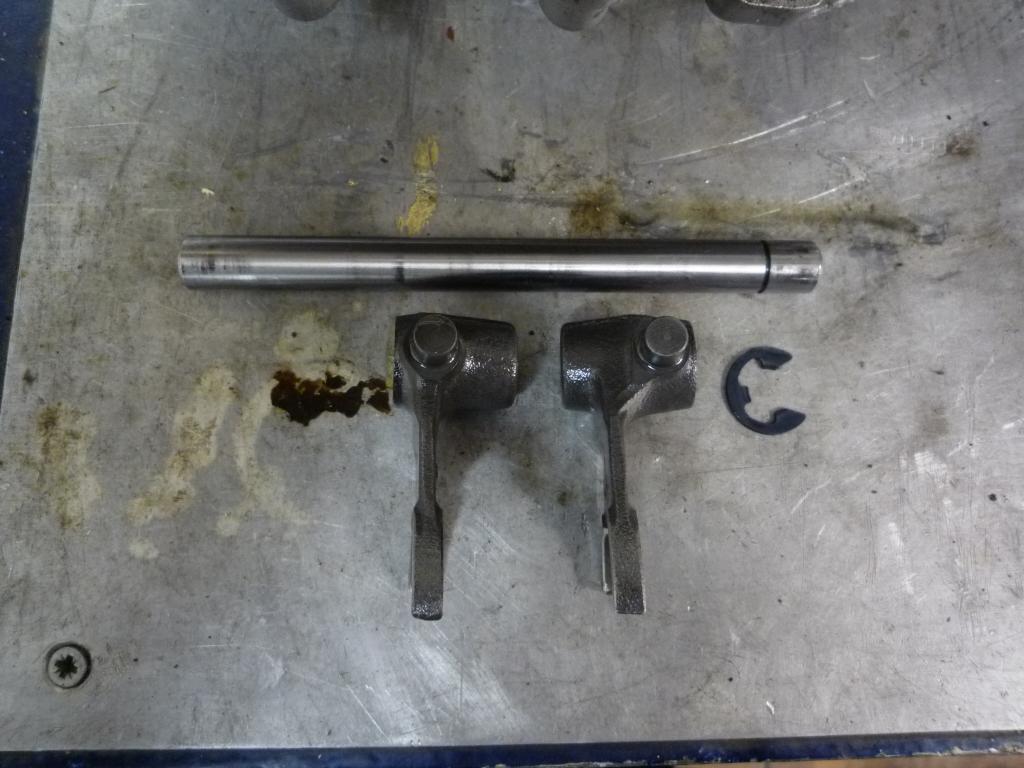
Leaving the shift rod and selector forks showing. By removing the circlip you can slide the shift rod out and take the selector forks off.
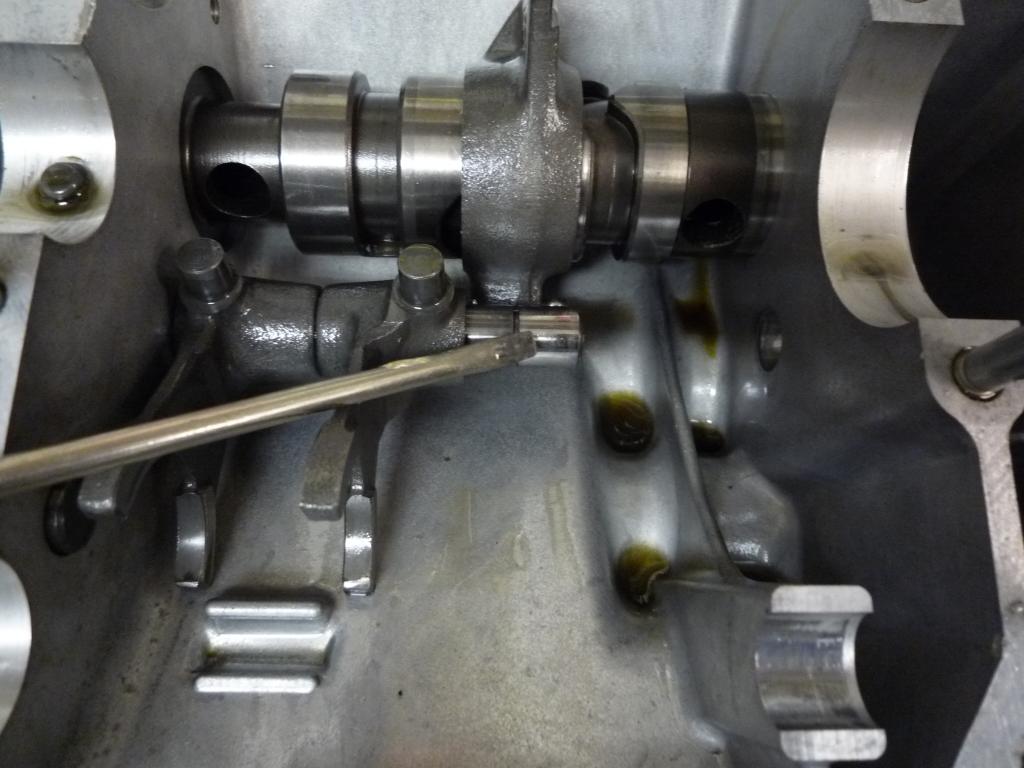

Then the split pin is removed from the selector fork on the shift drum which allows the guide pin to drop down. And the shift drum can be removed.
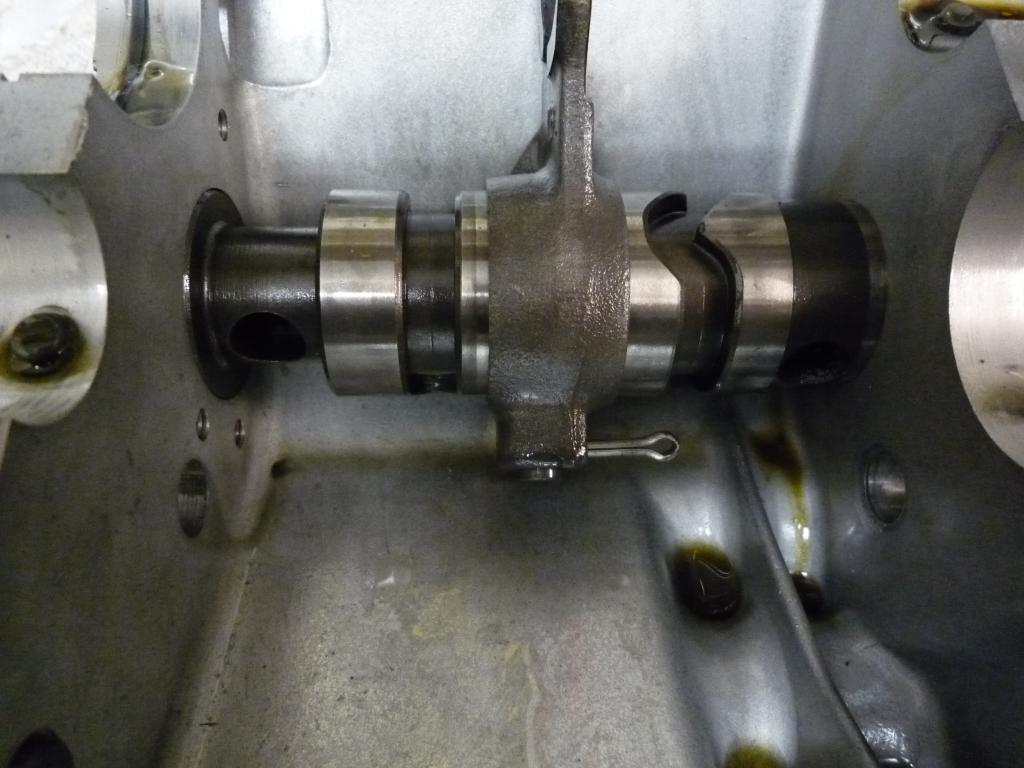
the three bearing set rings are taken out for safe keeping


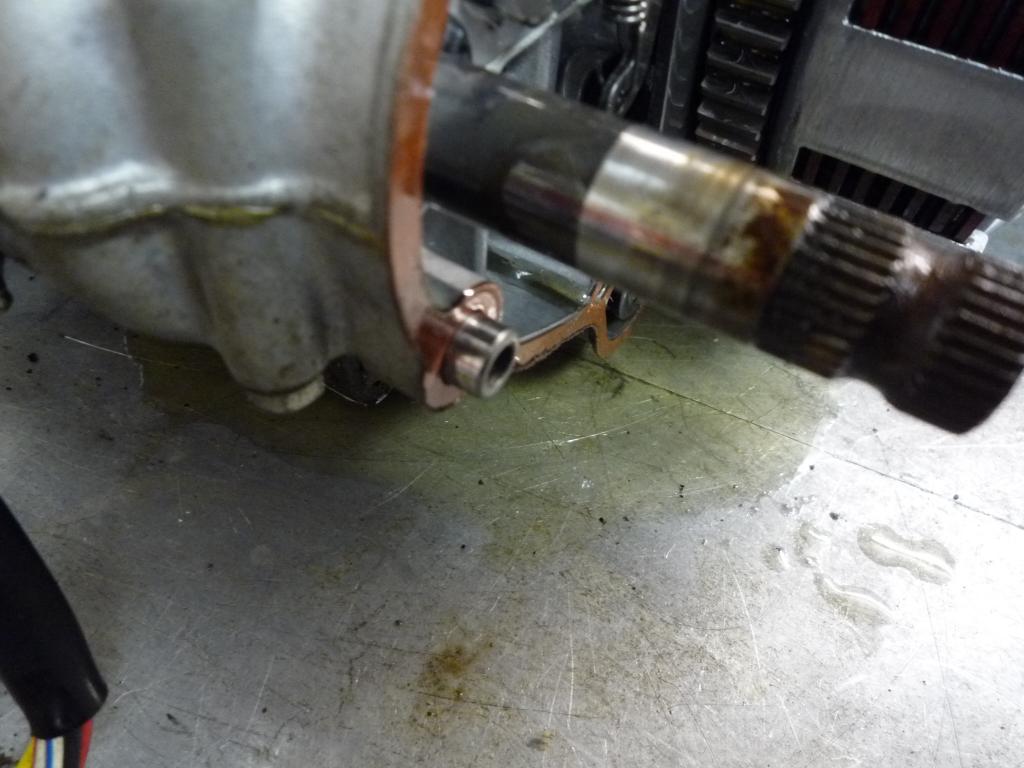
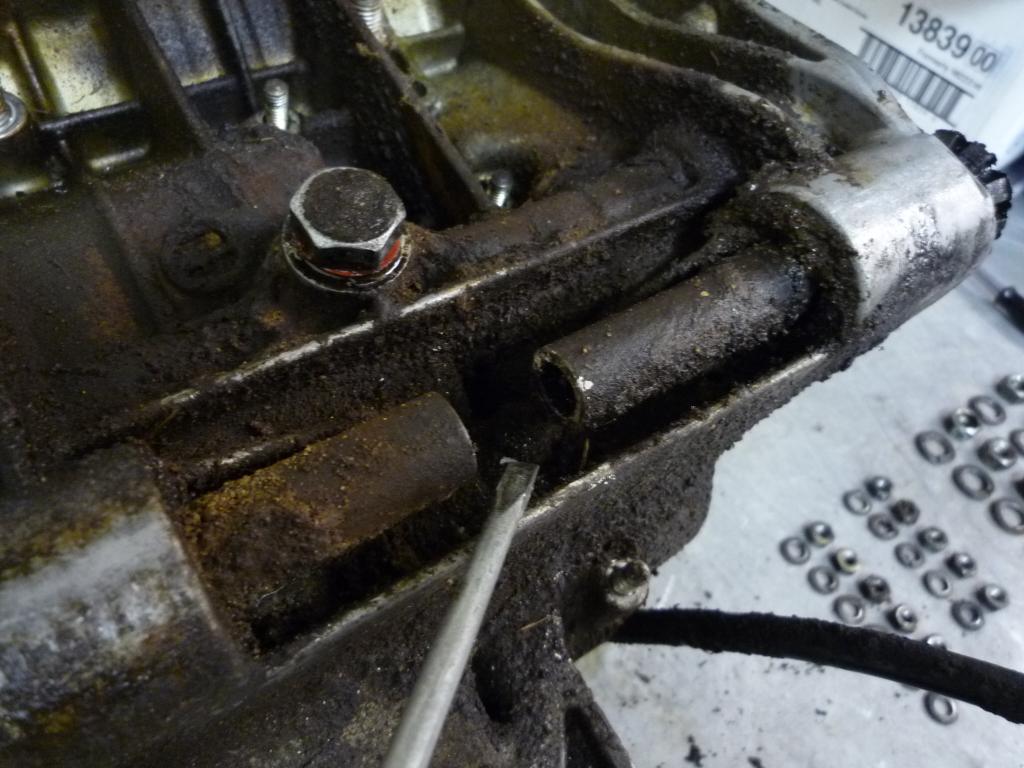
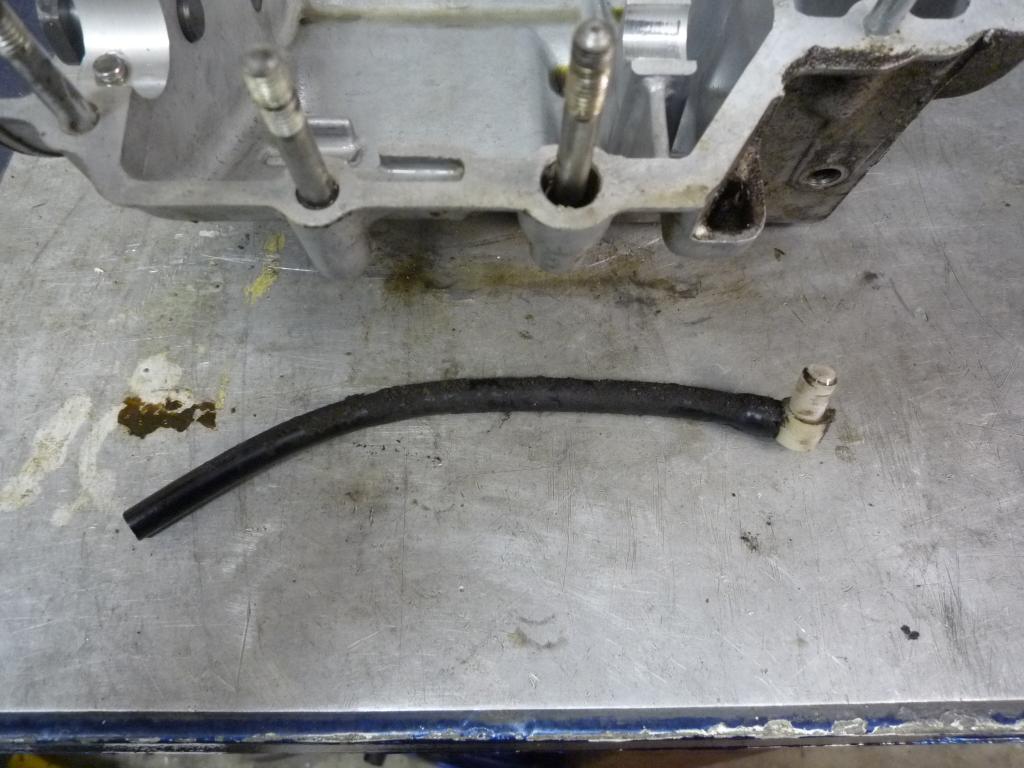
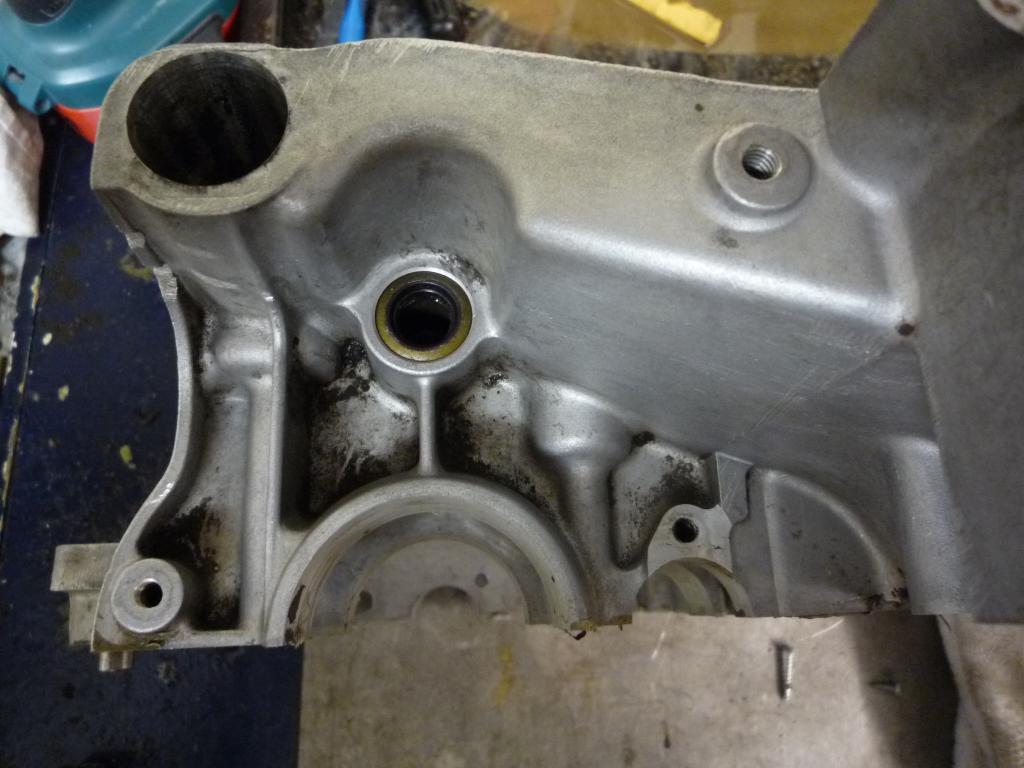
The crankcase breather hose is carefully pulled out. And the kick stopper bolt and the crankcase oil receiver are removed.


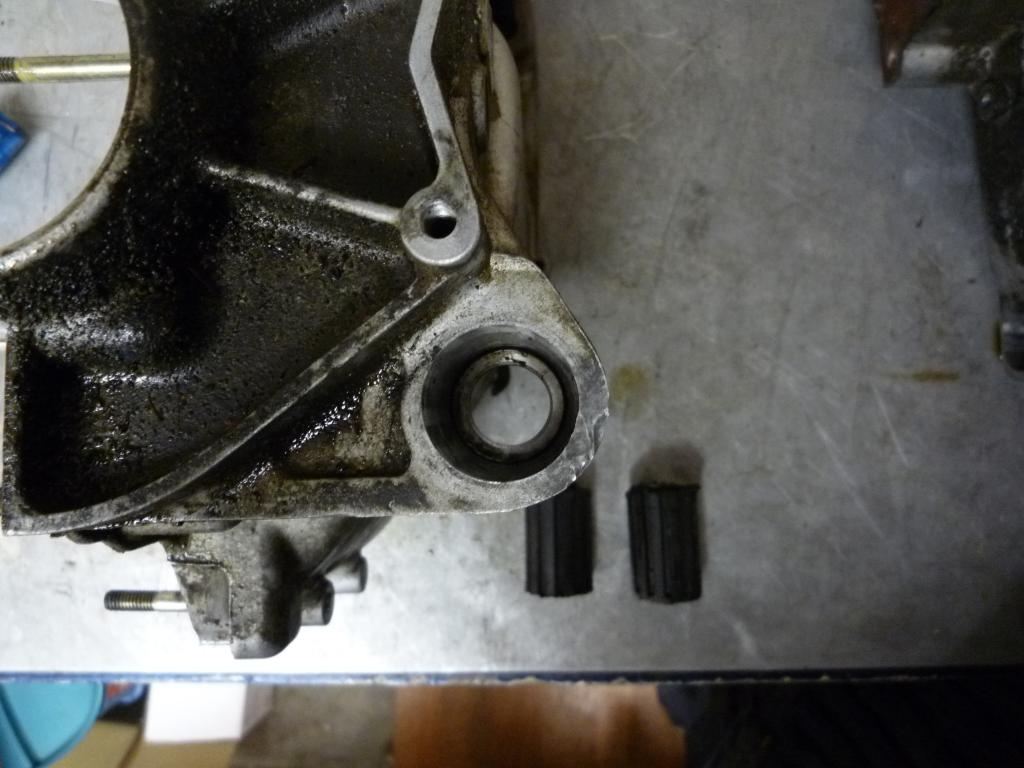
Which I think just leaves the upper rear engine mount bushes to remove and a
WARNING.
Be careful removing these bushes as they could me mistaken as one bush (as I
nearly did) There are two and they need to be removed from either side of the
casing. They are separated by a piece of casting which could easily be broken if
they are pressed or hammered out as one, you have been warned.
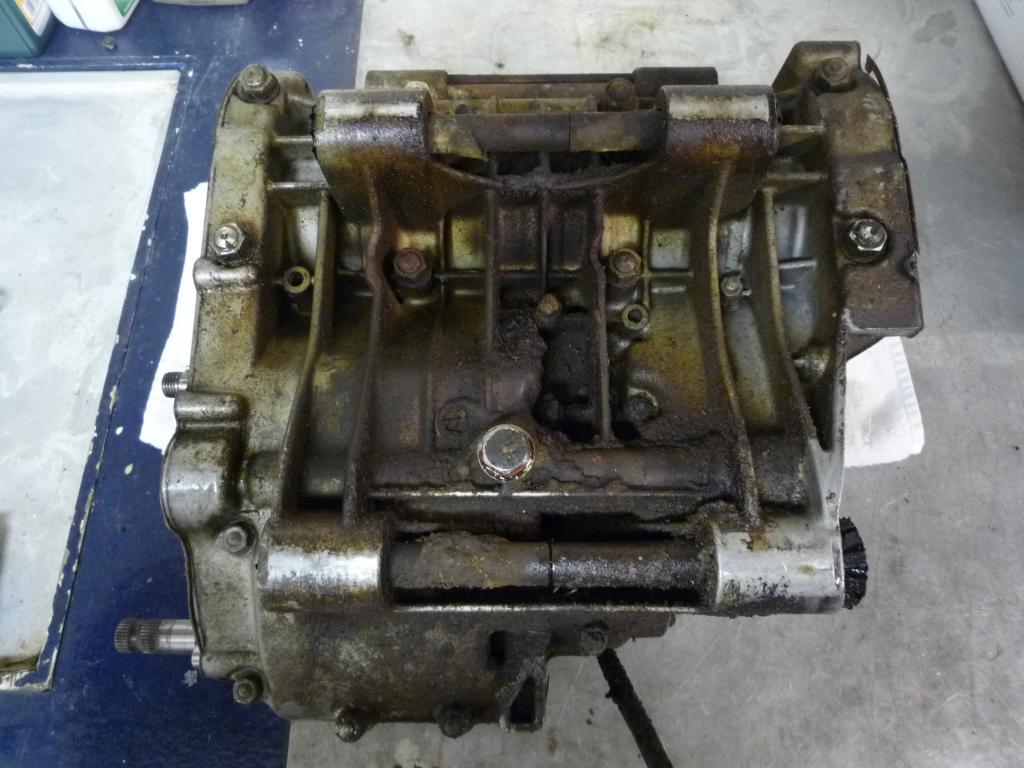
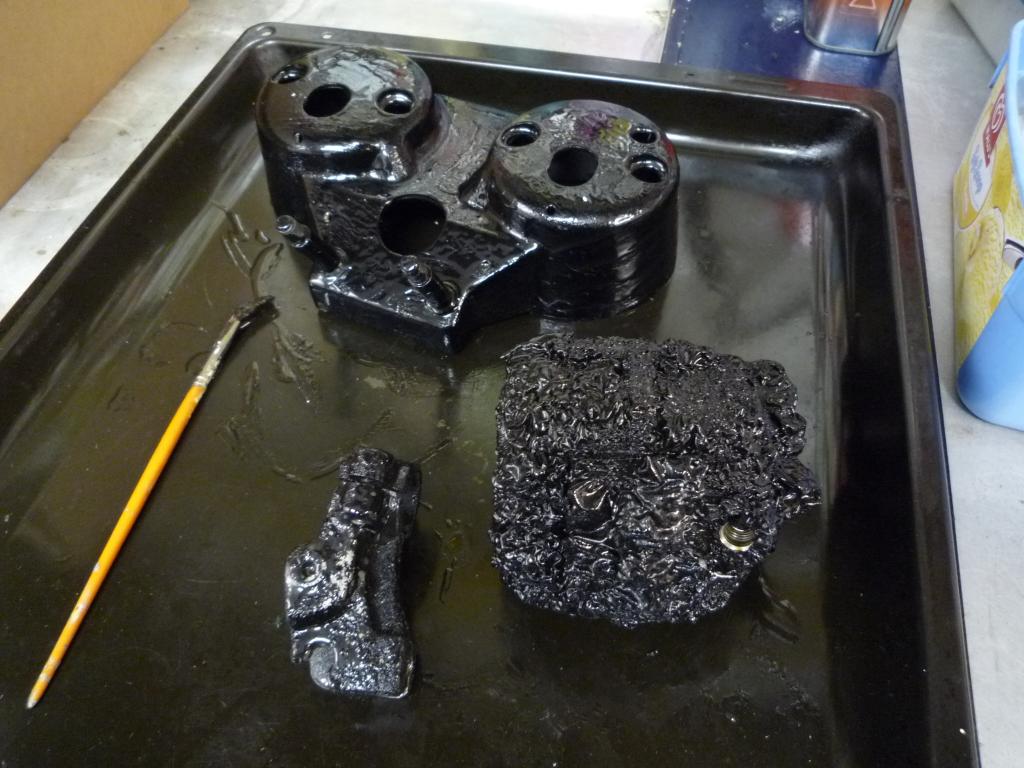
But that leaves me with a nice empty case ready for a pre vapour blast clean up.
As
for the crank well, more evidence that its past its best......Yuk
![]()
![]()
I enjoyed that ![]()
![]()
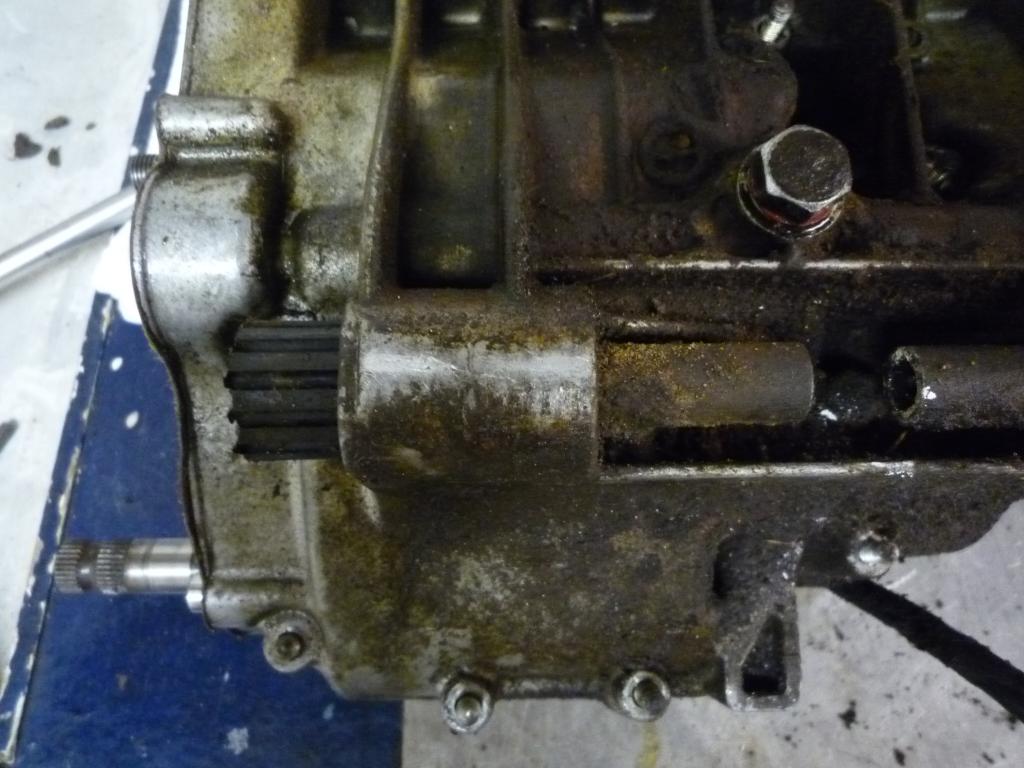
While degreasing the worst from the cases I found this little
fellow lurking under all the grime, it's the shift lever seal and that too is
now removed
![]()
Cases where horrible underneath caked in thick gritty muck, managed to get the worst of it off and they are now down at the Cleaners along with the heads and barrels.
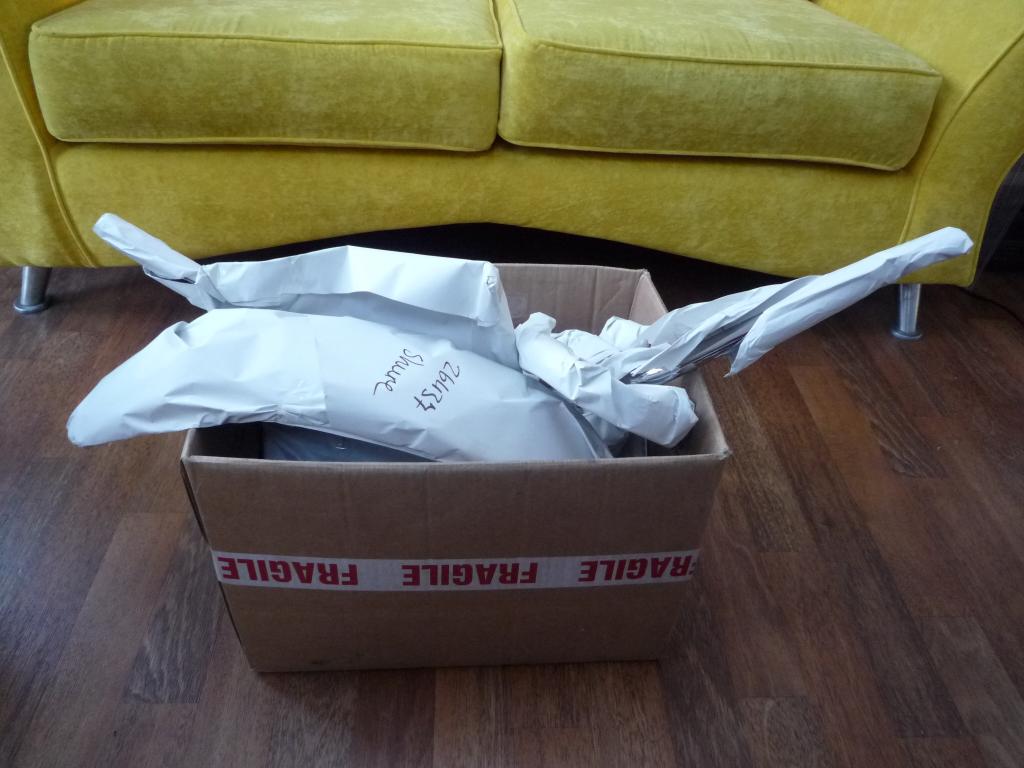
So I picked up
my first batch of Chrome work today from my new Plater and I have to say I am
mighty impressed and very happy with it
![]() Yeh......... I will post a picture when I can (sorry to tease) but I have to say
I am slightly miffed...................................I can't for the life of
me remember where these bits went
..........
think someone is going to be missing some door handles oops
Yeh......... I will post a picture when I can (sorry to tease) but I have to say
I am slightly miffed...................................I can't for the life of
me remember where these bits went
..........
think someone is going to be missing some door handles oops
![]()
Well the handles as much as I would like to keep to grips with
them
![]() they are off to be reunited with their owner, wouldn't look right on the 400
anyway although a handy bit of help for getting on the centre stand springs to
mind
they are off to be reunited with their owner, wouldn't look right on the 400
anyway although a handy bit of help for getting on the centre stand springs to
mind
![]()
Plater's very apologetic and relieved as well.
mmm....... shiny goodies
![]()
Had a good look over my stuff today and still very happy, indicator heads came
up well, so did the shocks and springs. Couple of minor pits in the front
mudguard but I can live with that. Chrome is deep and shiny.![]()
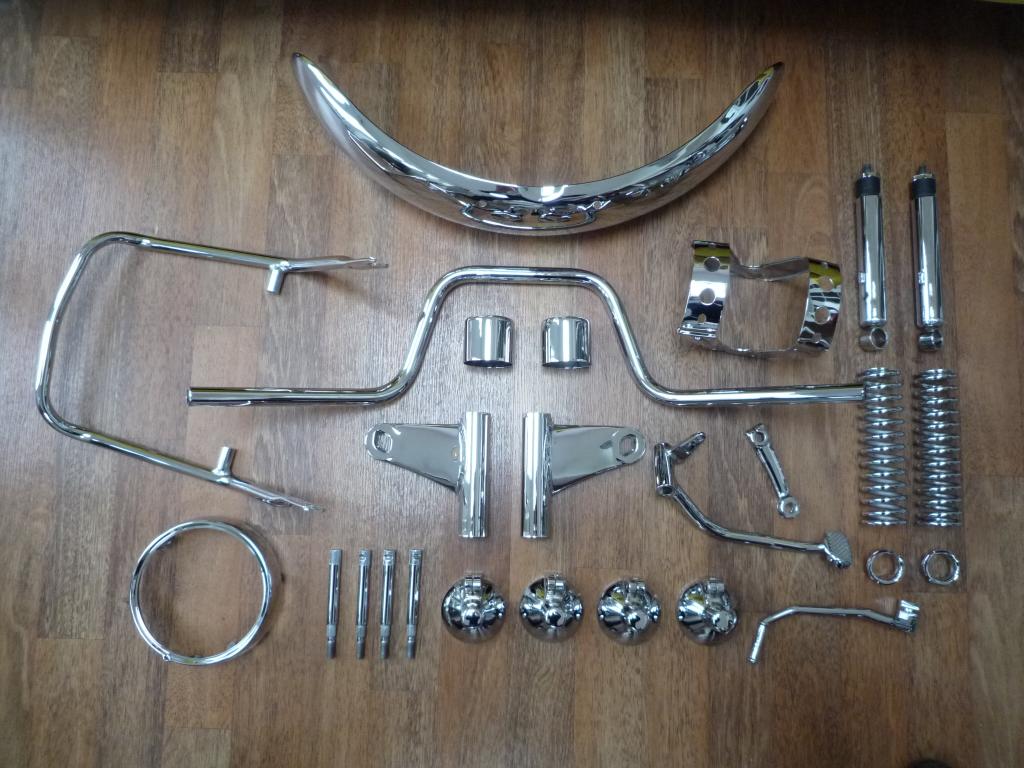
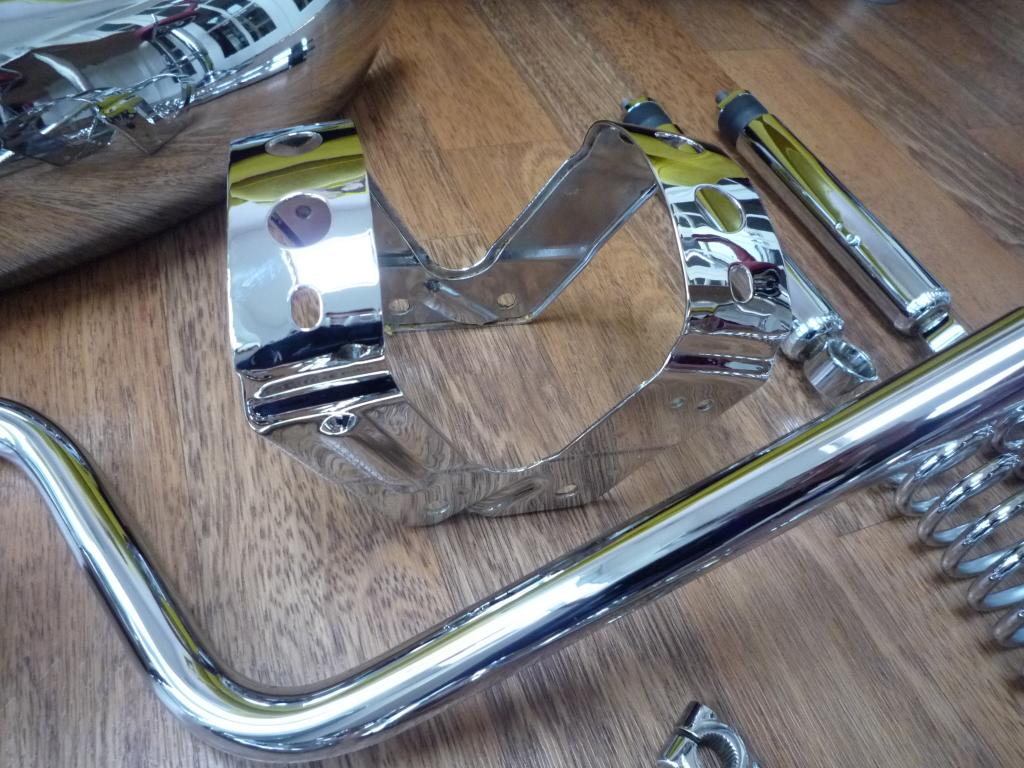
One other thing they did was apply silver hammerite to the inside of the headlamp ears, headlamp rim and mudguard, a nice touch if you want it and well applied...................

![]()
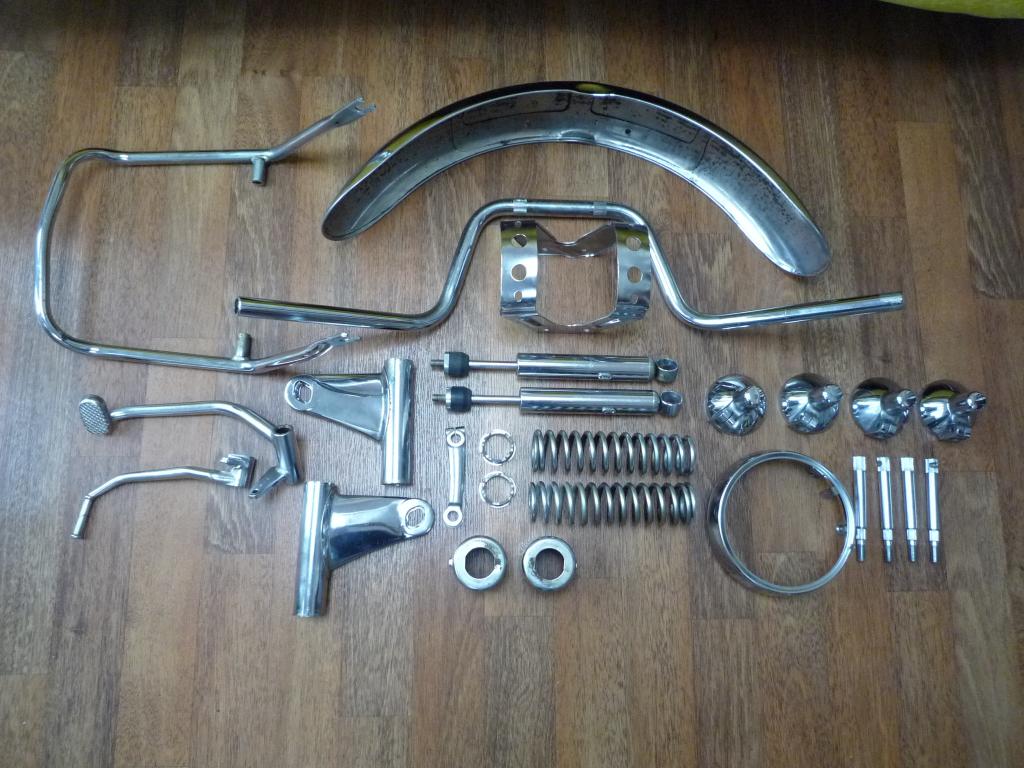
Well after all excitement the Chrome work is now polished, waxed and safely wrapped away again till we are ready for it.
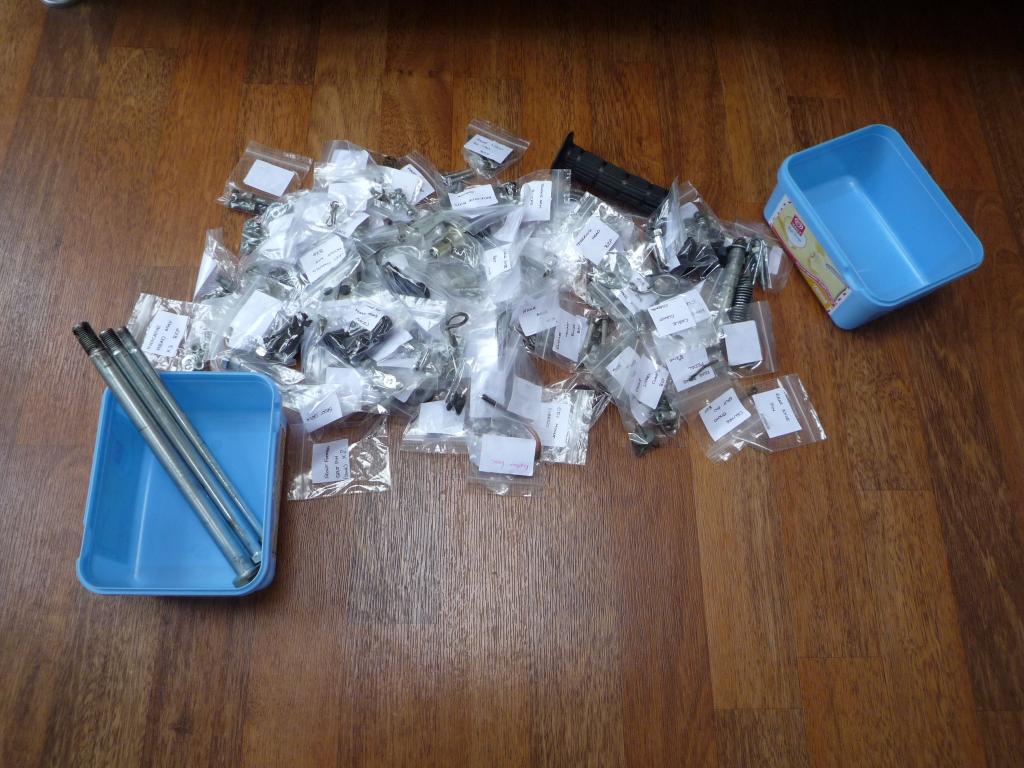
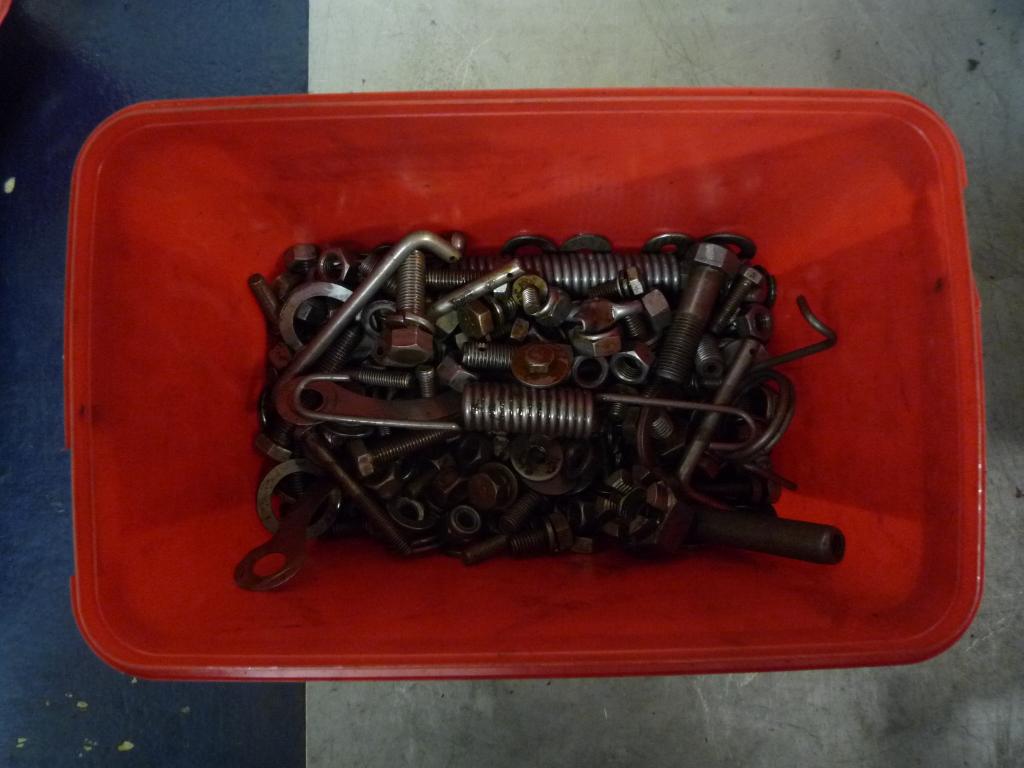
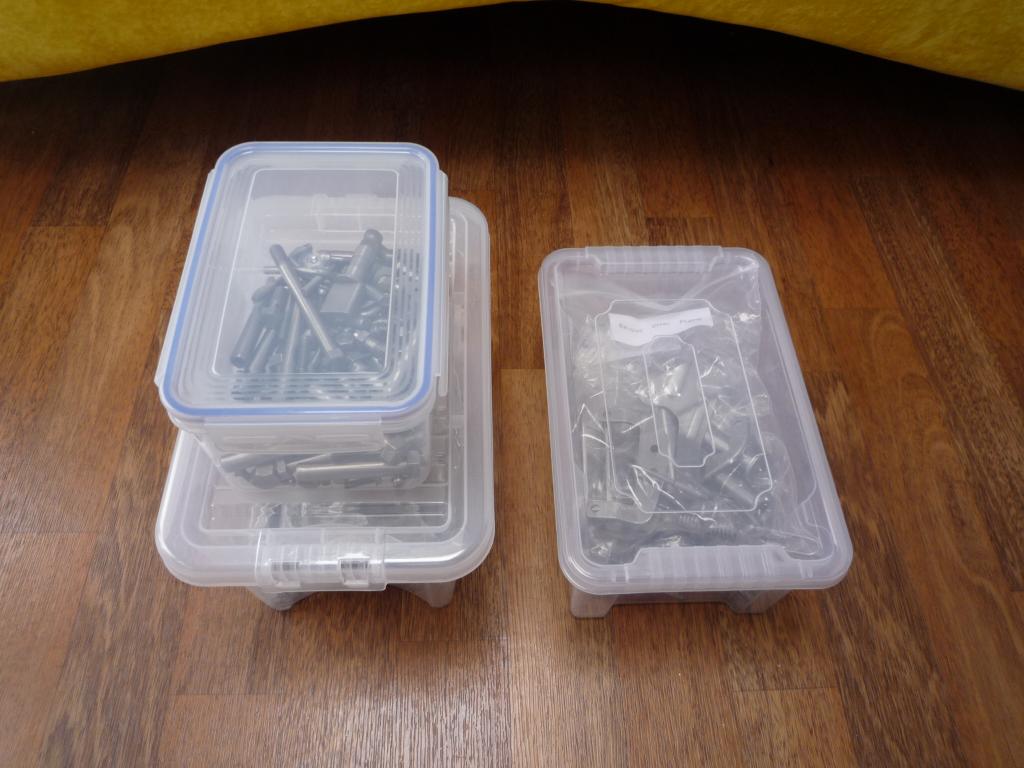
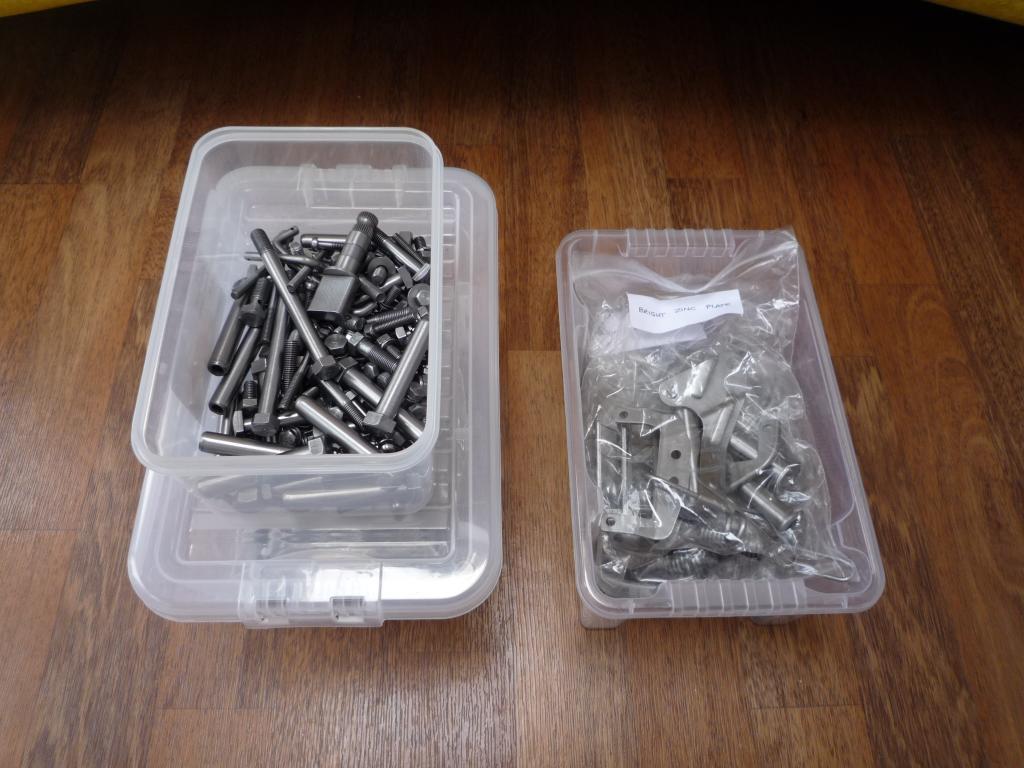
Now its down to
the less glamourous task of preparing all the many fasteners I have ready for
re-zincing and there are a lot and I haven't even stripped the wheels yet.
Its not too bad once you start but I do find it a useful and necessary part of
any restoration.
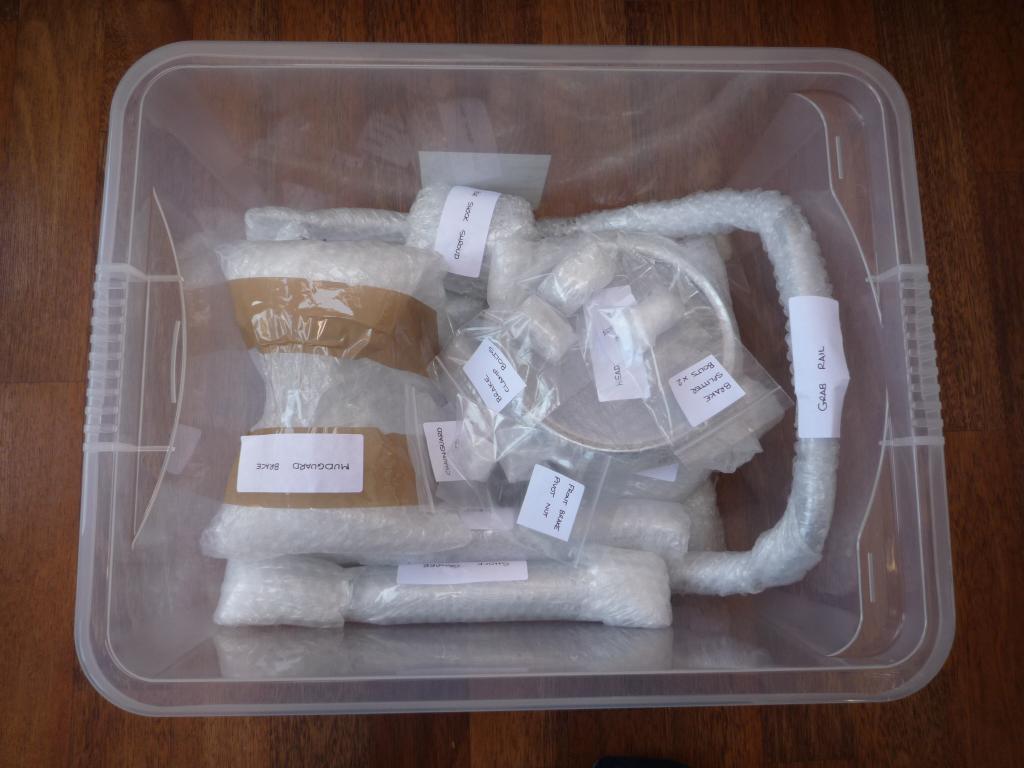
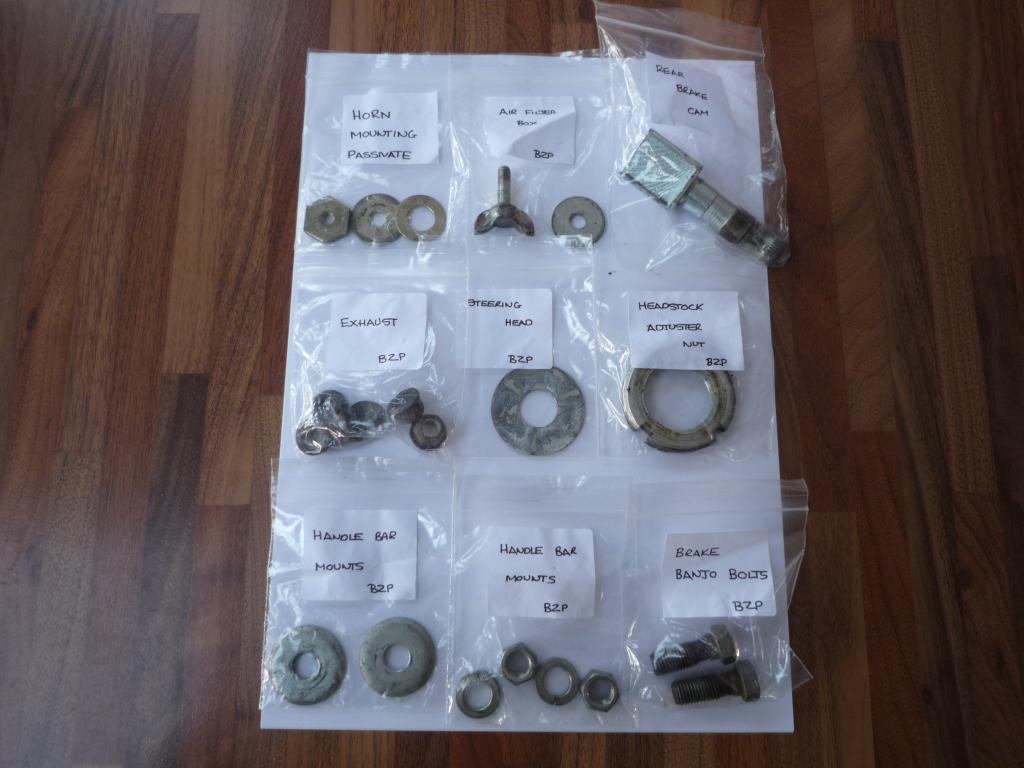
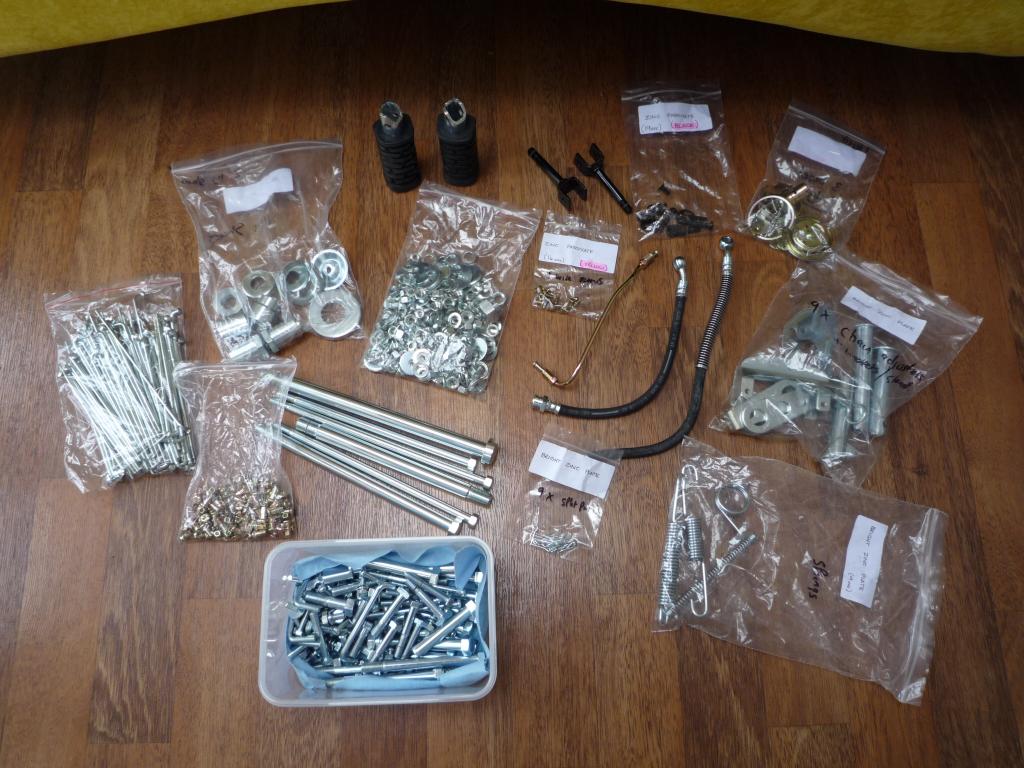
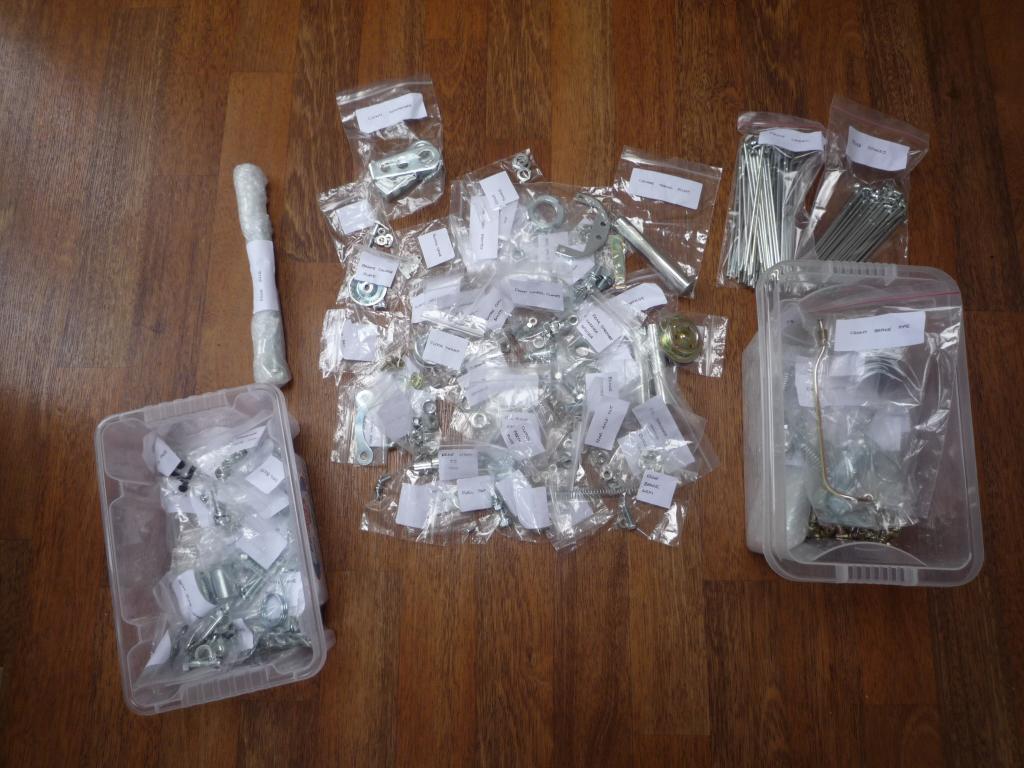
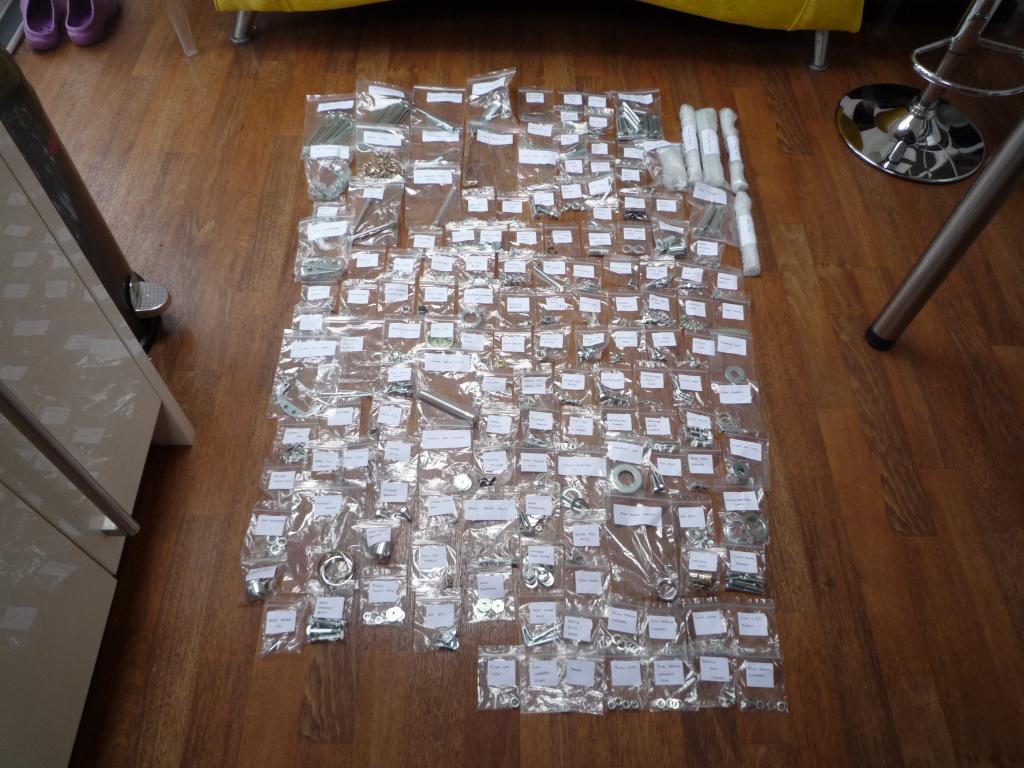
I have bagged, labeled and photographed everything before I start then I can
trace and place each item as I go.
Then after a quick dip in the magic potion the old platings stripped. Then
cleaned and protected ready for plating.
There's going to be some late night
fettling ahead I think
![]()
![]()
So in the workshop this
week..............................
Well glad to see the Out box of bits is getting bigger than the IN box so we are
making some progress but I have still to strip the wheels so Spokes and nipples
to add, may get round to them this week all being well.
To relieve the boredom I decided to add some interest and diversity to the mix and cleaned up the carb intakes and the engine rubber mounts which are all serviceable although one is slightly swollen at one end, these will have a light coating of wax on the shafts to protect them.


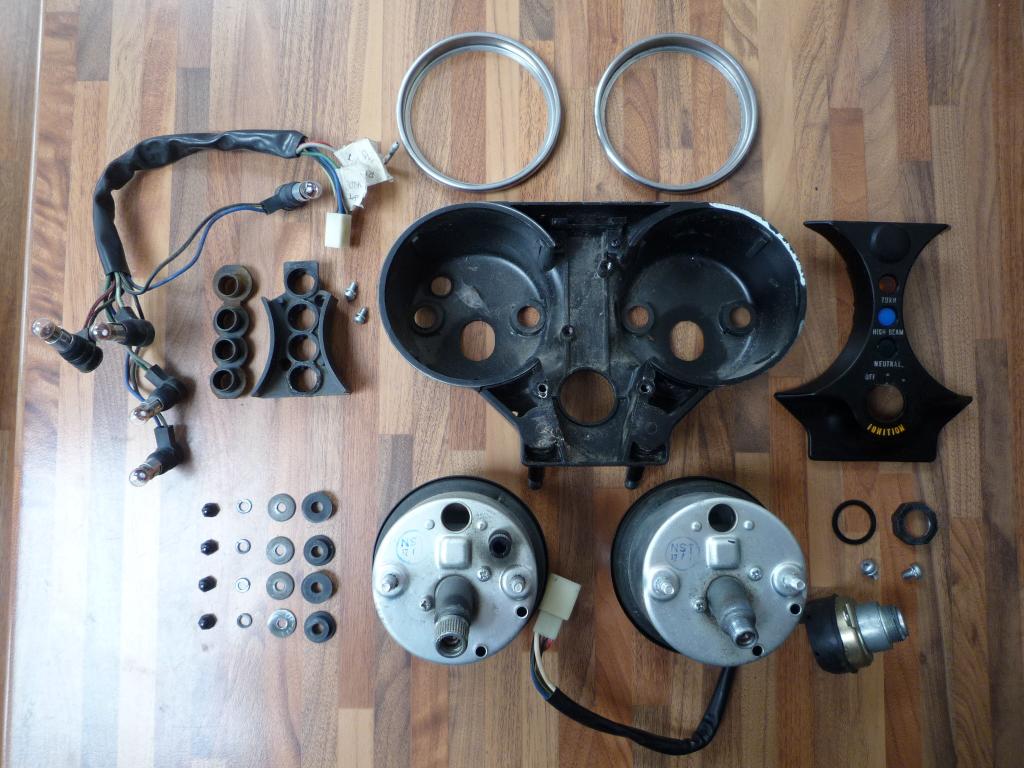
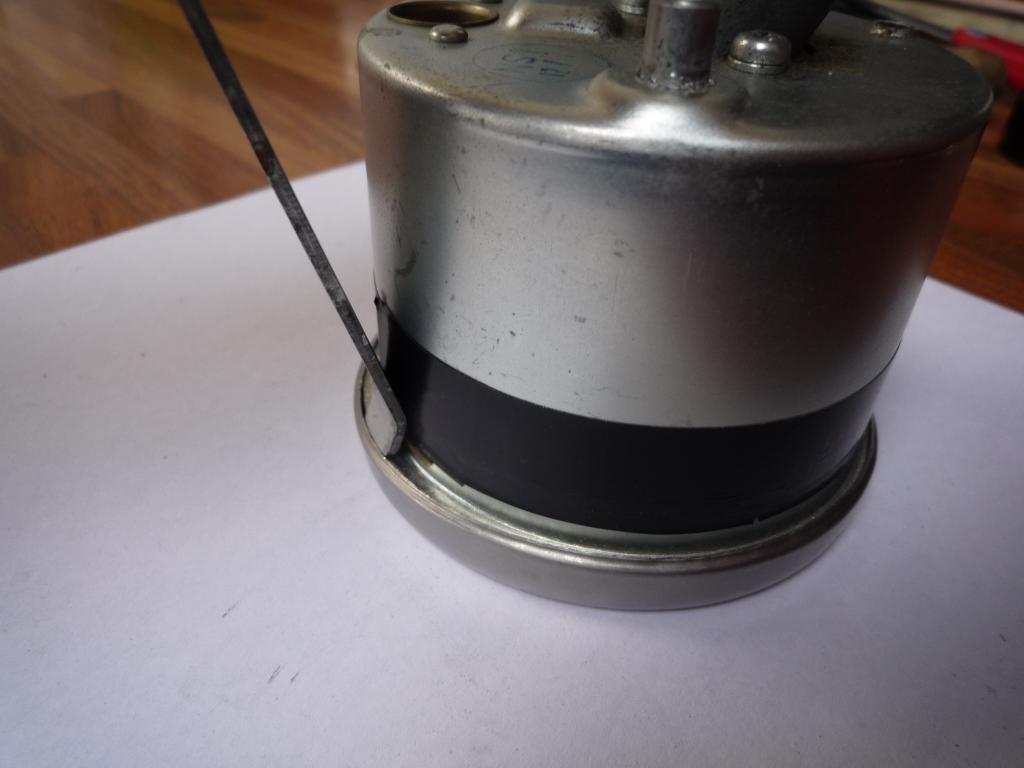
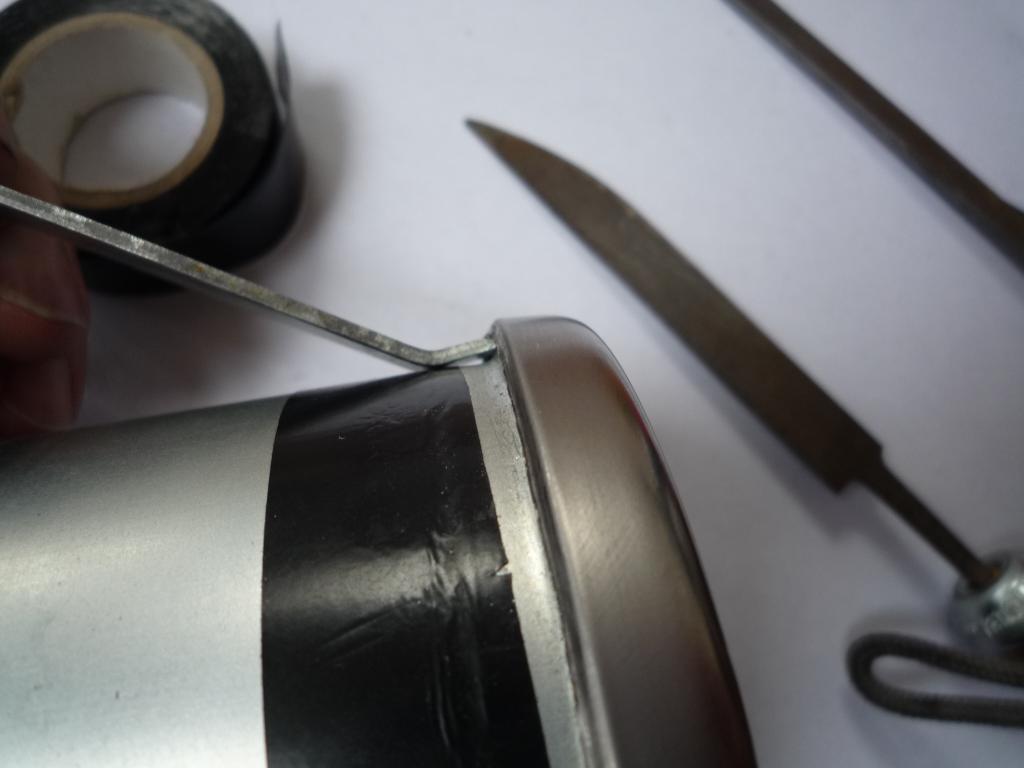
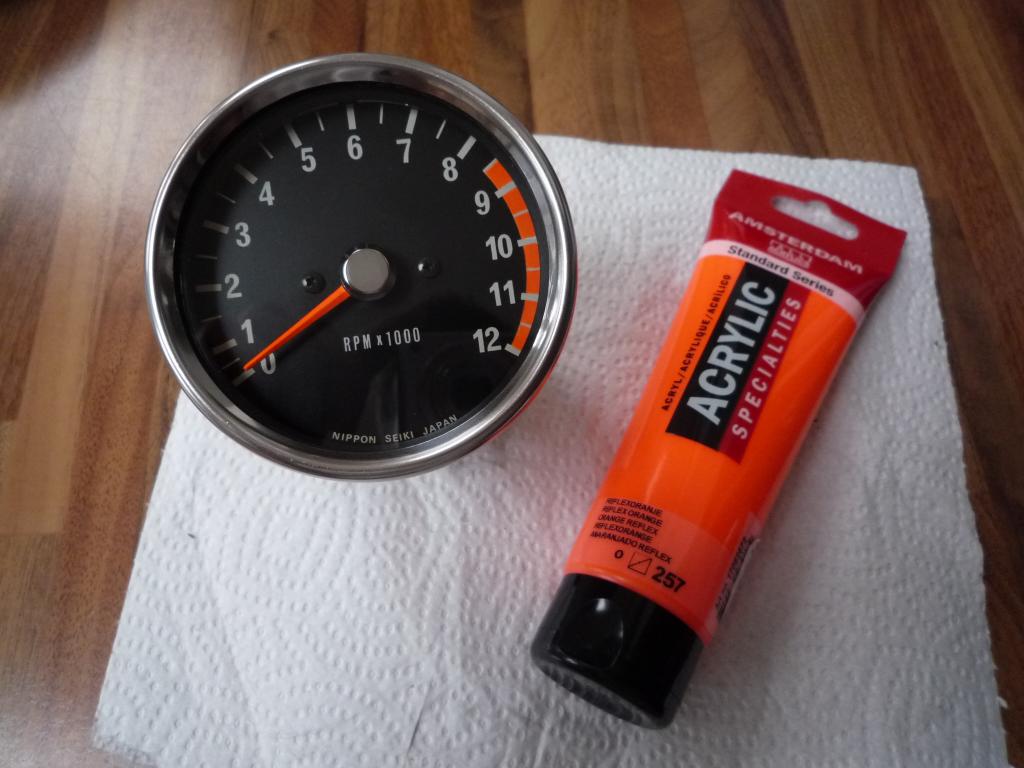
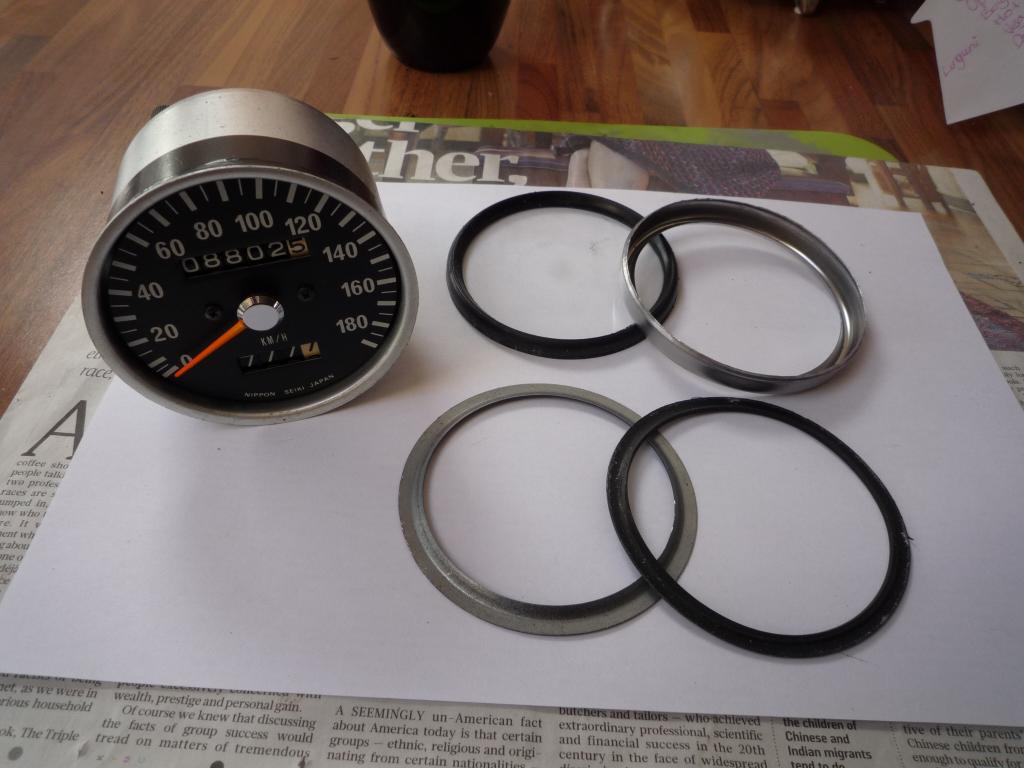
Then I decided to tackle the tacho.
Back soon ![]() just been bumped off the computer
just been bumped off the computer
![]()
Back now
![]() ......on with the Tacho, a couple of weeks ago I picked up a free tin opener
from the local paint shop thinking it would make the ideal tool for working on
the clocks, seems I was right and have since been back for a couple more
......on with the Tacho, a couple of weeks ago I picked up a free tin opener
from the local paint shop thinking it would make the ideal tool for working on
the clocks, seems I was right and have since been back for a couple more
![]()
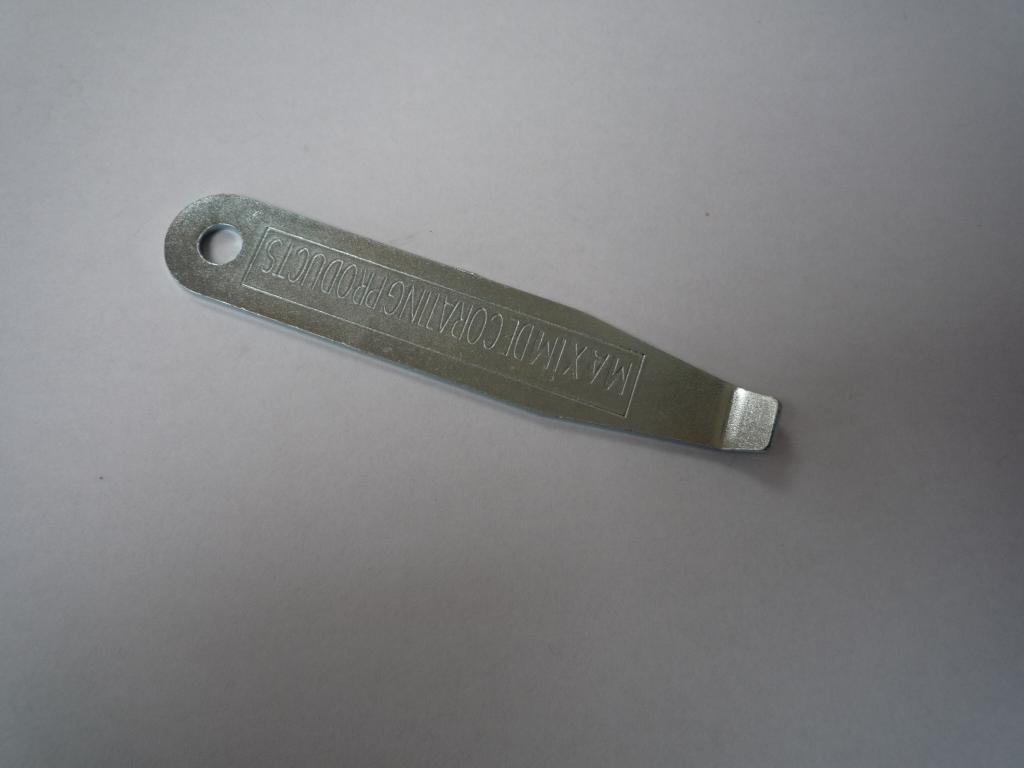
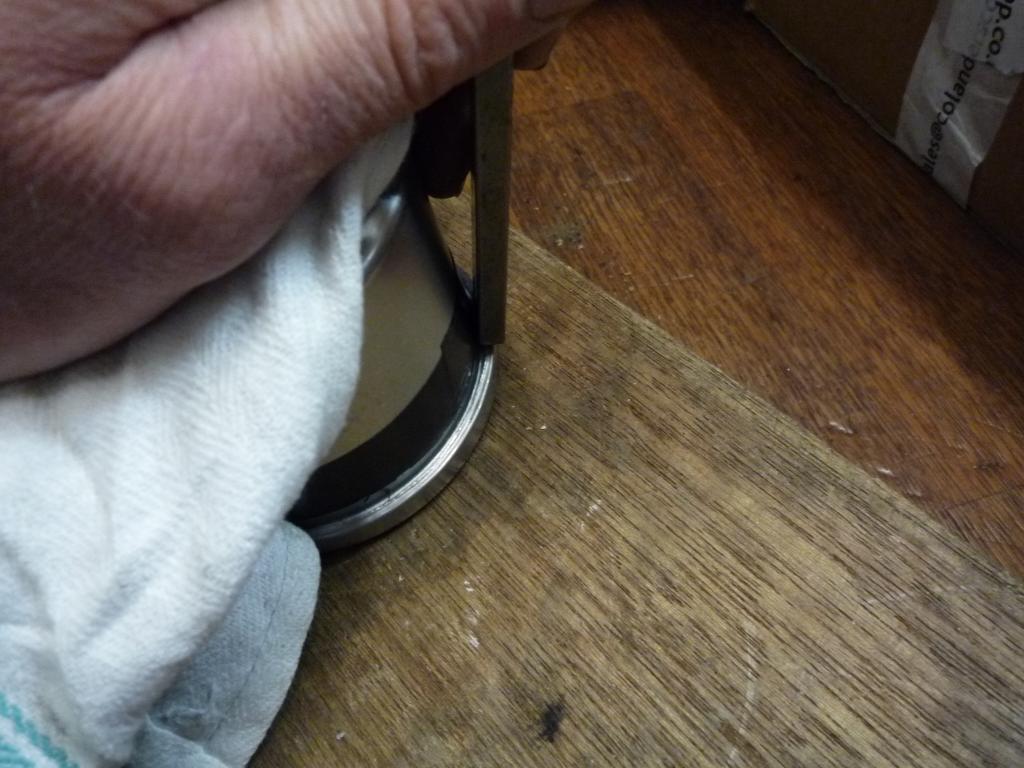
After a little file to produce the right edge and a radius to prevent kinking I set to work,....its a slow process and there is a bit of a knack to it but with a steady hand you can work the lip open without damaging the ring. I used the tape for added protection.
You have to judge when to stop as you don't want to over stress and deform the ring but eventually you will have done enough to be able to separate it from the body.

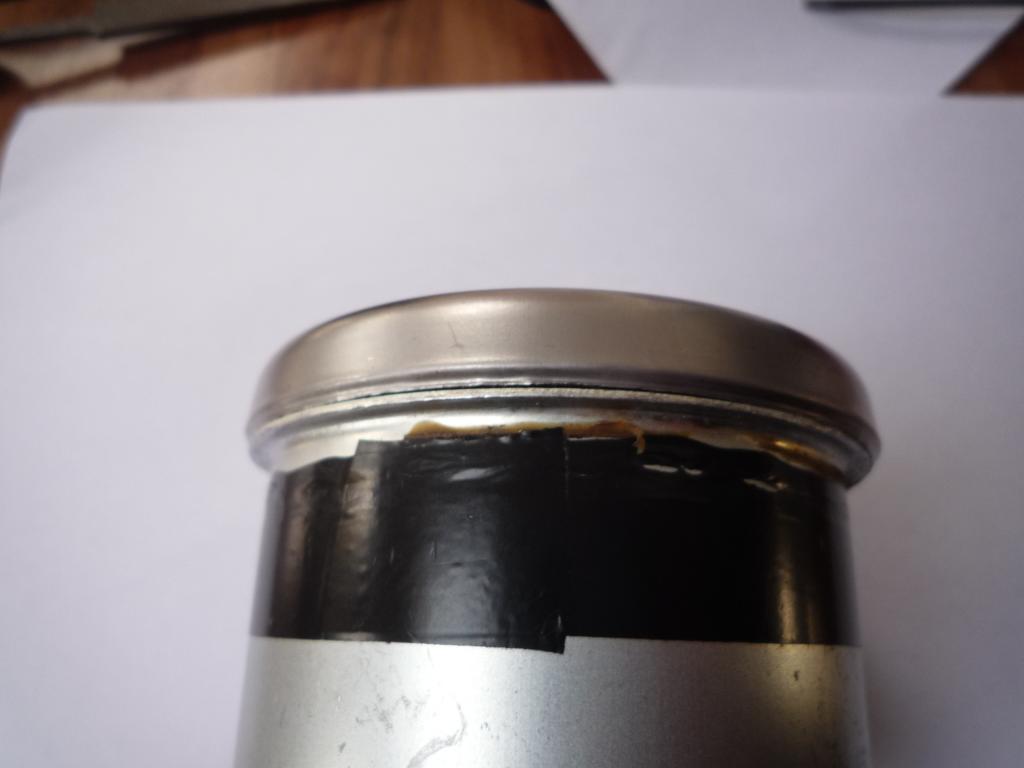
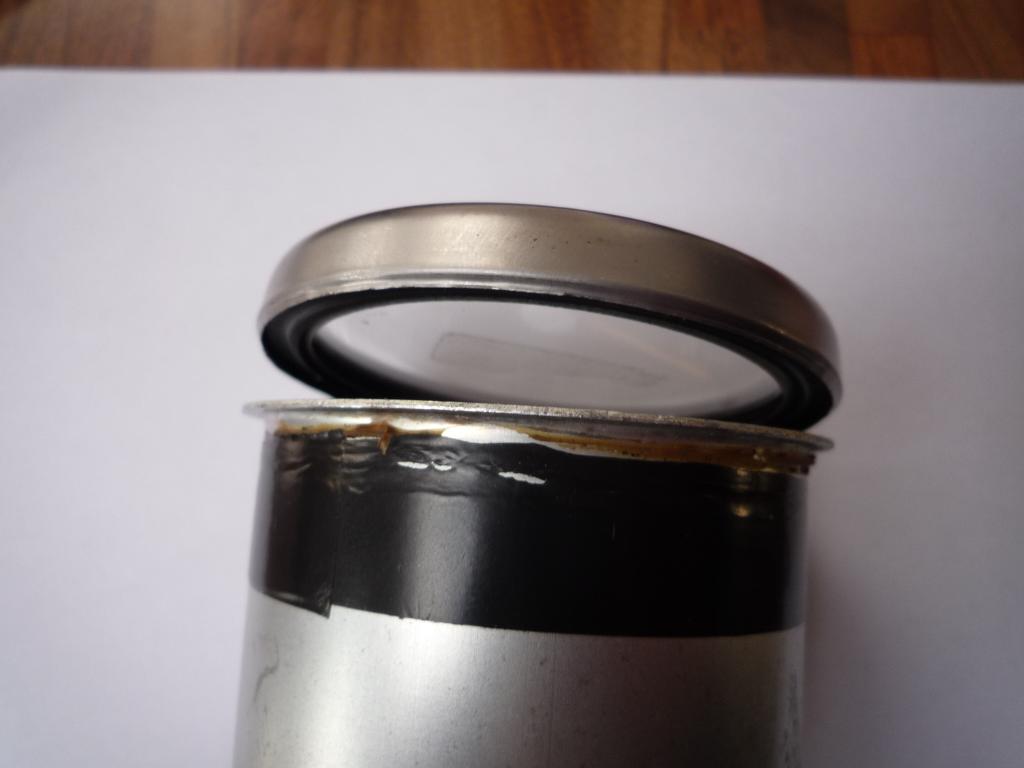

Removing the two screws releases the mechanism.......... and taking note of the assembly of the parts.
![]()
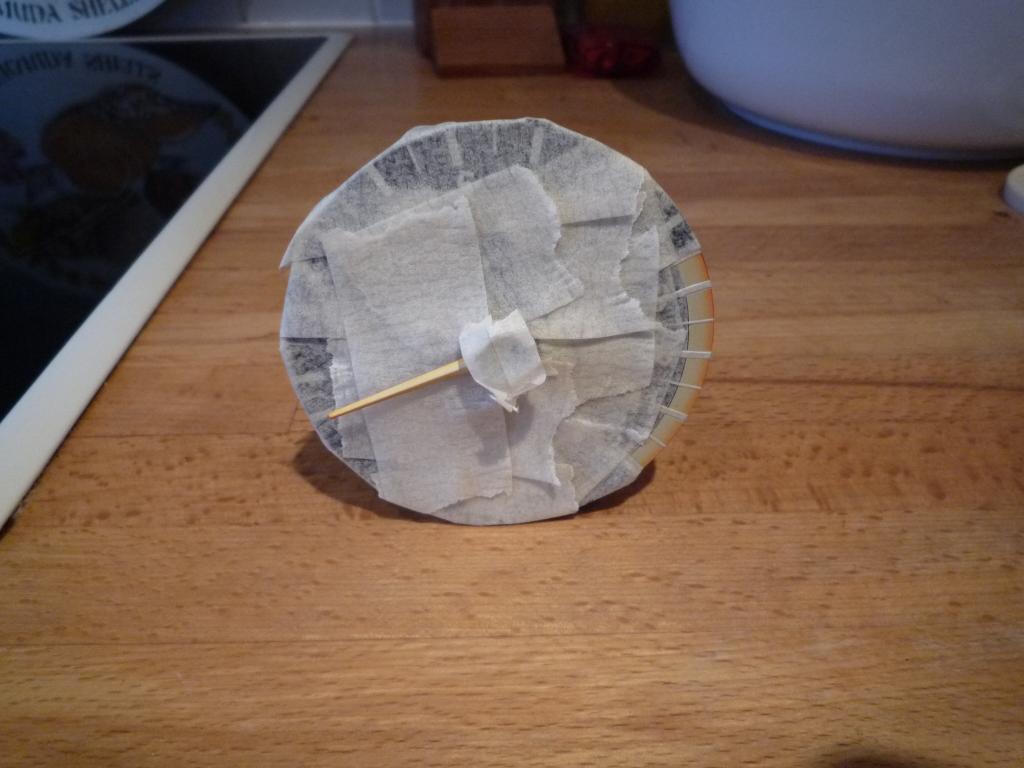
So the next stage was the painting, I
had no worries about brushing the needle but the red line was going to be the
difficult part due to the small separation lines between the segments.
I decided it was best to try airbrushing them in, a good buddy of mine had one
and though he hadn't used it for years it was the best way forward.
So after a bit of fine (fiddly as hell) masking, and with the paint mixed we
went for it.
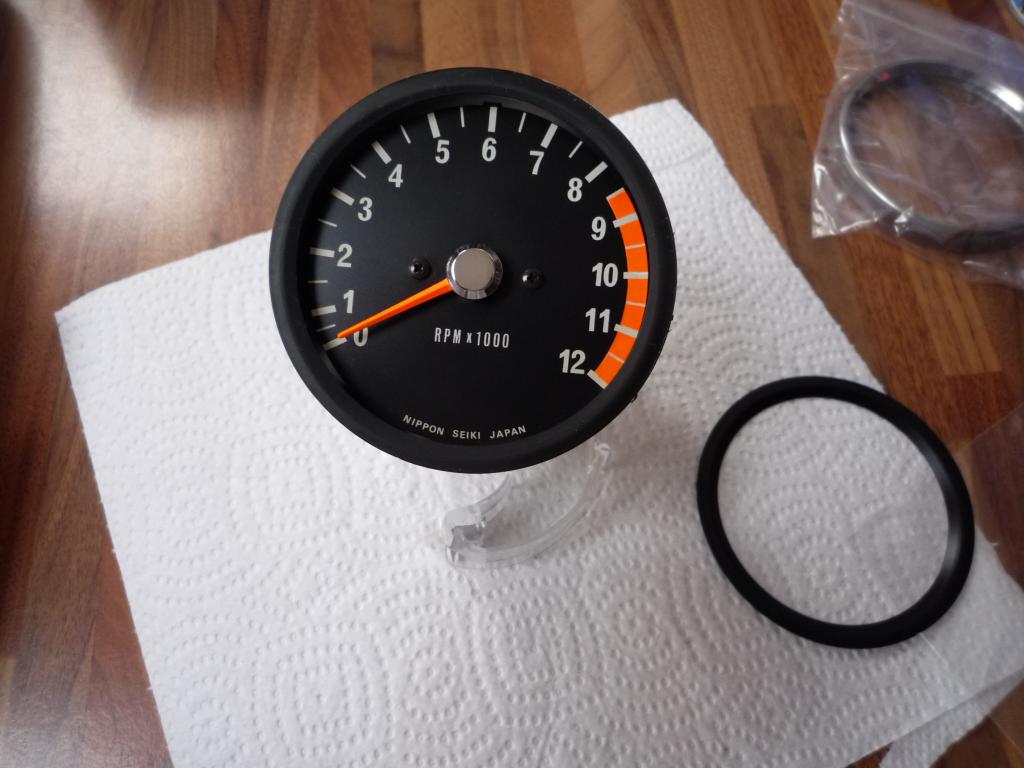
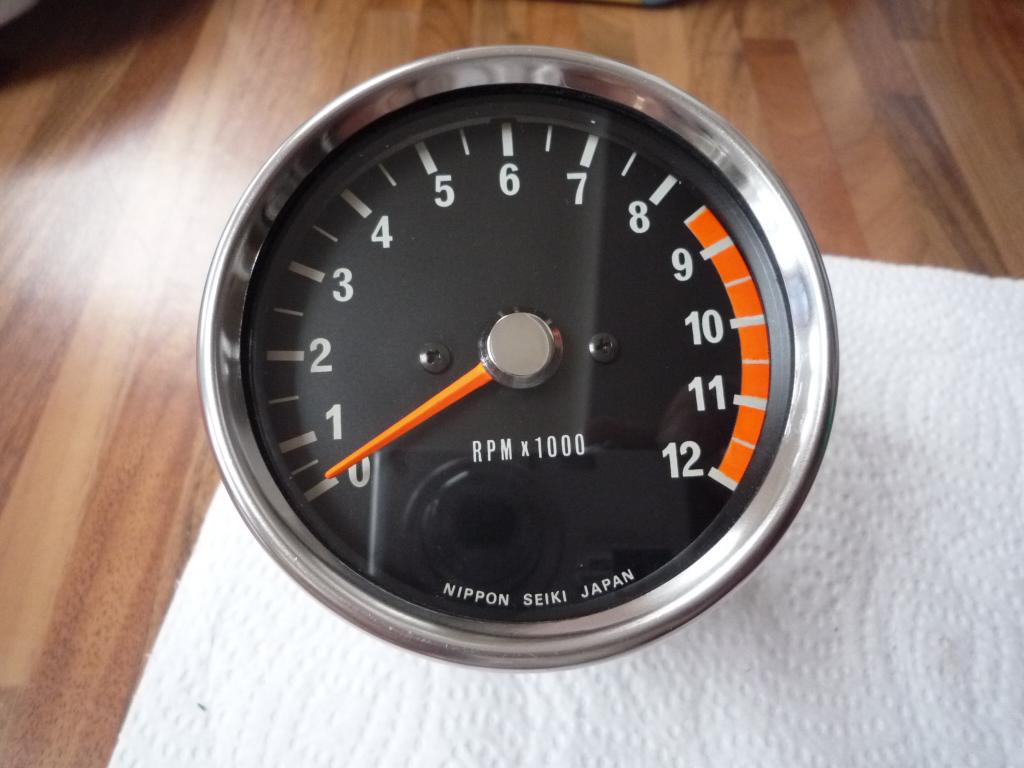
Here's the results of our efforts, with
the tacho sitting back in its case and with the removed parts cleaned and ready
for reassembly. doesn't look too bad at all with just a fine fettle and polish
needed for me to be happy
![]()

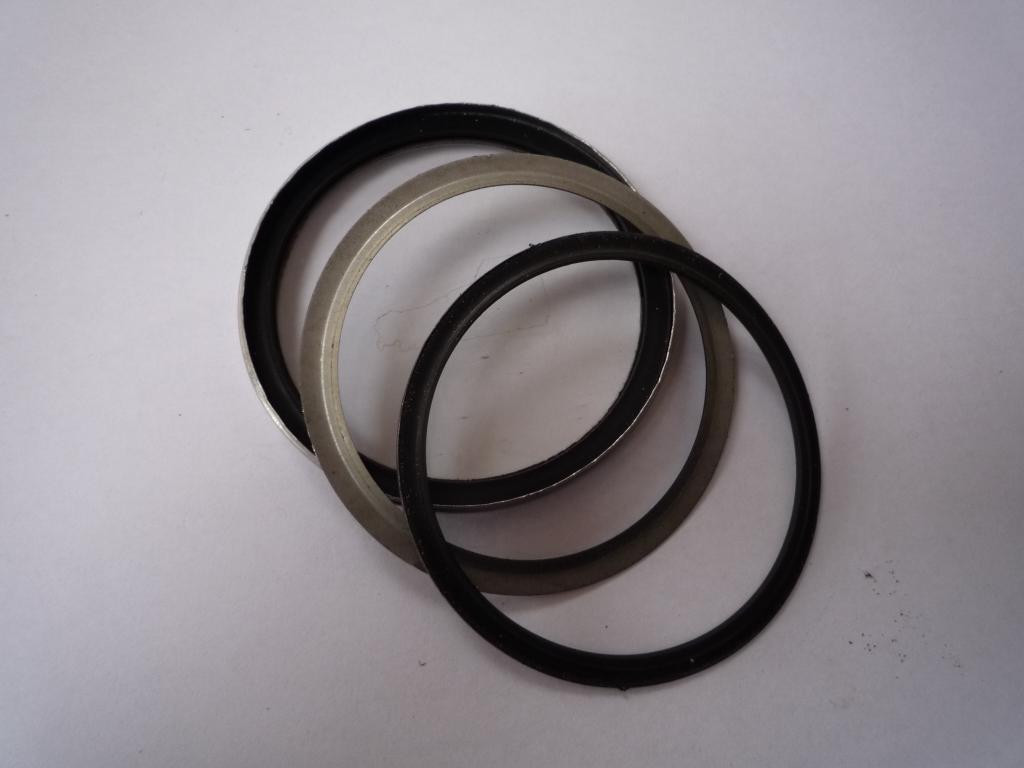
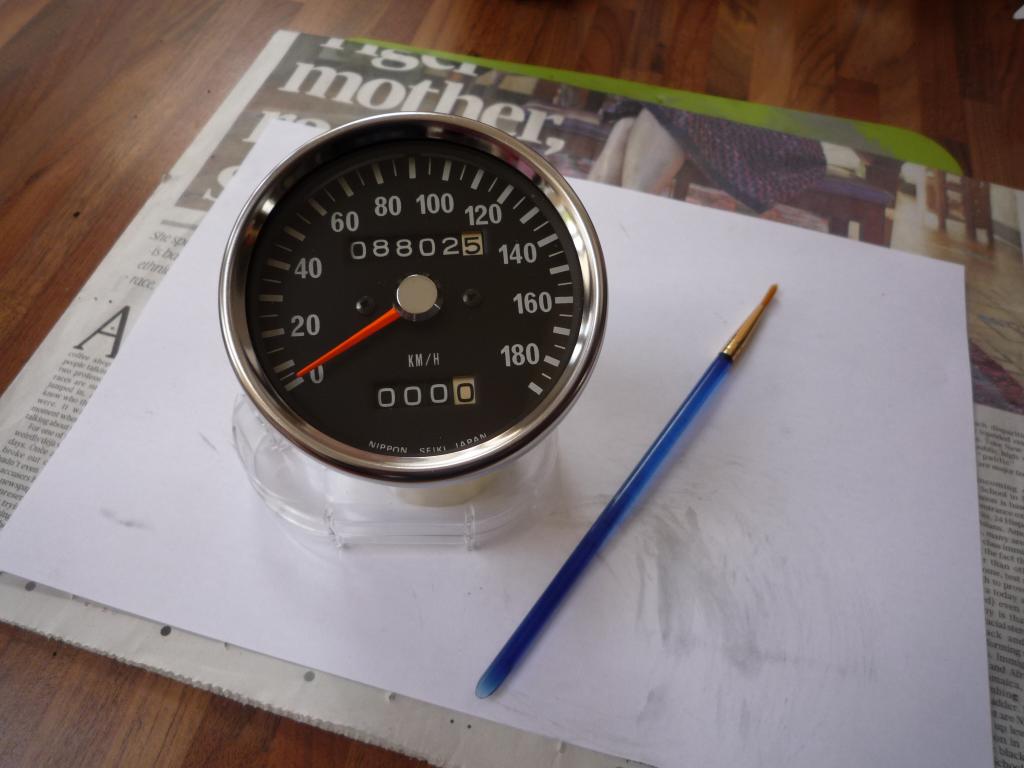
Next job was to reassemble it all
starting with the first seal, I found it was best to refit the glass into the
ring before that was fitted it just made life a bit easier and cleaning was
crucial.
Once the ring was snapped back into place it was time to close up. After a quick
rummage in the toolbox I found an old chuck drift and a toffee hammer, perfect
for the job of dressing the lip down.
Using a rag and some downward applied pressure to compress the seals, and starting to dress at an angle first to draw the lip inwards you gradually work the ring closed.
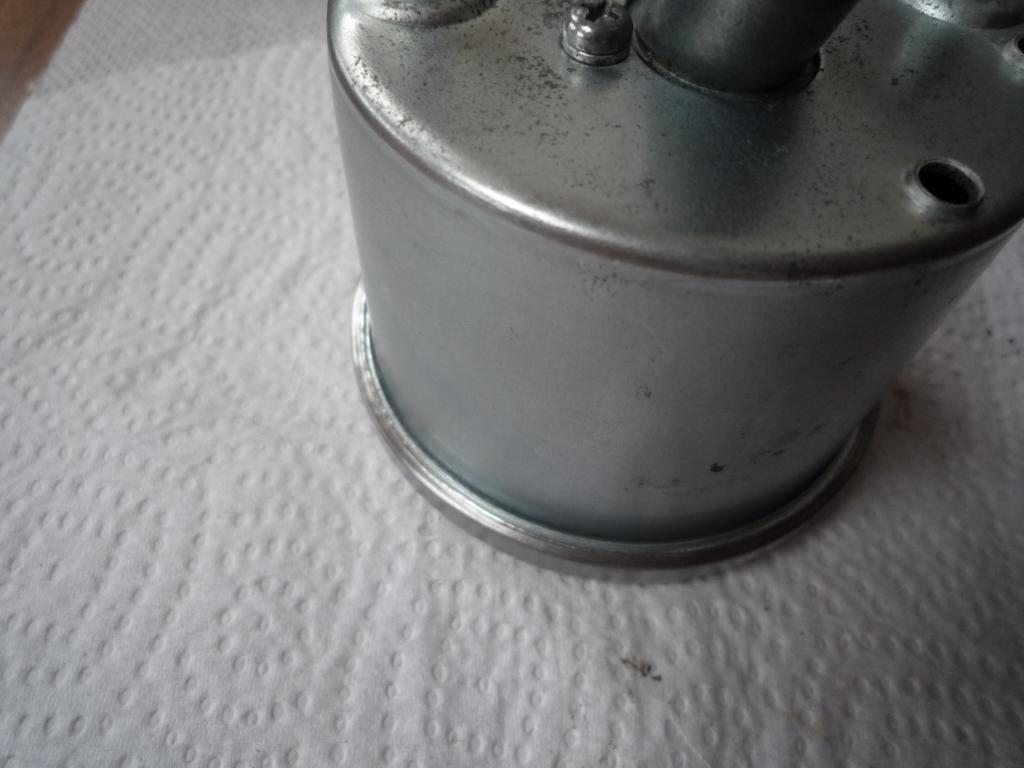
After a couple of runs round to finish and check, its job done.
and time for a well earned cup of tea
![]()
At it again on today's little project....................
Now ship shape and dandy.
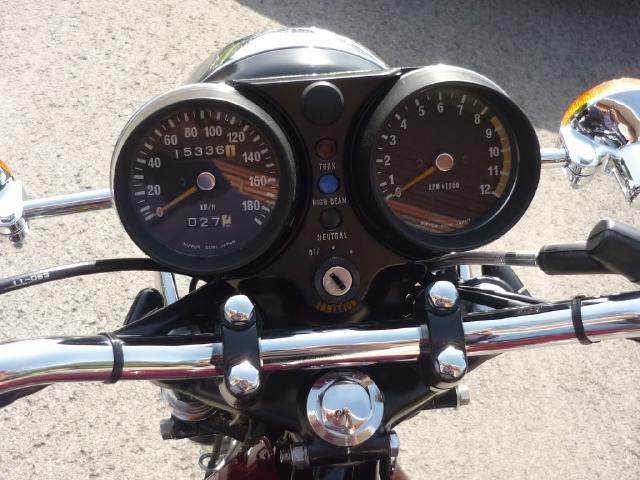
Have decided to stick with the km clock for now as its true to the bike and I won't be converting to the UK look.
Well progress continues to be good on
the 400, I didn't expect to be this far along with things but these projects do
seem to get under your skin and can keep you entertained for hours
![]()
Still a long way to go though but happy with the way its progressing.
I had Just started to prep the 250 for the summer
season (oil change and brush up) when I get the call that my cases are ready for
collection.........off we go again
![]()
An hour later and they are back with me, I am always relieved to have parts
back.
Which means that along with the shiny
new Crank which Gary C did for me (beautiful job), BIG thanks again Gary and
what superb service
![]() I am almost ready to rebuild the engine..........
I am almost ready to rebuild the engine..........
But first I had better pay a visit to
Simons
![]()
Its all go.......
![]()
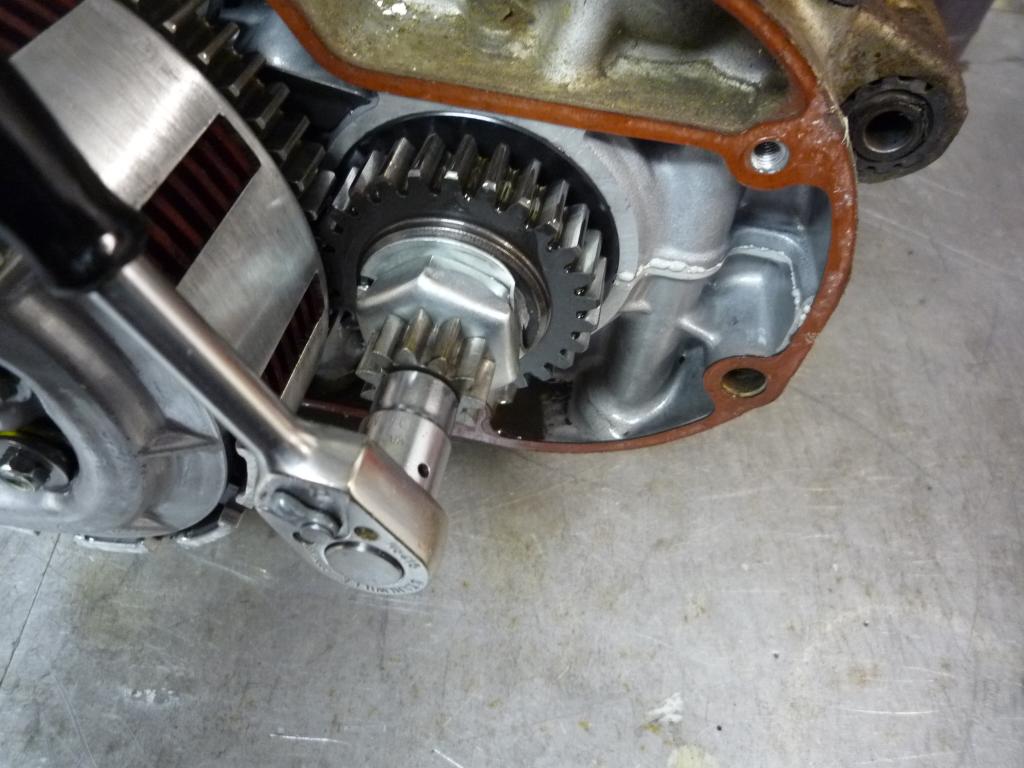
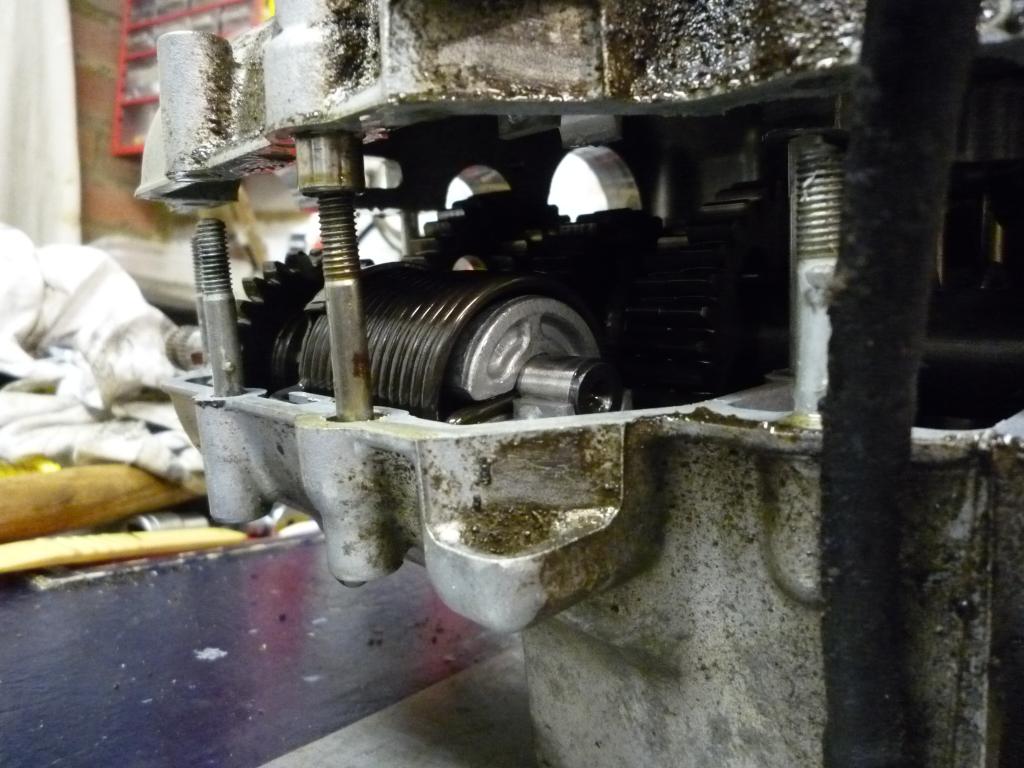
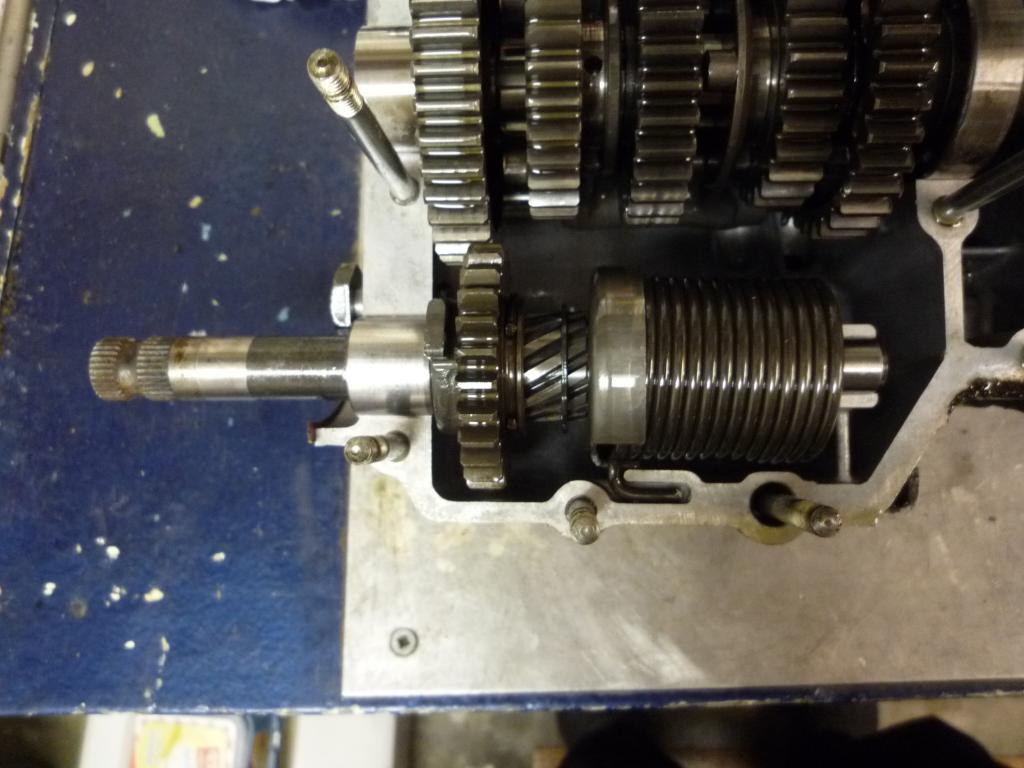
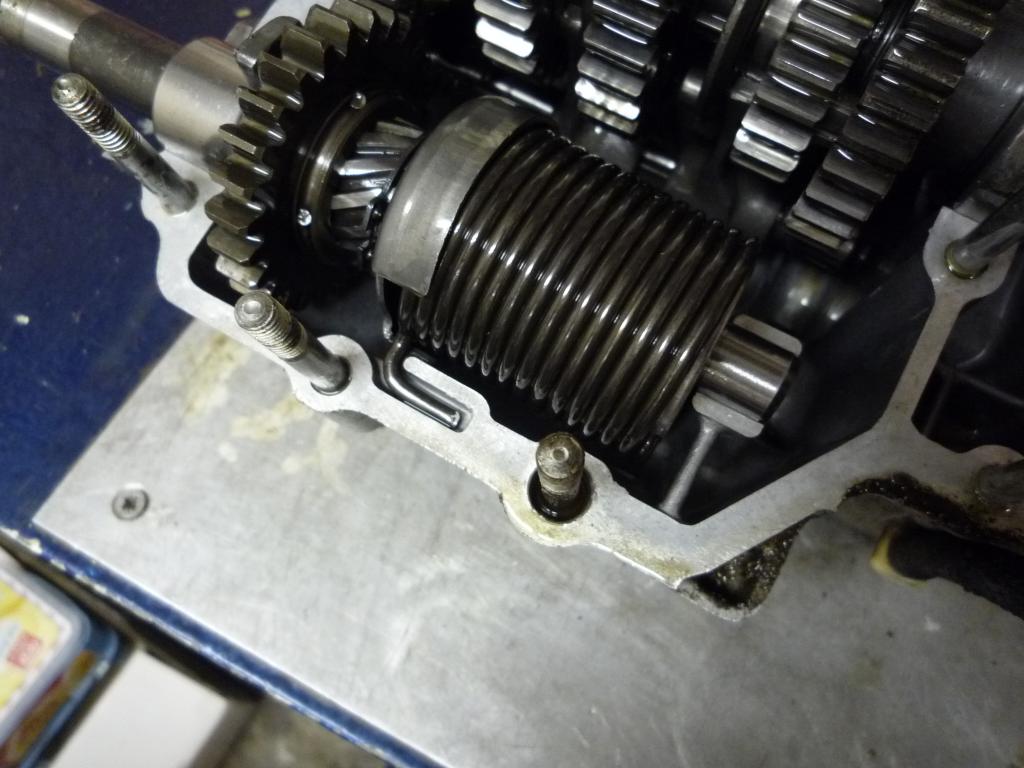
Today I gave
the rest of the transmission a good look over, cleaning and inspecting as I
went, all was given a good bill of health other than the second gear on the
output shaft which didn't feel quite right.
The 1st, third and second gear sprockets (numbered 5th, 3rd and 1st from the
right as shown in the picture) should rotate freely and two of them did but the
second gear sprocket felt very tight and seem to be binding up. Checking this
against some spares I had been given seemed to confirm this, maybe it helps with
engagement.
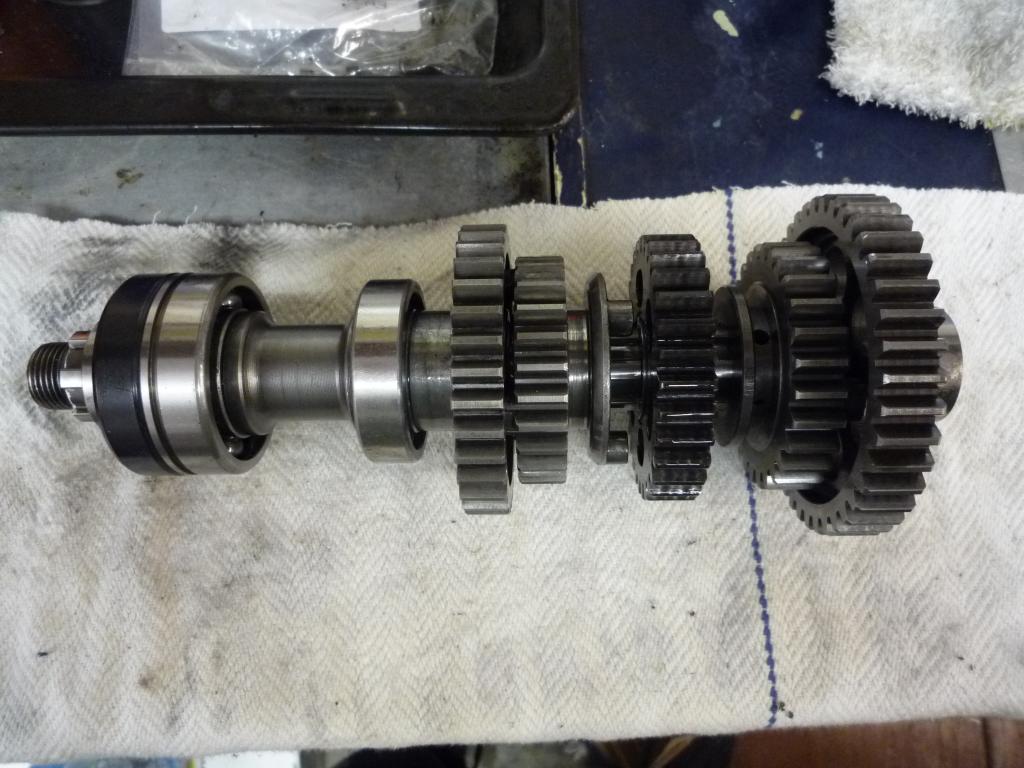
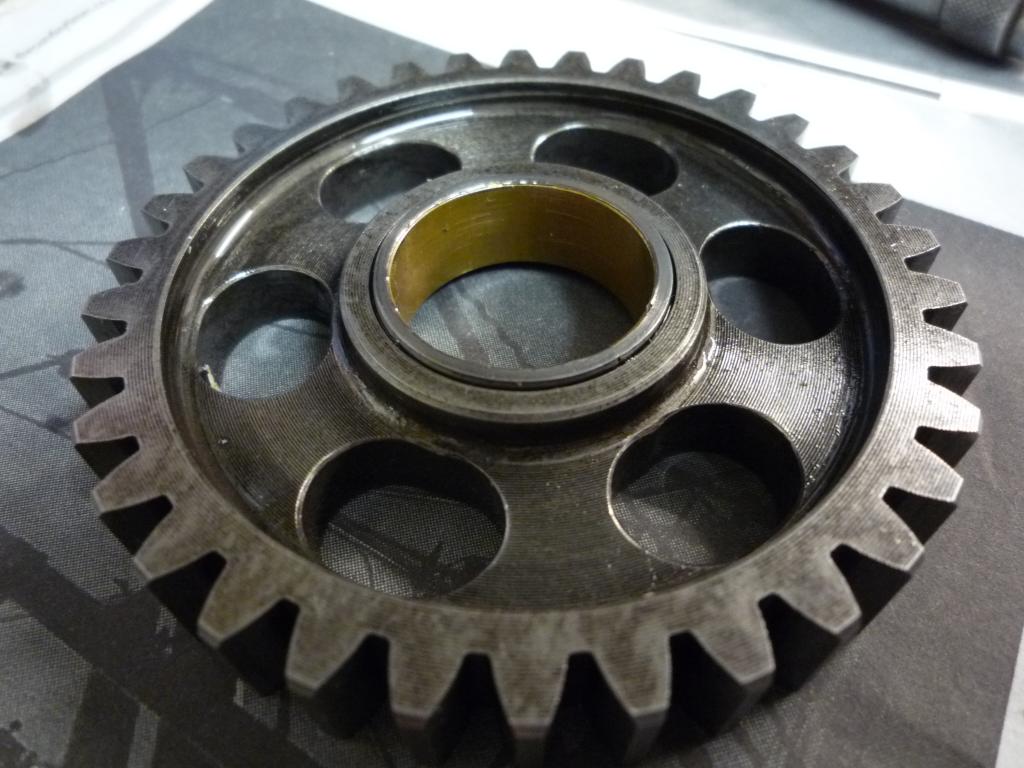
Anyway I decided to look into the cause and after stripping the shaft down I found the reason for it, the centre bush on the second gear had either migrated or had most probably not been pressed fully home during manufacture and was causing the gear to bind up.
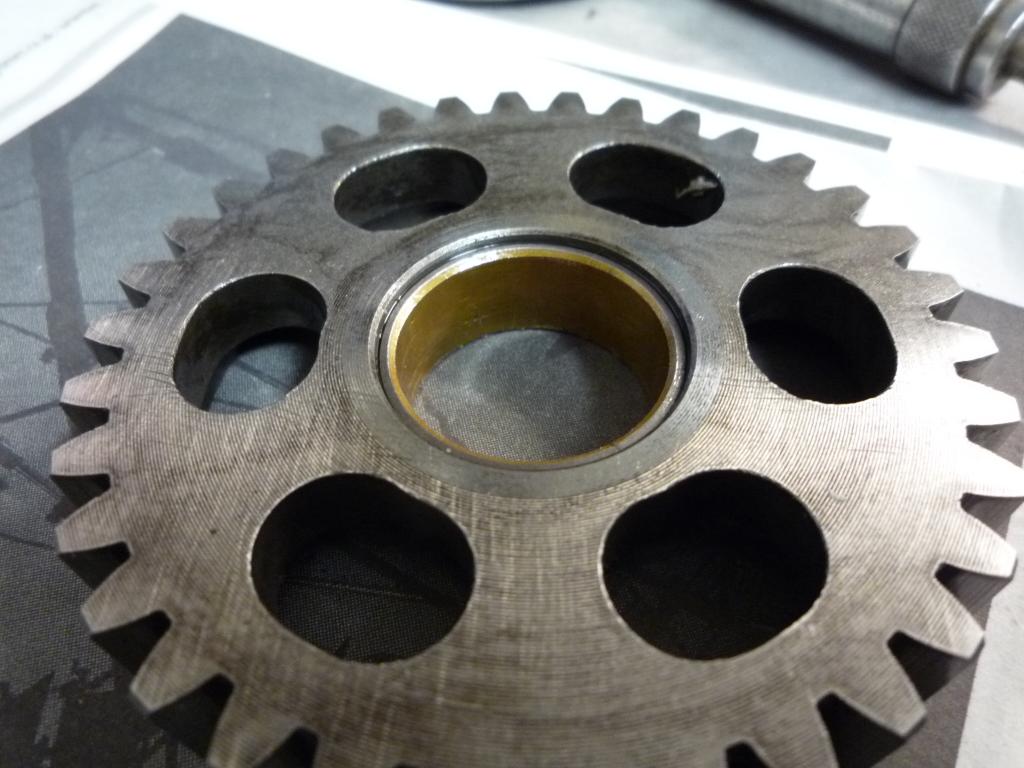
After a little bit of gentle pressing
persuasion and a deburr she was sorted, and I've learned something else
![]()
Pictures make it look huge! ![]()
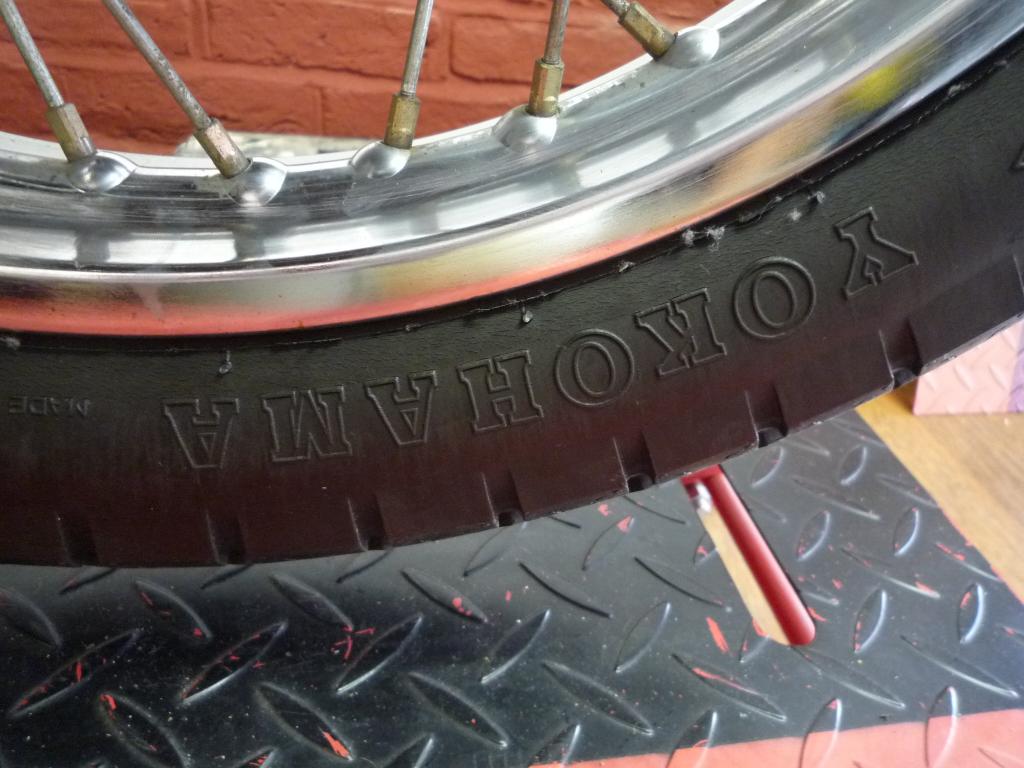
Well I finally got round to stripping the wheels down which are both in fairly
good condition however due to some wear marks on the rear rim and the plating
looking a bit tired they will need a little love and attention.
My aim is to get the last of the chroming less the exhausts delivered this week
so they are away and in the system and not knocking around in the garage.
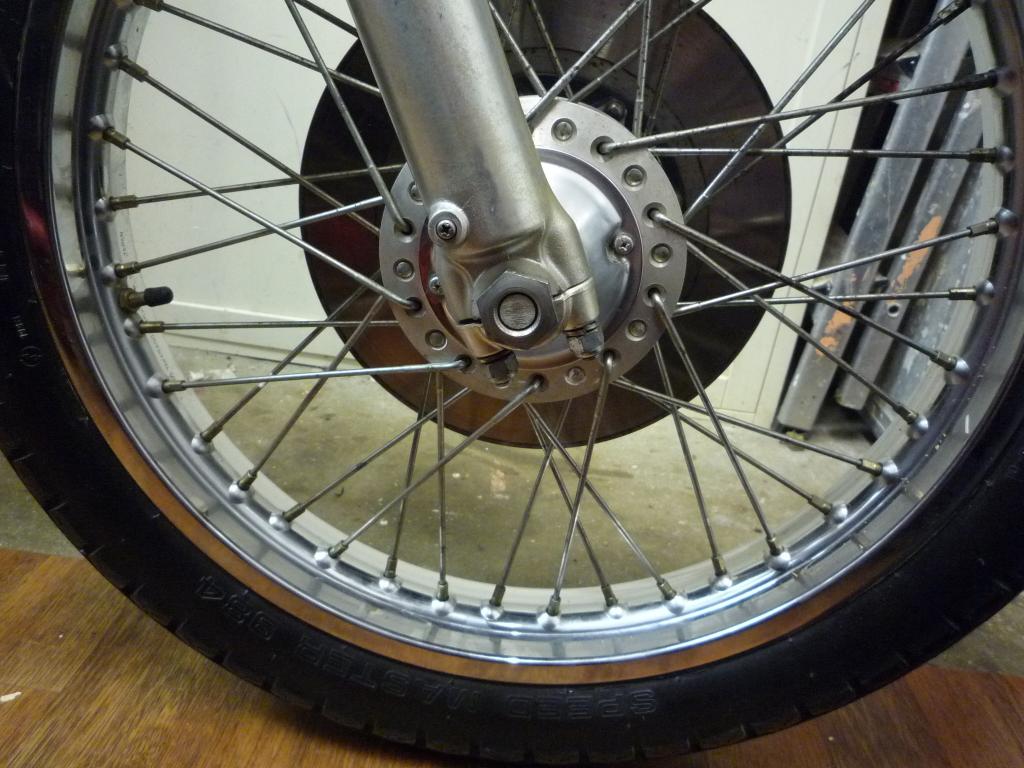
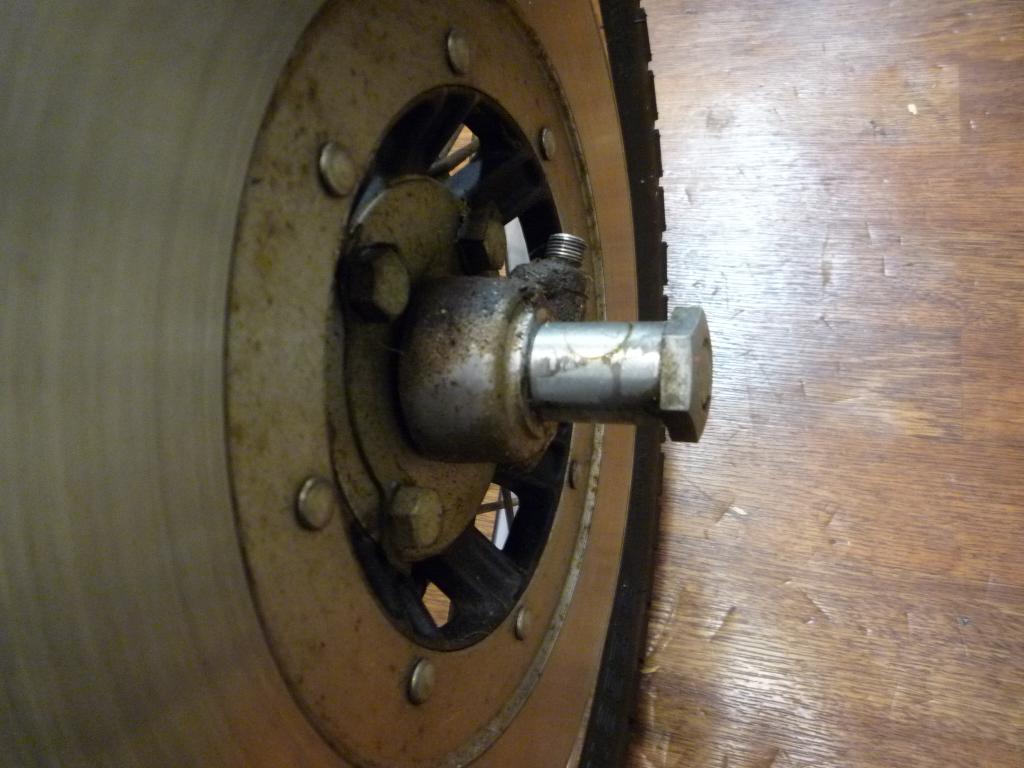
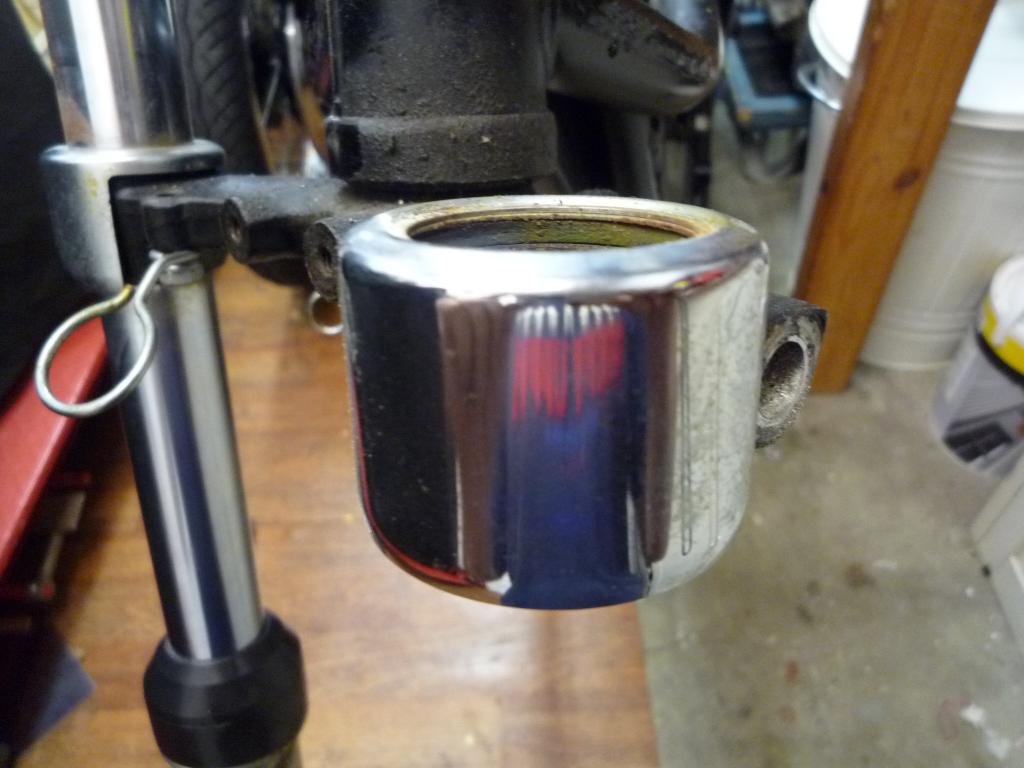
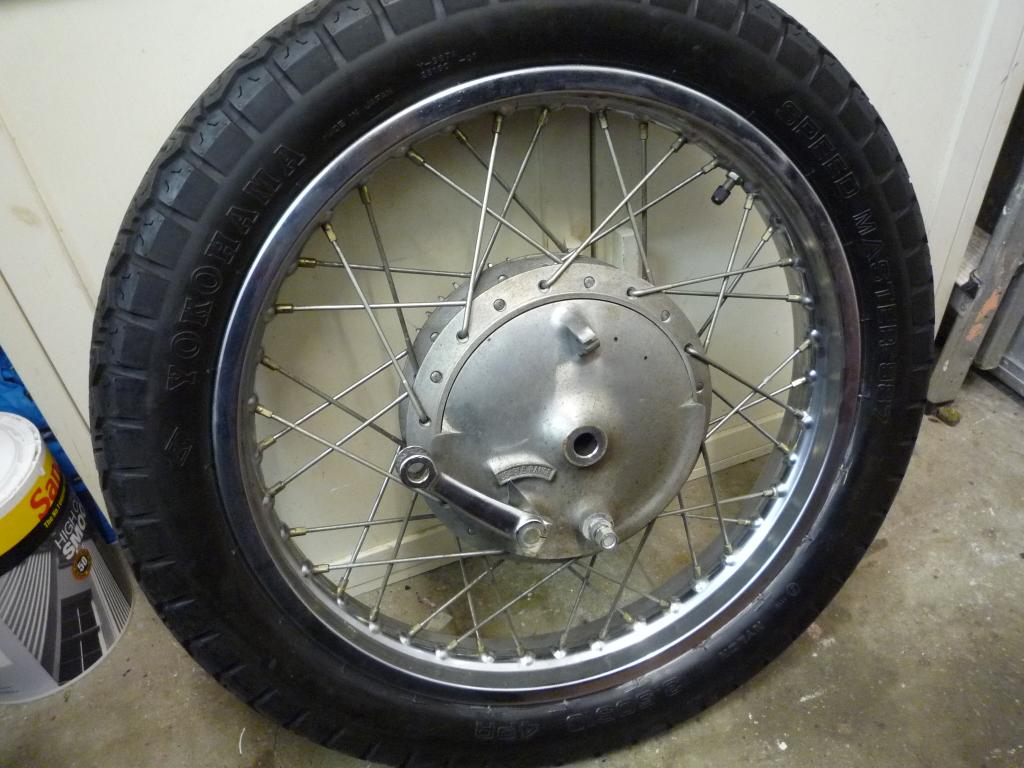
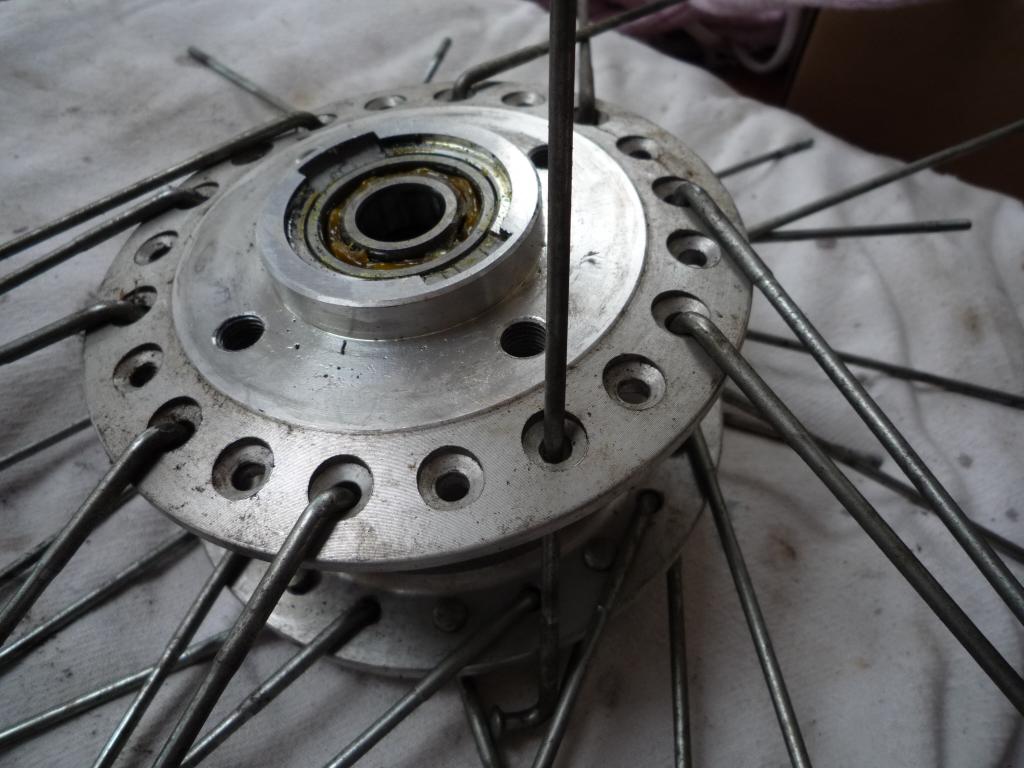
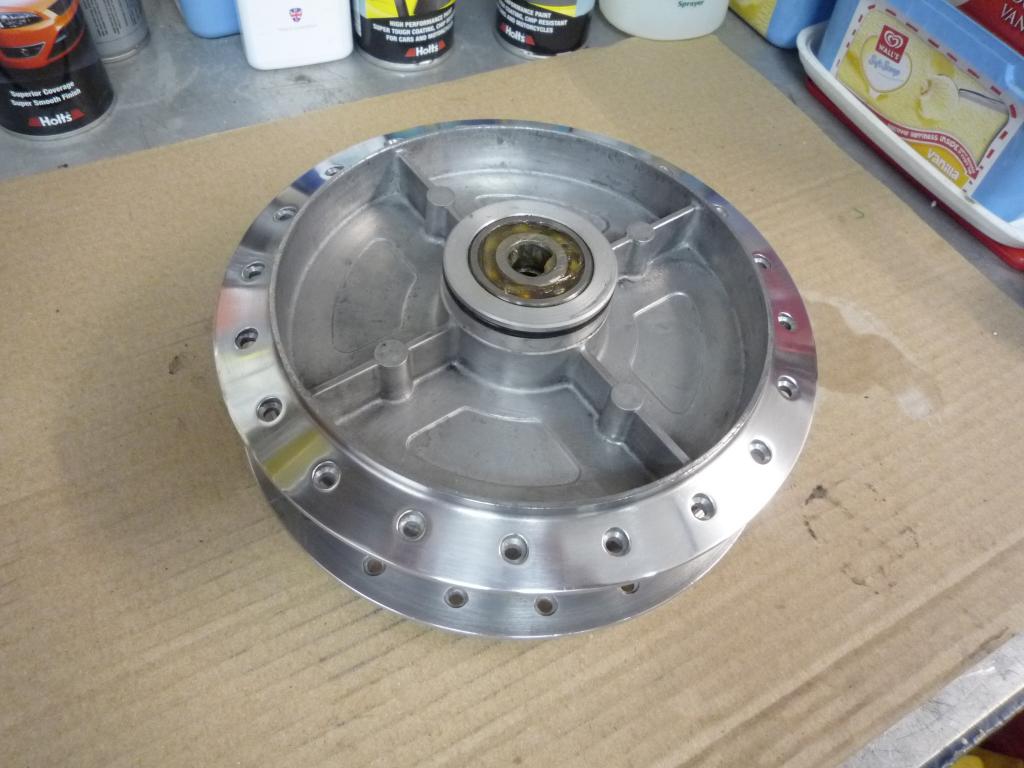
Front wheel first................... Disc should
come up well and is showing little signs of wear.
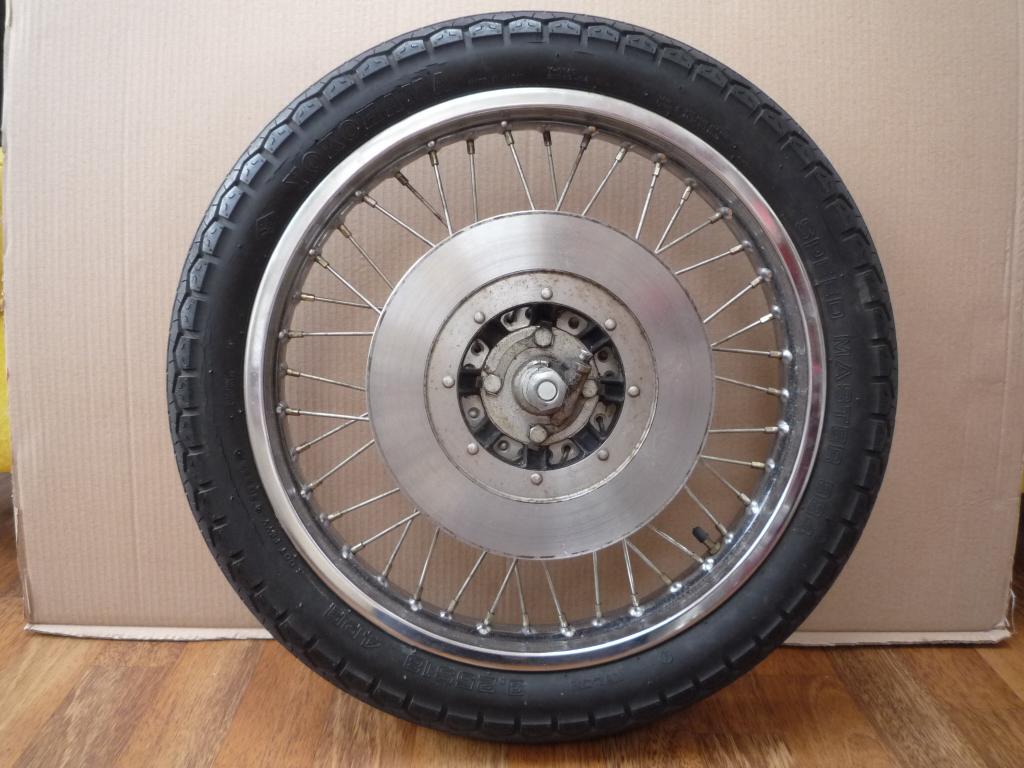
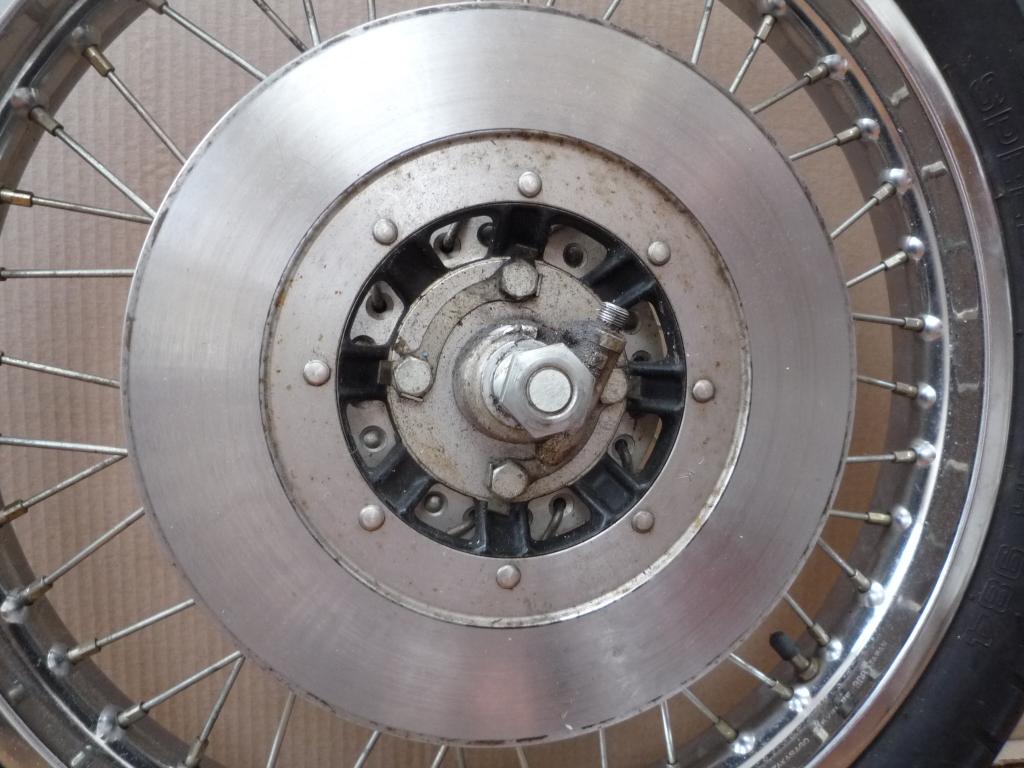
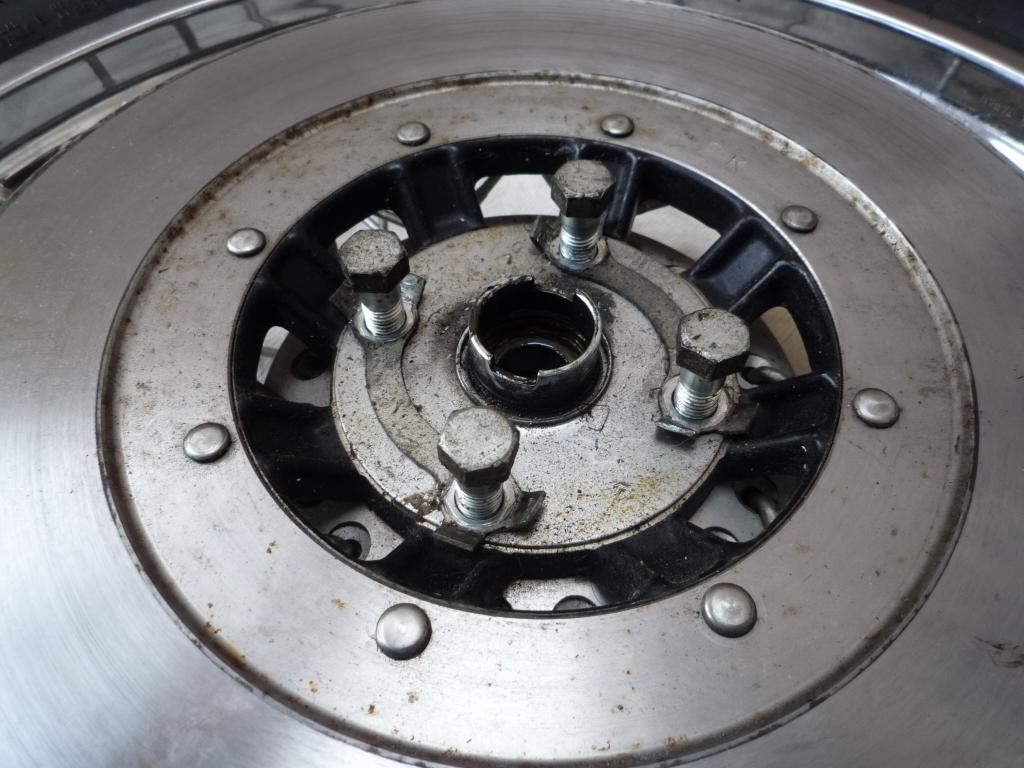
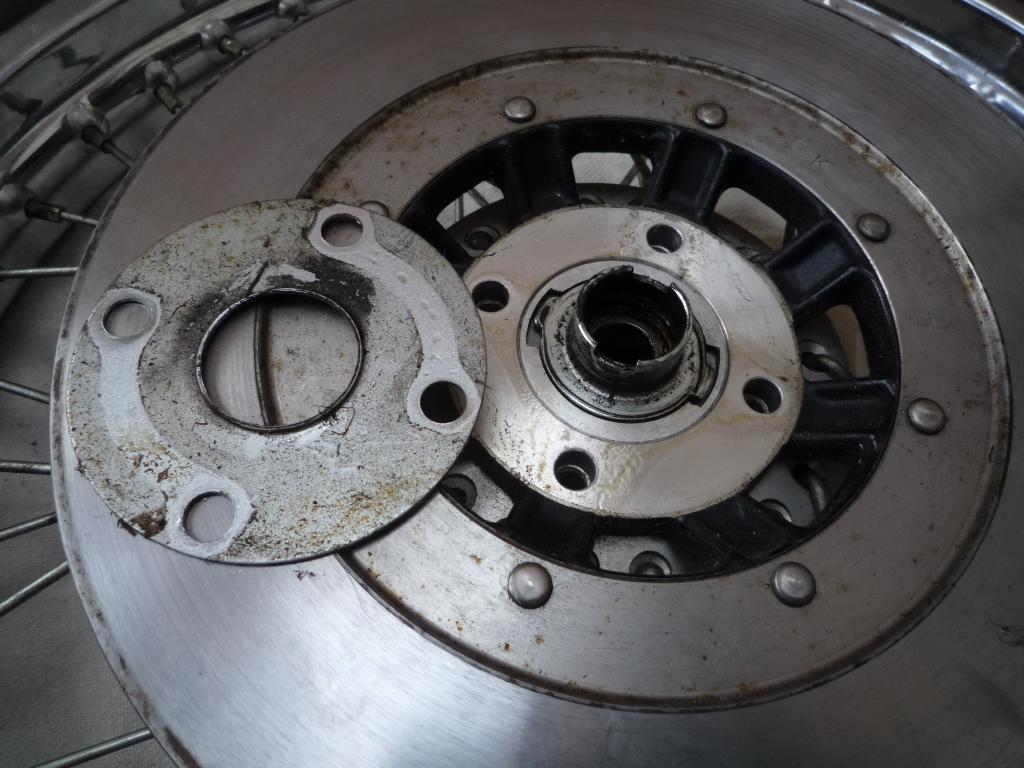
Removing the four bolts allows access to the speedo drive sitting under the retaining plate.
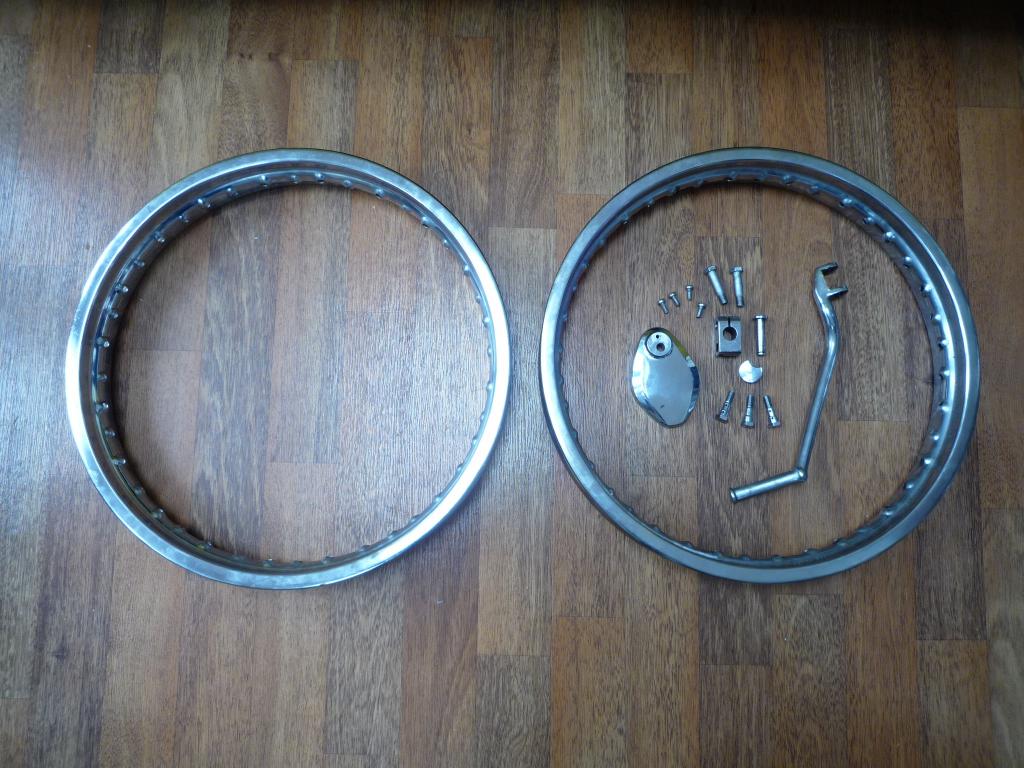
With the tyre removed the spoke nipples can be loosened and unscrewed and the rim detached. The spokes are then unlaced from the hub whilst making a note of their position, shape and length this makes it easier for reassembly.
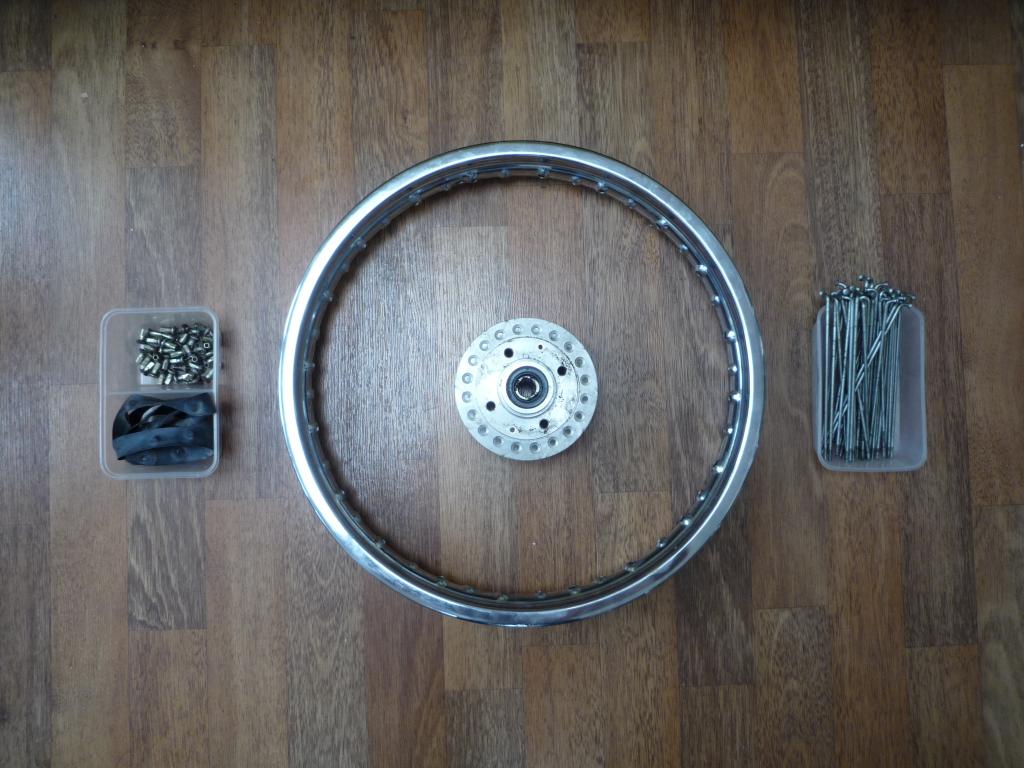
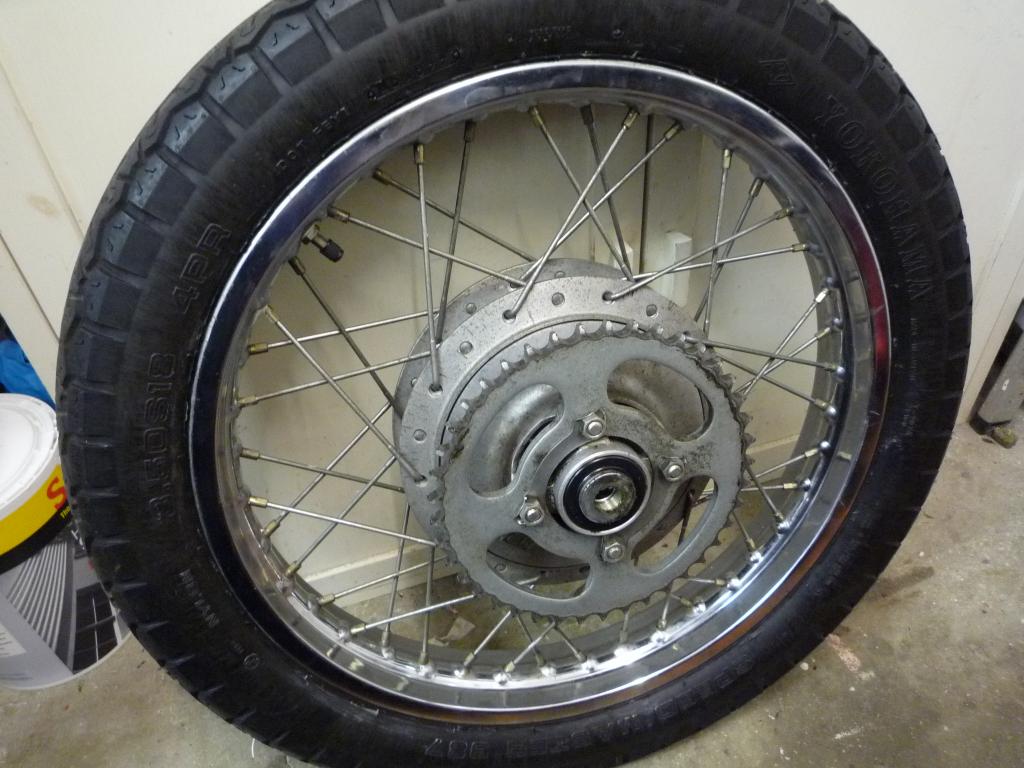
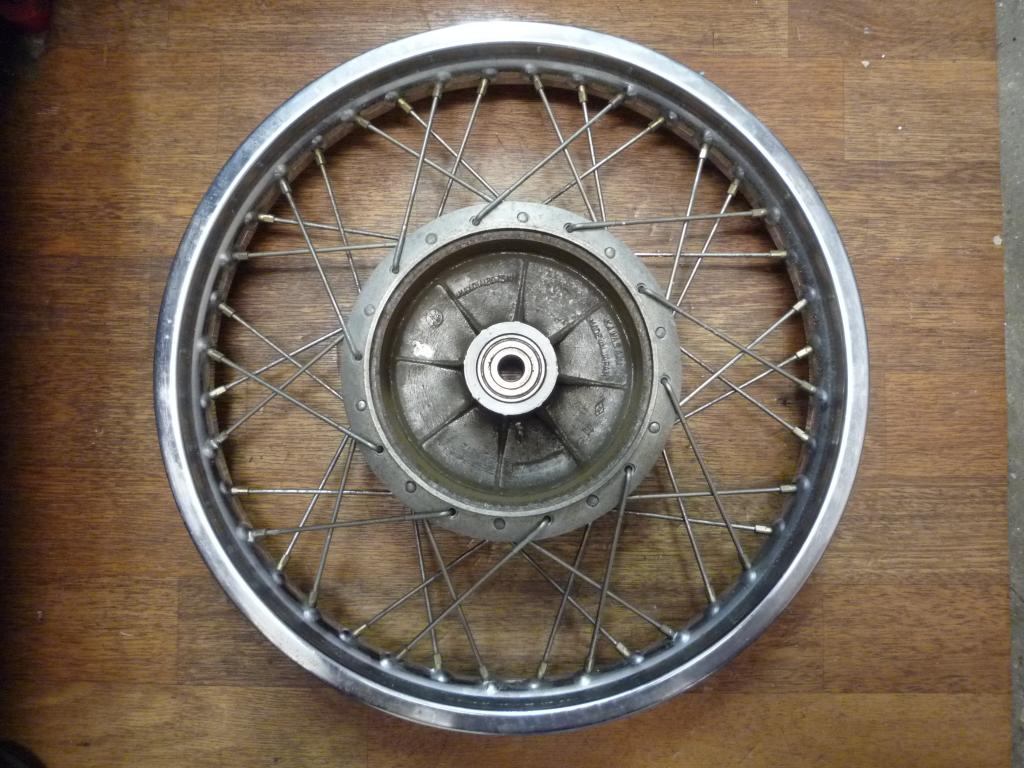
Rear wheel follows the same process. Wear marks on the rim (how annoying).


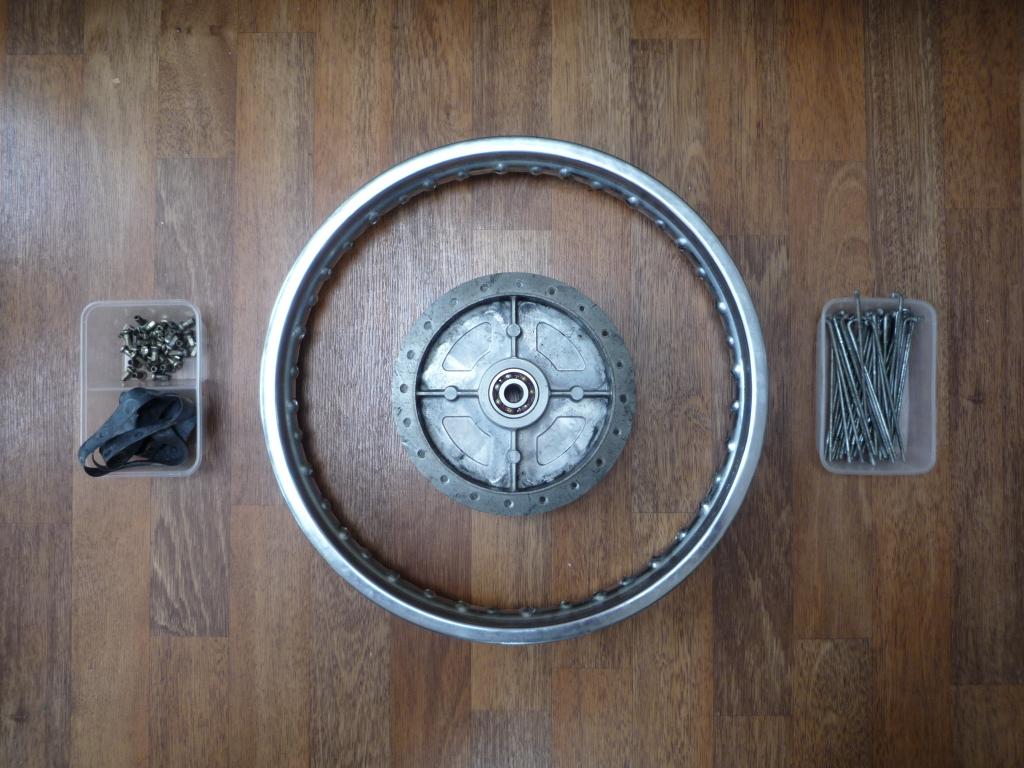
Job done, now spokes and nipples to dip and clean
![]()
So this week now I have the wheels
stripped I have continued with the clean up of the seemingly never ending pile
of parts for zincing with my aim to get them delivered next week. I find having
targets to reach with any project keeps the momentum and enthusiasm going which
we all know can be difficult sometimes during the cold winter evenings in the
shed or garage...........All along the way with the 400 I have been saying to
myself there is no rush to get it done and whilst that is true it does get under
your skin and taking the 250 out for its first spin the other afternoon did
nothing more than fire up my appetite to get it finished.......but there is
still a lot to do so steady as we go.
I am sure there are actually two bikes here
![]() so far I have filled 5 large plastic storage bins and numerous ice cream tubs, I
have parts under the bed, in the wardrobe in the lounge, the kitchen and the
Garage and I am still taking bits apart
so far I have filled 5 large plastic storage bins and numerous ice cream tubs, I
have parts under the bed, in the wardrobe in the lounge, the kitchen and the
Garage and I am still taking bits apart
![]()
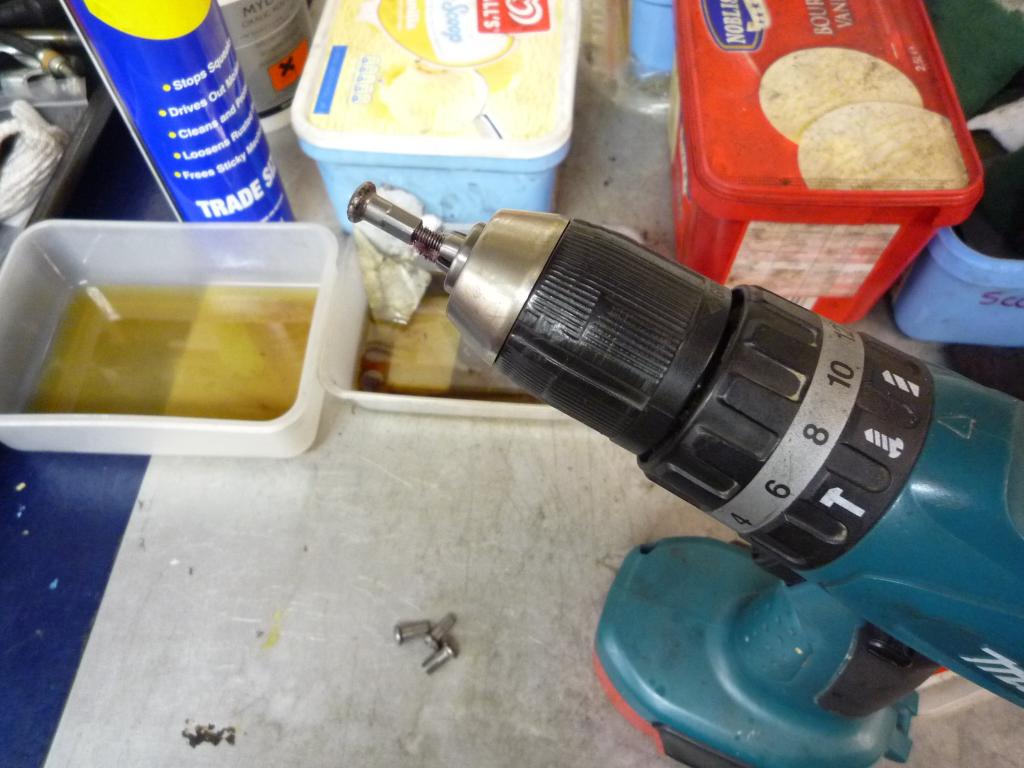
But anyway armed with my trusty drill we continue cleaning......spokes
first...Then nipples ![]()
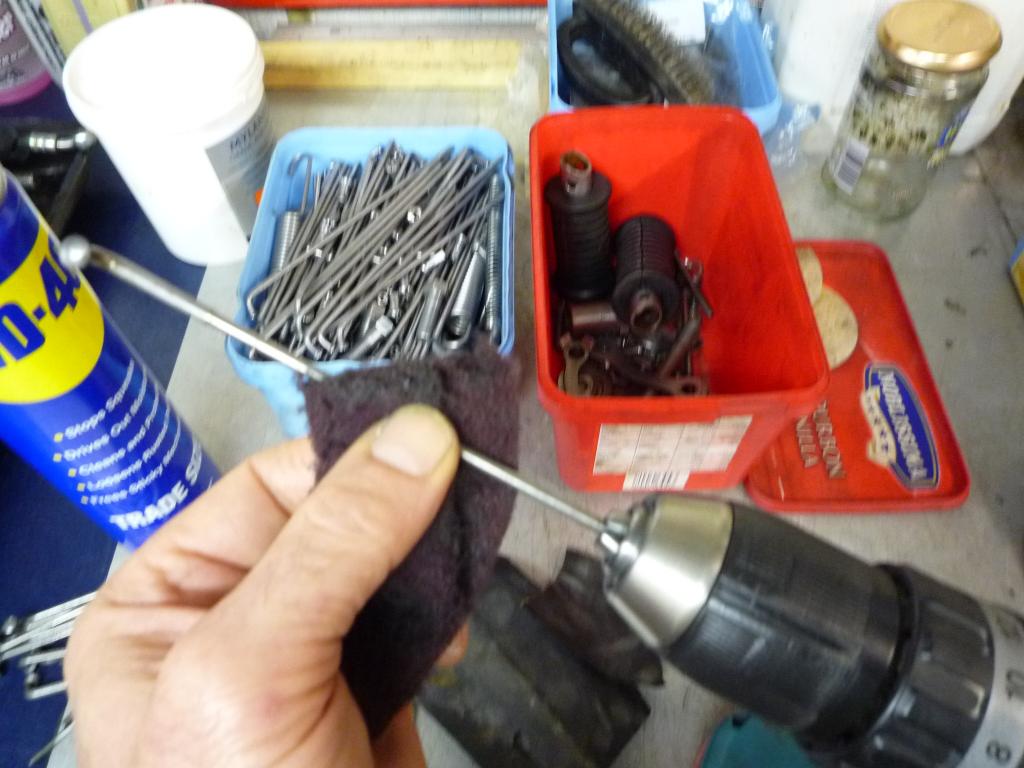
Time to buy some new wheels I think.

Still stripping parts down for restoration now its fuel cap time. Which produces this little lot to go through.

With that stripped I delivered the final batch (less exhausts) for chroming and another target met.
Its a very sociable hobby restoring bikes, I am now on first name terms with the
Postman who very kindly delivered me another little package this week namely
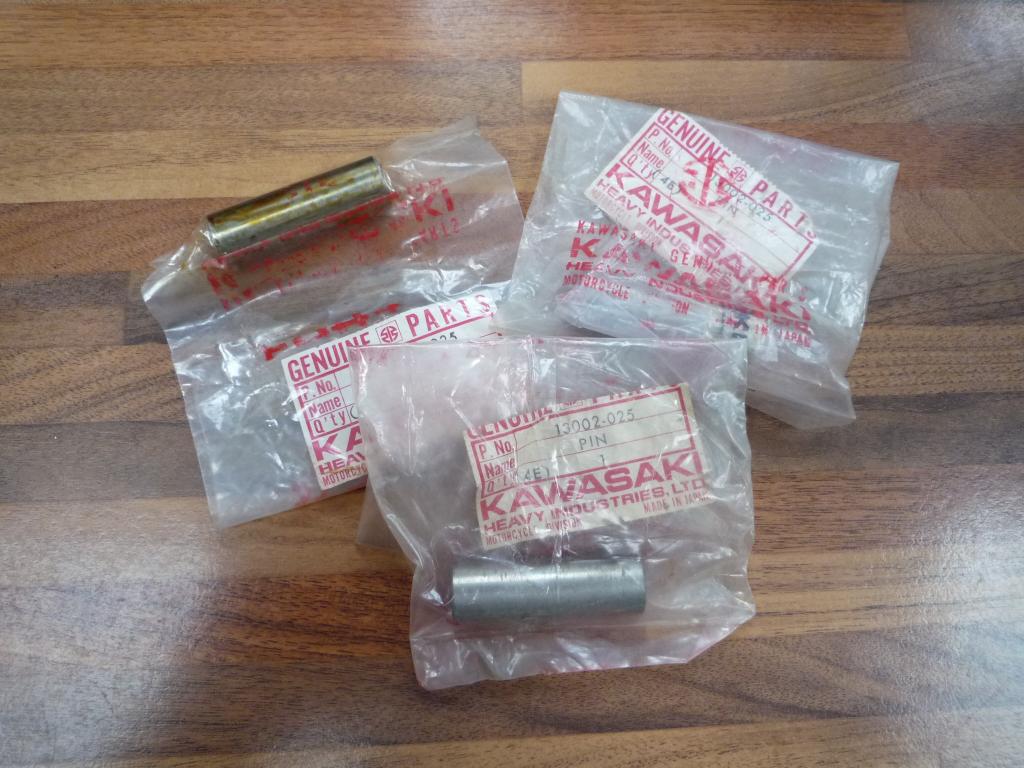
some nos piston pins to add to the goodies pile
![]()
And finally for now one of the little fiddly jobs that I have been putting off but got around to.
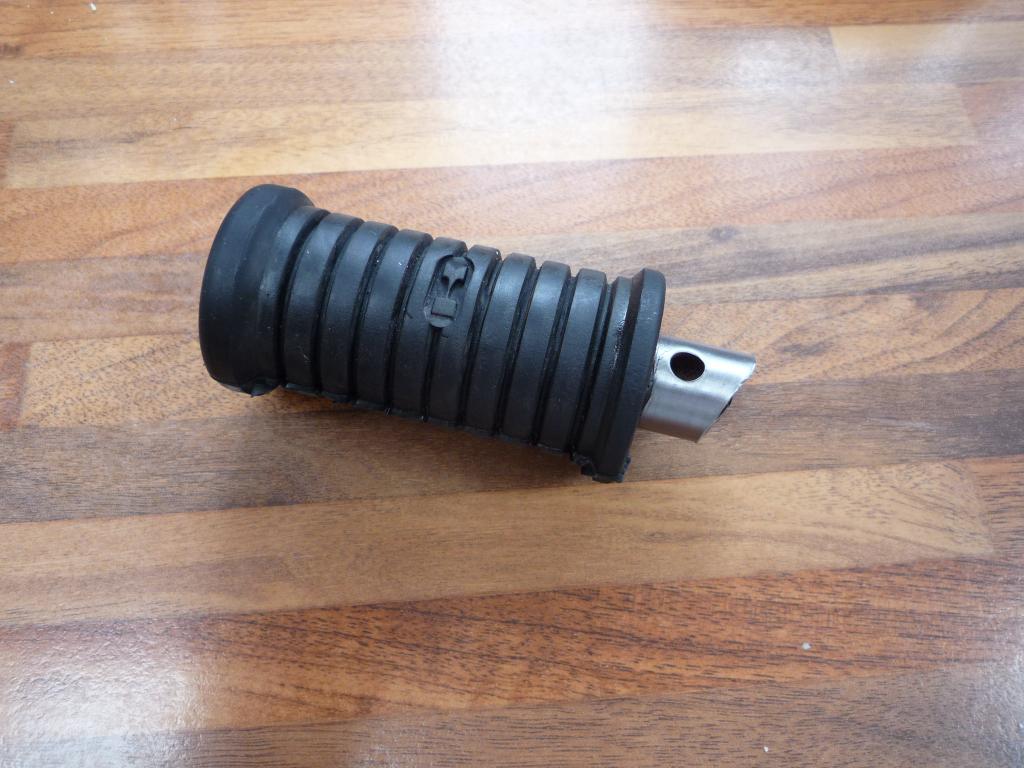
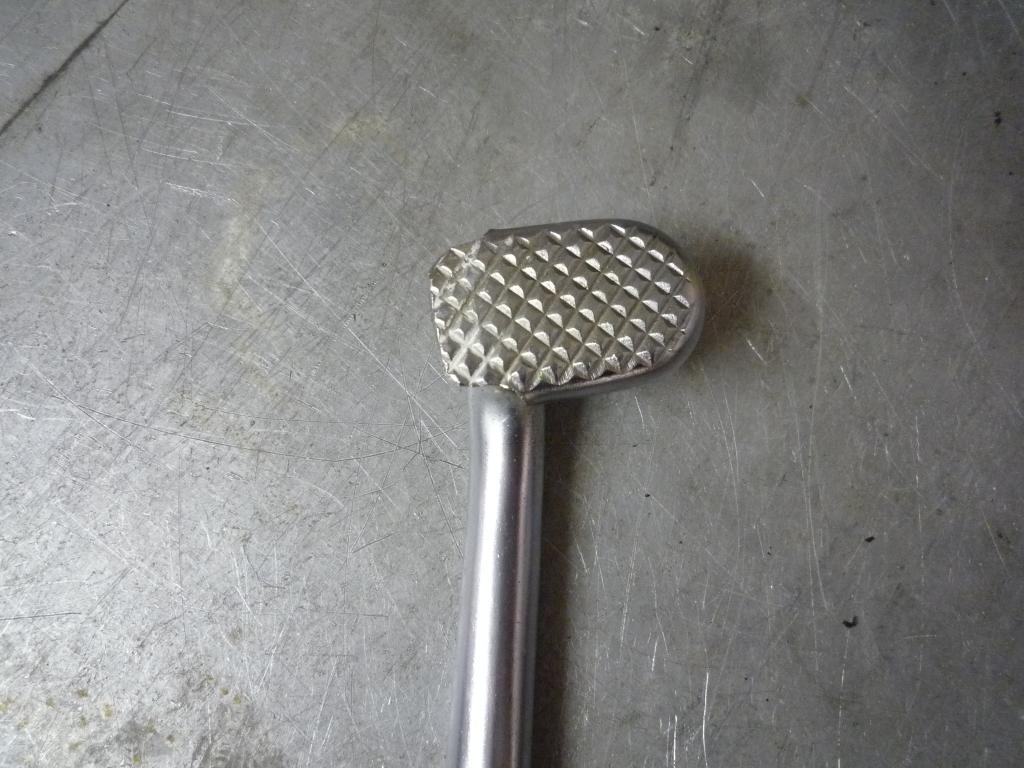
Should be simple really but has its challenges, didn't want to spear it with the screwdrivers so had a brainwave...........I cut a piece of 22mm copper pipe and slit it. Then stuck the peg in boiling water.
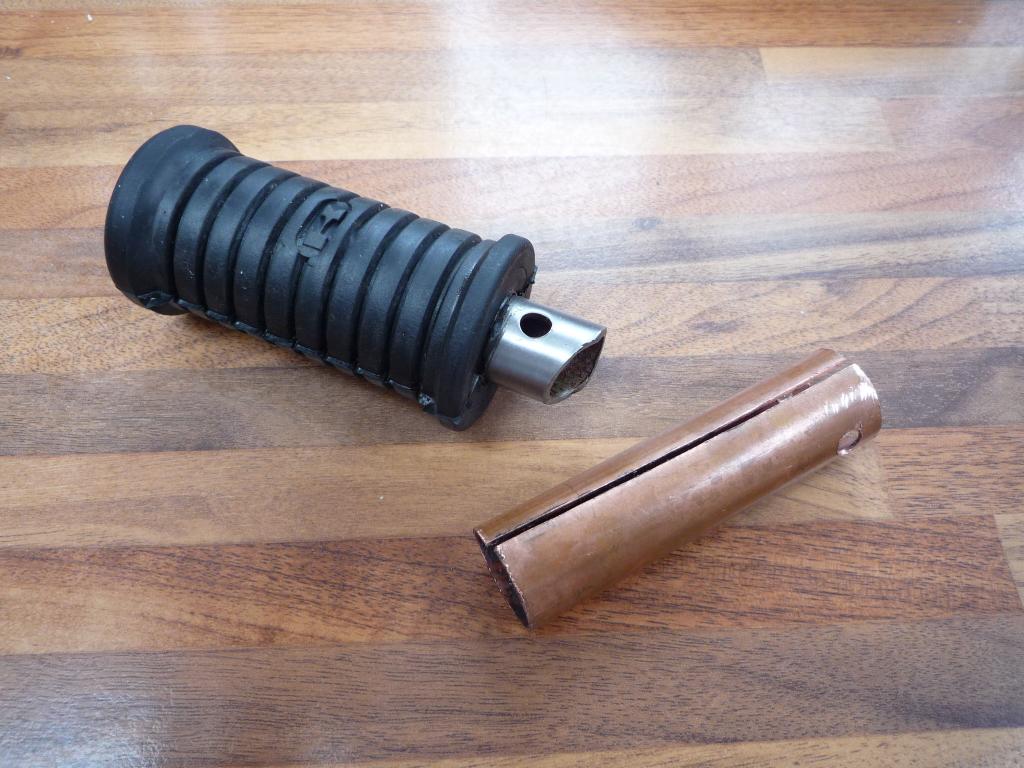
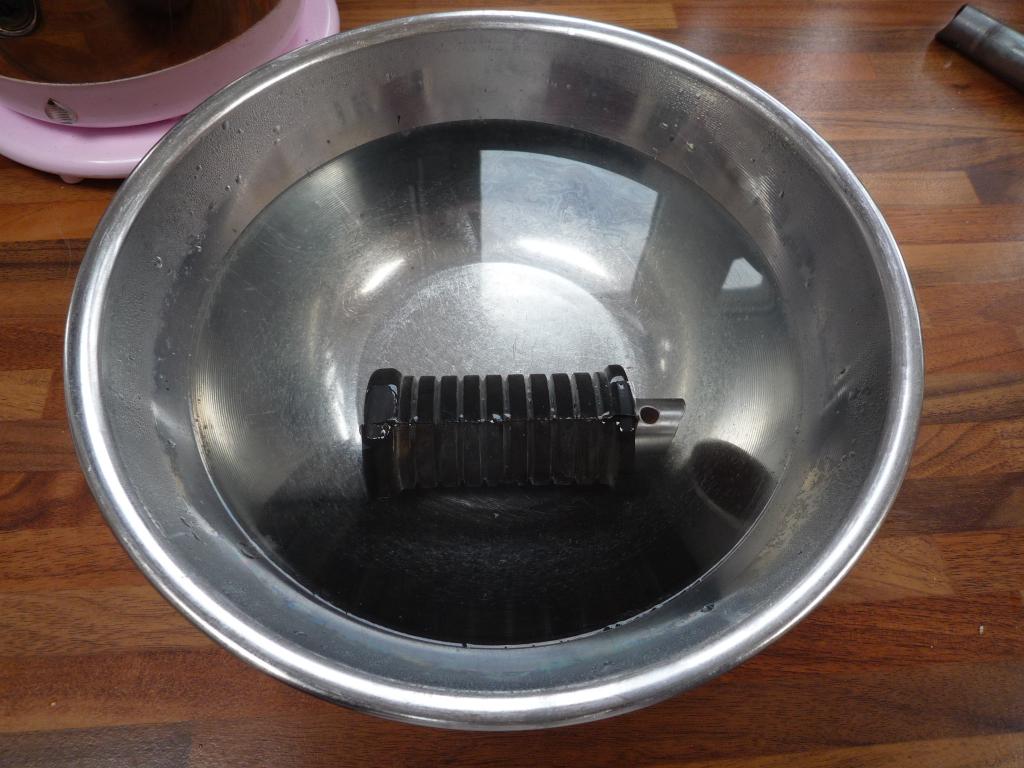
Quick squirt of Wd40 pushed the pipe into the rubber over the shaft and started
pulling.
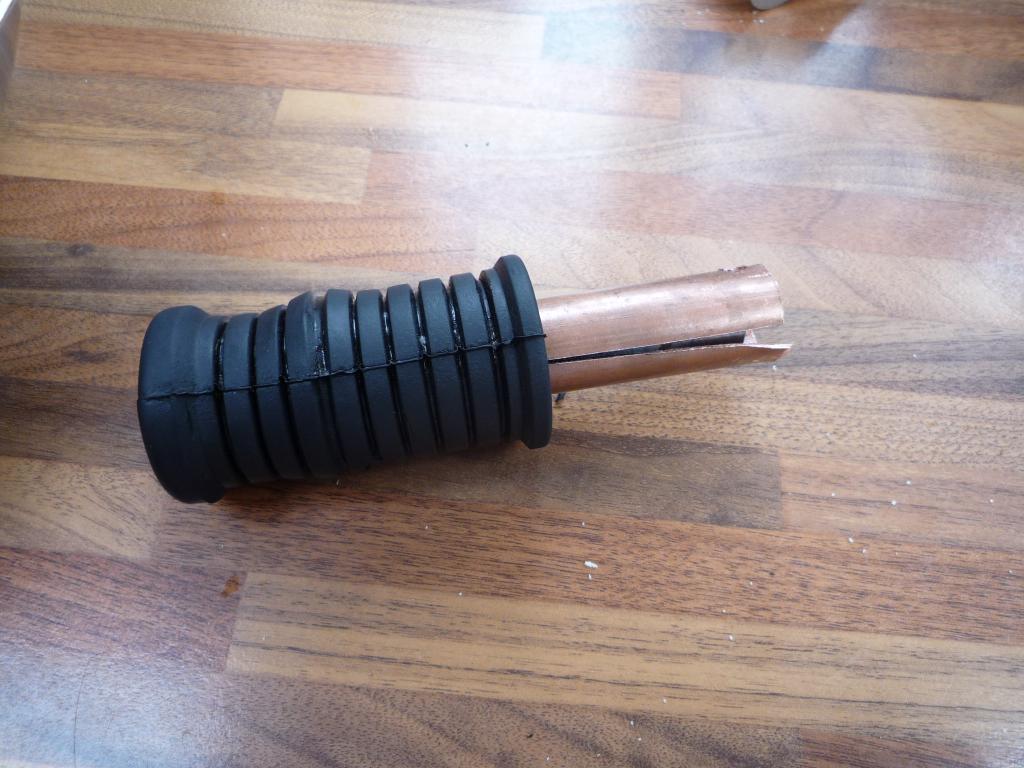
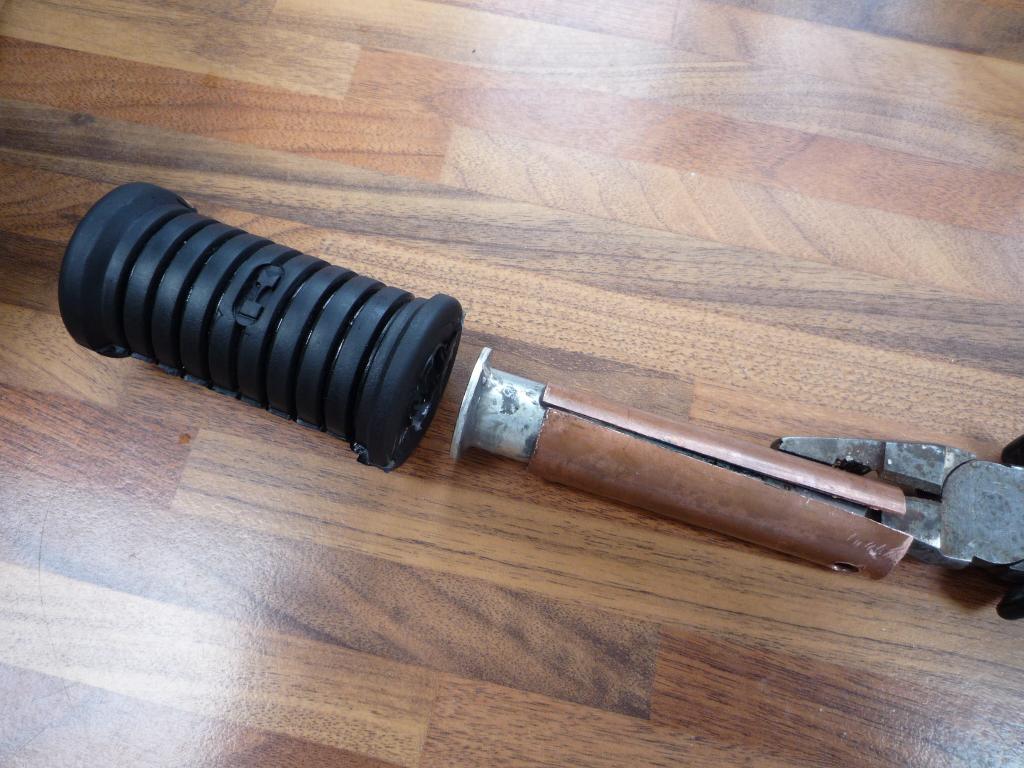
Job done.
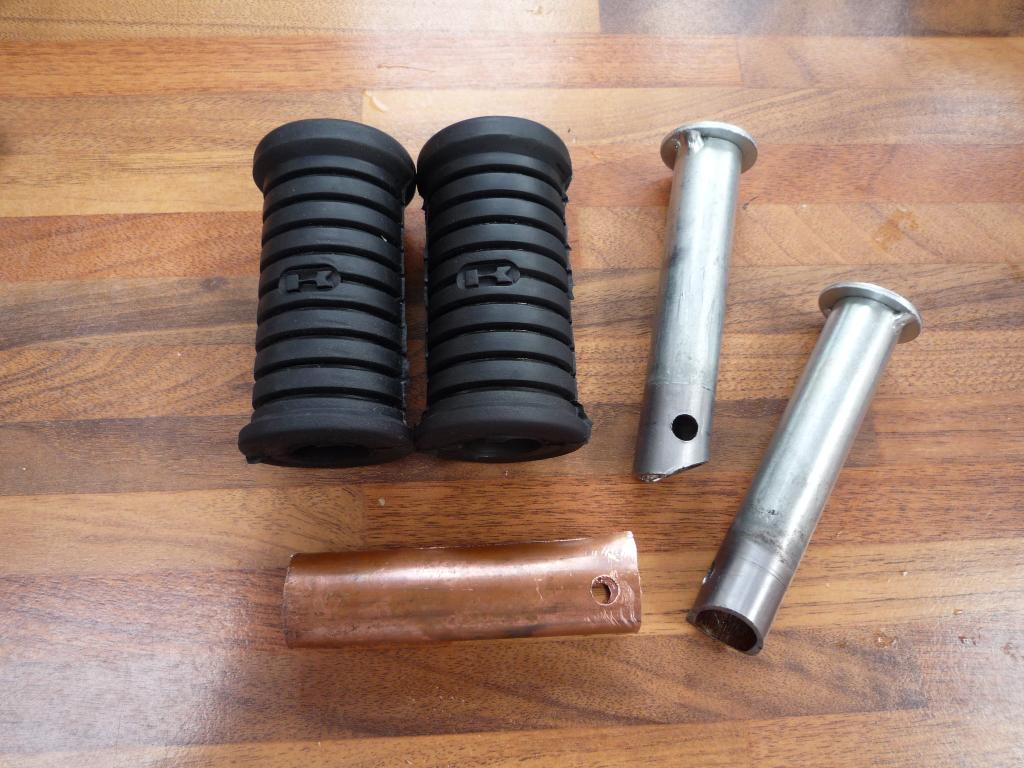
Loving it ![]()
Hurrah!!.......finally its
done!..........I never want to see another nut, bolt, washer, spoke or nipple
again........okay well maybe the odd nipple would be nice ![]()
Anyway I'm done with cleaning and hope to deliver this
little lot for zincing on Monday.
Then I get the pleasure of worrying
they might lose something oh joy
![]() ...........
...........![]()
For the Zinc, if it needs replating I
use Wickes mortar and brick cleaner to remove the old plating (use wisely and
don't get it in a cut!) then scotchbrite, wet and dry or a wire wheel depending
on the severity of corrosion, quick spray of Wd 40 or GT85 to protect it before
its replated.
For everything else I have my favourites as do most of us, Solvol Autosol on the
Chrome to get the pre resto muck off and any light rust but not for continued
use or it will rub it away. Brasso wadding great for spokes and Chrome, Auto
Glym Bumper and Trim gel for the rubber parts (great stuff to revive that old
rubber part) also really good on black parts, Auto glym super resin polish for
the paintwork although there are better or just as good products out there also
good on Chrome.
Have been known to use Shoe polish, Vinegar, jif, olive oil (virgin), fireplace
grate polish, even toothpaste and anything else that comes to hand when i am
stuck although I have yet to find a use for Marmite
![]()
Well the parts for zinc plating were
delivered yesterday morning down to another new company (on recommendation) and
the nervous wait began. There was quite a lot of it but they said hope to have
it done by Friday which was great.
Get a phone call this afternoon to say its done!! Blow me I was gobsmacked
![]() so off to pick it up tomorrow
so off to pick it up tomorrow ![]()
Well I finally feel like we are making
good progress and there are only a couple of major jobs outstanding, that is
apart from putting it all together again ;-) the paint work and exhausts being
those two jobs and I will focus on them over the next couple of months.
In the meantime its time to look at the brake caliper and the other Satin black
items that are not going down the powdercoating route. I prefer to finish items
like the switchgear and master cylinder myself so I can control the amount of
finish applied and keep the lettering readable plus i enjoy getting involved in
the process.
The only difference I will make on the 400 over the 250 is the handlebar clamps
which didn't stand up too well to the keyring treatment so this time they have
been powdercoated (lesson learnt).
The caliper like a lot of parts on this bike
wasn't really in need of a total resto but for safety's sake it would be
stripped, inspected and new seals fitted so lets just do the job properly.
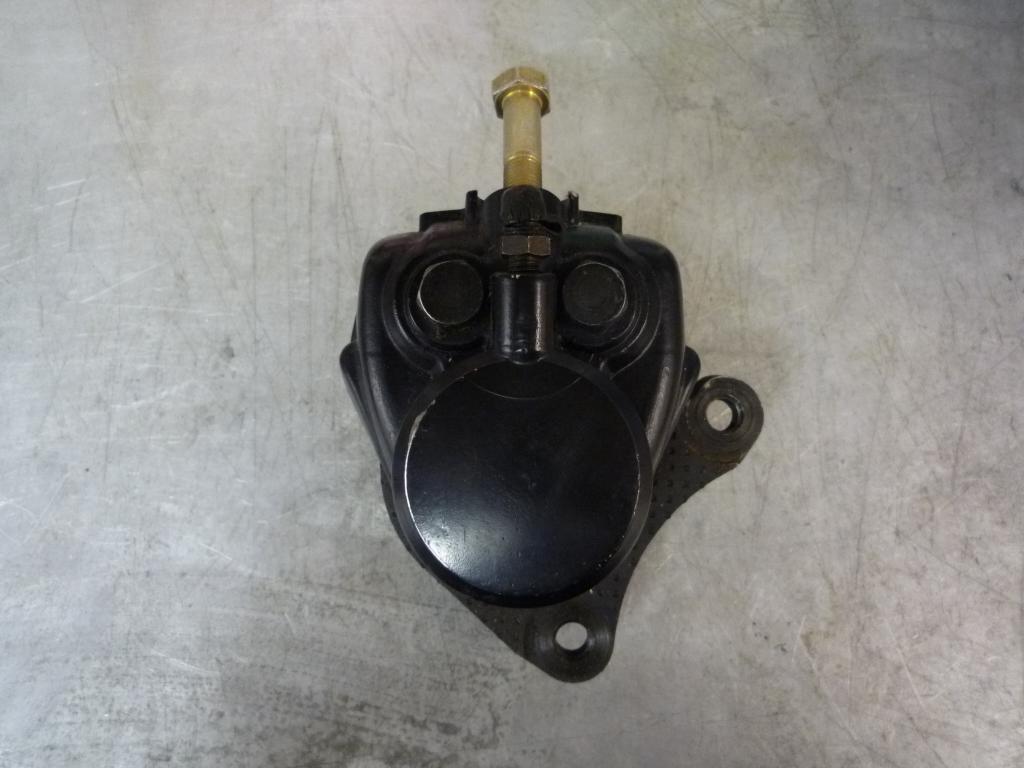
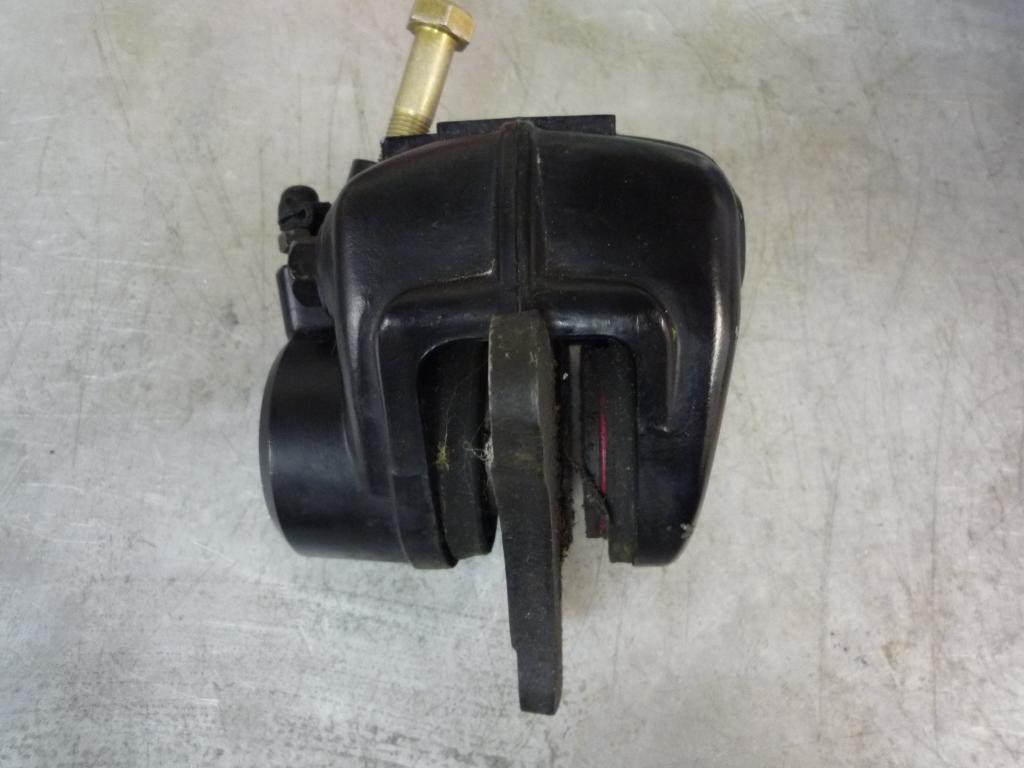
Blue/green colour on nuts must be like a loctite substance? Pads removed came out nicely complete with anti squeal shim.

Then it was on to the piston which was found to be seized, after a bit of added freeway and some encouragement it was on its way out......
Expecting a lot of mess behind it wasn't too bad and will clean up nicely. Last job was to remove the dust seal retaining ring.


A new seal kit should have it up and running again, but first its off to the strippers. Interestingly the paint on the caliper falls off but the clock housing takes for ever, wonder what they used on it originally, have noticed this before it tends to melt not bubble up.
Anyway after a short while...........................they were cleanish.
To be continued......................
Whoever said that Christmas comes only once a year was
obviously not in the restoration business, for today felt like Christmas when I
picked up this little lot from the platers..........its the little things that
make us happy.
Now to bag it all up again.
Spent yesterday sorting out this little
lot, as always so glad I took lots of photos of the strip down, though even with
my album you can always do with more.
Now all bagged up accounted for and labeled again ready to re assemble, glad
that's over. There is rather a lot
![]()
A good day today
![]() and making the most of the fine weather a good day to get some painting done
outside.
and making the most of the fine weather a good day to get some painting done
outside.
With all bar one of the remaining Satin black items (I
forgot the seat latch)
![]() stripped, cleaned and prepared. And after a bit of fiddly masking I was ready to
roll.
stripped, cleaned and prepared. And after a bit of fiddly masking I was ready to
roll.


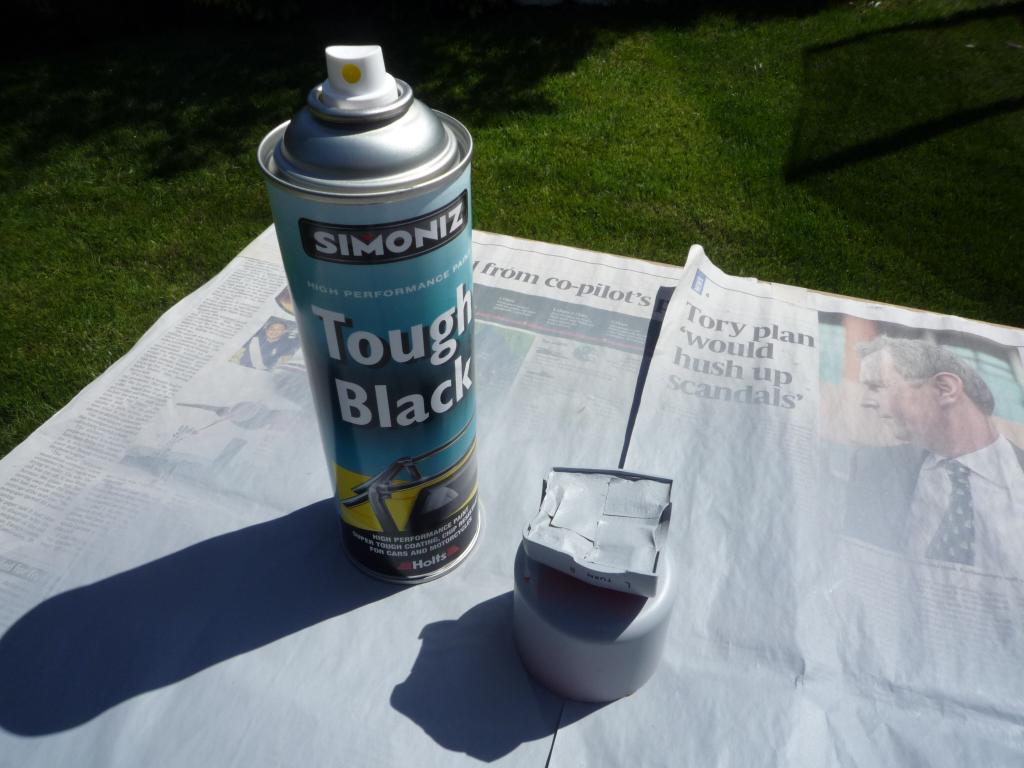
As you can't seem to get hold of PJ1
Satin Black anymore I decided to try the next best recommended paint which was
Simoniz tough Satin black and its primer. Haven't used this before but it seems
to do the job nicely.
Master cylinder being primed. Then top coat applied.
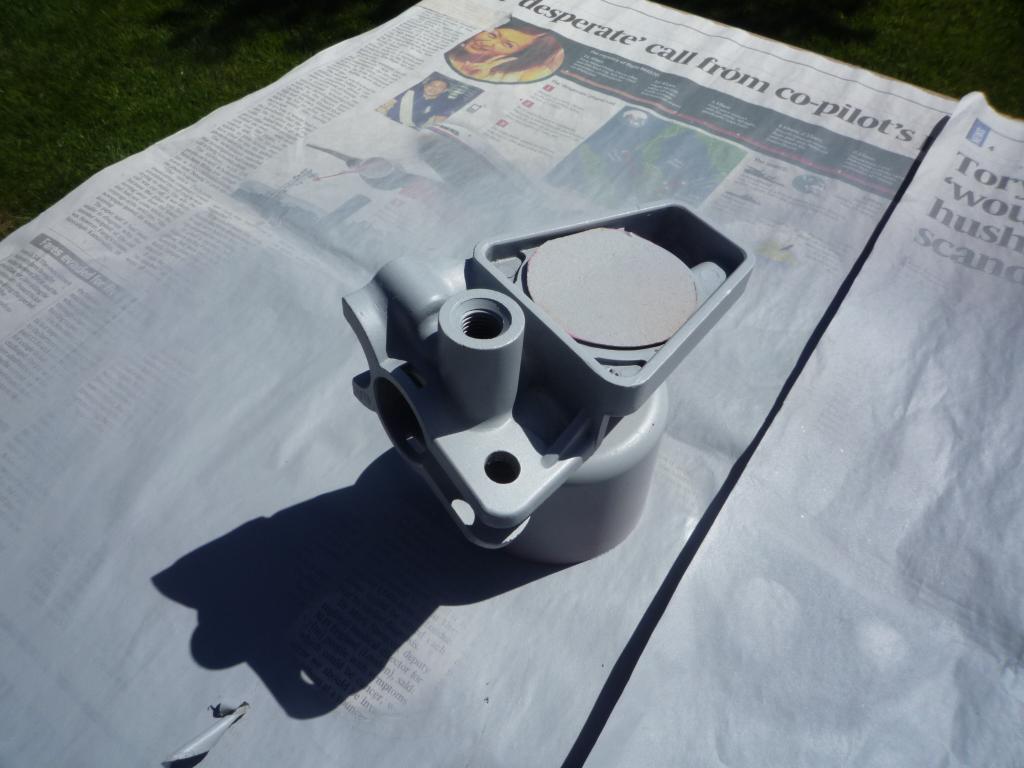
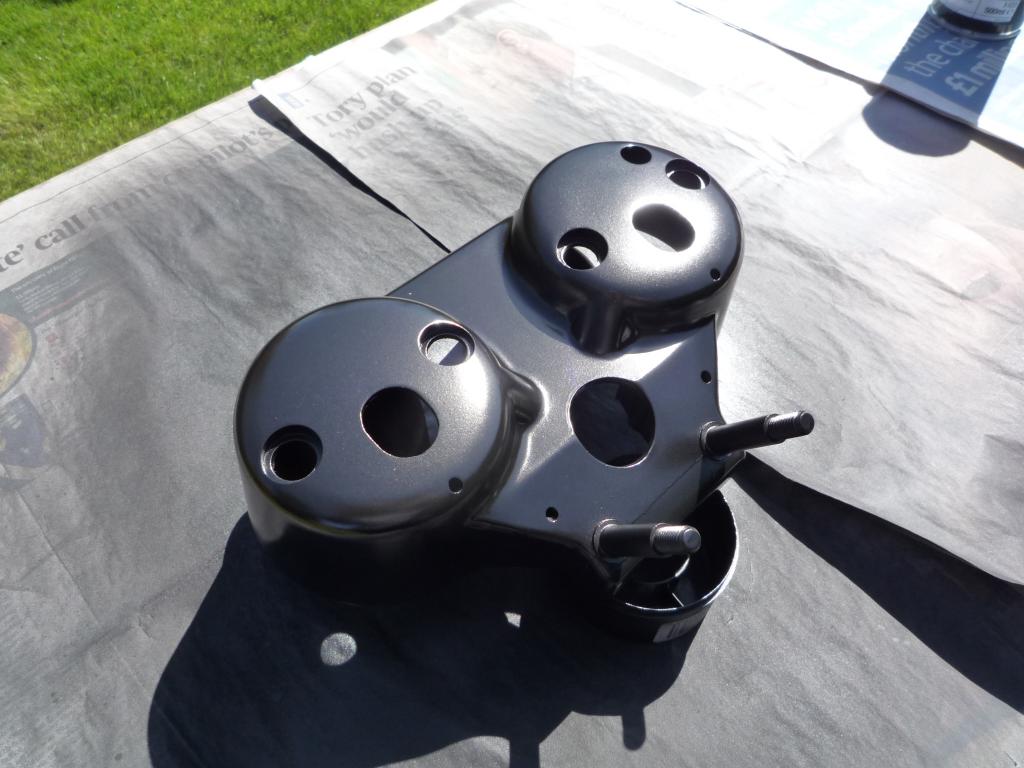
Clock housing getting the same treatment. And finished in black.

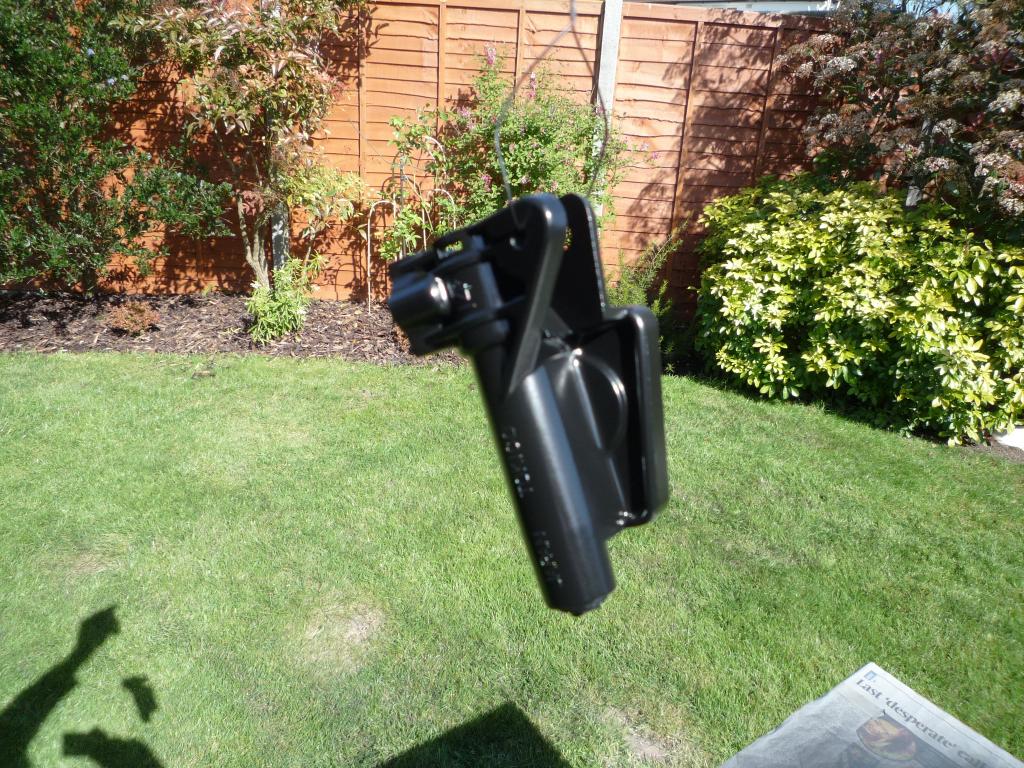
The switchgear gets a fine coating on the inside faces first.
Then finished off on the outside (sorry not a great picture) blame the sunshine.
after a quick baking in the oven for 20 minutes at 100 deg
![]()

Job done
![]() What a great day
What a great day ![]()
![]()
Not a great deal done this weekend, the
Clock panel was prepped ready to spray however this didn't quite go to plan.
First it was too windy, then the can pressure was too low and spattered then I
nipped the fresh paint with the knife
third time lucky I think I have got it now but I haven't been back to check it
since............ it will be done.
Also finished the detailing on the switchgear, though I did manage to do too much as the 'pass' should be left black on this model so that may have to be attended to be correct though I think I prefer it yellow.
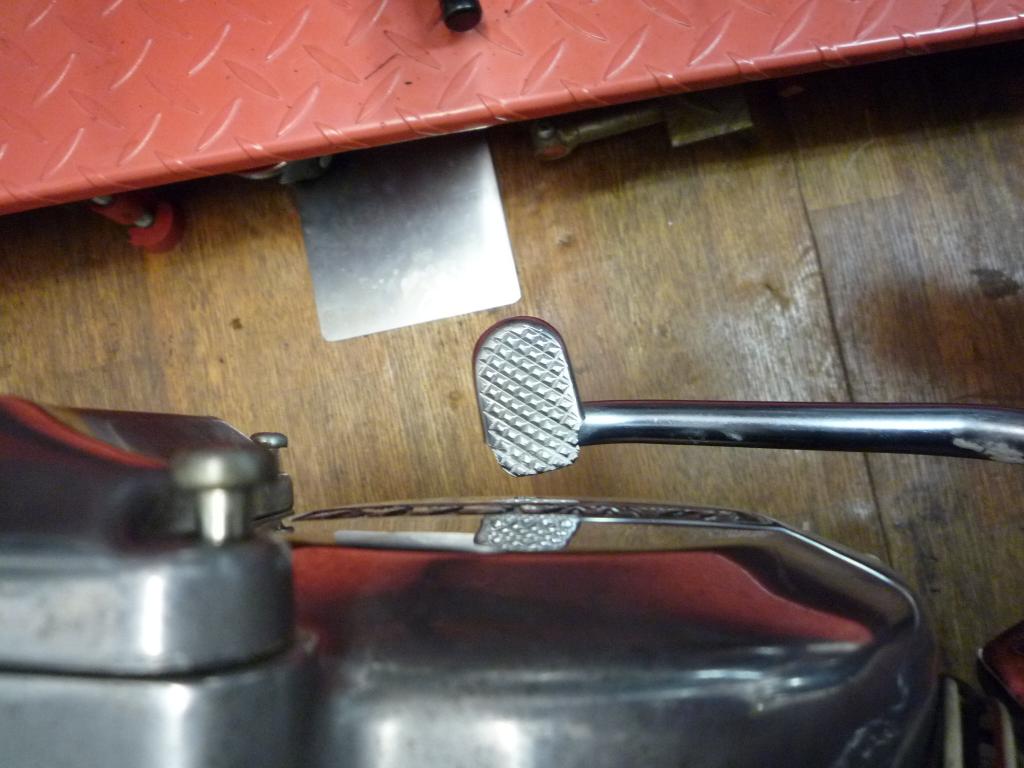
I am trying to tidy away all the loose items before I concentrate on rebuilding the engine,...... the exhaust baffles have been knocking around the garage getting in the way, I like to give them a little spruce up before fitting them and as two of them had been cleaned up ready to go they were finished off and re wrapped....to be loose items no more.....just one more to do tomorrow.


Must crack on a bit....... still lots
to do
![]()
A few more loose items finished up,....Both Wheel hubs now cleaned and polished ready for when the rims return from the platers.

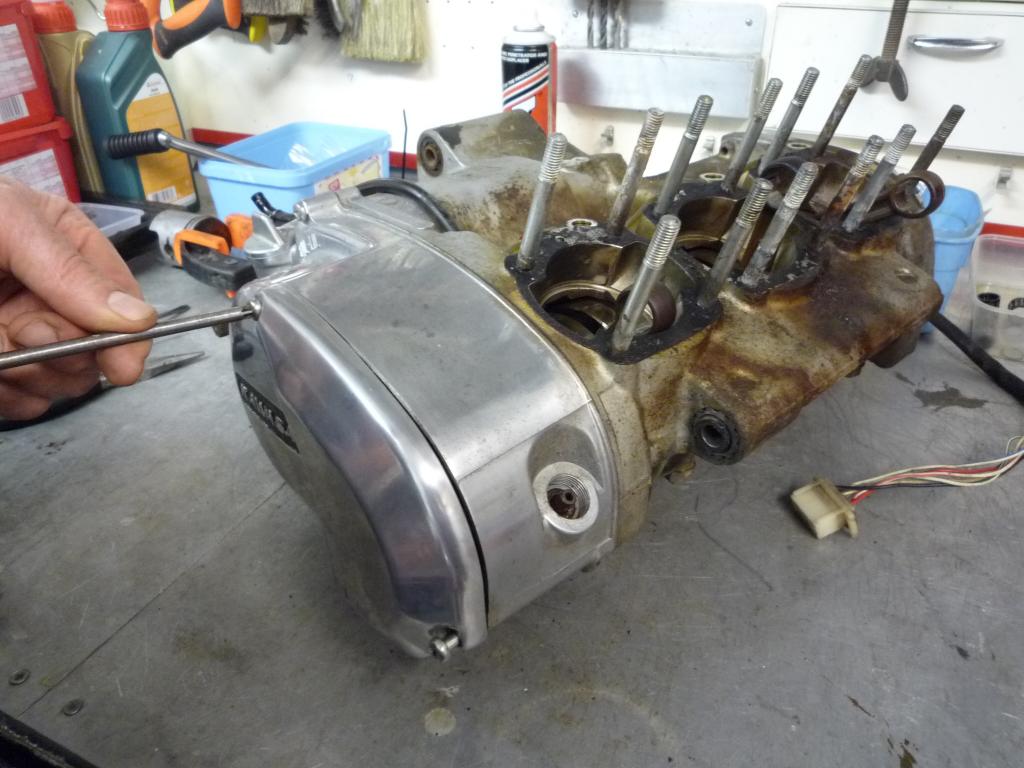
Also worked on the left engine cover, this was found to have quite a deep battle scar on it. Previous owner must have had big boots!
Took some measurements on the thickness and managed to lose it with some careful filing and very happy with the result.

Lettering surround painted in Satin black to finish off.
Corrosion now removed from the Caliper mount bushes and plate touched up.

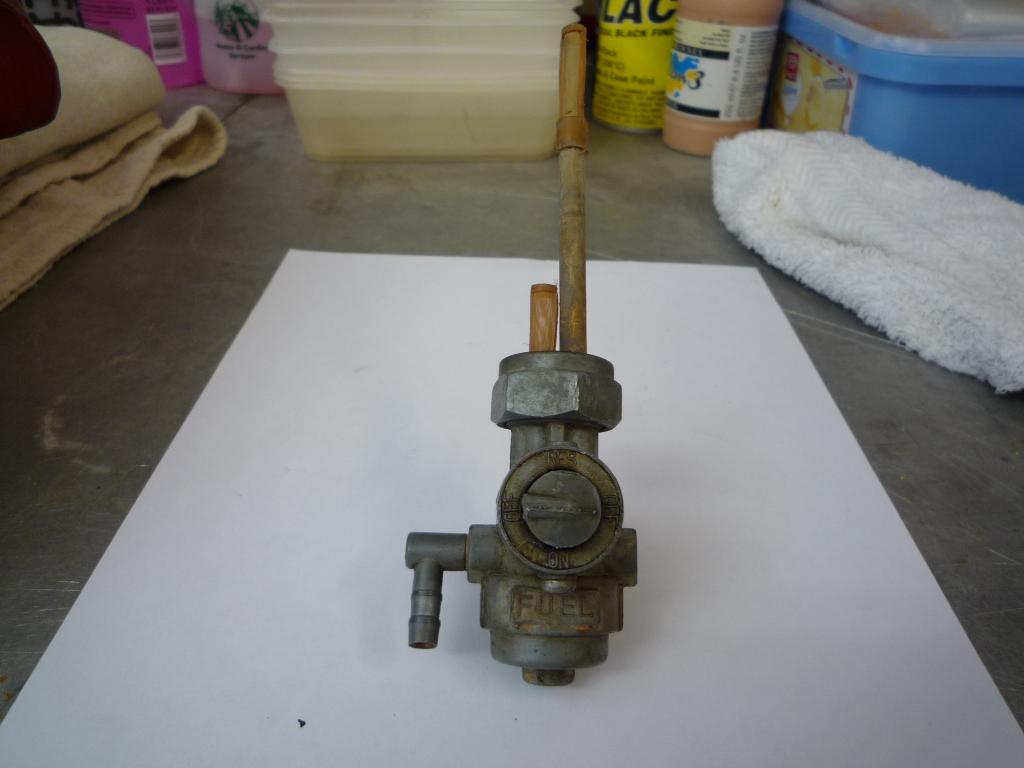
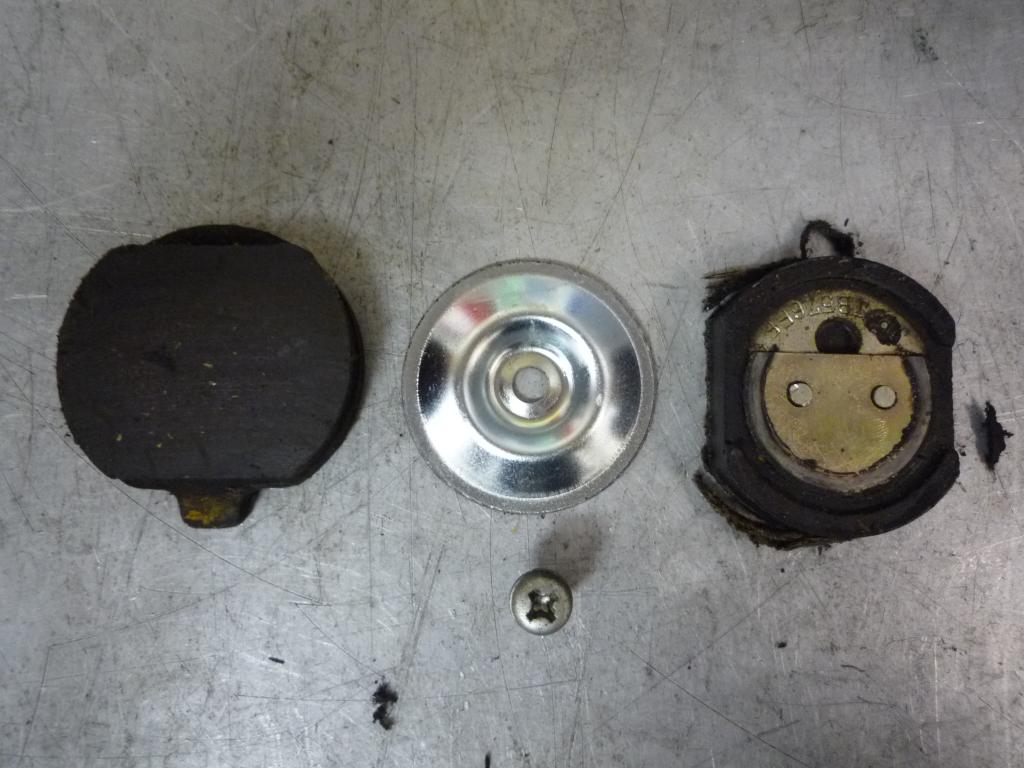
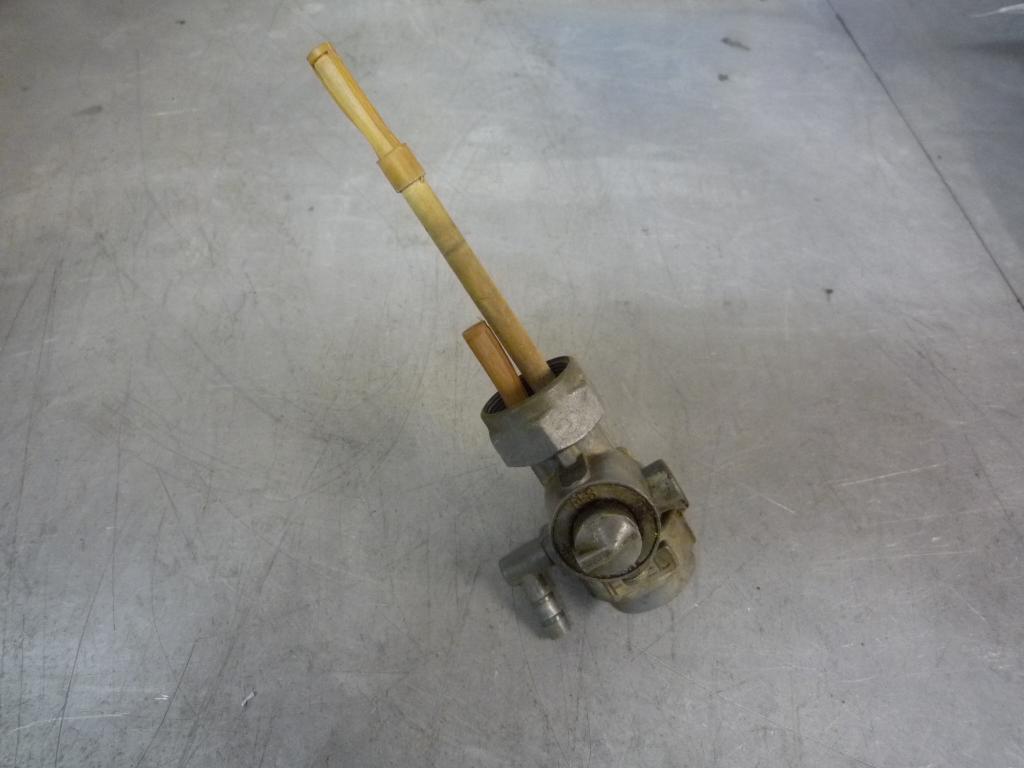
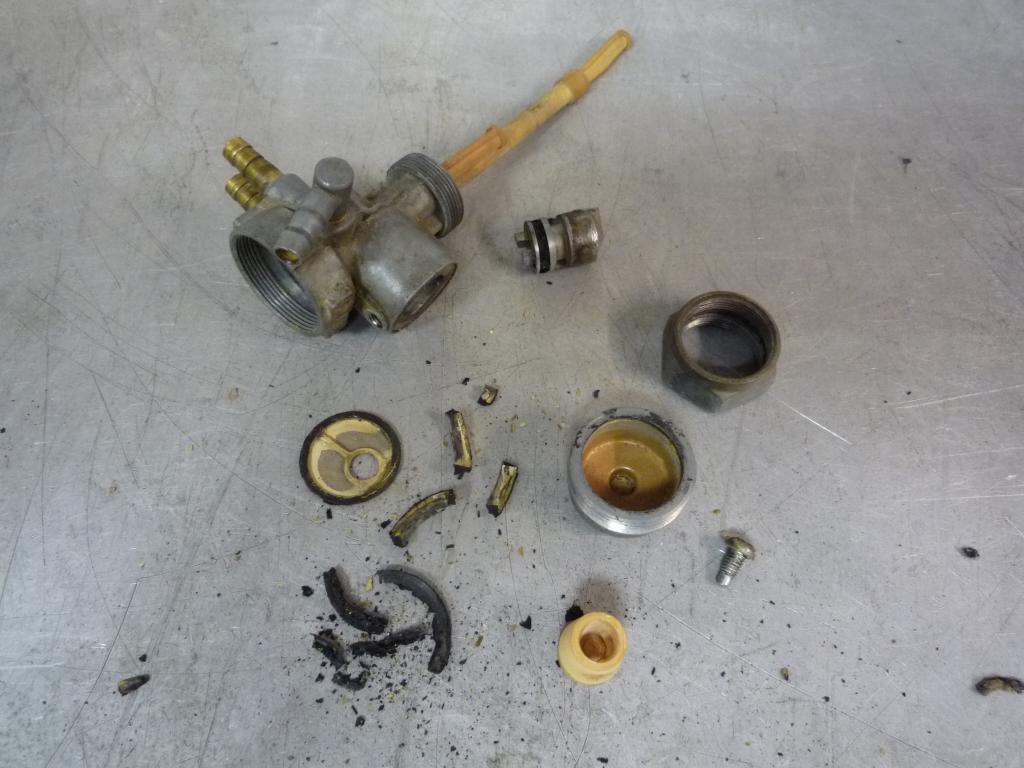
Fuel tap stripped ready to overhaul, seals as expected all perished, new ones to order and replacement handle to fit.
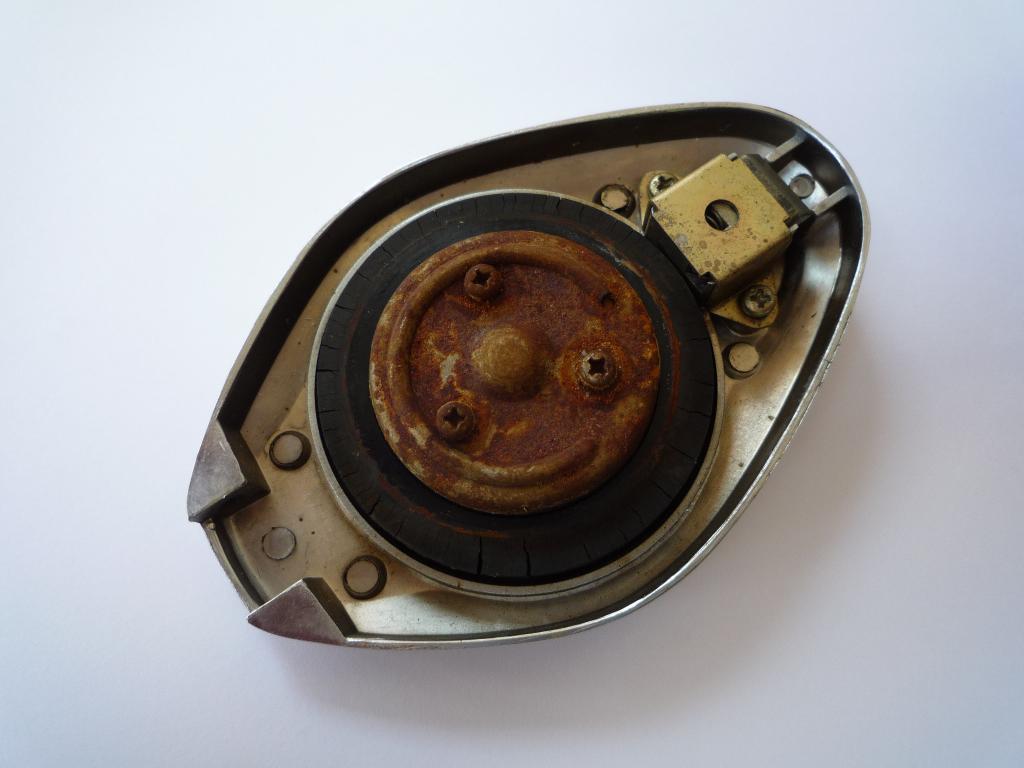
And the forgotten seat lock heading for the paint shop.............. Once the backing plate is off the lock can be removed by compressing the brass retainer plate.


The front cover cap can be gently taken off and any dents can be carefully dressed out, and after a quick rub and polish secured back in place.

More to follow
![]() Not everything goes to plan
Not everything goes to plan
![]()